 order online
 weekly specials
The MN State Fair is cancelled. Those are words I never thought would come out of my mouth, but it’s 2020, and anything is possible this year 🙂 And what a year it’s been! Luckily, some food trucks and vendors are still able to sell their highly demanded food at various locations around town. If you have ventured out and waited in line for any of your favorites – good for you! If you have not, there’s still time. OR…. drum roll, please…. you can enjoy fair food in the comfort of your own home.
Just think….no crowds, no waiting in line, no overcrowded buildings, no “sold out” signs, etc. I love the MN State Fair so if I have to miss out on one of my favorite summer traditions, this is as good as it gets. The list of foods we “have to get” is quite long and the “if we aren’t too full” list seems to grow every year. So, I compiled a list of some of our absolute favorites and those are what we made at home.
I hope you have some time because the list is quite long 🙂 Who am I kidding, if you’re a MN State Fair lover, you aren’t going to want to miss this! Here goes…
Finger Foods!
Handhelds and On-A-Stick!
Sweets!
- Deep Fried Donut Holes
- Air Fryer Fried Oreos
- Sweet Martha’s Cookies
Beverages!
- Fresh Squeezed Lemonade
- Flight of Beer
- Flight of Wine
Finger foods are perfect for sharing at the fair. How many times have you said “I just want one” when talking about cheese curds but end up eating an entire tray yourself? So maybe not all finger foods are perfect for sharing 🙂 but they are convenient when everyone wants to sample a new food or just try a bite of something.
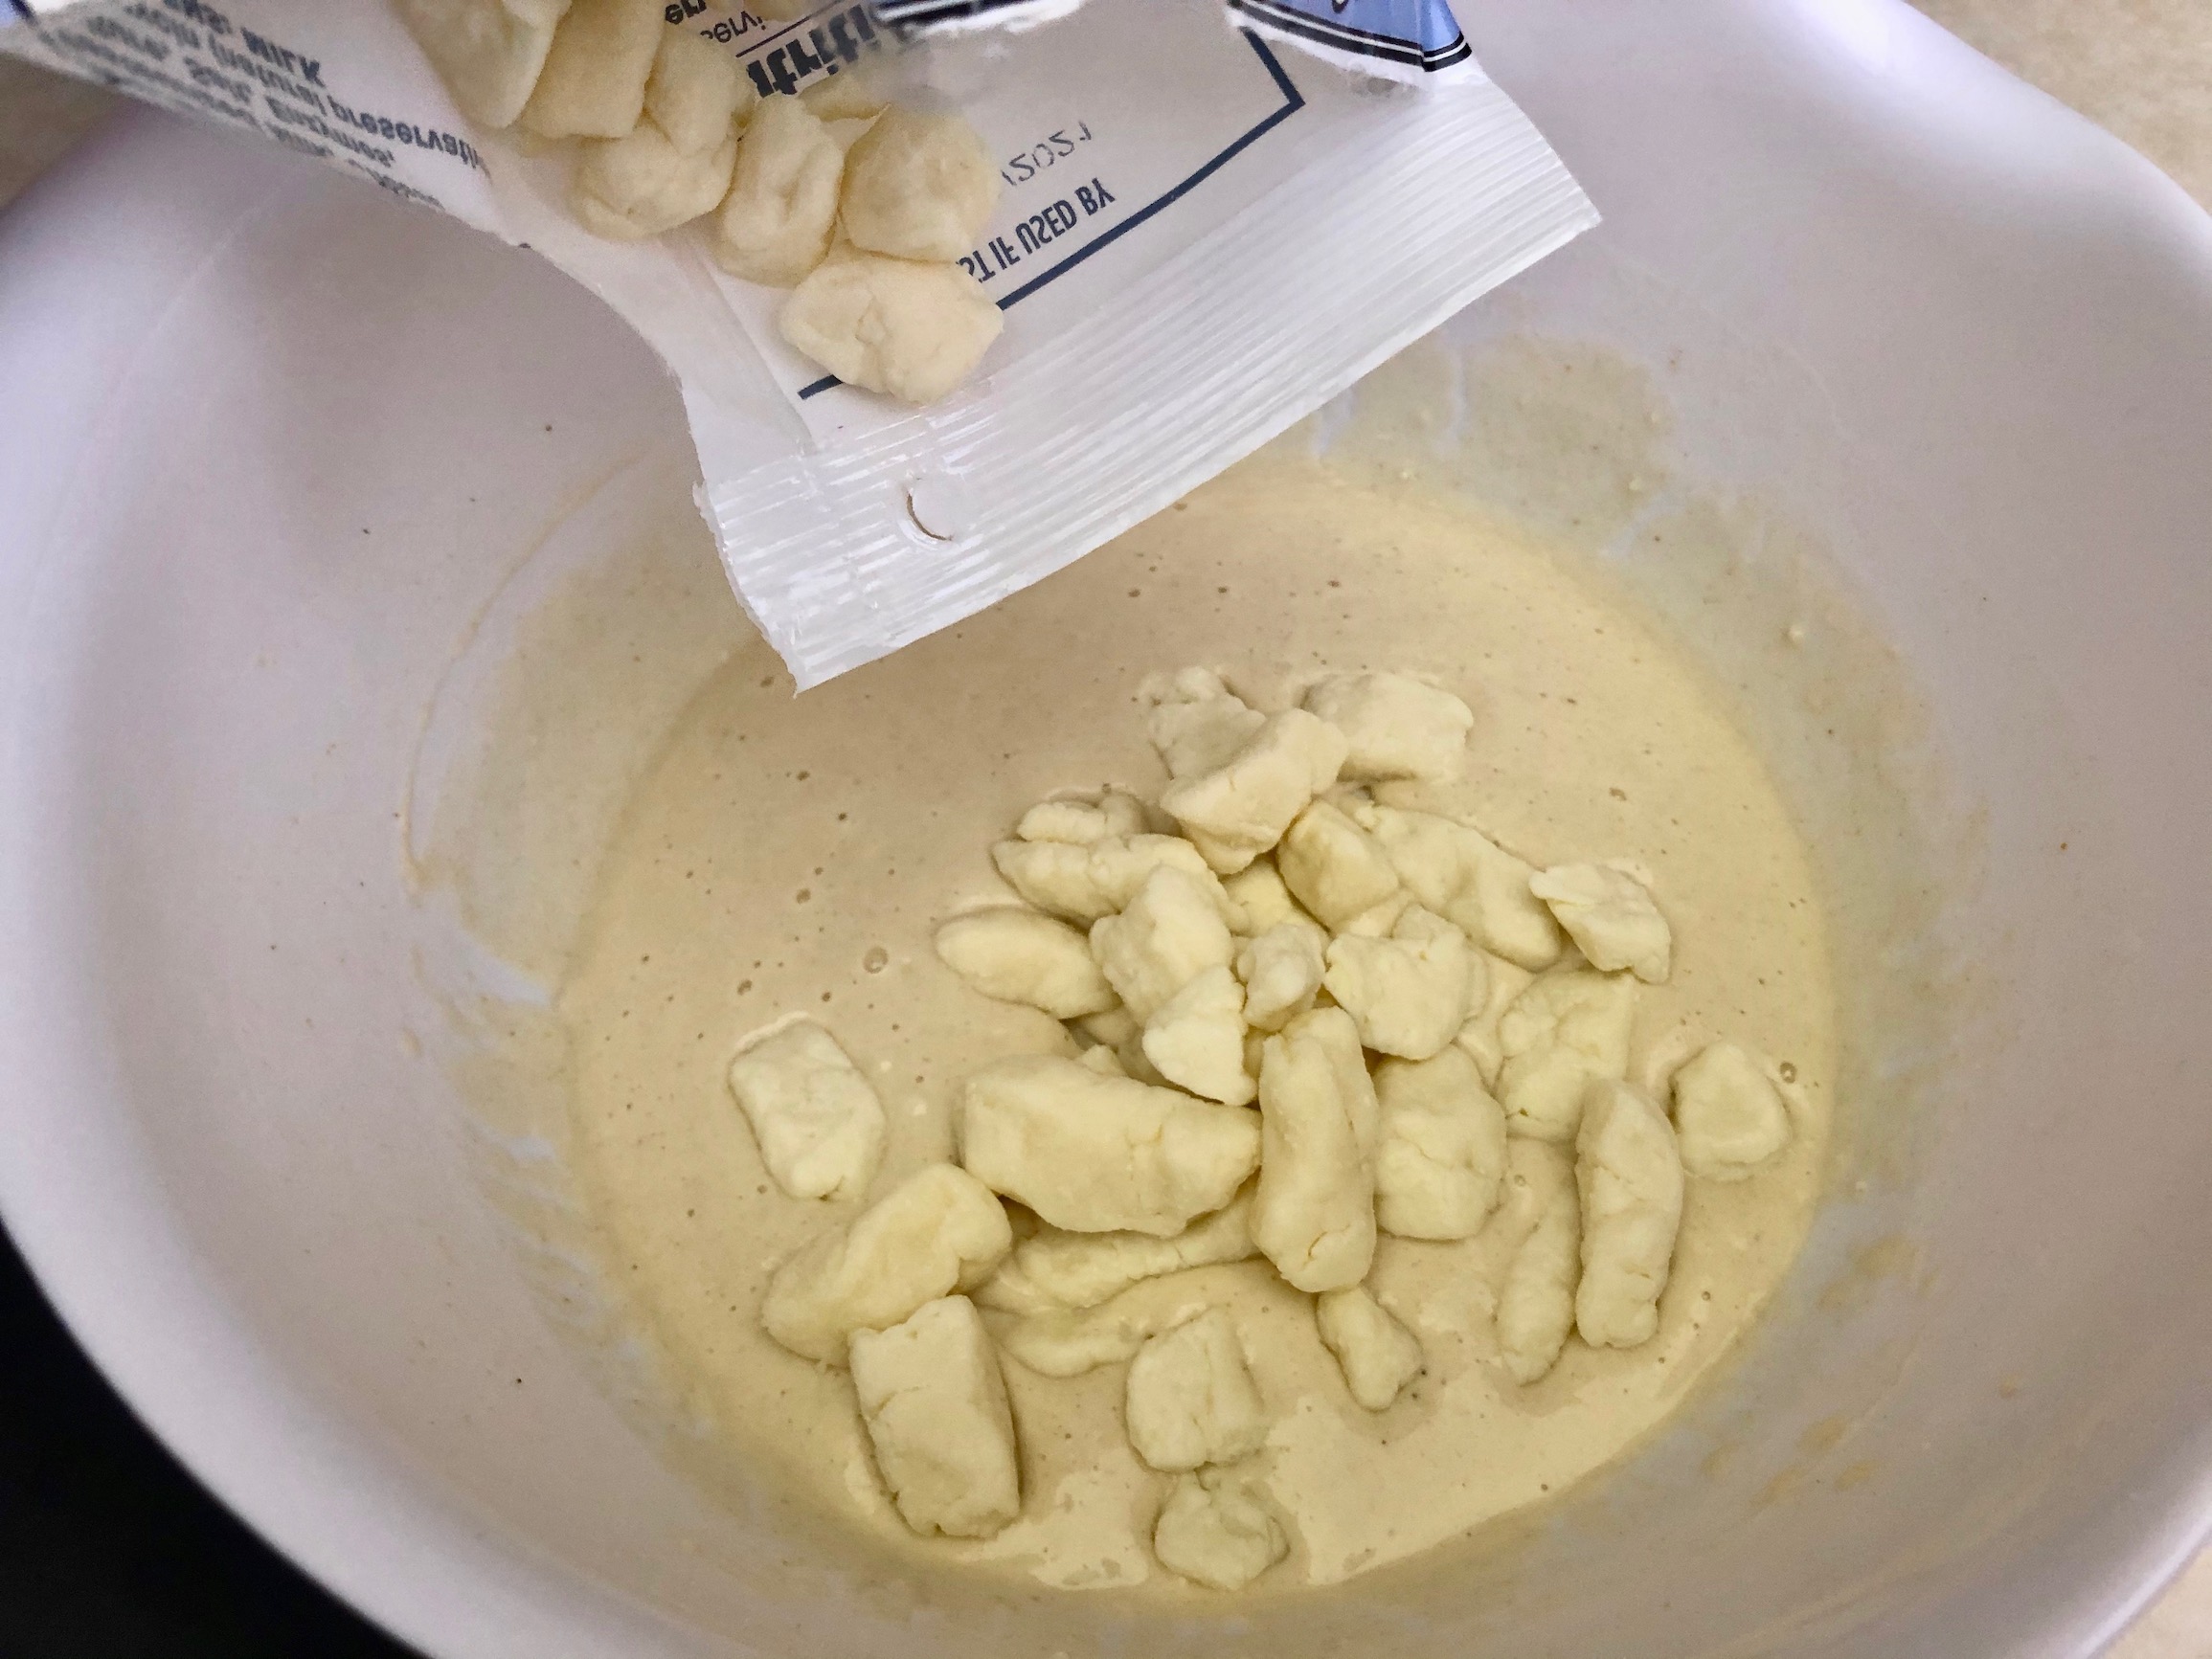
Beer Battered Cheese Curds taste just like what you get at the fair! These are definitely a crowd pleaser and won’t last long. The cheese is perfectly melted and stretches when pulled apart, and the batter has great flavor. This recipe is very easy to double or triple depending on how many cheese curds you need. I like to serve the cheese curds with Ranch dressing or ketchup on the side but get creative and use whatever dipping sauce you like!


The recipe can be found here.
I find it easiest to use a deep fryer, but a Dutch oven works just as well. You want to add enough oil that the curds will float when added. Then, preheat to 350 degrees F. If you are using a deep fryer, the appliance will keep a consistent temperature for you. If you are using a Dutch oven, I recommend using a thermometer in the oil, so it doesn’t get too hot and burn the curds!
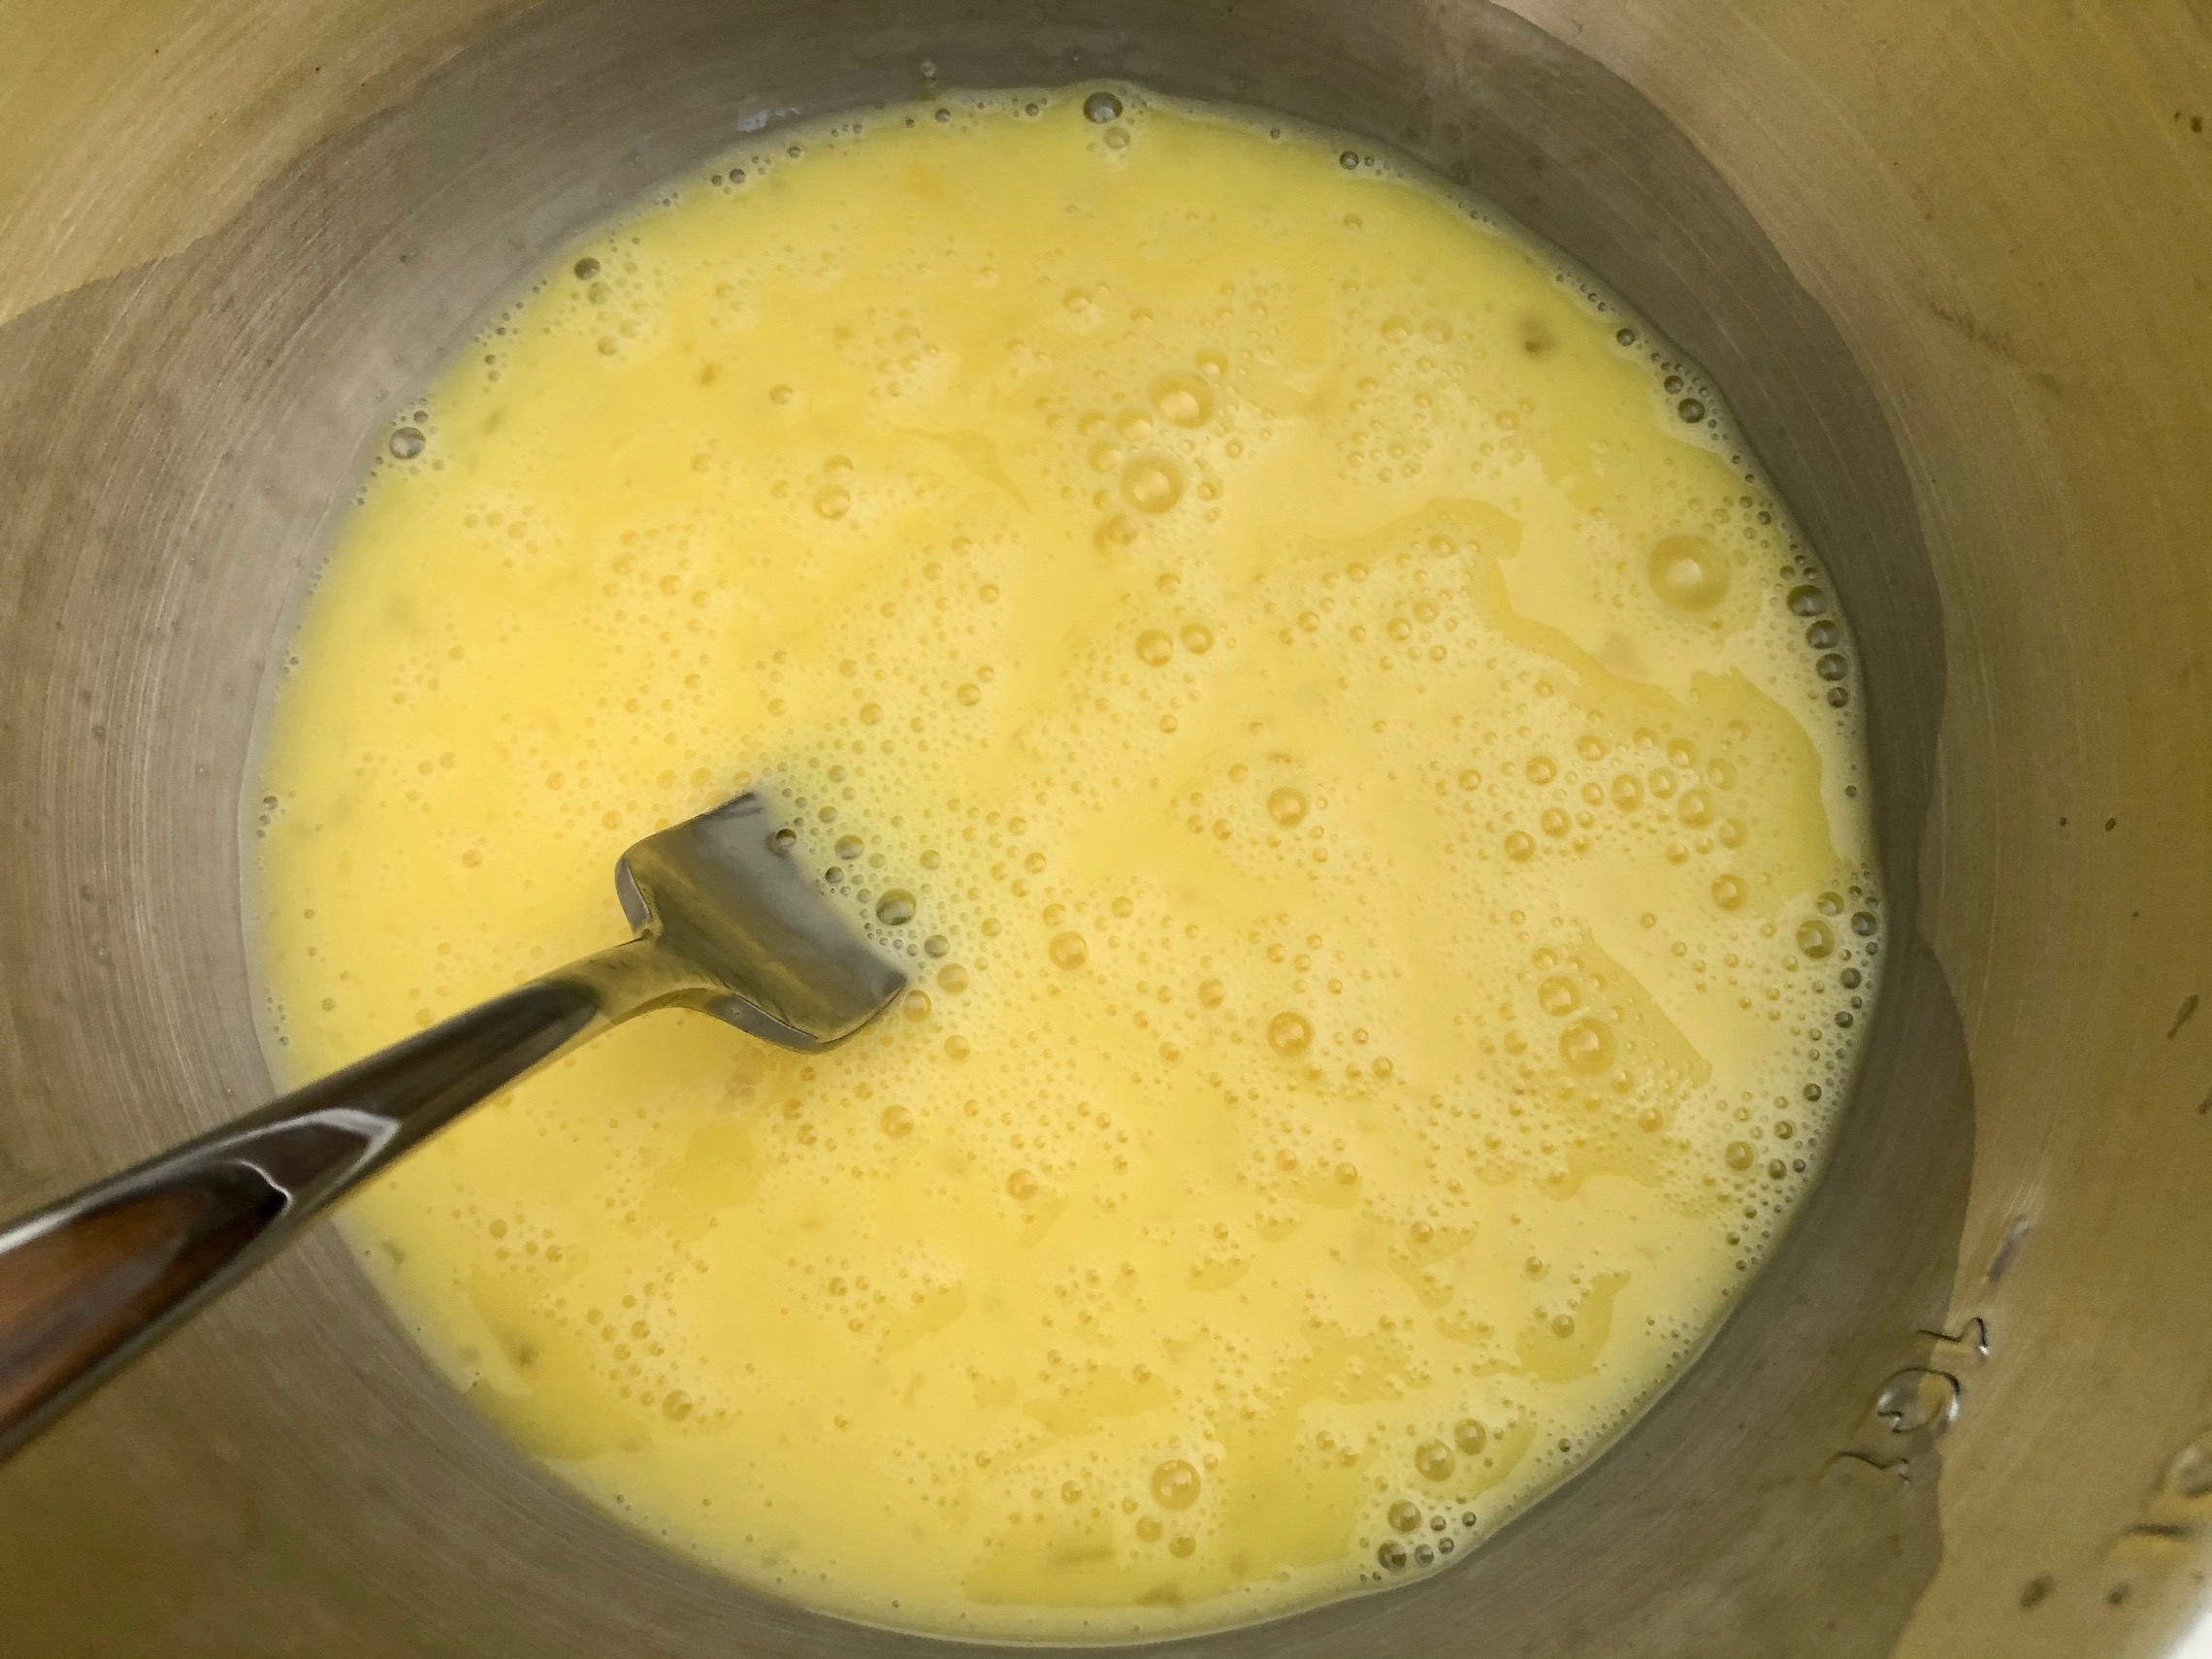
Whisk together the beer, baking powder, flour, egg, salt, and garlic powder. I recommend using a lager or ale but feel free to use a beer of choice or substitute with non-alcoholic beer.


Use a slotted spoon or fine mesh strainer to dip the cheese curds into the batter and shake the excess batter off. You will want to do this in batches. Carefully add the cheese curds to the hot oil and fry until golden brown and heated through, about 1-2 minutes.


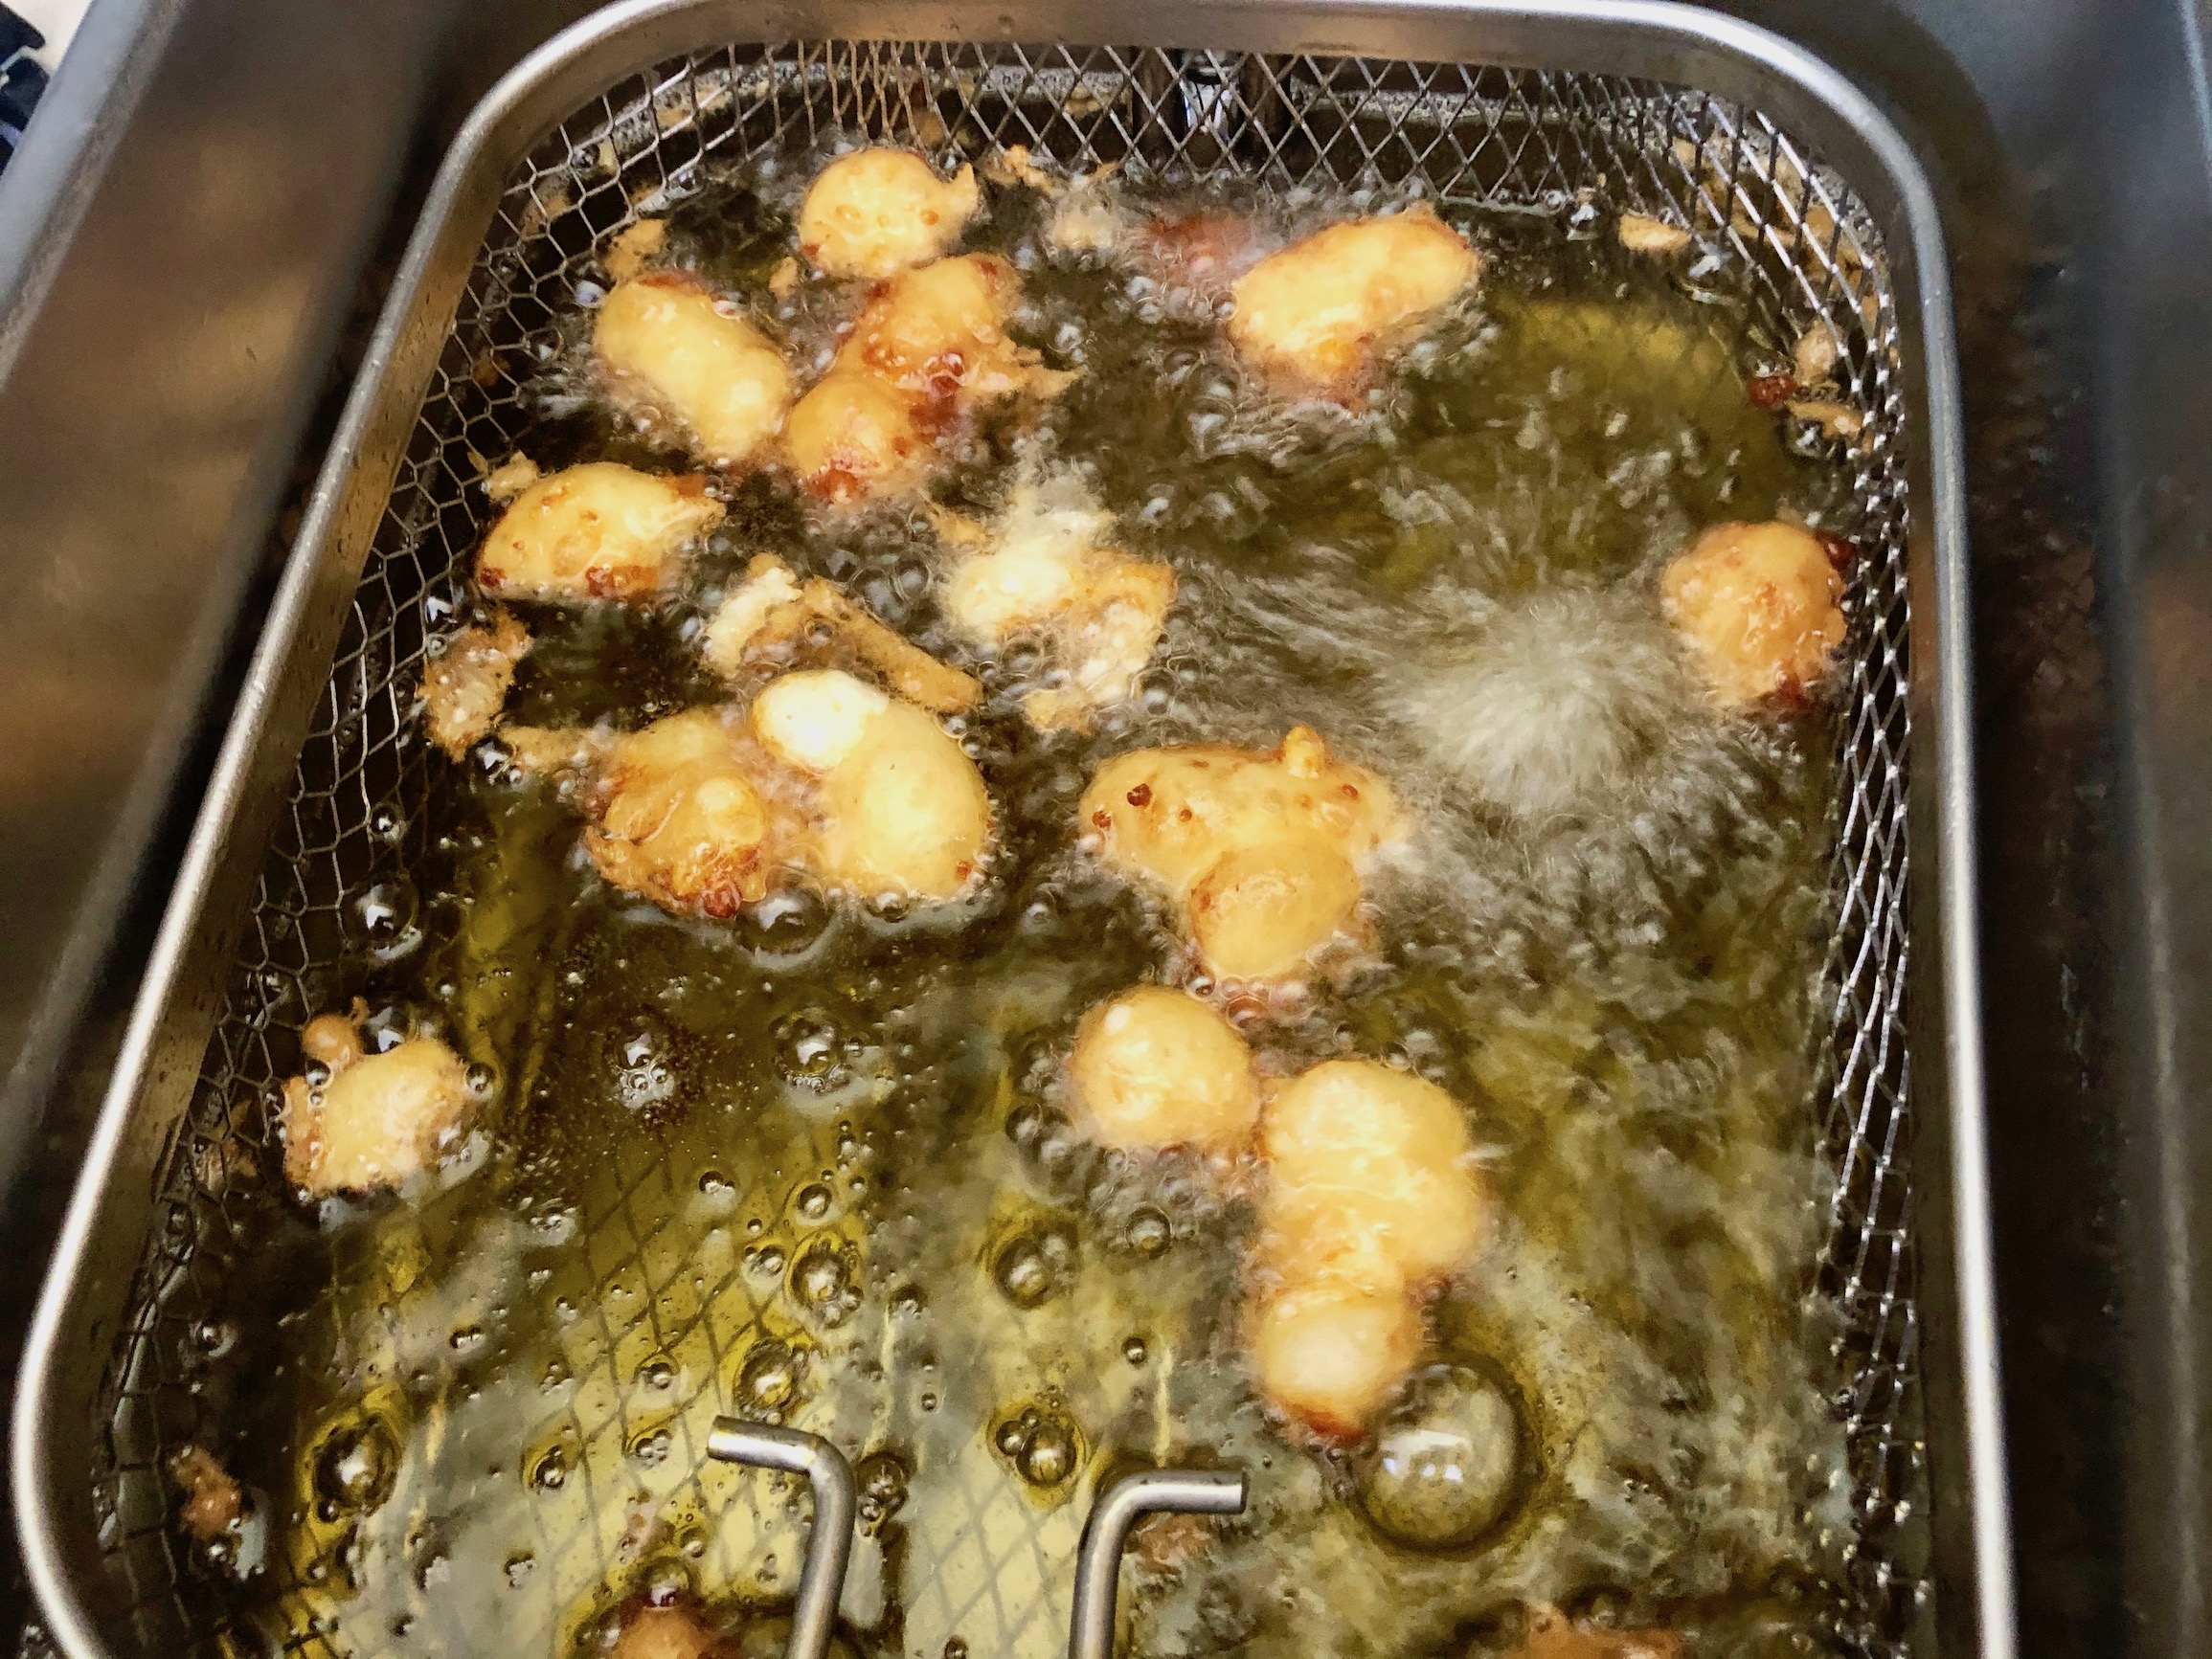
Use a slotted spoon to remove the curds and place on a paper towel lined plate. Repeat until all the cheese curds have been fried.


Serve warm with your choice of dipping sauce on the side. You won’t be able to eat just one!

The recipe can be found here.
Oven Baked Fried Pickles are very similar to the deep-fried pickles you would get at the fair, but they are less greasy. I know, who counts calories when it comes to fair food? Trust me, these have great flavor, a crispy crust, and are super easy to make.


The recipe can be found here.
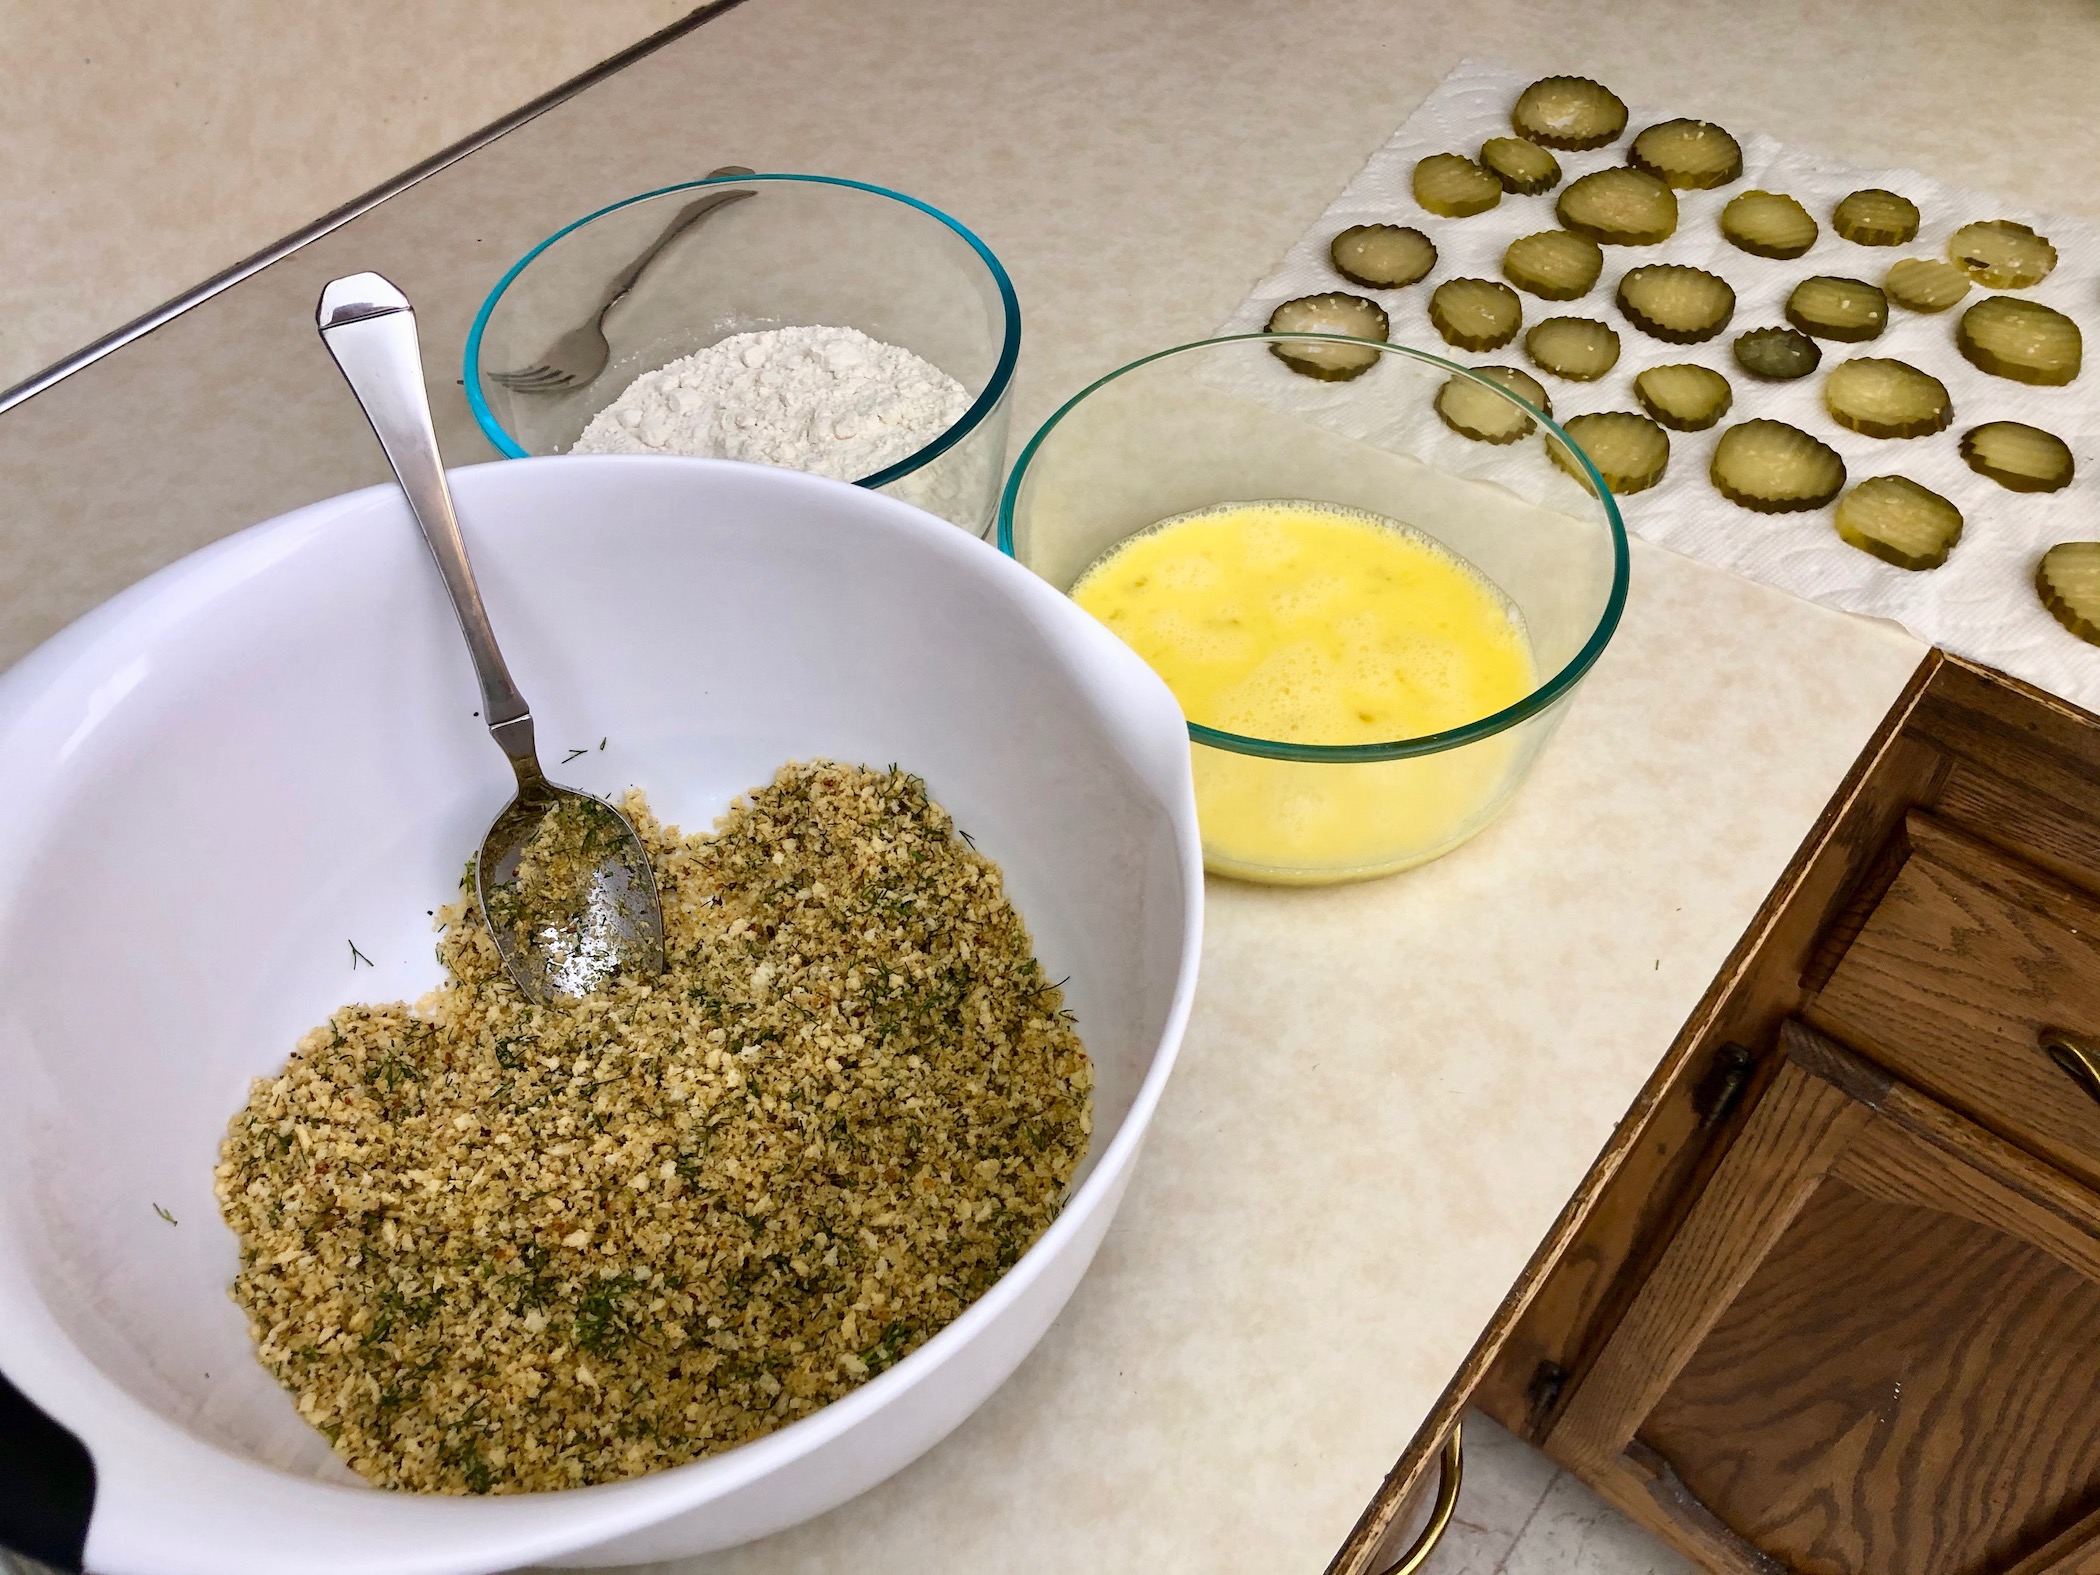
Start by preheating the oven to 450 degrees F. Line 2 baking sheets with parchment paper. Pour the pickles into a strainer to drain the liquid. Then, pat the pickles dry with a paper towel. You want the pickles to be mostly dry or the batter won’t stick as well.


In a large shallow bowl, combine the breadcrumbs, dill, melted butter, garlic powder, cayenne, salt, and pepper. Mix well. This will be the coating for the pickles.


Add the flour to another separate dish. I recommend using a shallow dish if you have one.
Crack the eggs into another separate dish and whisk. I also recommend using a shallow dish for the eggs if you have one.
Working in batches, toss 4-5 pickles in the flour, then dip the pickles in the egg mixture until coated, then toss in the breadcrumb mixture until coated. Place on a baking sheet in an even later, leaving space between each pickle. Repeat this until all pickles have been coated. Your fingers will be coated in batter by the end!


Bake for 15-17 minutes or until crispy and golden brown. Serve warm with Ranch dressing or ketchup as a dipping sauce. Yum! This recipe can easily be doubled if necessary.


The recipe can be found here.
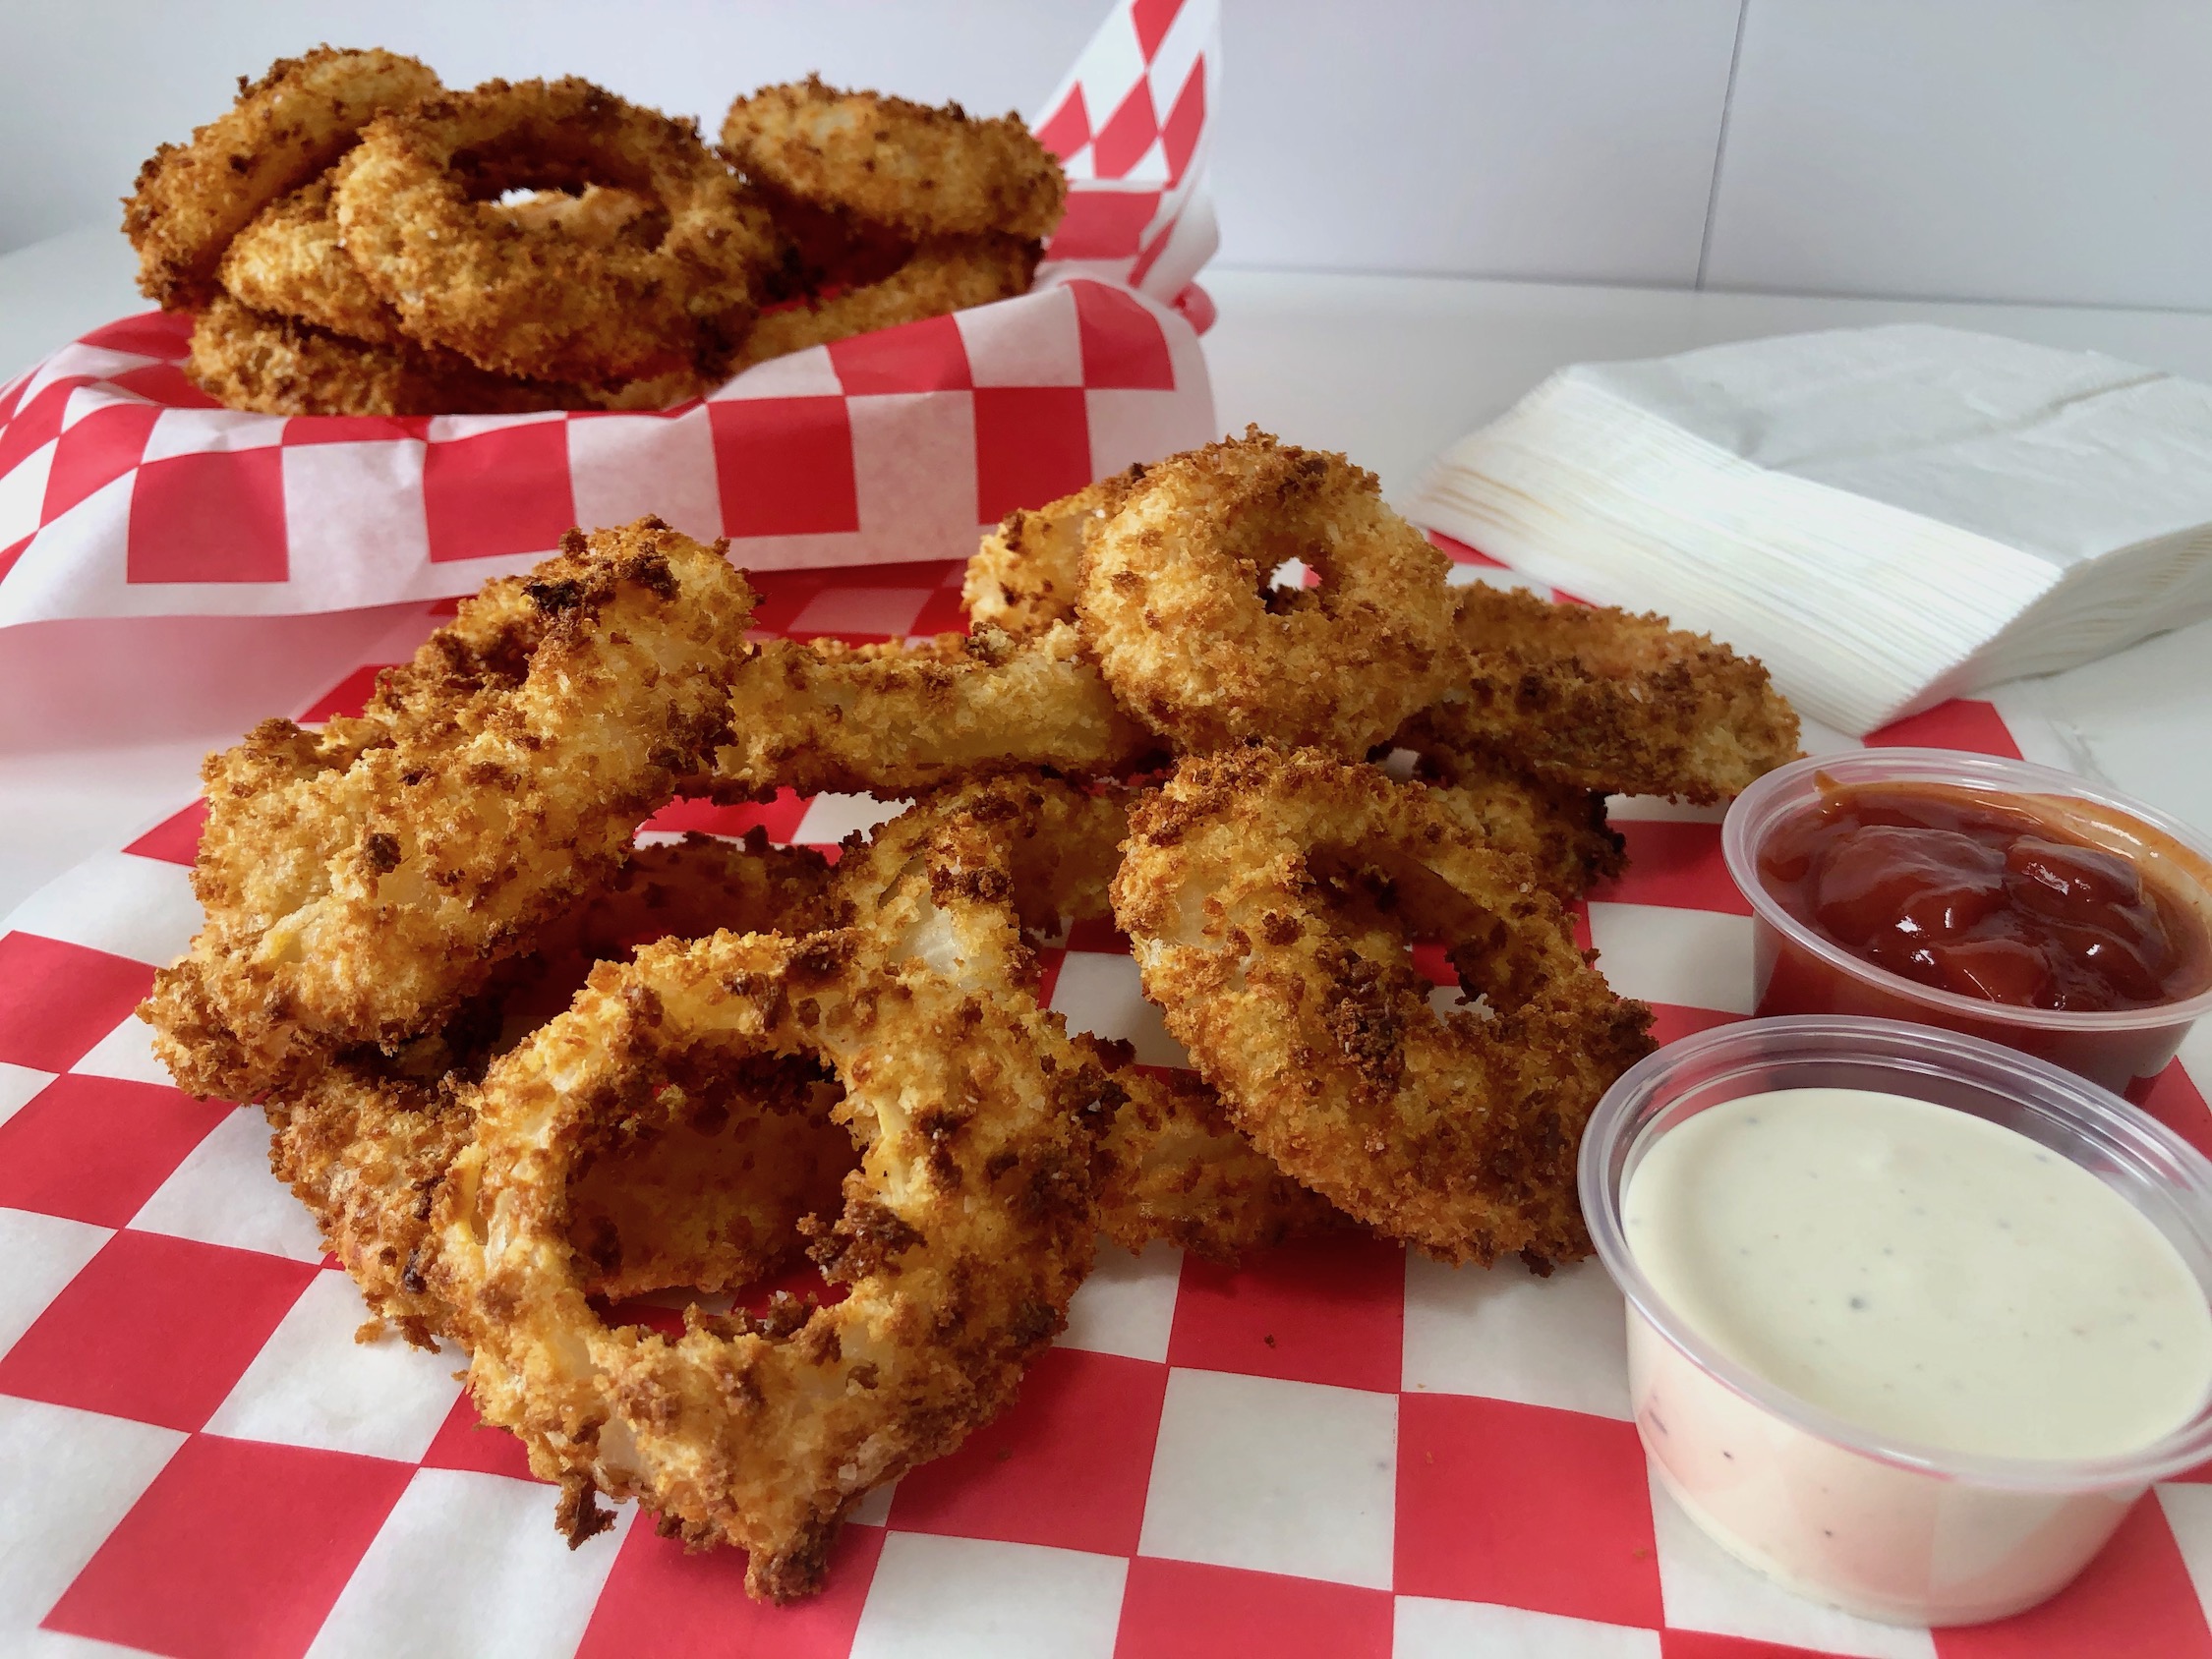
Air Fryer Onion Rings are crispy and crunchy, and taste like the real deal without using a ton of oil. They’re a guilty pleasure you don’t have to feel guilty about eating! The onions are tender, and the breading has the perfect amount of seasoning. These not only gave my deep fryer some time to rest but were a fun alternative to make.


The recipe can be found here.
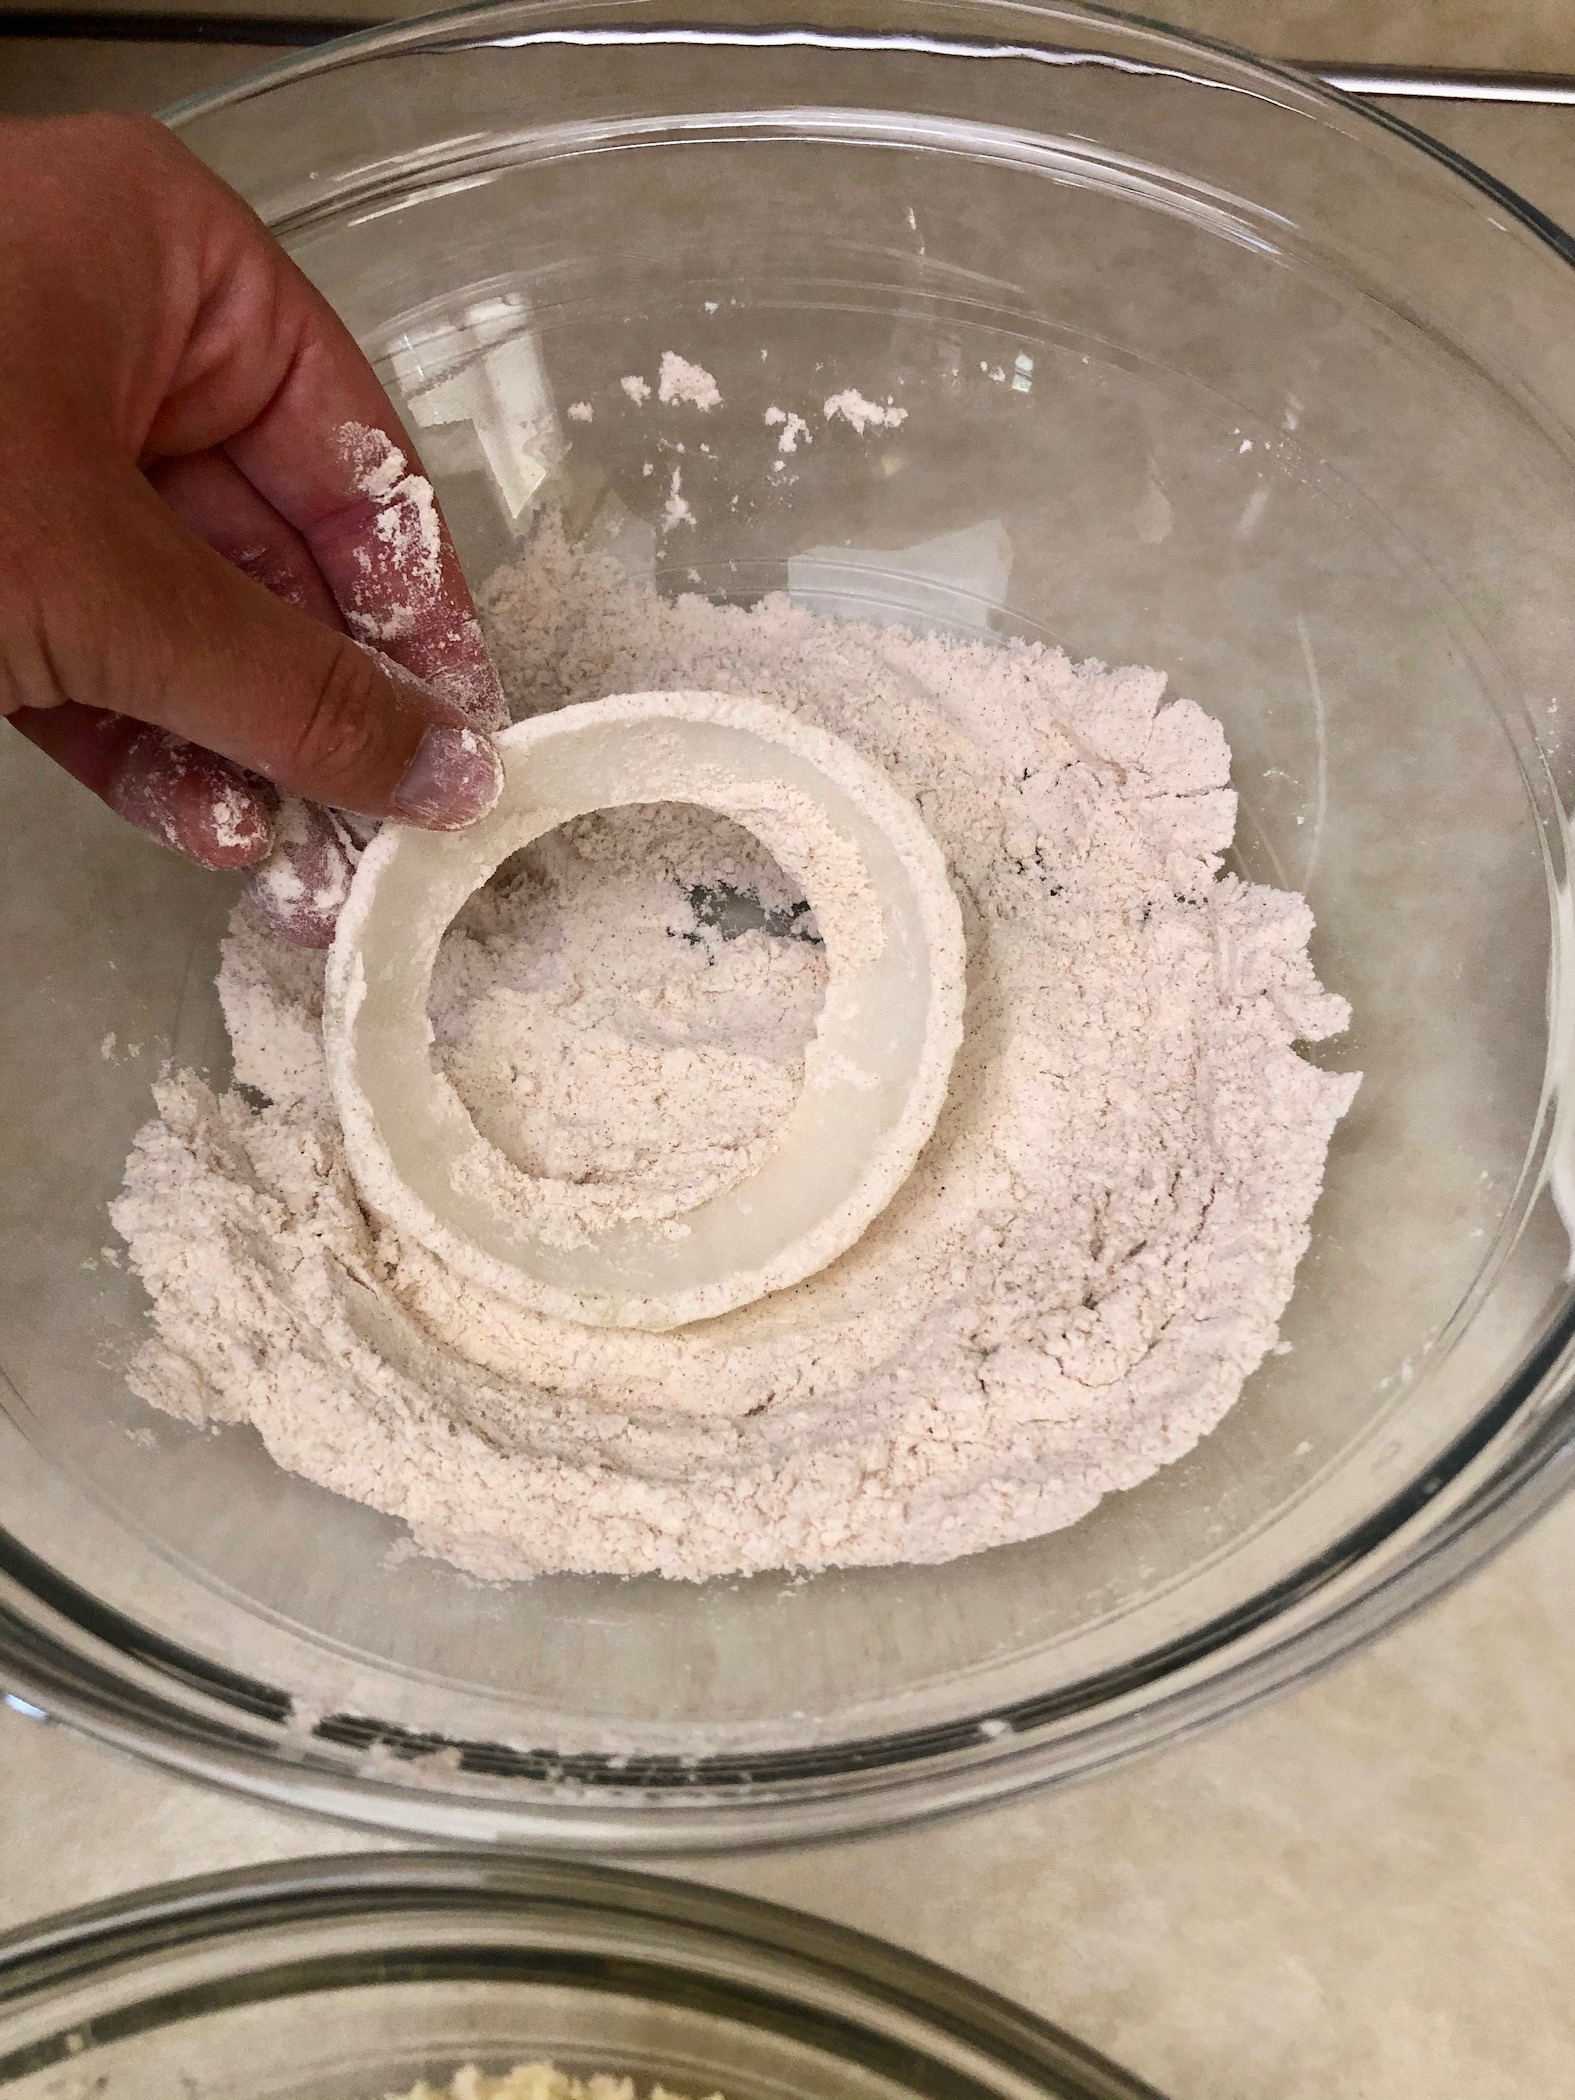
Place 3 shallow bowls on the counter. In the 1st bowl, add the flour, paprika, and 1 tsp salt. Stir to combine.


In the 2nd bowl, add ½ cup of the dry mixture (flour/paprika/salt), buttermilk, and eggs. Stir to combine.


In the 3rd bowl, add the breadcrumbs, olive oil, and 1 tsp salt. Stir to combine. The breadcrumbs should be coated in the oil but not soggy.

Slice the onion(s) into ½-inch round slices and separate the rings.

Working in batches, dredge the onion rings in the flour mixture, then dip into the buttermilk mixture, then coat with the breadcrumbs. Don’t be afraid to get your fingers in the batter and get a little messy! Place the onion rings in a single, even layer in the air fryer. You will only be able to fit about 4-5 onion rings at a time.


I like to fry the onion rings as is, but you can lightly spray with cooking spray before frying if you want. I think the onion rings are perfectly crunchy without it, but the cooking spray does add a little extra crispness.
Air fry at 400 degrees F for 8 minutes. Remove the onion rings to a plate and continue to air fry the rest of the onion rings until finished.

Serve warm with ketchup or Ranch dressing as dipping sauce. So good! You won’t be able to stop yourself from having a second or third helping!
The recipe can be found here.
Handhelds and On-A-Stick are a MN State Fair staple. You cannot go to a fair without having something on a stick and these days, people are creative and can put just about anything you want to eat on a stick. They aren’t great for sharing but they are perfect to eat while walking around the fair. Messy without being too messy 🙂
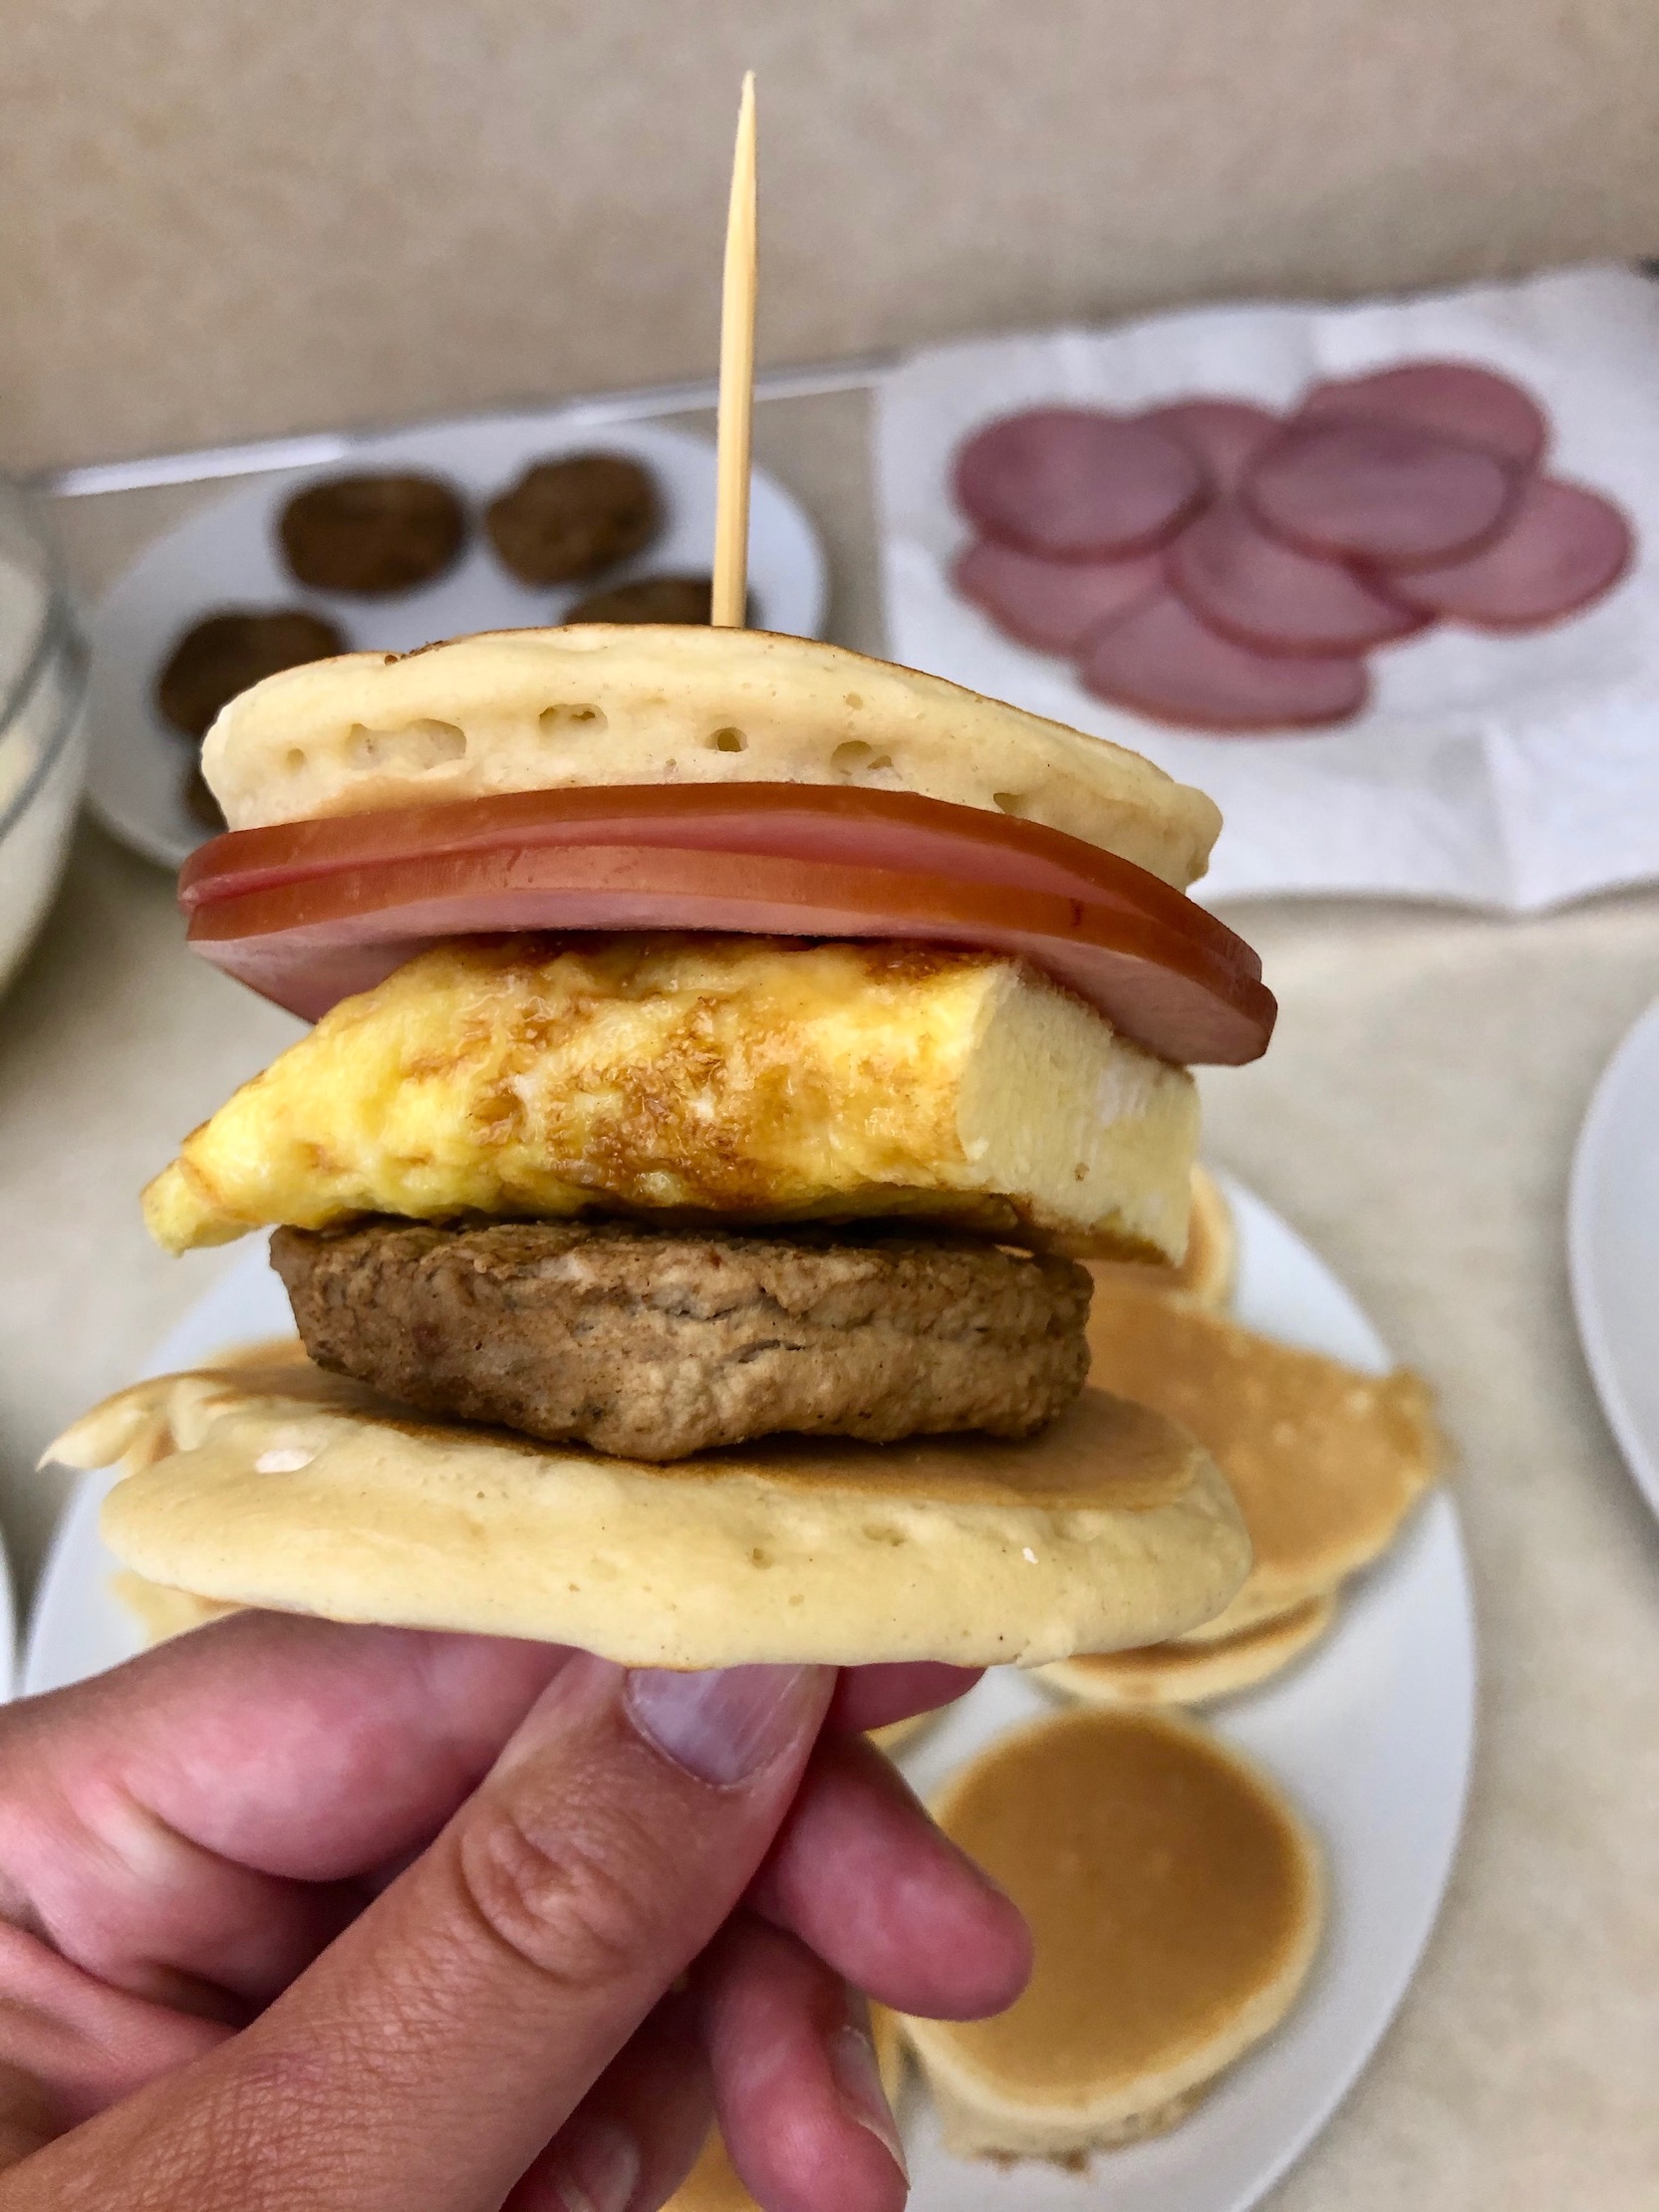
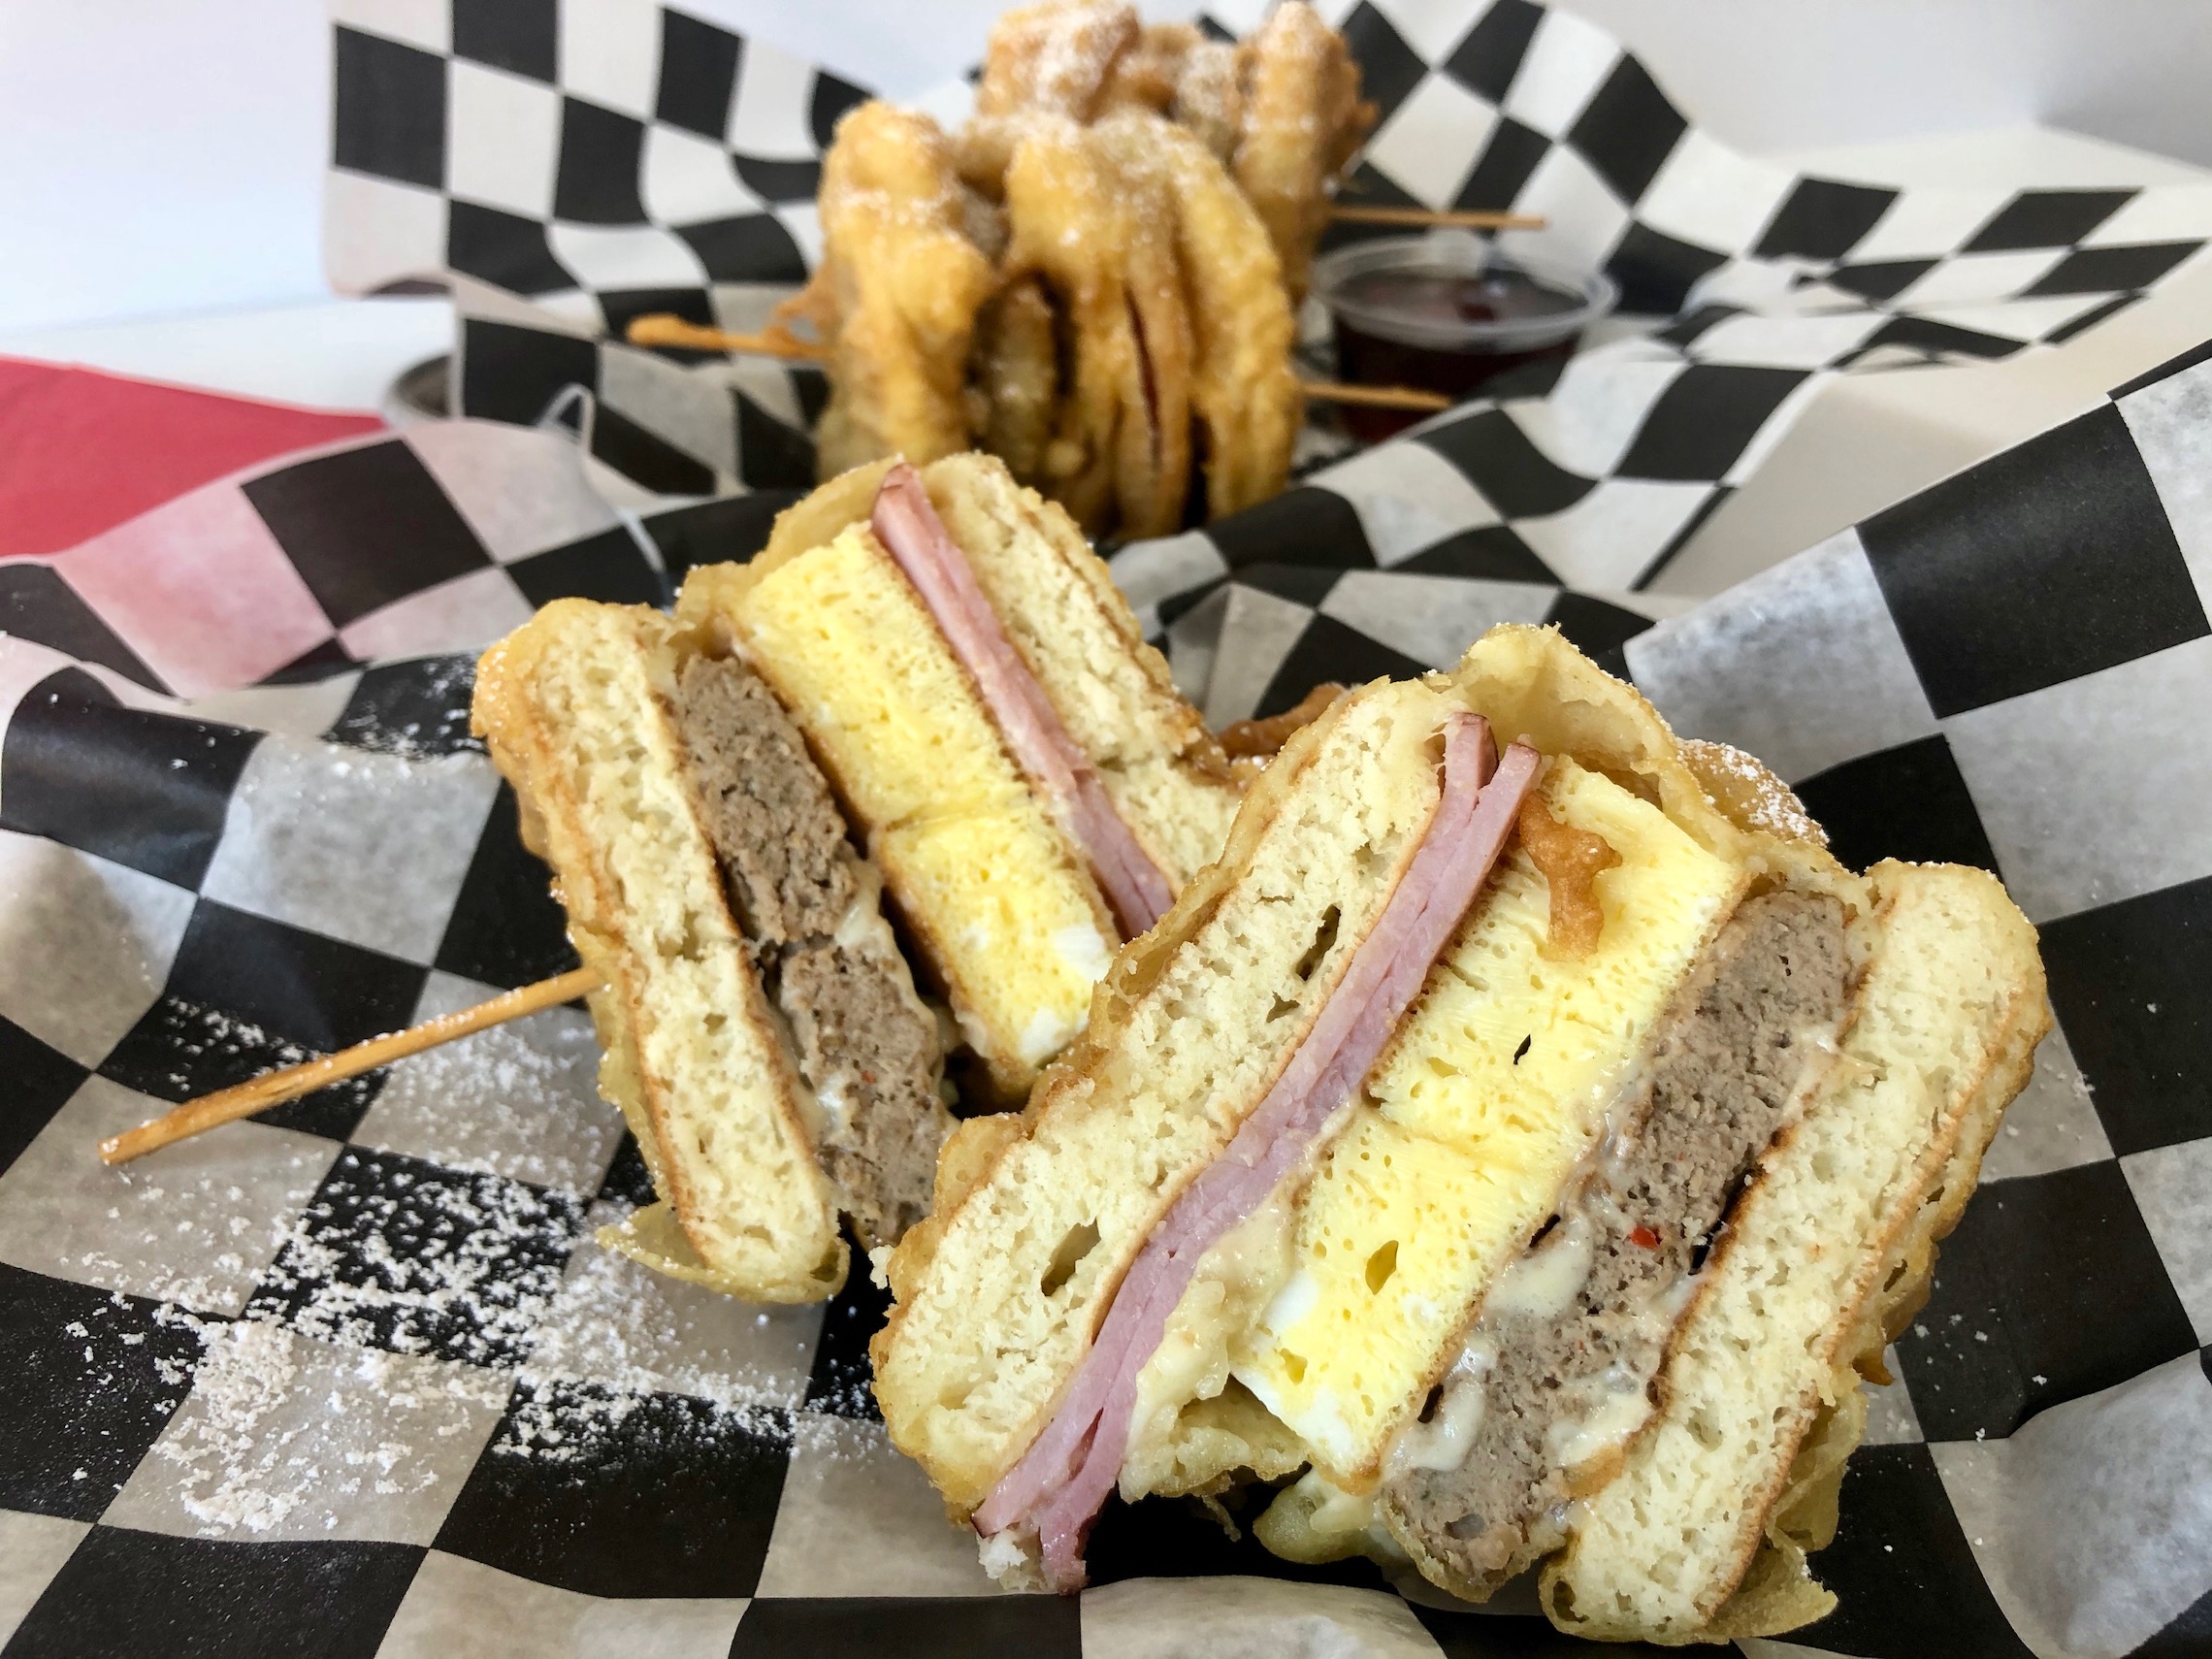
Deep Fried Breakfast on a Stick will change your life…. or the way you eat breakfast. These take a little effort to make but are sooooo worth it. We had something similar at the fair a few years ago and have been eating it every year since. I knew right away this was a recipe to recreate at home. It’s your favorite breakfast foods; pancakes, sausage, egg, and Canadian bacon, stacked together, battered, deep fried, and drizzled with maple syrup. Calories don’t count during the fair 🙂


The recipe can be found here.
Start by making the pancakes according to package instructions. You want the pancakes to be slightly smaller than the size of your palm. Any boxed mix or homemade batter will work. Depending on how many sandwiches you want to make will determine how many batches of pancakes to make. I only needed to make 1 batch of pancakes with 2 pancakes per sandwich. Once the pancakes are cooked, place in the fridge to cool. This will help skewer the pancakes and prevent crumbling.


Heat the sausage according to package instructions. It’s OK if the sausage cools slightly while you prepare the rest of the ingredients. Deep frying the sandwich will help keep the sausage warm. I like to use pre-cooked sausage because it’s one less item to prep.

Next, cook the eggs. The number of sandwiches you are making will determine the number of eggs you need; 2 eggs per sandwich. Crack the eggs in a bowl and whisk. Pour into a heated pan and let cook over medium heat. You don’t want to stir, or you will scramble the eggs. Let the eggs cook low and slow. Once the eggs are mostly cooked through, flip the egg in half (similar to making an omelet). Let the eggs continue to heat until completely cooked through. Remove from the heat and slice into squares for each sandwich.


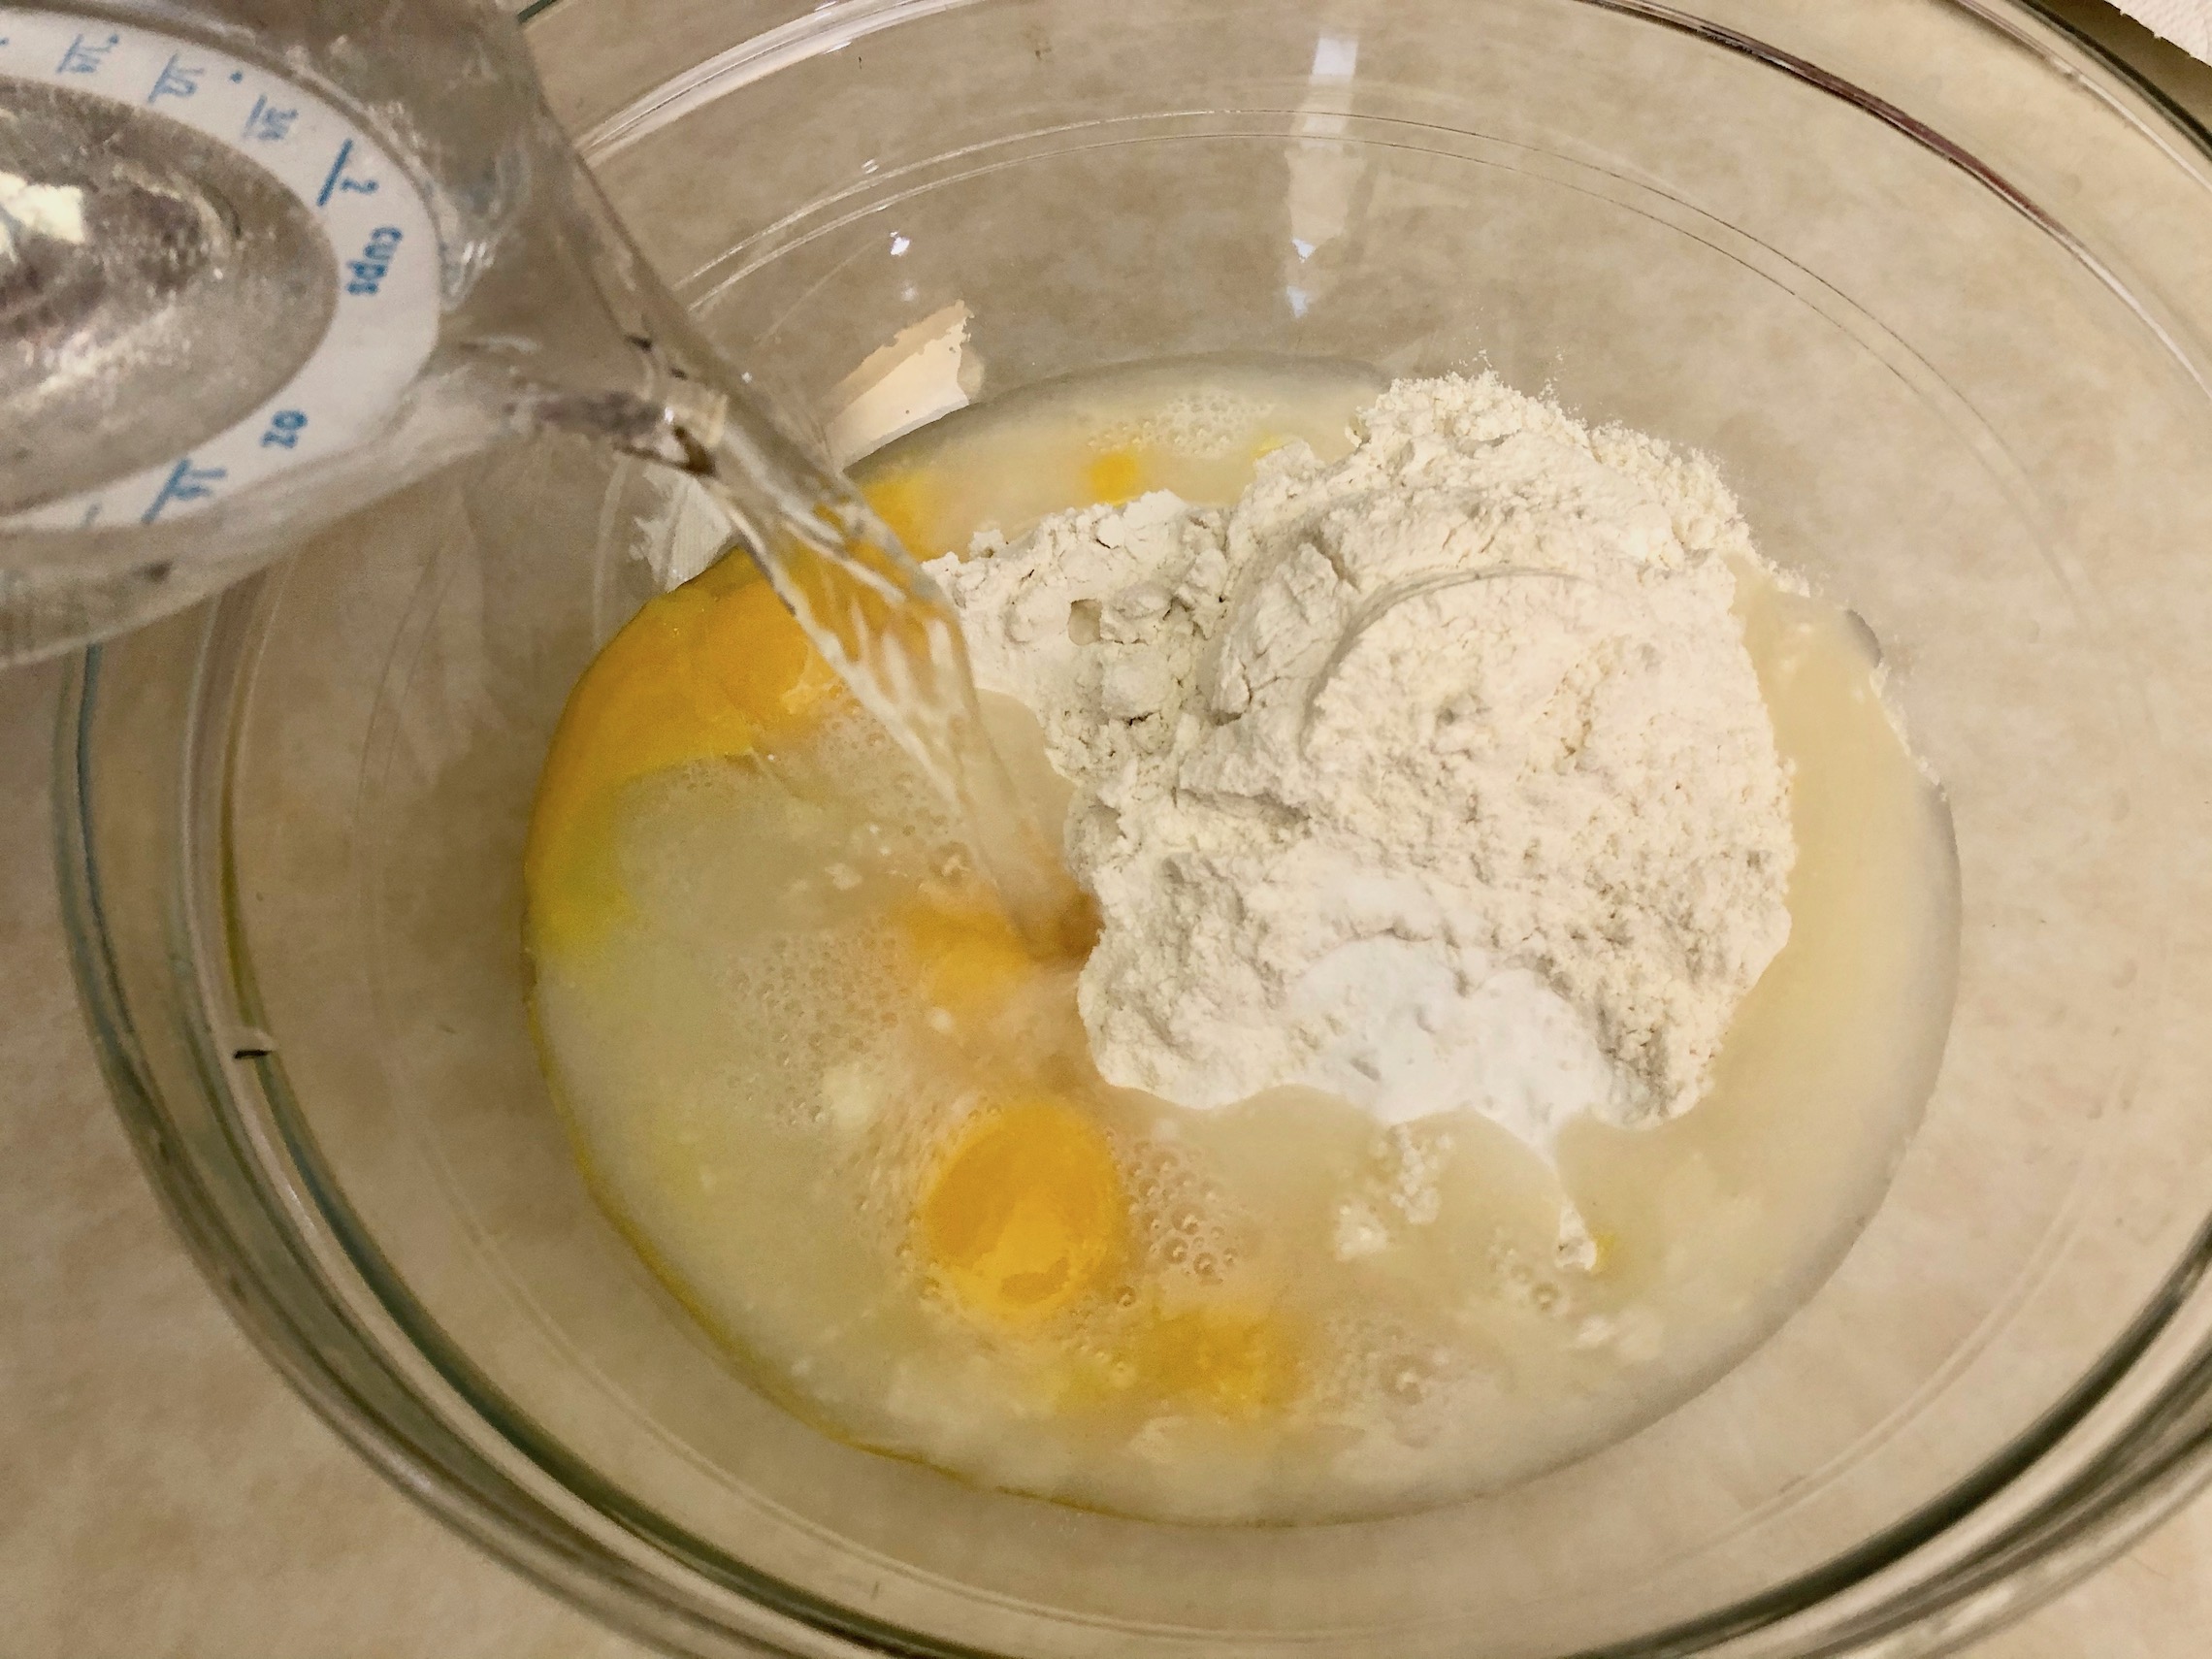
Next, prepare the batter. Whisk the egg yolks, water, flour, and baking soda in a large bowl until smooth. If you are making more than 5-6 sandwiches, you will want to double the batter.

Create and assembly line to skewer the sandwiches. Slide one pancake on the skewer, followed by one piece of sausage, then one piece of egg, then 2 slices of Canadian bacon, and end with one more pancake. Continue to assemble the sandwiches until you have as many as you need.


Add oil to a deep fryer or Dutch oven. You want enough oil that at least ½ of the sandwich is submerged when frying. Heat the oil to 350 degrees F. I prefer to use a deep fryer because the temperature is more consistent but use what you have on hand. You can also start heating the oil while you are assembling the sandwiches to speed things along.
Once the oil is hot, take one skewer and dip it in the batter. You want to fully coat the sandwich. If the batter isn’t reaching every nook and cranny, use a spoon to scoop the batter onto the sandwich.


Carefully place the skewer in the hot oil and fry to about 2 minutes or until golden brown. Use tongs or a slotted spoon to rotate the sandwich while frying. Then, use the same tongs or slotted spoon to remove the sandwich to a paper towel. Repeat this process until all sandwiches are made.


Sprinkle each sandwich with powdered sugar and drizzle maple syrup over the top. Serve warm with a side of maple syrup for dipping. A-M-A-Z-I-N-G! This is one of the best breakfast sandwiches you will ever have!

The recipe can be found here.
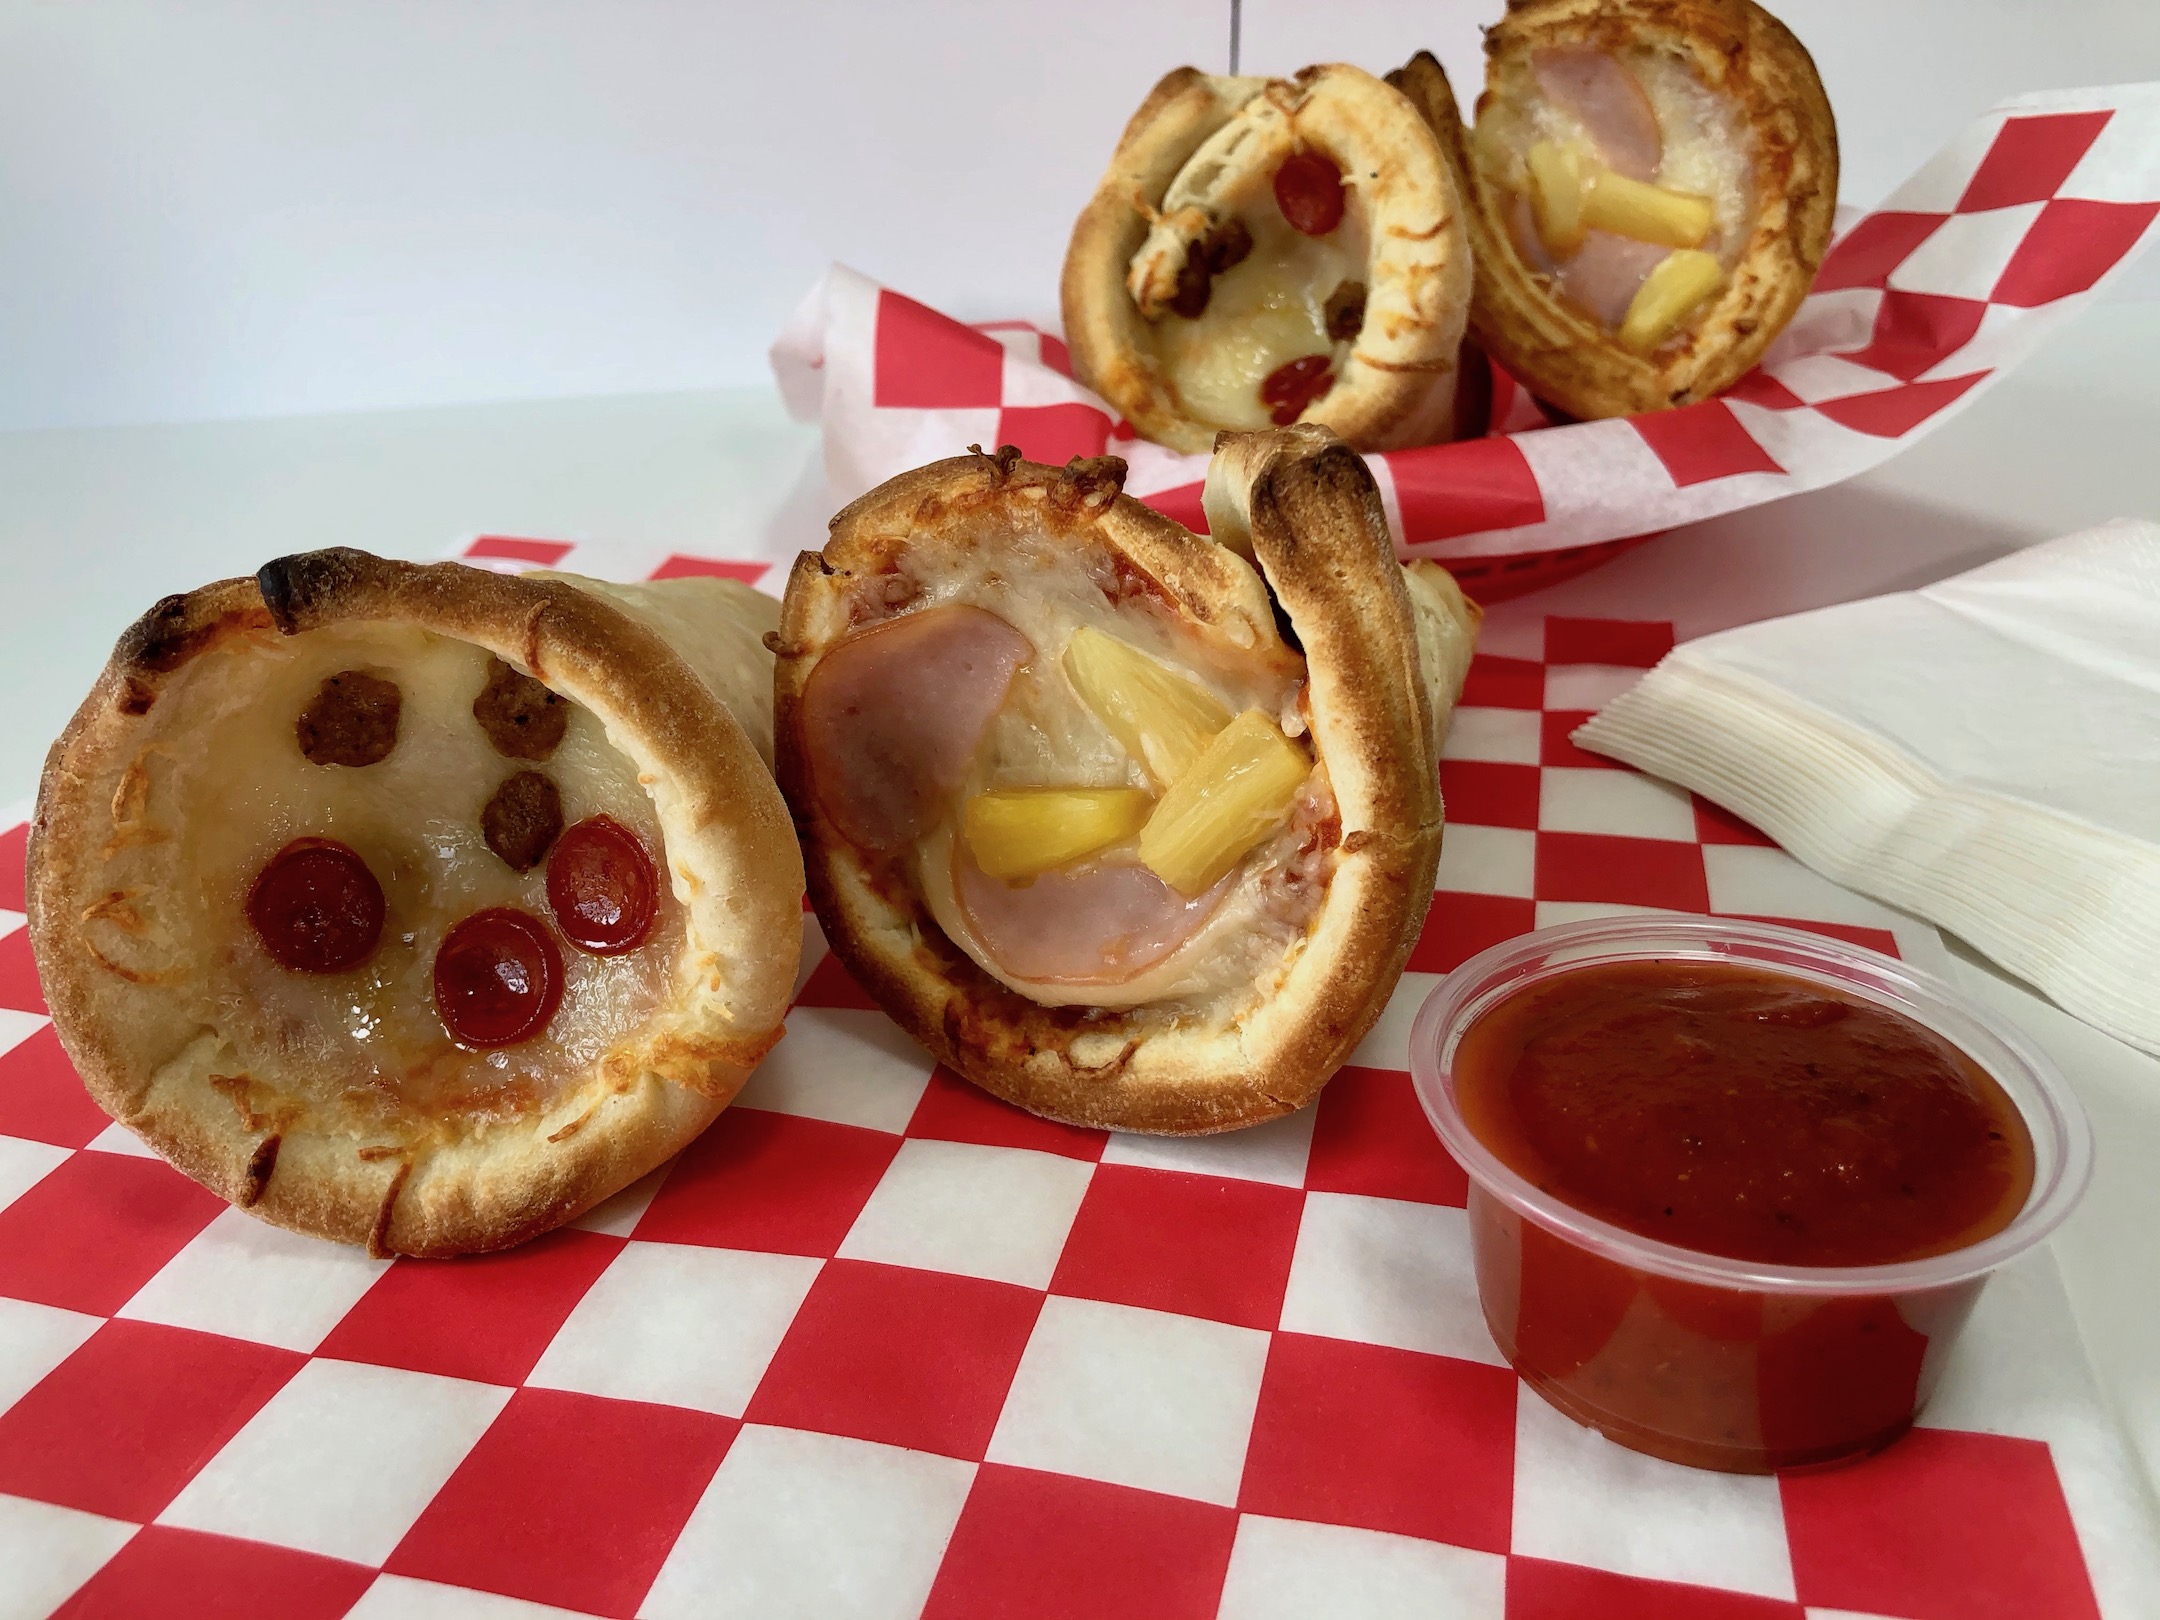
Pizza Cones are pizza that is rolled up and eaten like an ice cream cone. Think calzone, because the cone is stuffed with cheese, sauce, and toppings. These are fun for the whole family! Add whatever toppings you like and customize the toppings to meet anyone’s taste.


Please note, you will need 2 pizza cone molds to make this recipe.
The recipe can be found here.
Add the flour, sugar, salt, and instant yeast to the bowl of a stand mixer. Mix to combine.
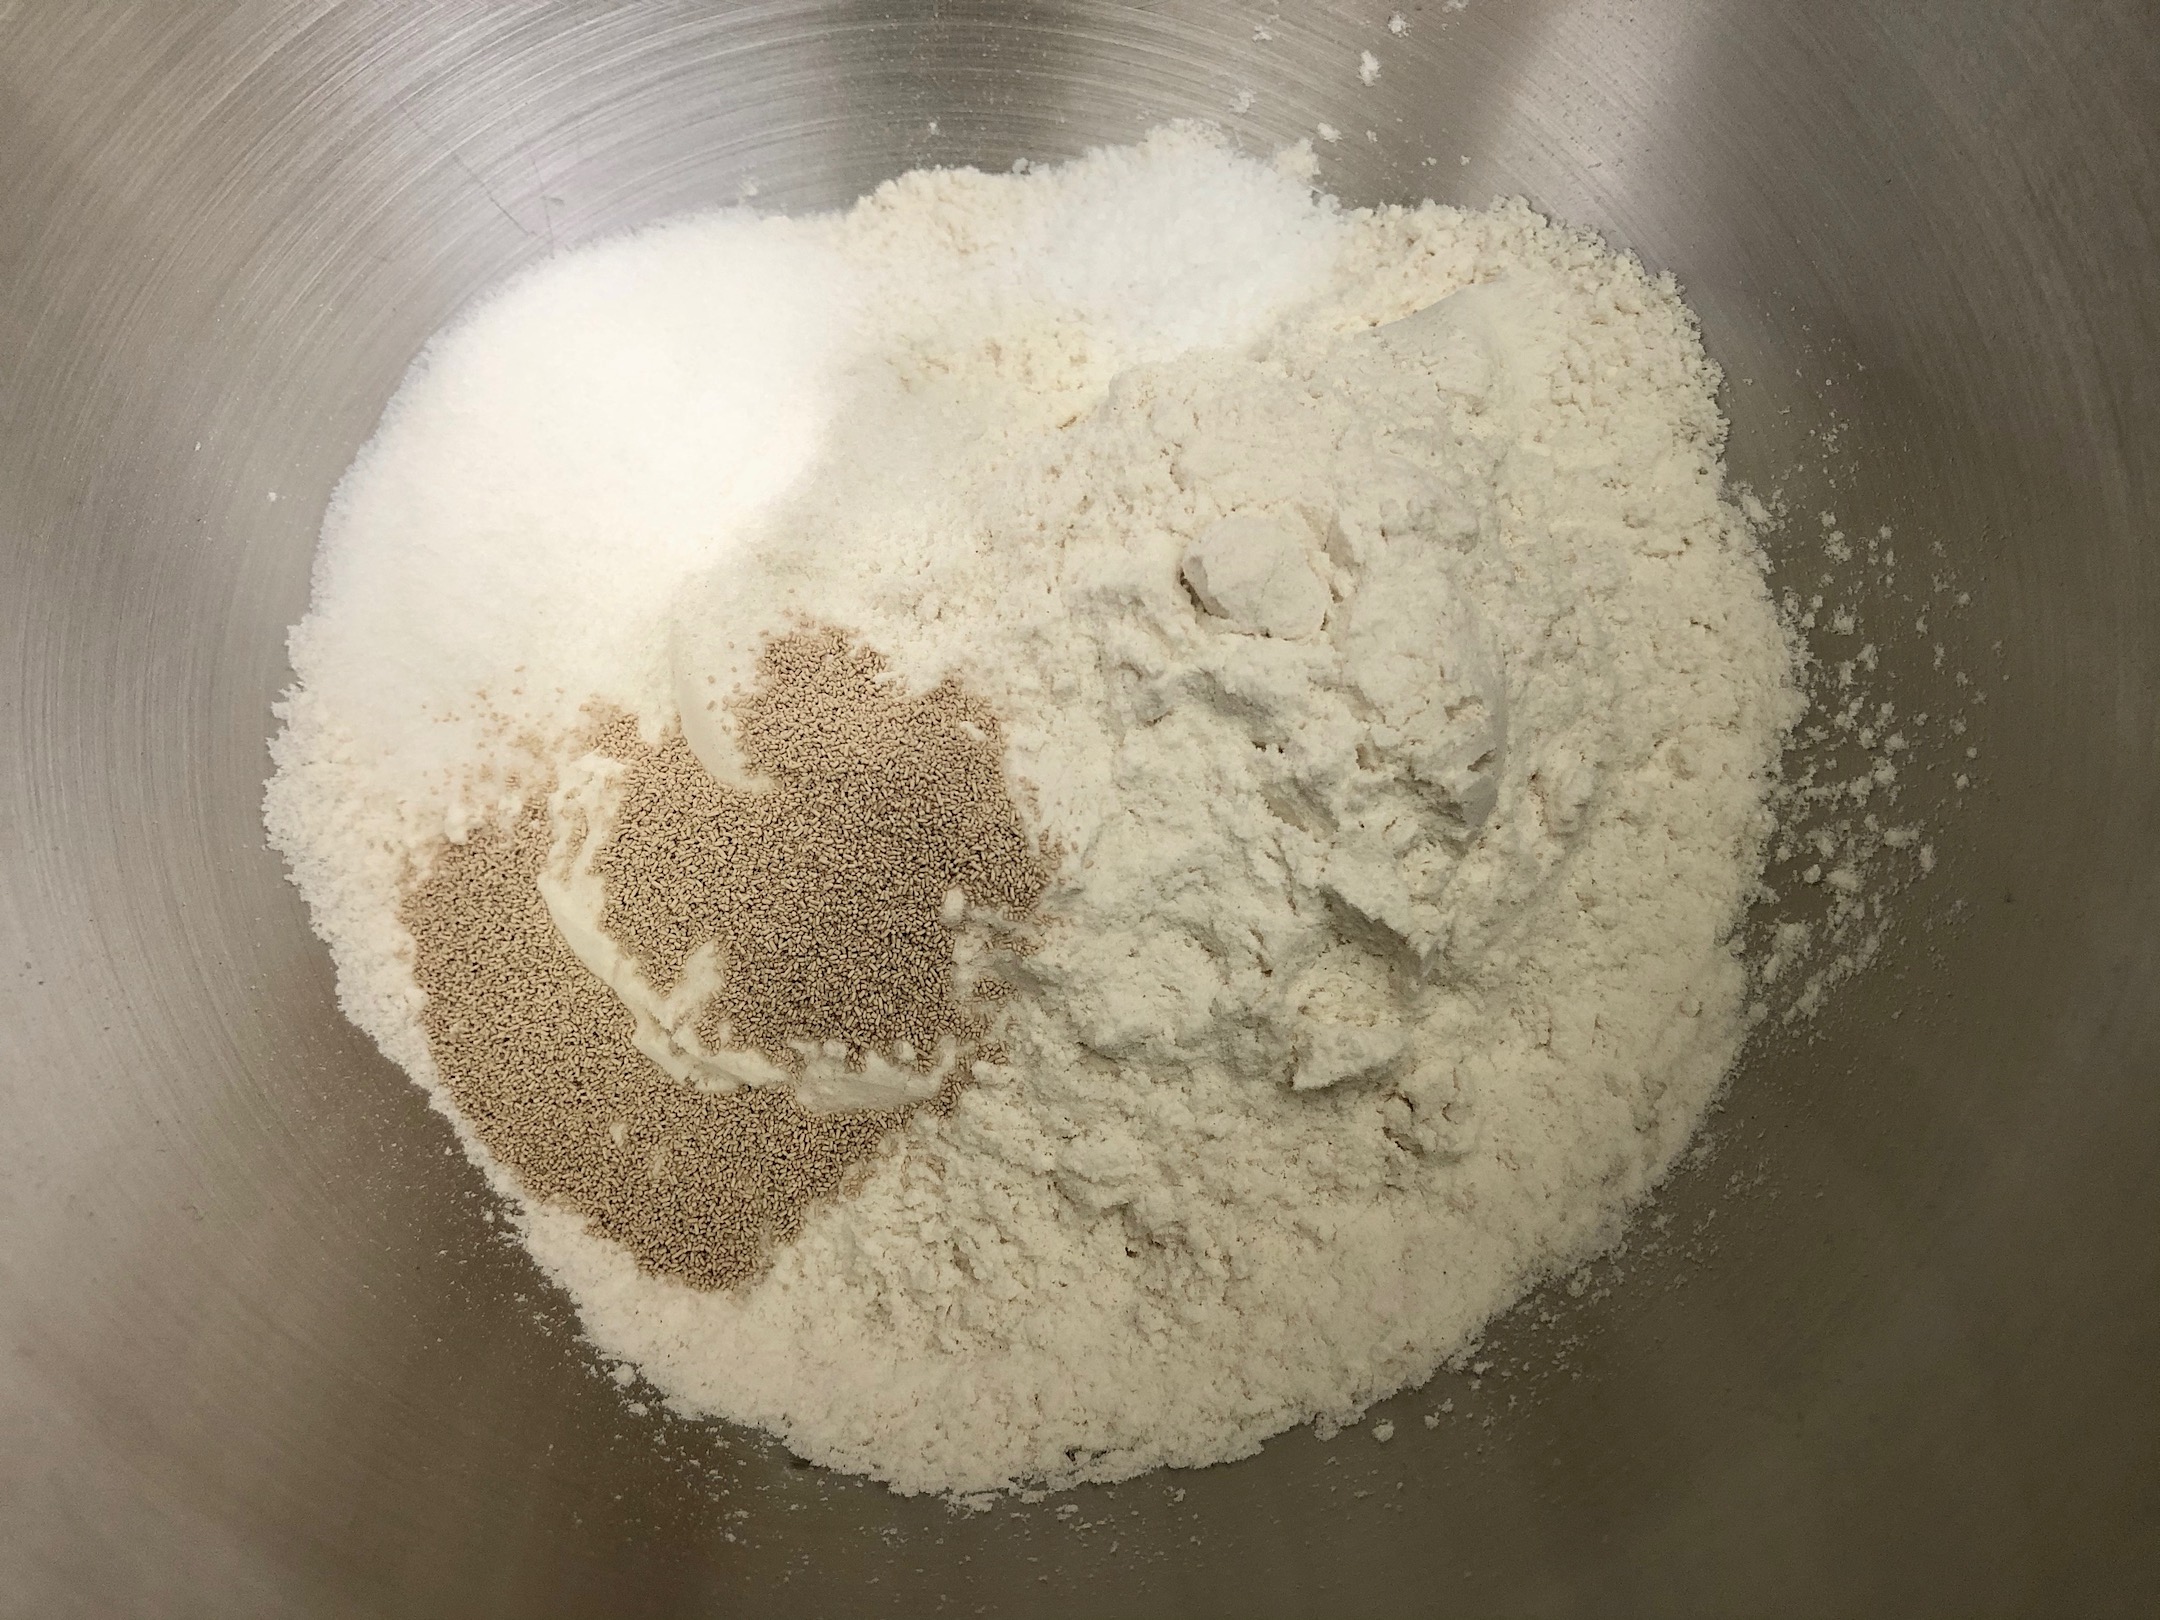
Add the water and canola oil. Use the dough hook to combine on low speed for 1-2 minutes. Increase the speed to medium for 2-3 minutes to knead the dough. Once the dough forms a ball and starts to pull away from the sides of the bowl, it’s done. If the dough is not coming together and resembles a dry crumble, add another Tbsp water to help combine the ingredients.


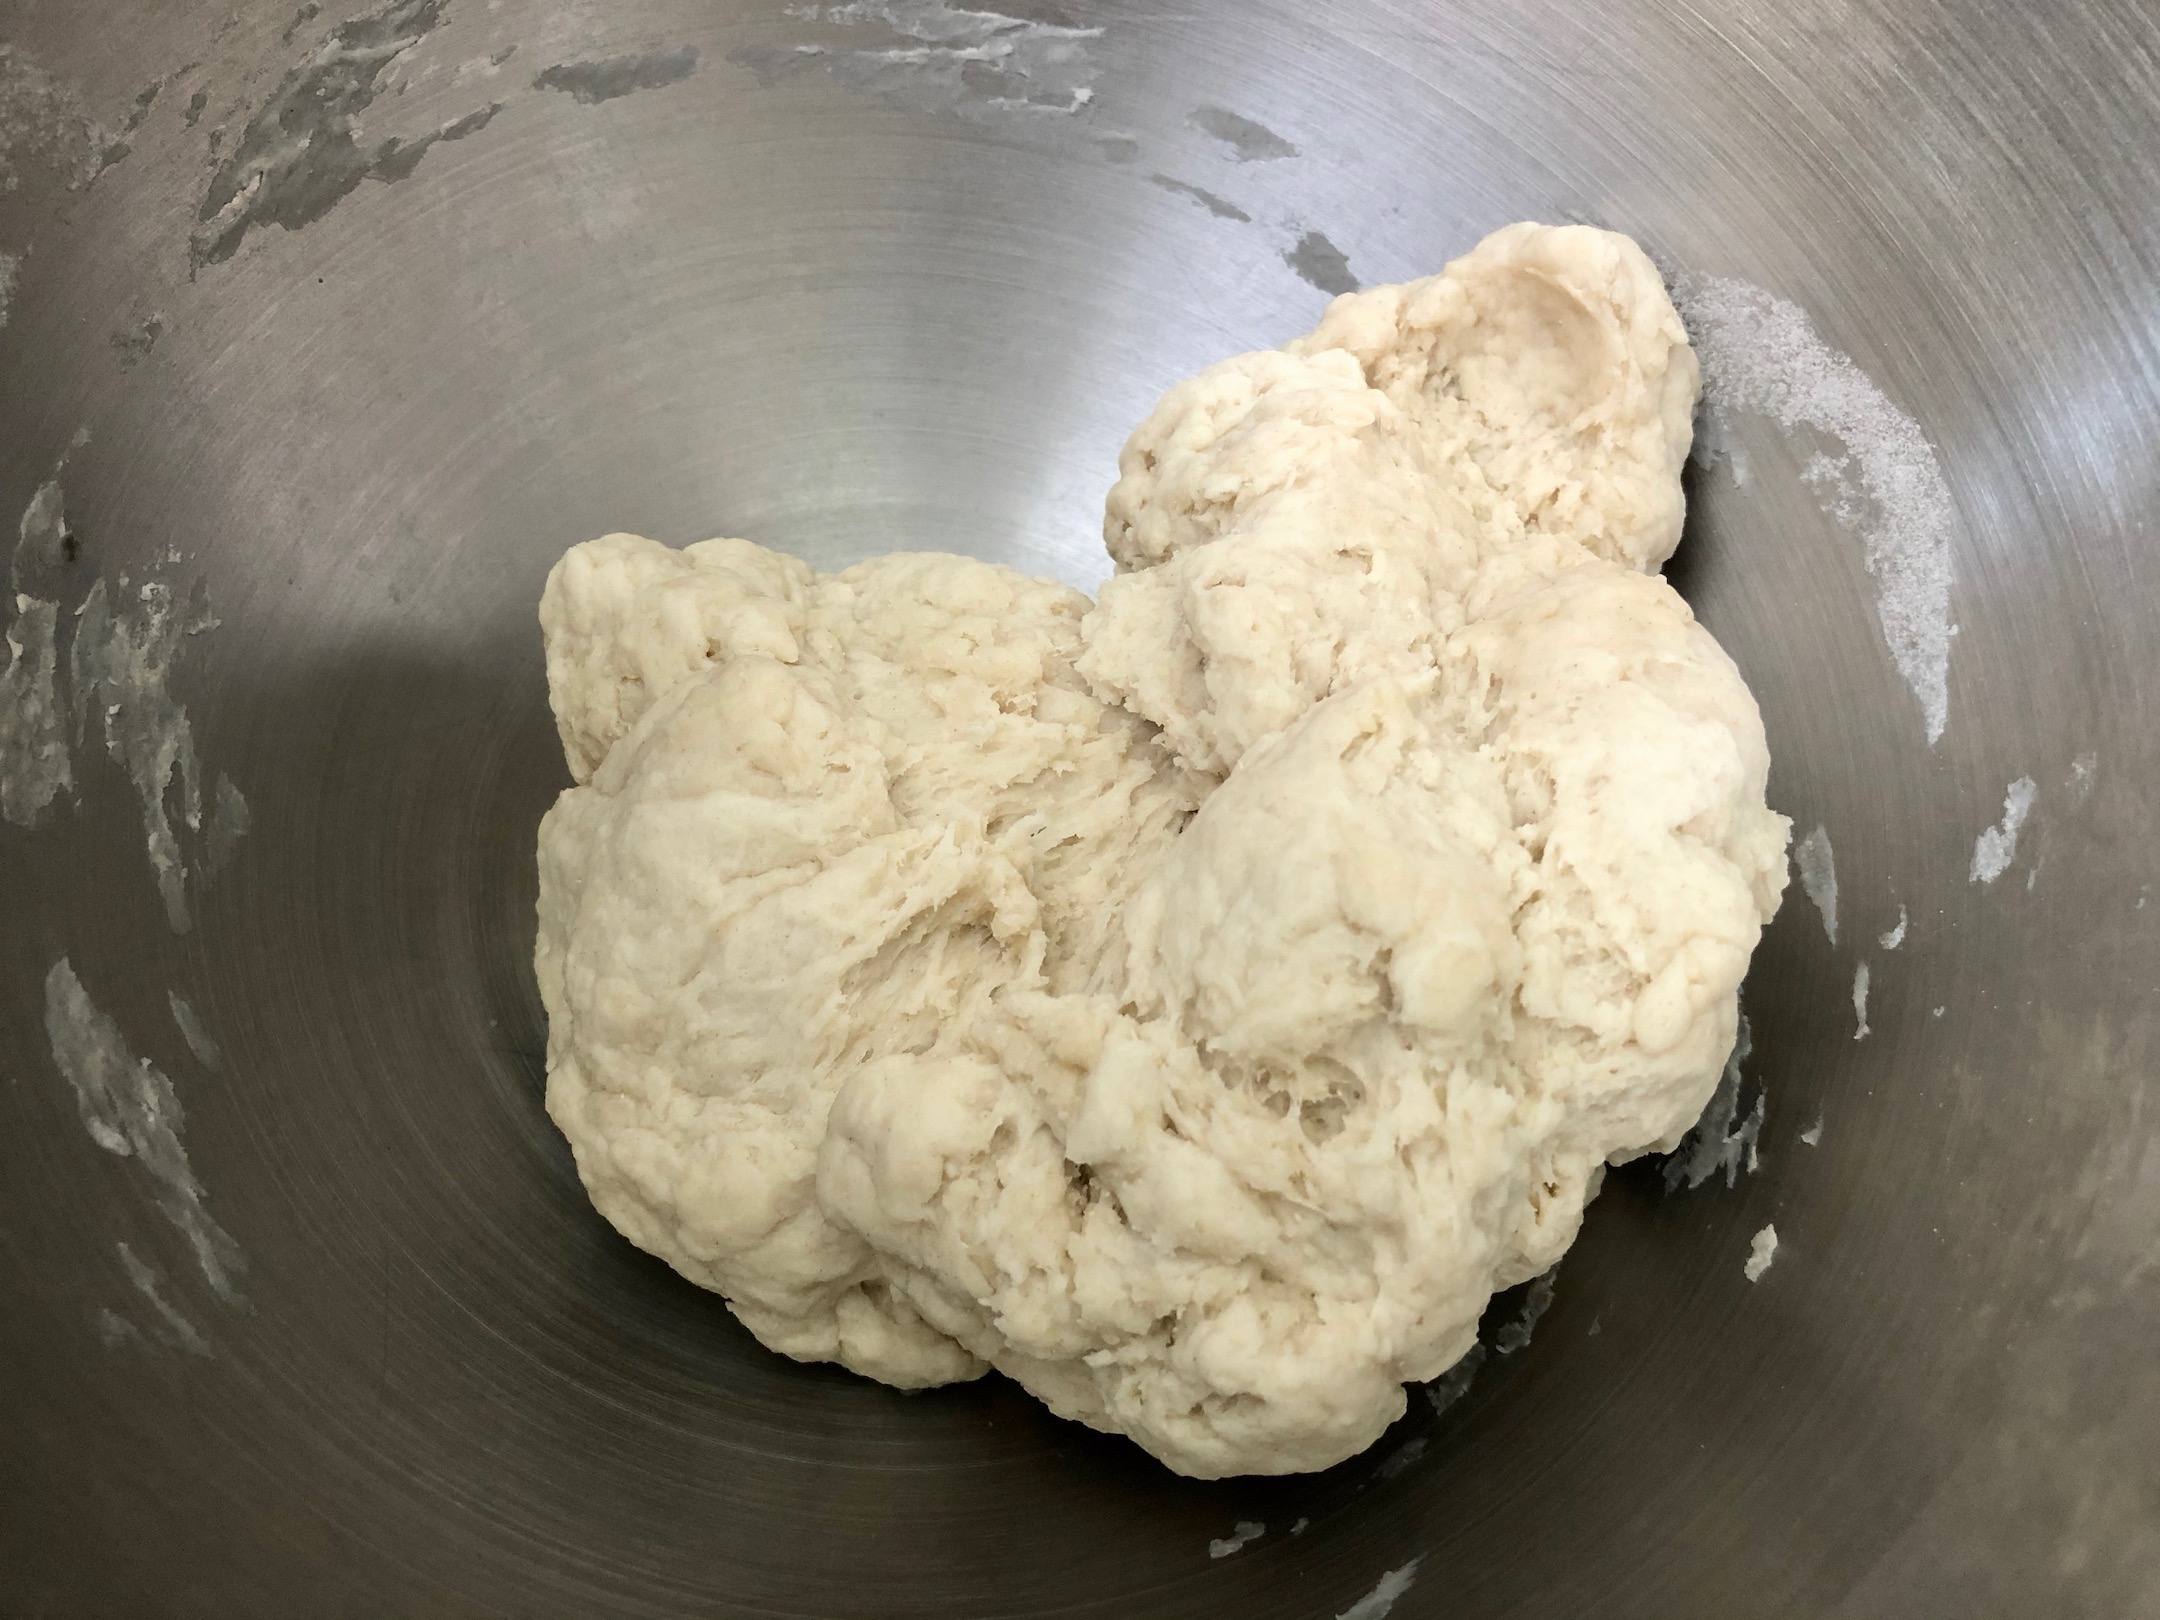
Coat the dough in a small amount of oil and place in a large bowl. Cover the bowl with plastic wrap and place in a warm space to rise for about 45-60 minutes. You want the dough to double in size.


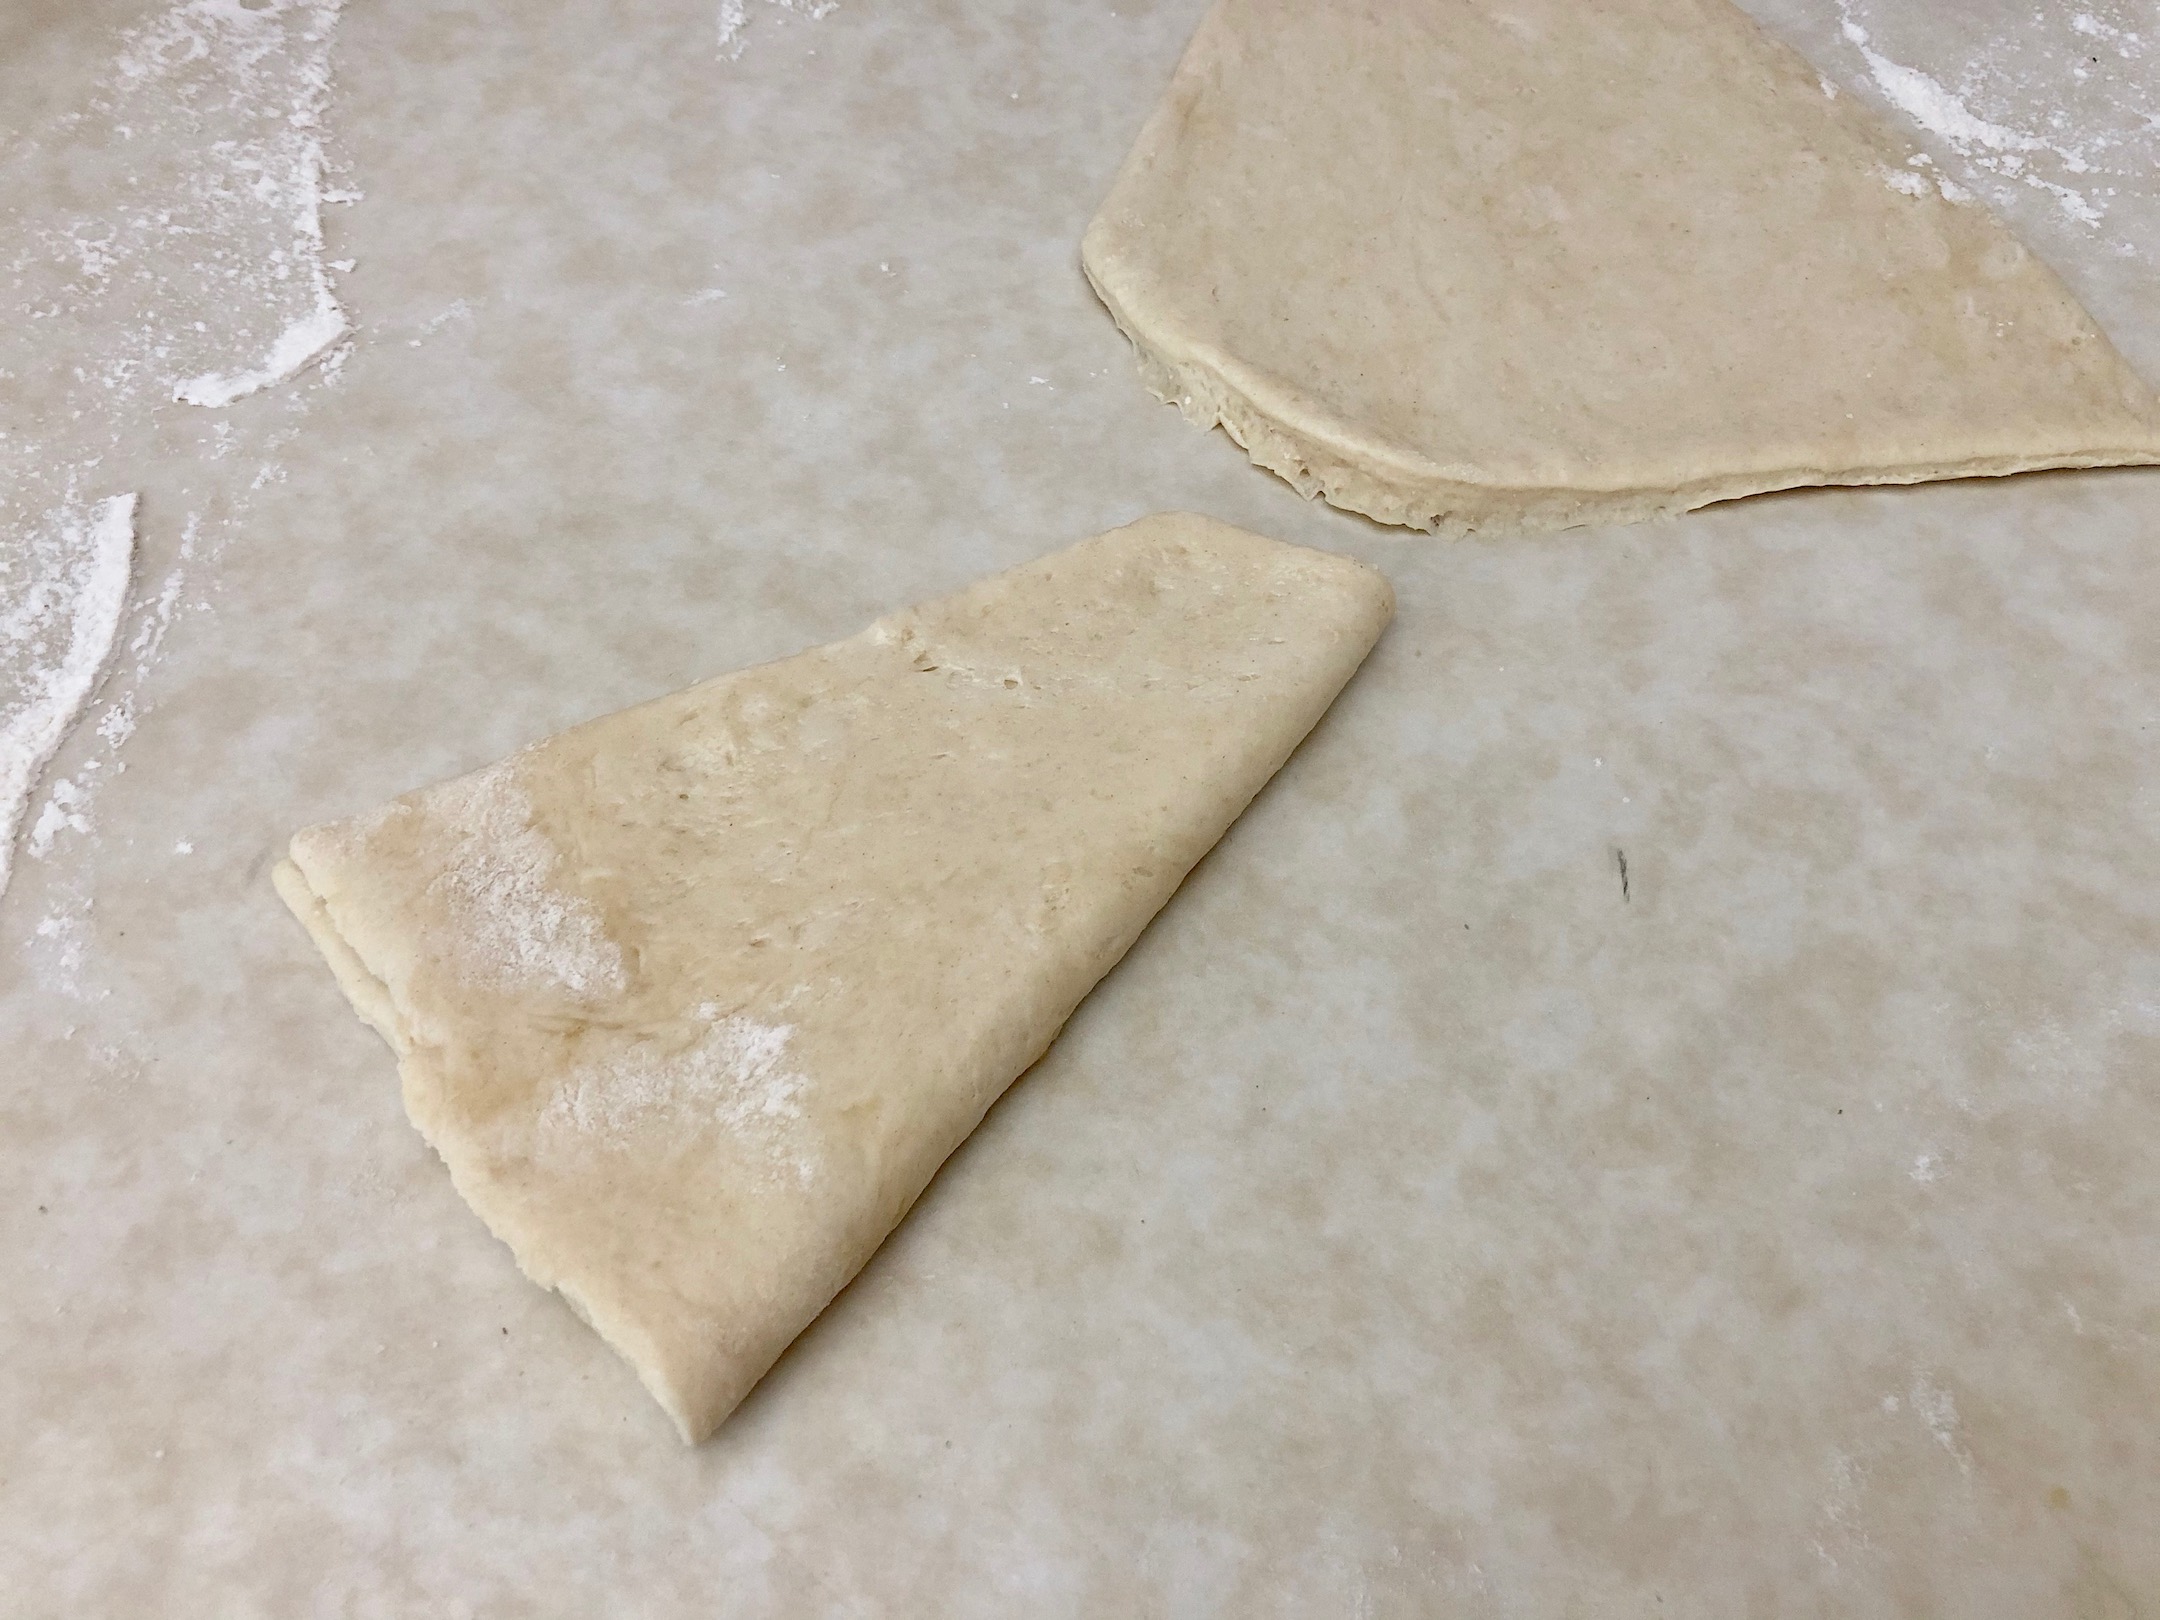
Once the dough has doubled in size, roll out the dough to about 1/8-inch thick. You want the dough to be large enough to fit the triangle mold 4 times. Use the triangle mold to cut out 4 pieces of dough, which will become the cones. You can either discard the scraps of dough or knead them into a ball and roll out to cut out more triangles.


Preheat the oven to 400 degrees. Moisten the edge of one piece of dough with water. Fold the dough in half so the edges meet. Use your fingers to press down at the seams then use the crimper to run along the edge of the seams.


Generously spray one of the metal cones with cooking spray. Place the folded dough over the cone. Make sure the edges are still sealed. Repeat with the second cone.

Place both baking cones on a baking sheet. This will make transporting the cones easier and help the cones remain stable when baking. Bake for 5-6 minutes or until the dough begins to turn brown.

Remove from the oven and let the cones sit for about 5 minutes to cool. You want the dough to be cool enough to remove from the cones without burning yourself.
Remove the dough from the cones and place in the holders. If the dough did not hold while baking and is not a complete cone, that’s ok! You can still form it into a cone shape when putting in the cone holder. Make sure to add an ingredient to the bottom that will hold the rest of the ingredients in the cone (i.e. a few pieces of pepperoni or sausage). This will make more sense when you bake the cones yourself…trust me!

Fill each cone with the ingredients of your choice. Layer the ingredients until each cone is packed full. I like to use pepperoni and sausage in one cone and pineapple and Canadian bacon in the other. Both cones have sauce and shredded mozzarella cheese. Make sure to do a couple layers so you have cheese and sauce throughout the cone.

Transfer the cone holders to a baking sheet and bake for 7-8 minutes or until the cheese has melted and the ingredients are heated through.

Let cool for about 5 minutes. Then, repeat the above steps to make the other 2 pizza cones. Serve warm with additional marinara sauce on the side. What a fun way to eat pizza? So yummy!
The recipe can be found here.
Hand Dipped Corn Dogs are about as state fair as you can get. I’m not sure if this is the #1 food at the fair but there seems to be a line at every booth to get a corn dog. I think I could give some of those vendors a run for their money with this recipe 🙂


I like to use a variety of hot dogs to meet every taste. Some are beef, some are pork, and some are turkey, so everyone can find something they like. Nothing beats the flavor of the breading!
The recipe can be found here.
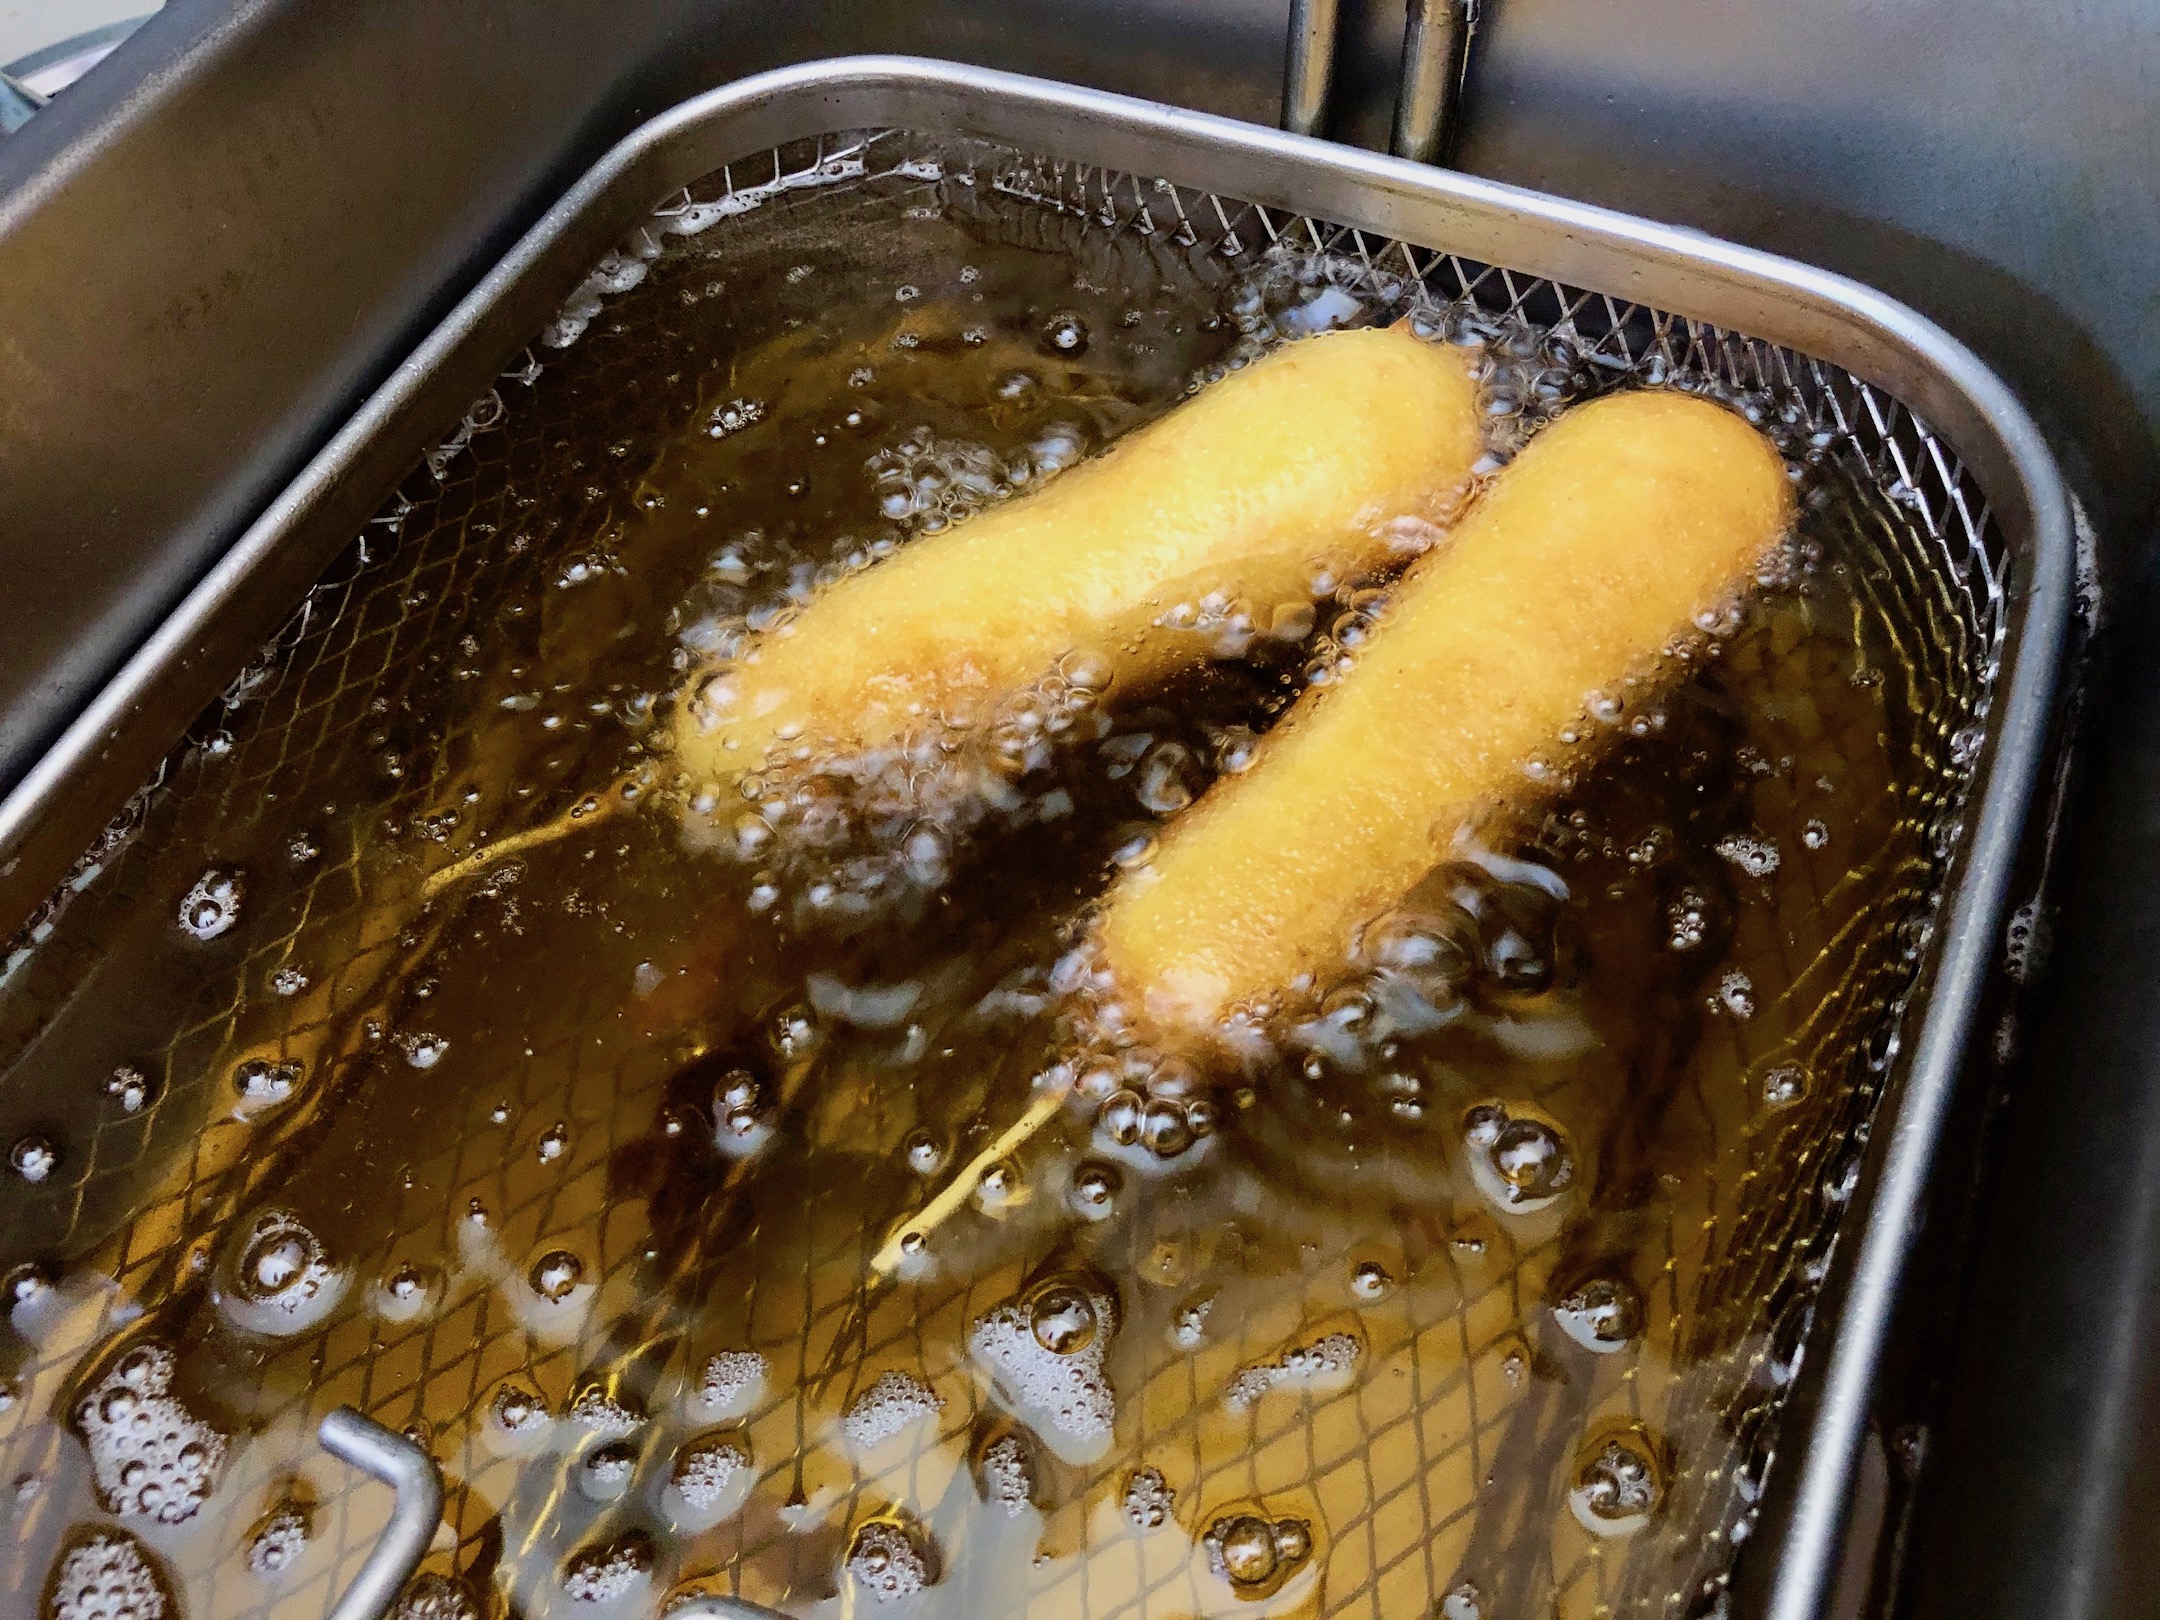
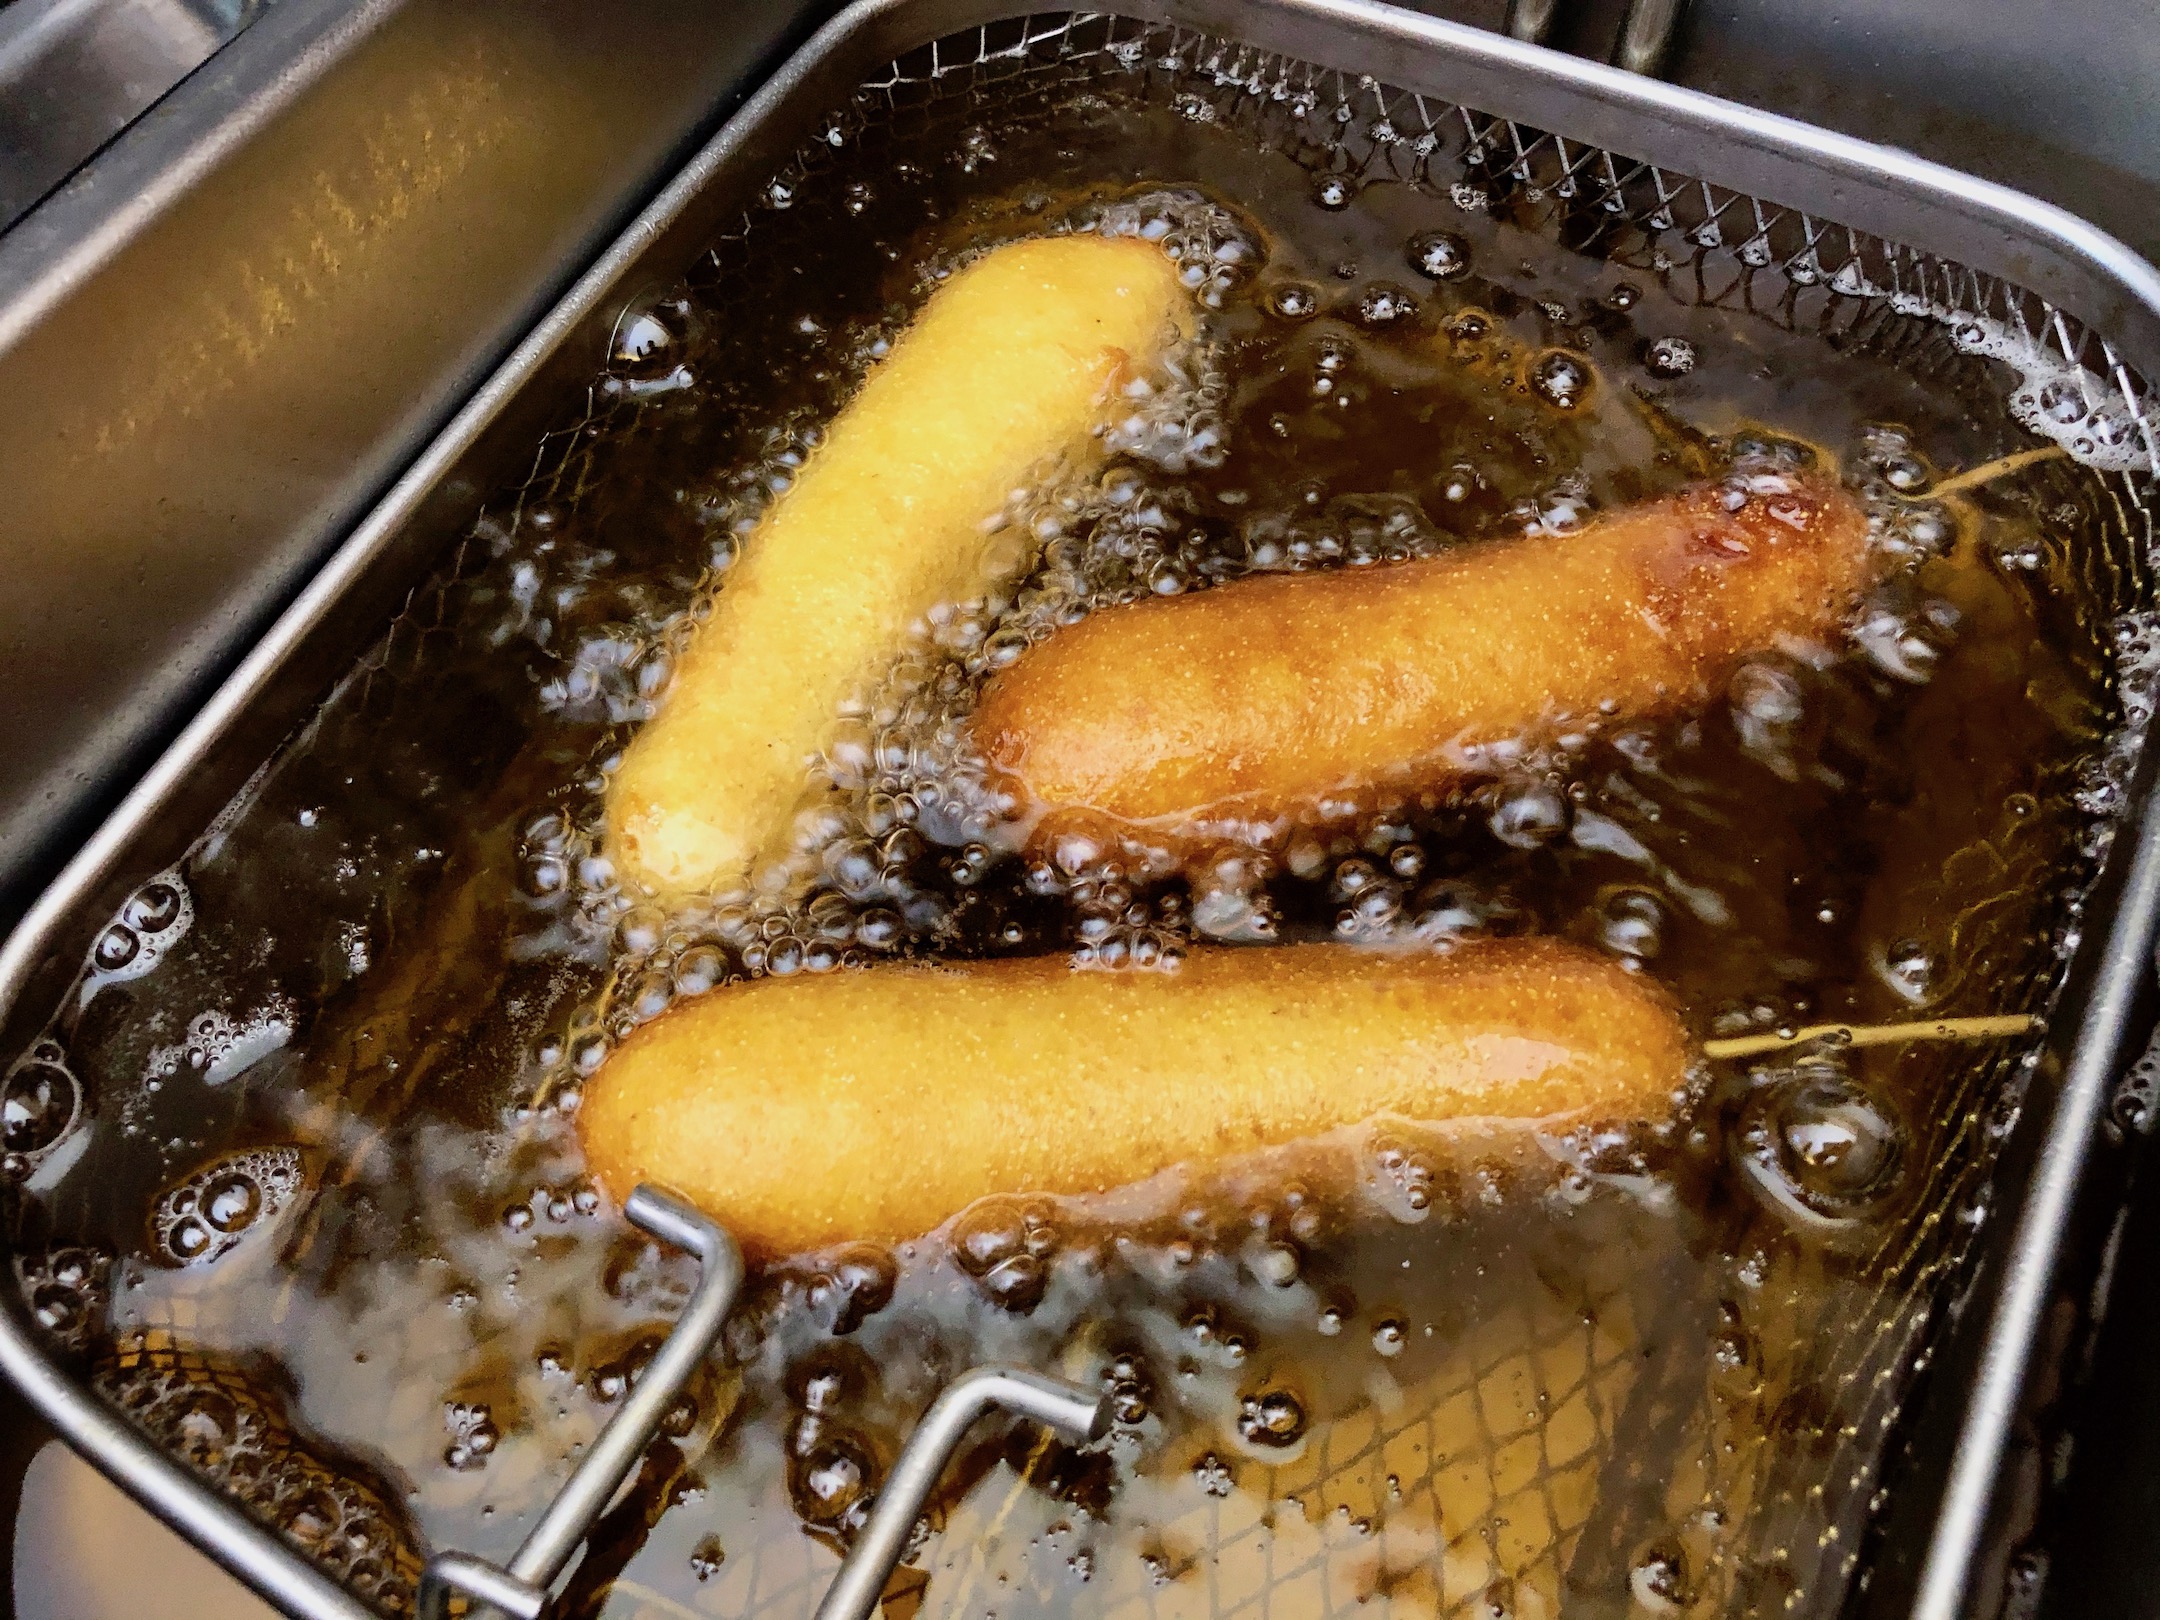
Add canola oil to a deep fryer or Dutch oven. You want enough oil for the corn dogs to float and be partially submerged. Let the oil heat to 350 degrees F while you prepare the corn dogs.
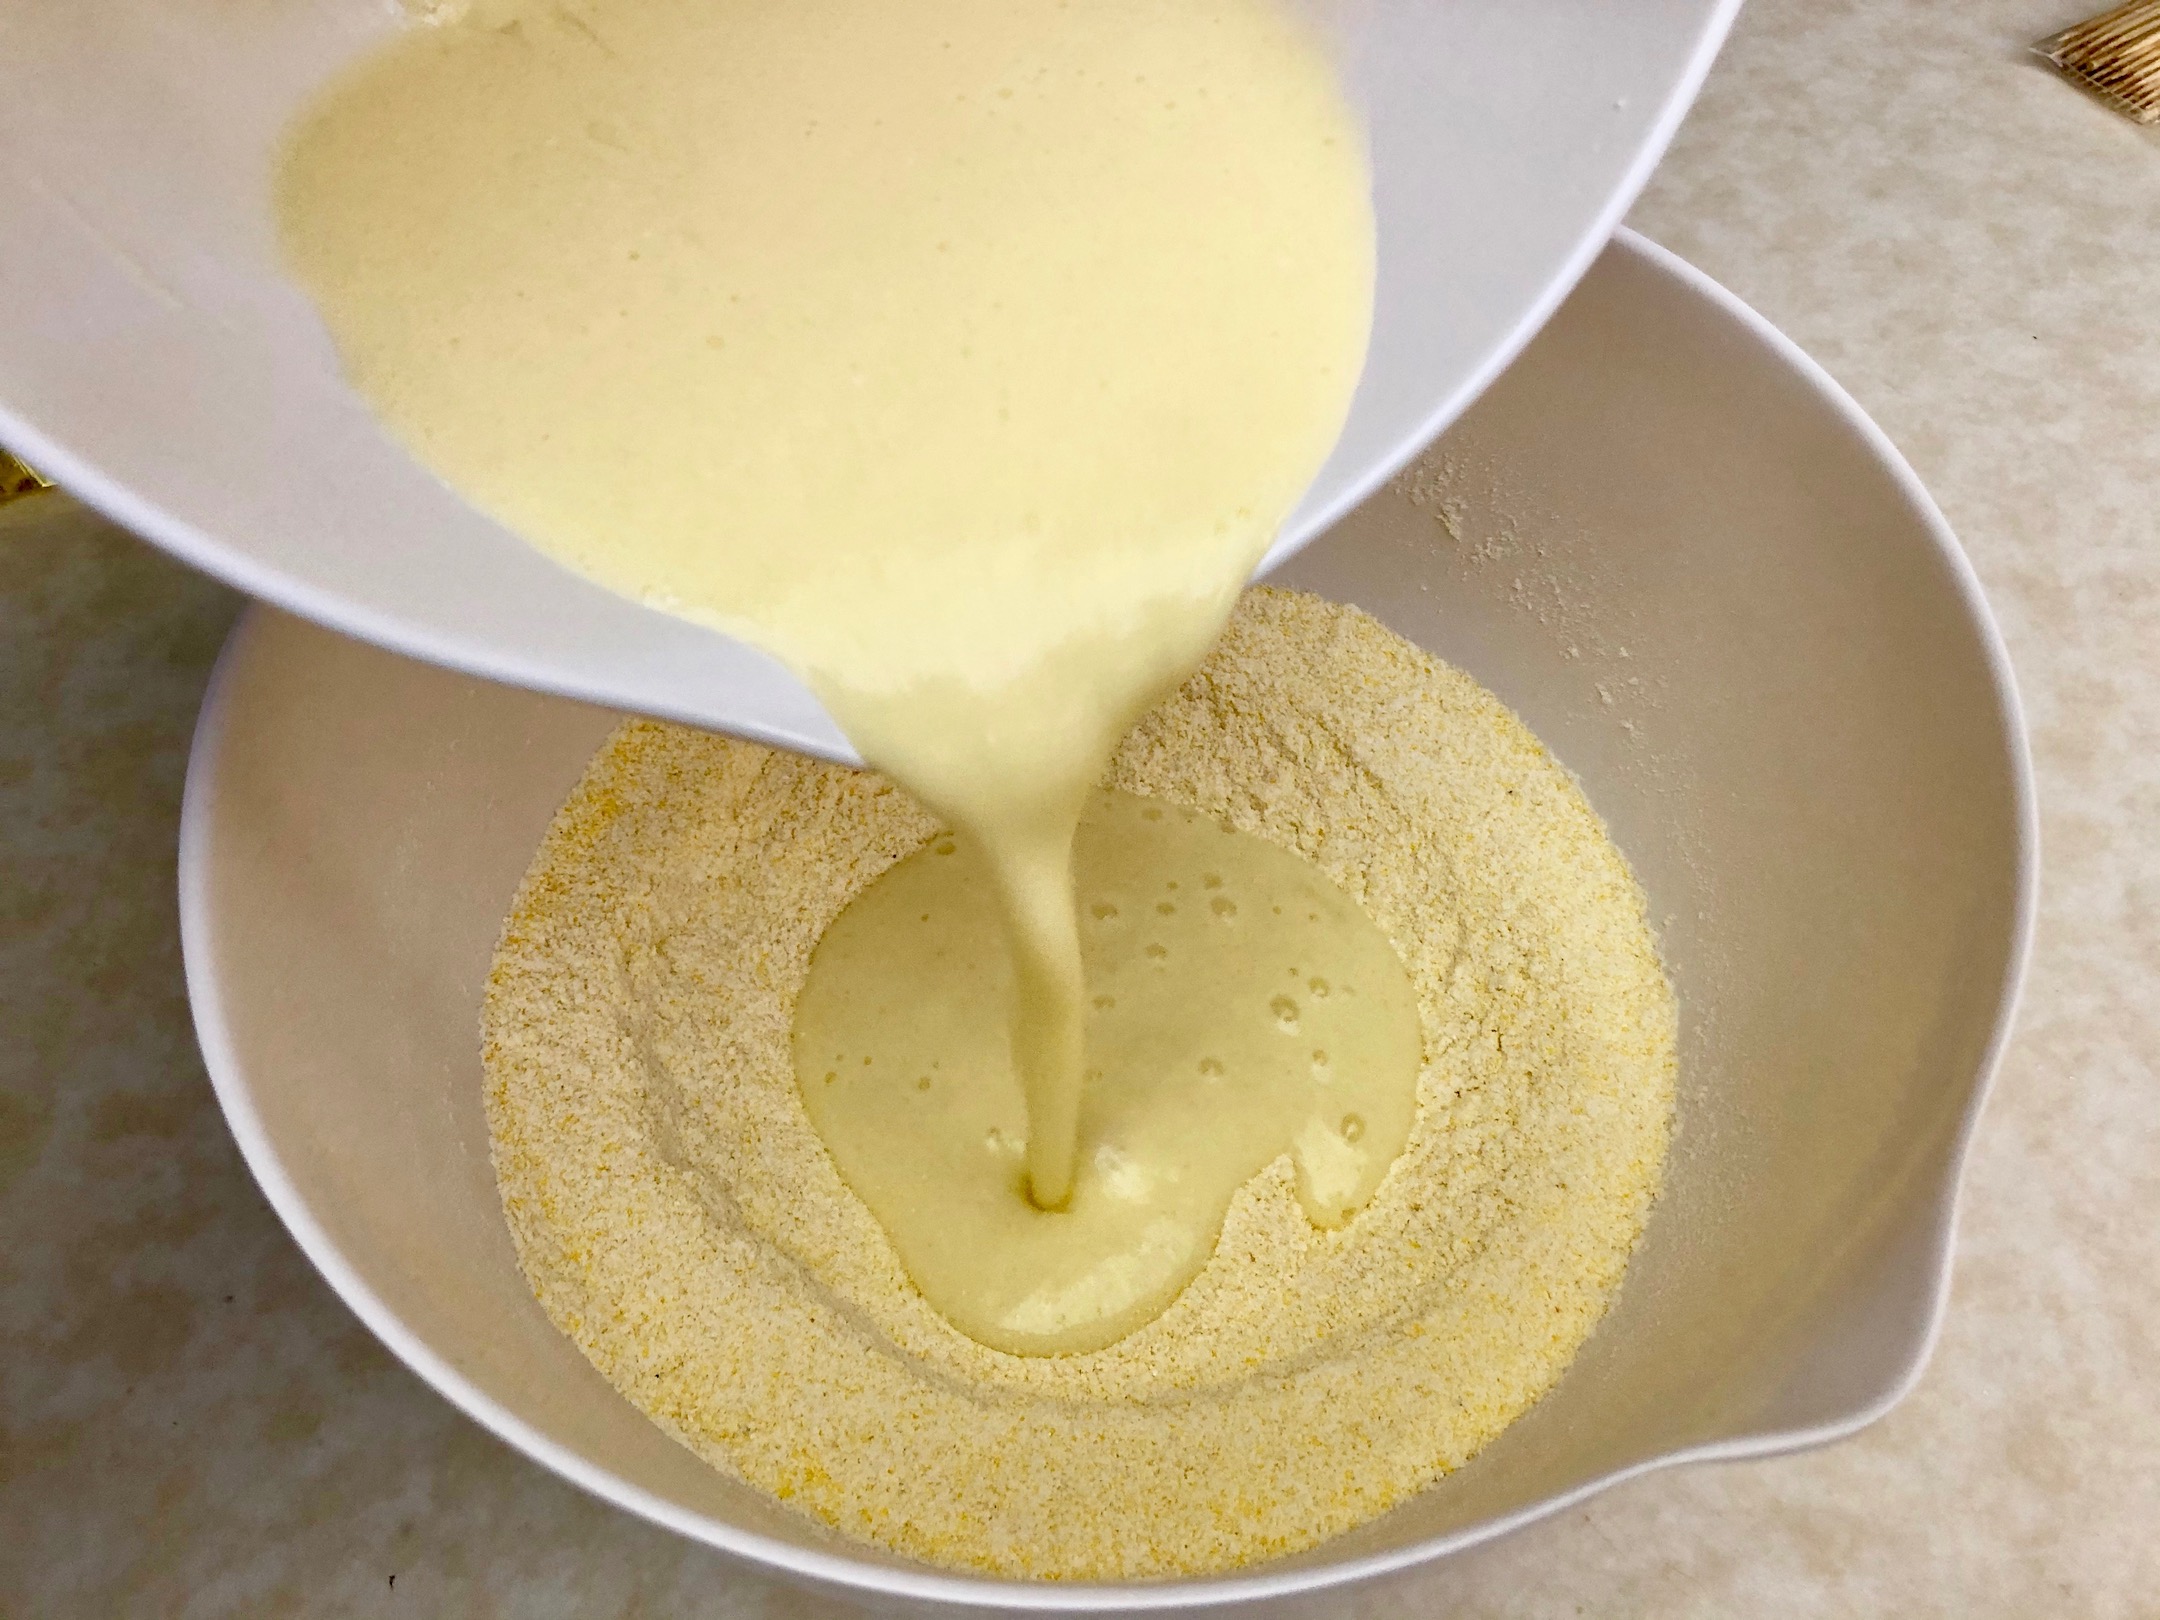
In a large mixing bowl, add the cornmeal, flour, sugar, salt, and baking powder. Whisk together.

In a separate mixing bowl, add the egg, honey, buttermilk, and vegetable oil. Whisk to combine.
Pour the wet ingredients into the dry ingredients and stir to combine.
Remove the hot dogs from their packages and pat dry. If you are using different kinds of hot dogs or accommodating any dietary restrictions, make sure to keep them separated while cooking. Insert a skewer into each hot dog. It’s OK if you push the skewer all the way through! I definitely did this a few times. Just pull the skewer back so only piercing one end.

Pour the batter into a tall drinking glass. Use the skewered hot dogs to measure how tall the glass needs to be. You want the entire hot dog to find when dipping.
Dip a hot dog into the batter, making sure it is fully coated. You may need to rotate the glass or move the hot dog around in the batter to make sure the batter is all over every inch!

Then, place the batter hot dog into the hot oil. Deep fry for 2-3 minutes or until golden brown with a crispy crust. Remove to a paper towel lined plate and move on to the next corn dog. You can deep fry 2-3 corn dogs at a time, just keep track of how long each has been in the hot oil, so you don’t undercook or overcook anything. Repeat this process until all corn dogs have been fried.
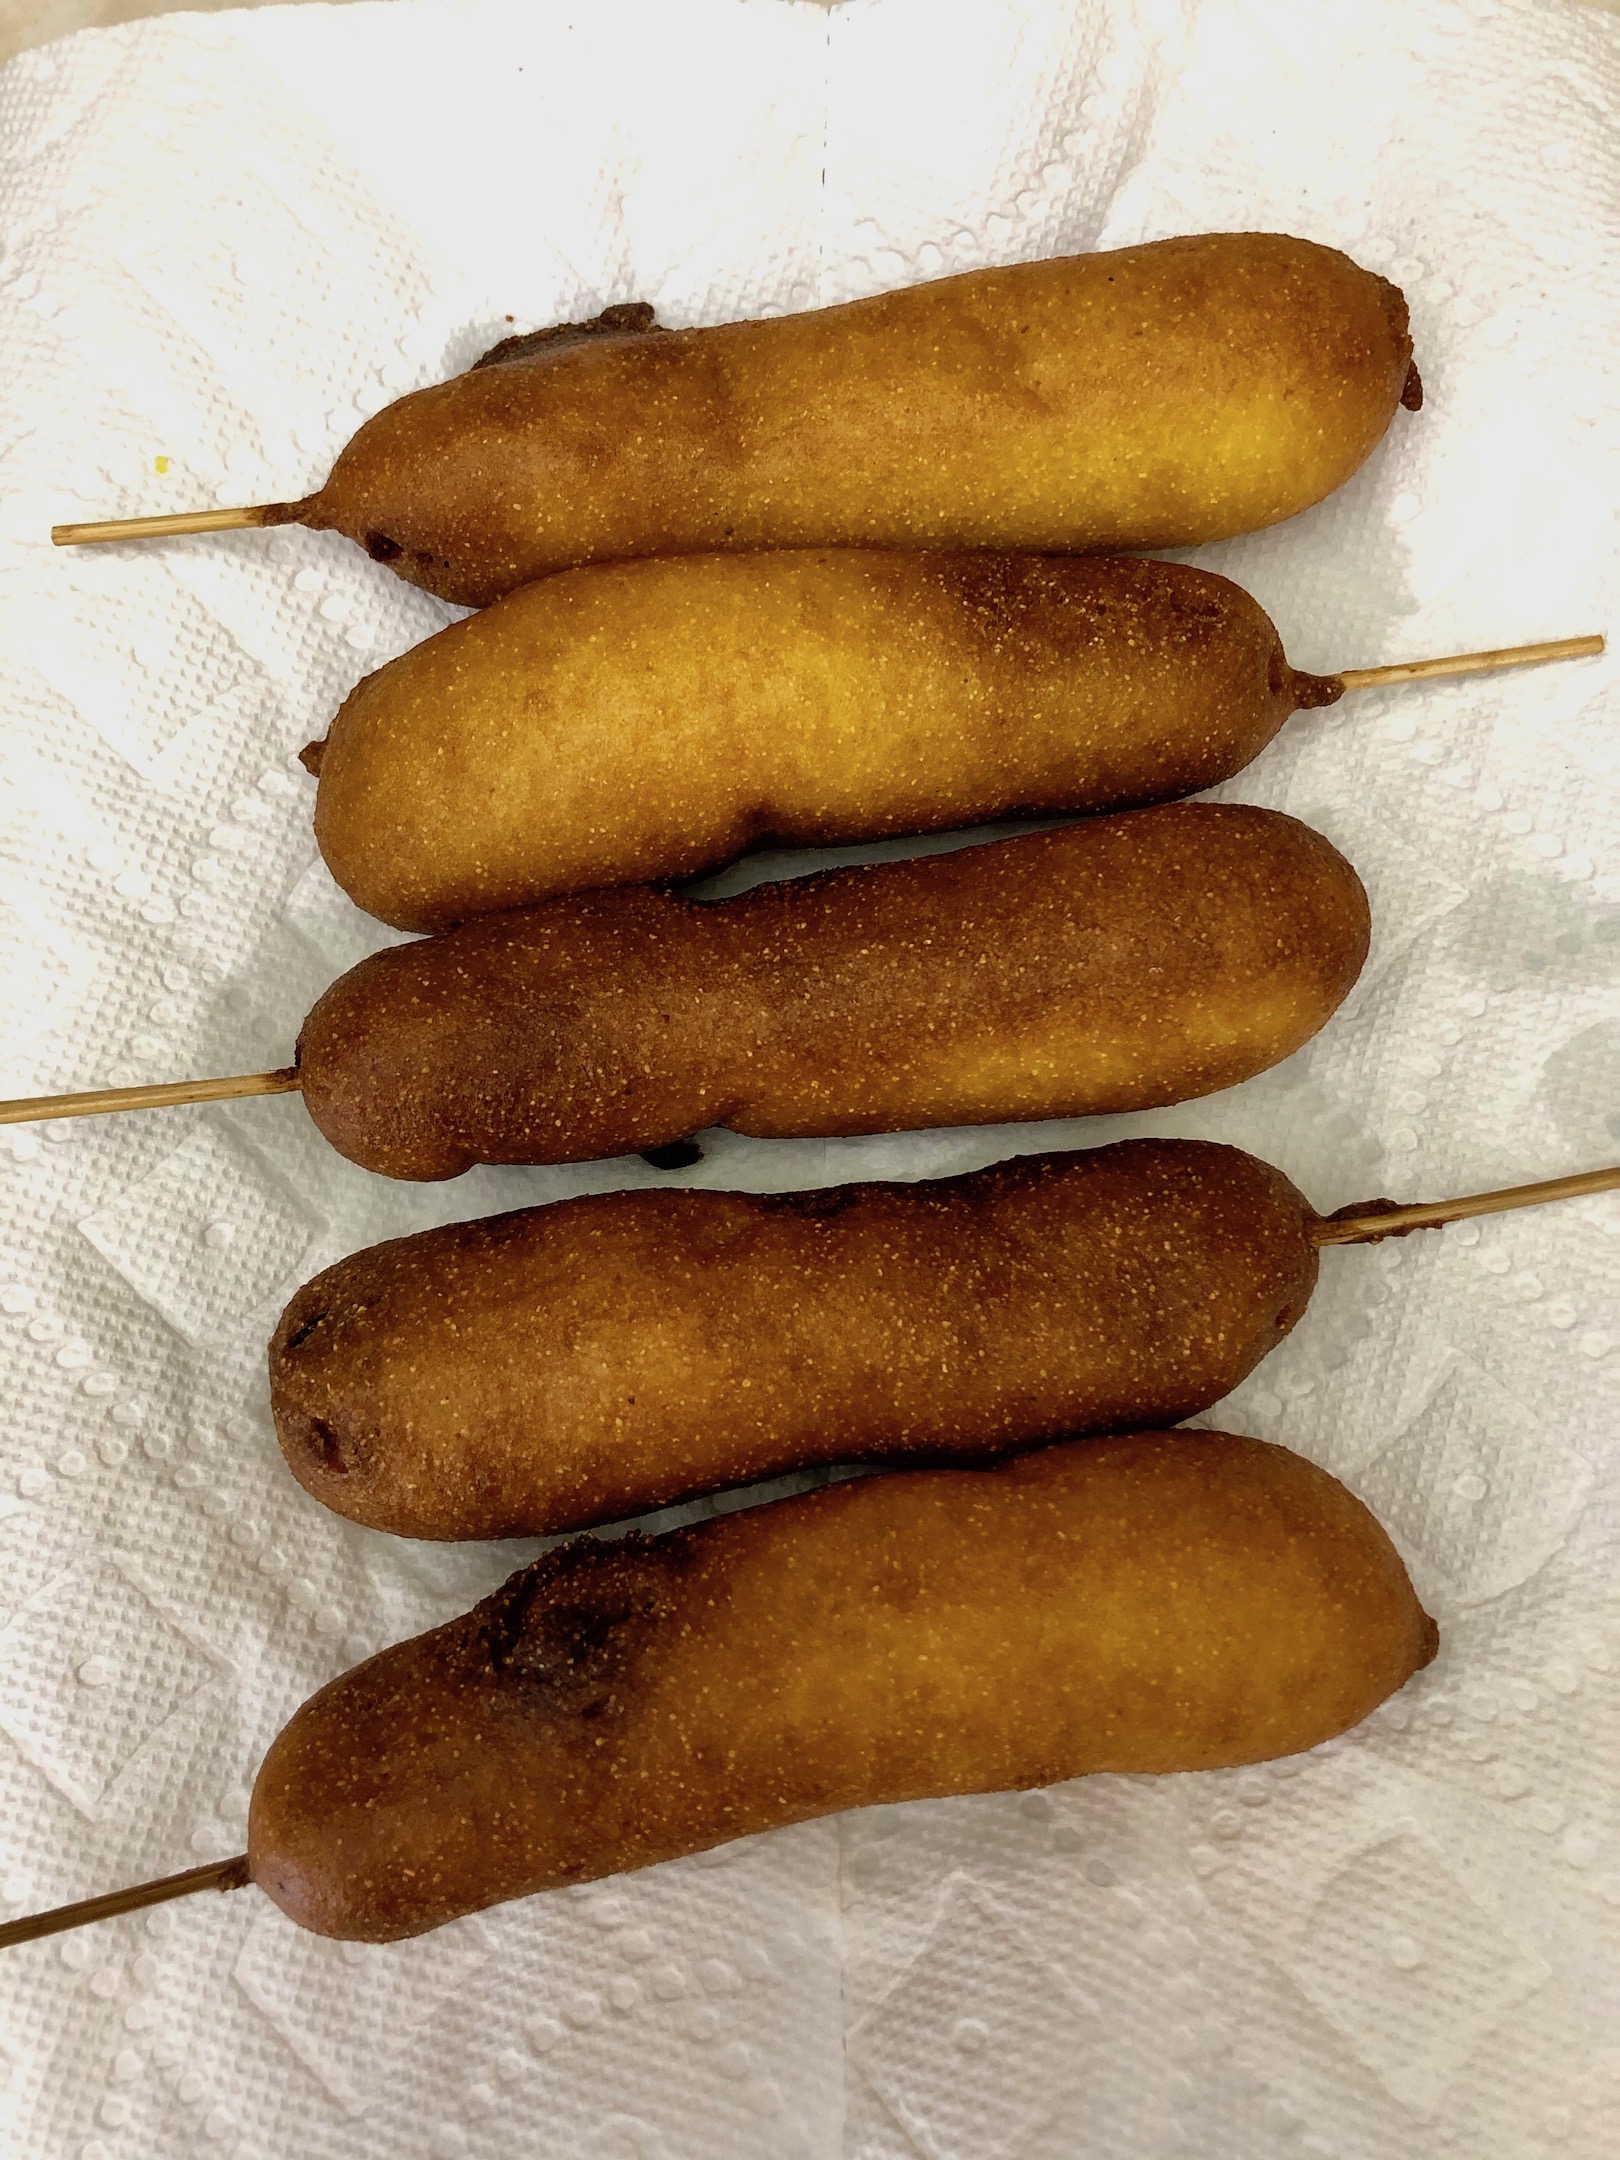
Serve warm with ketchup and mustard. Super simple yet super delicious!

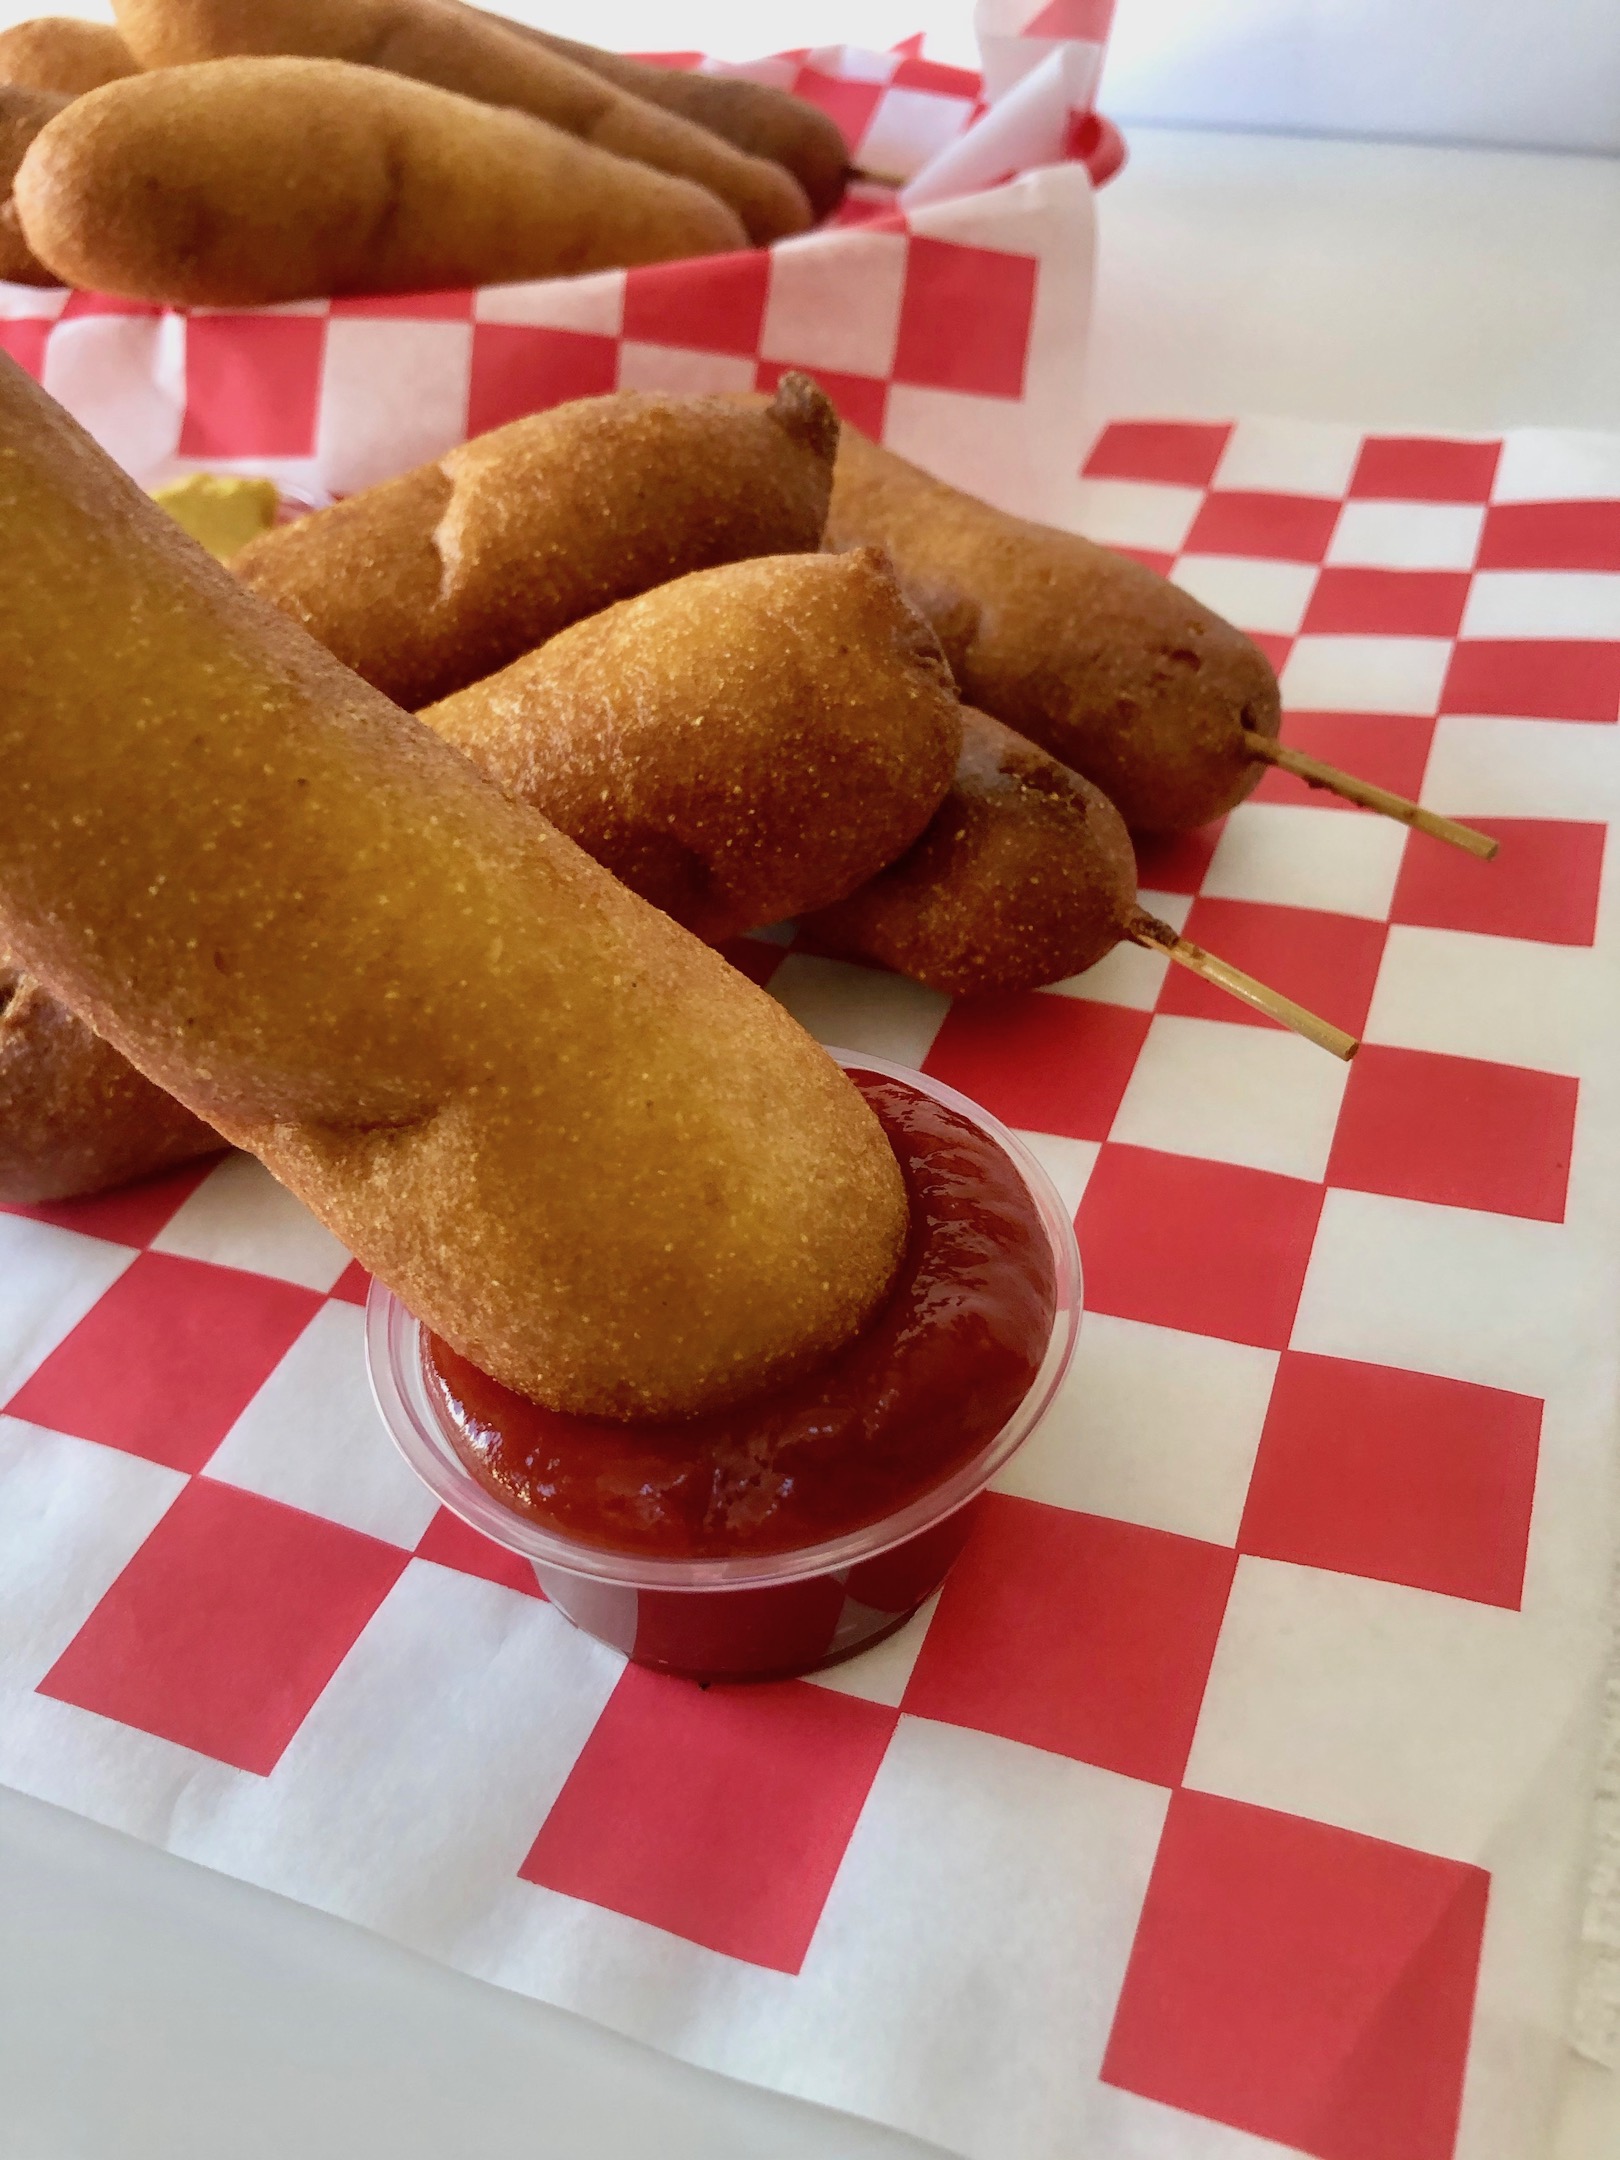
The recipe can be found here.
Sweets are a must have at the state fair! Anyone with a sweet tooth knows how many options are available and probably has a favorite booth or two they visit. I definitely have my favorites and also seem to always find room for dessert, no matter how full I am! You can’t forget about the dessert options when visiting the fair.
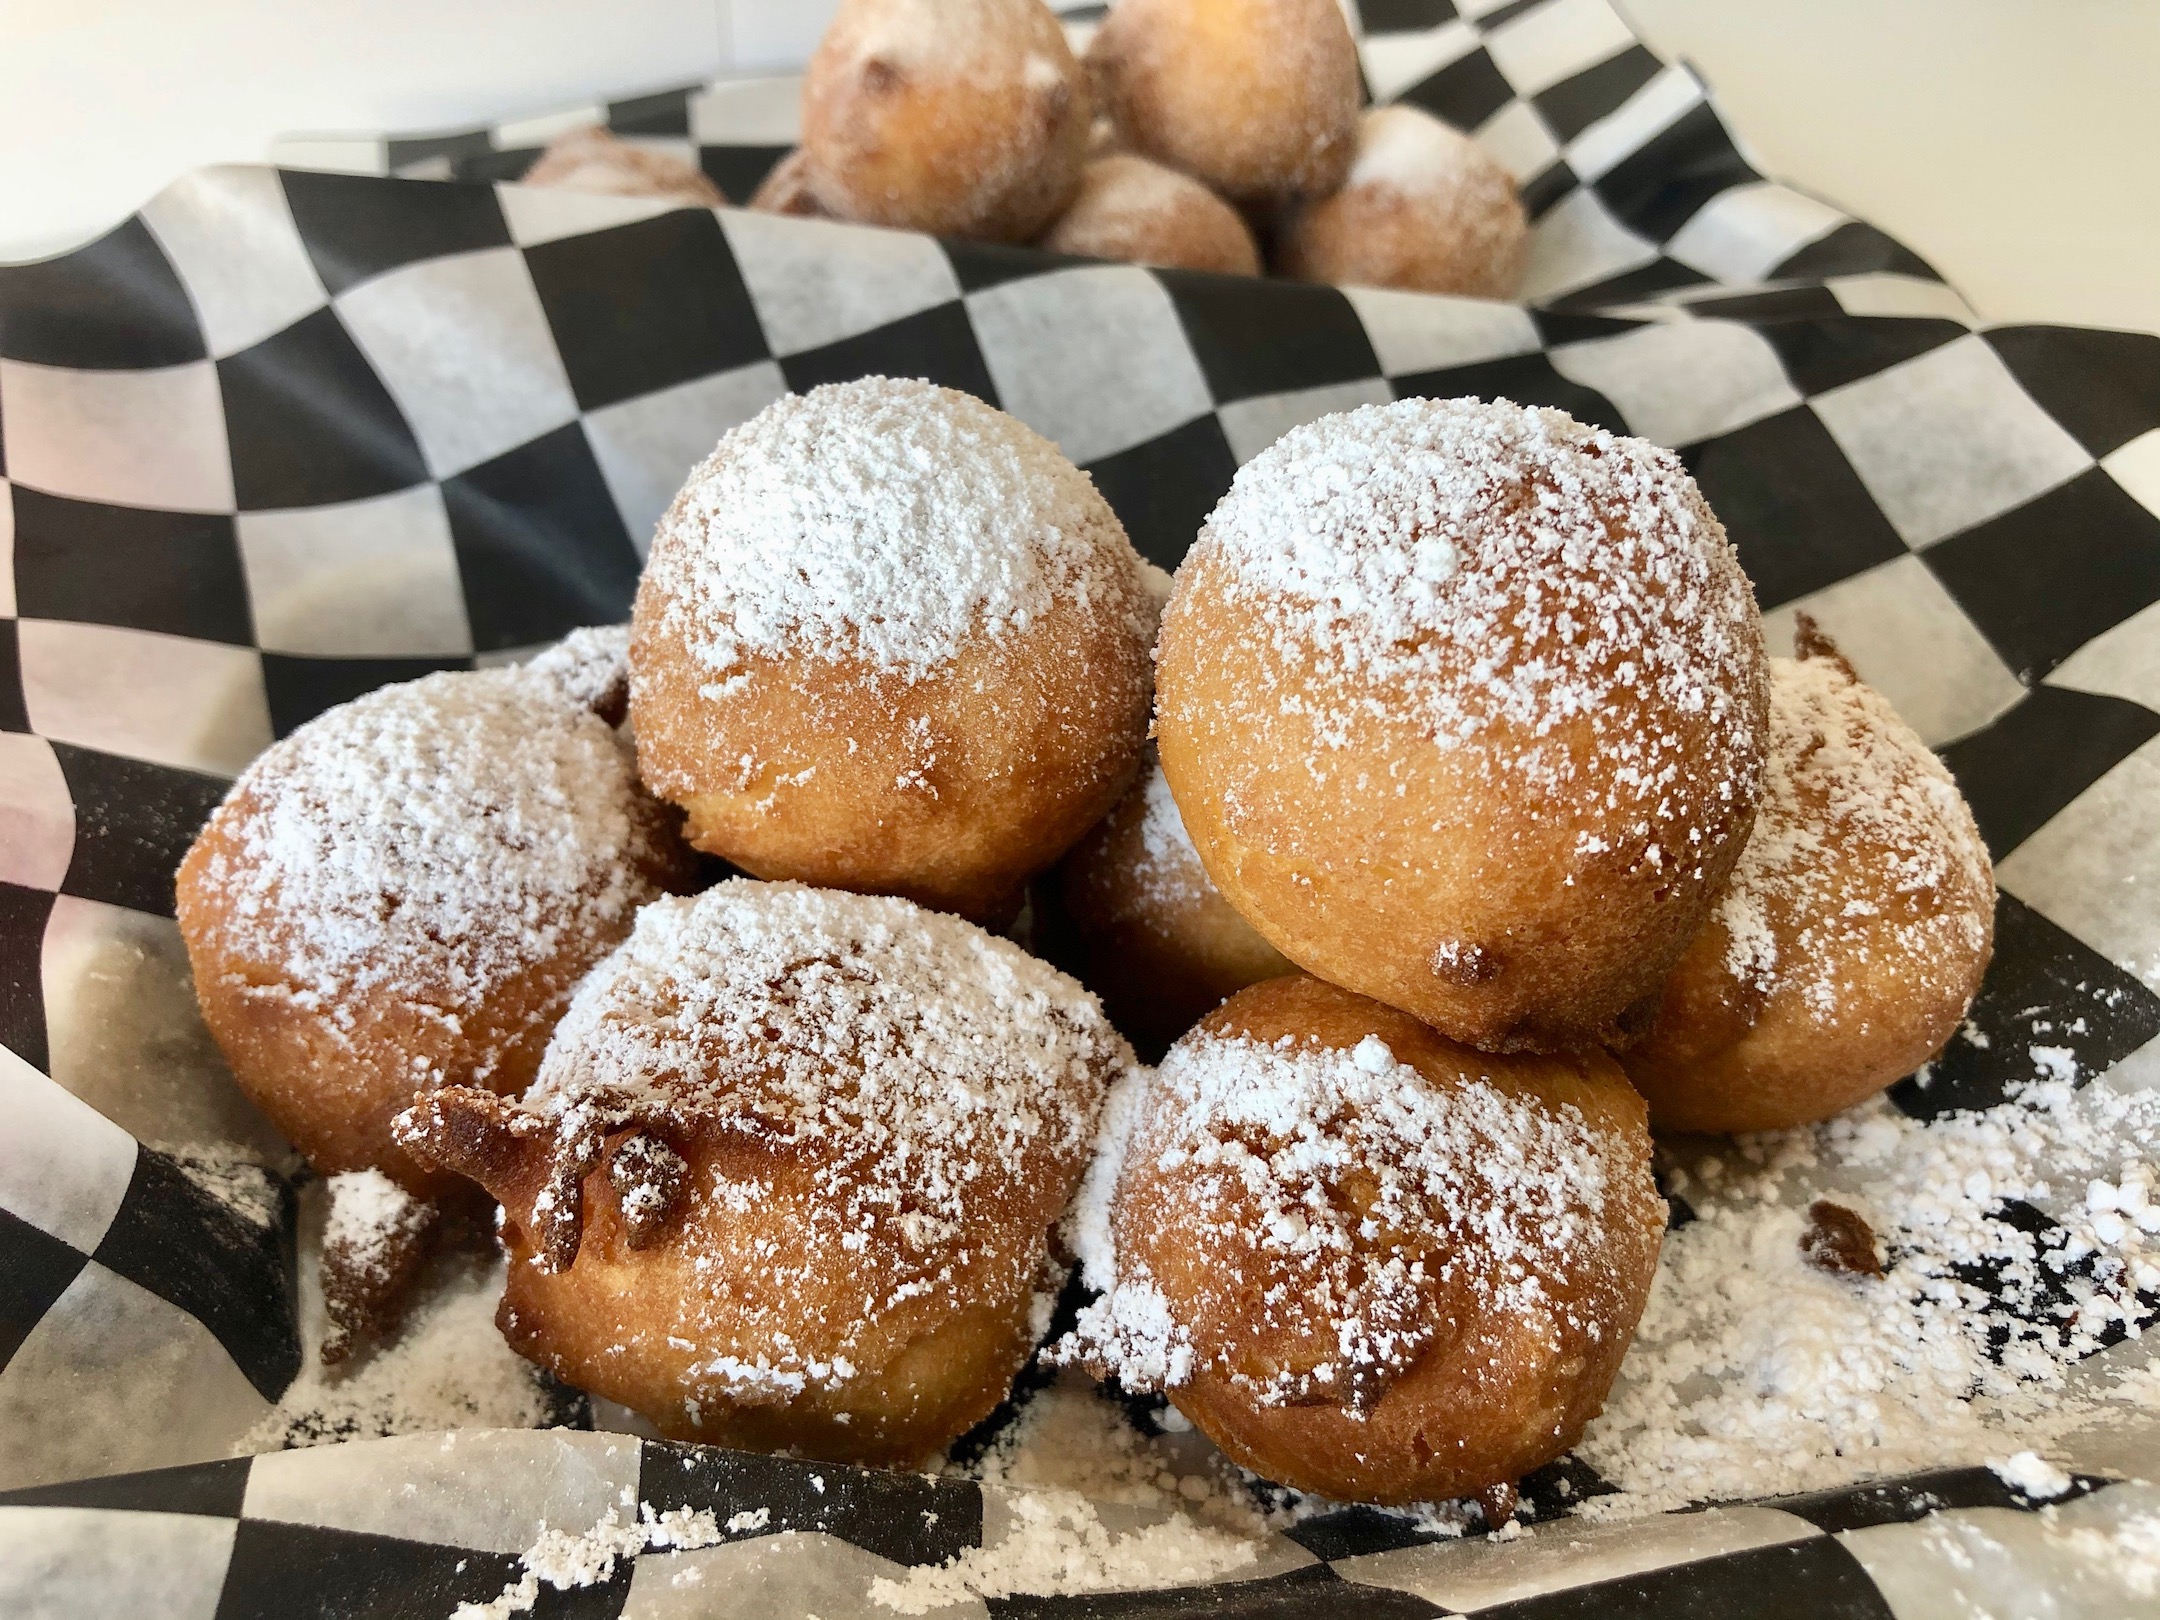
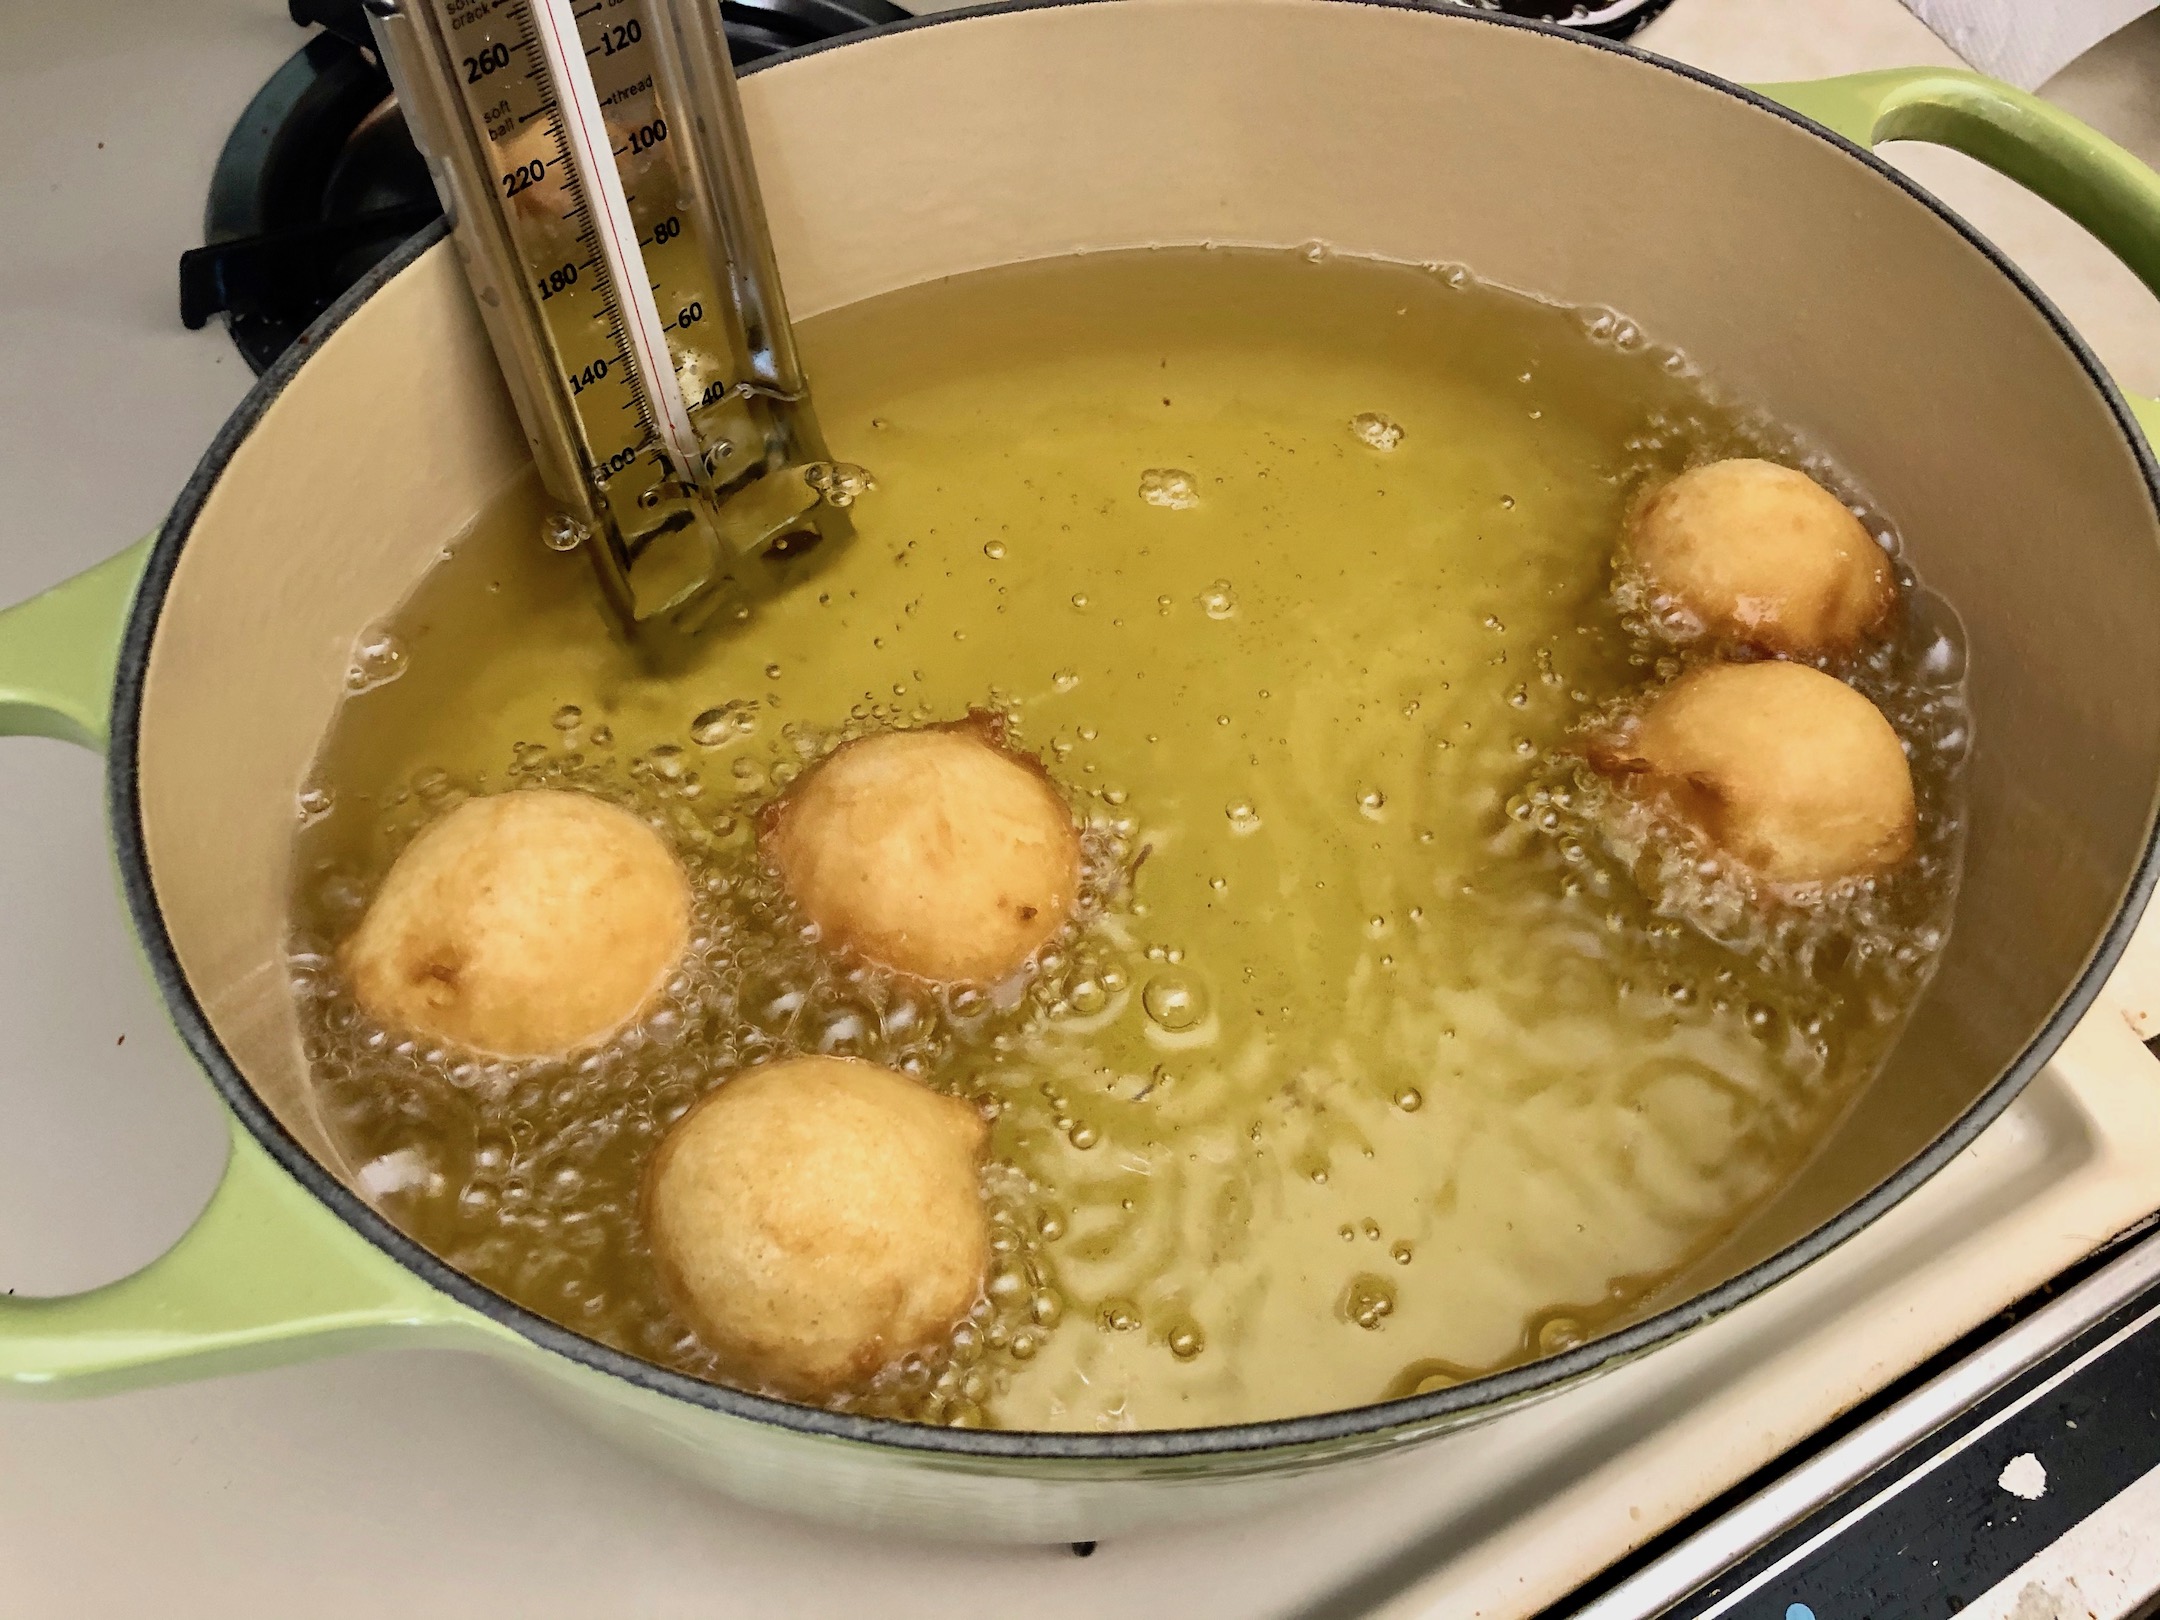
Deep Fried Donut Holes are very similar to the mini donuts you would get at the fair. Not identical, but a close match! The base flavor is a simple donut, but you can add different toppings to change the end result. I like to use powdered sugar on some and a mixture of cinnamon and sugar on the rest. You can’t go to the fair and not get a bag of the piping hot, super fresh mini donuts so I hope you give these a shot!

The recipe can be found here.
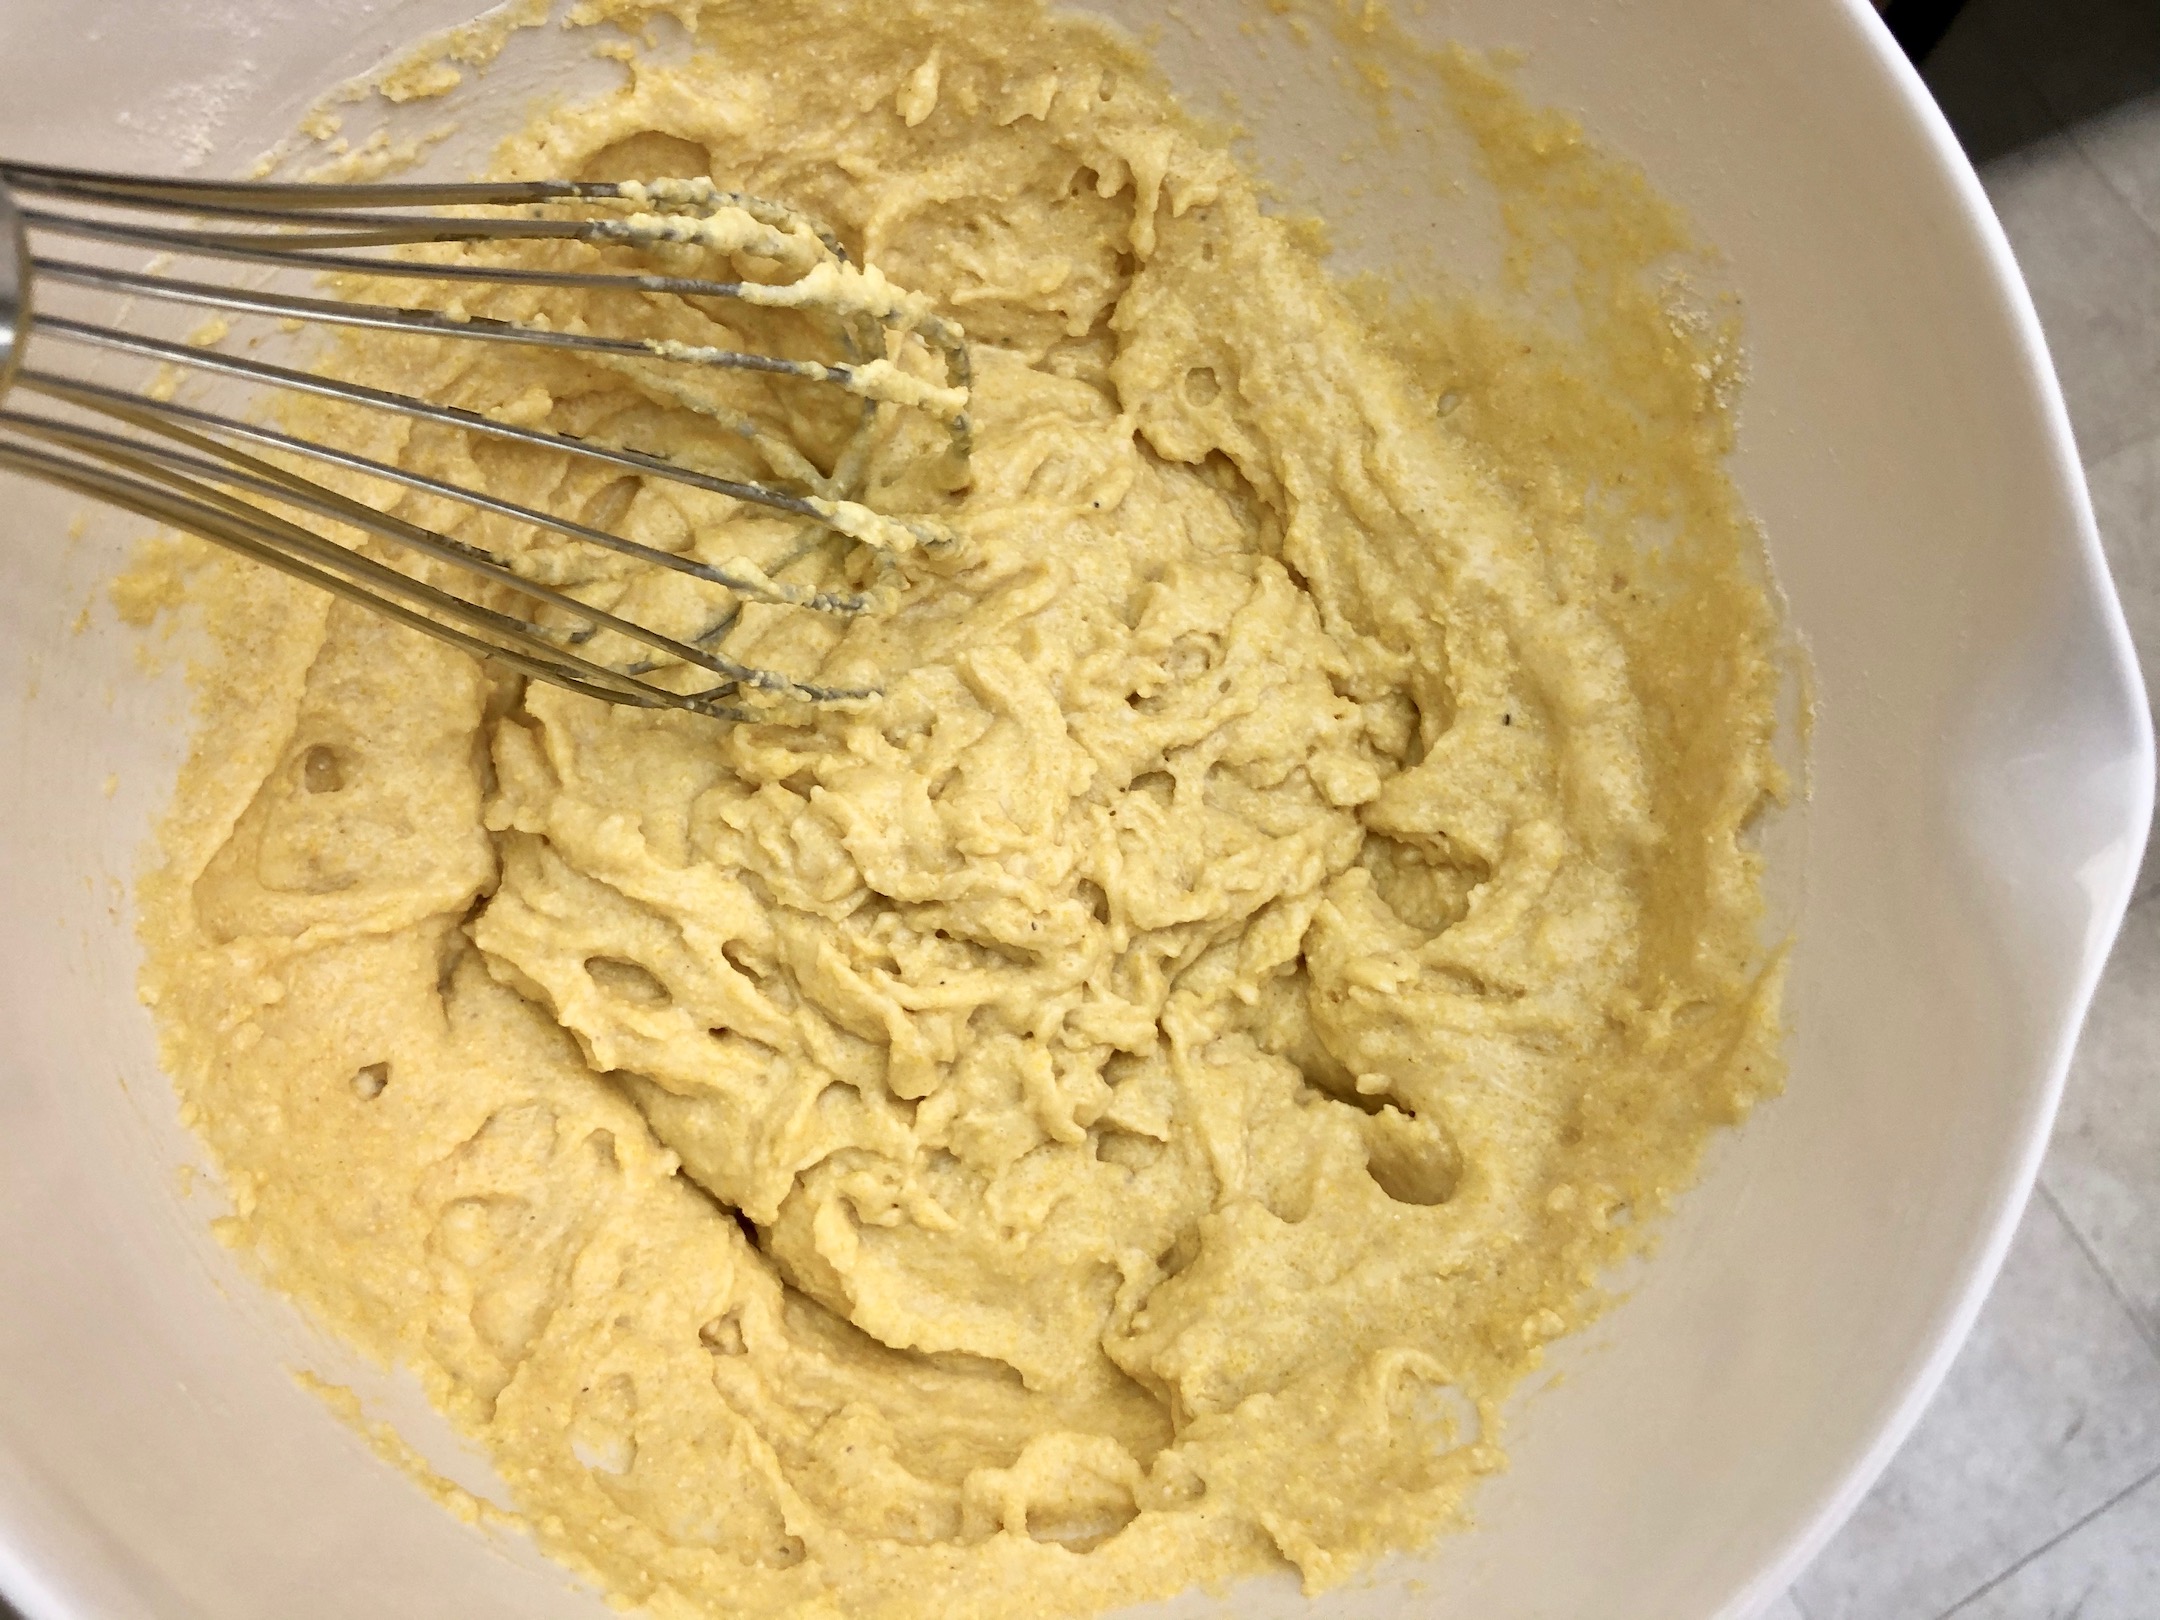
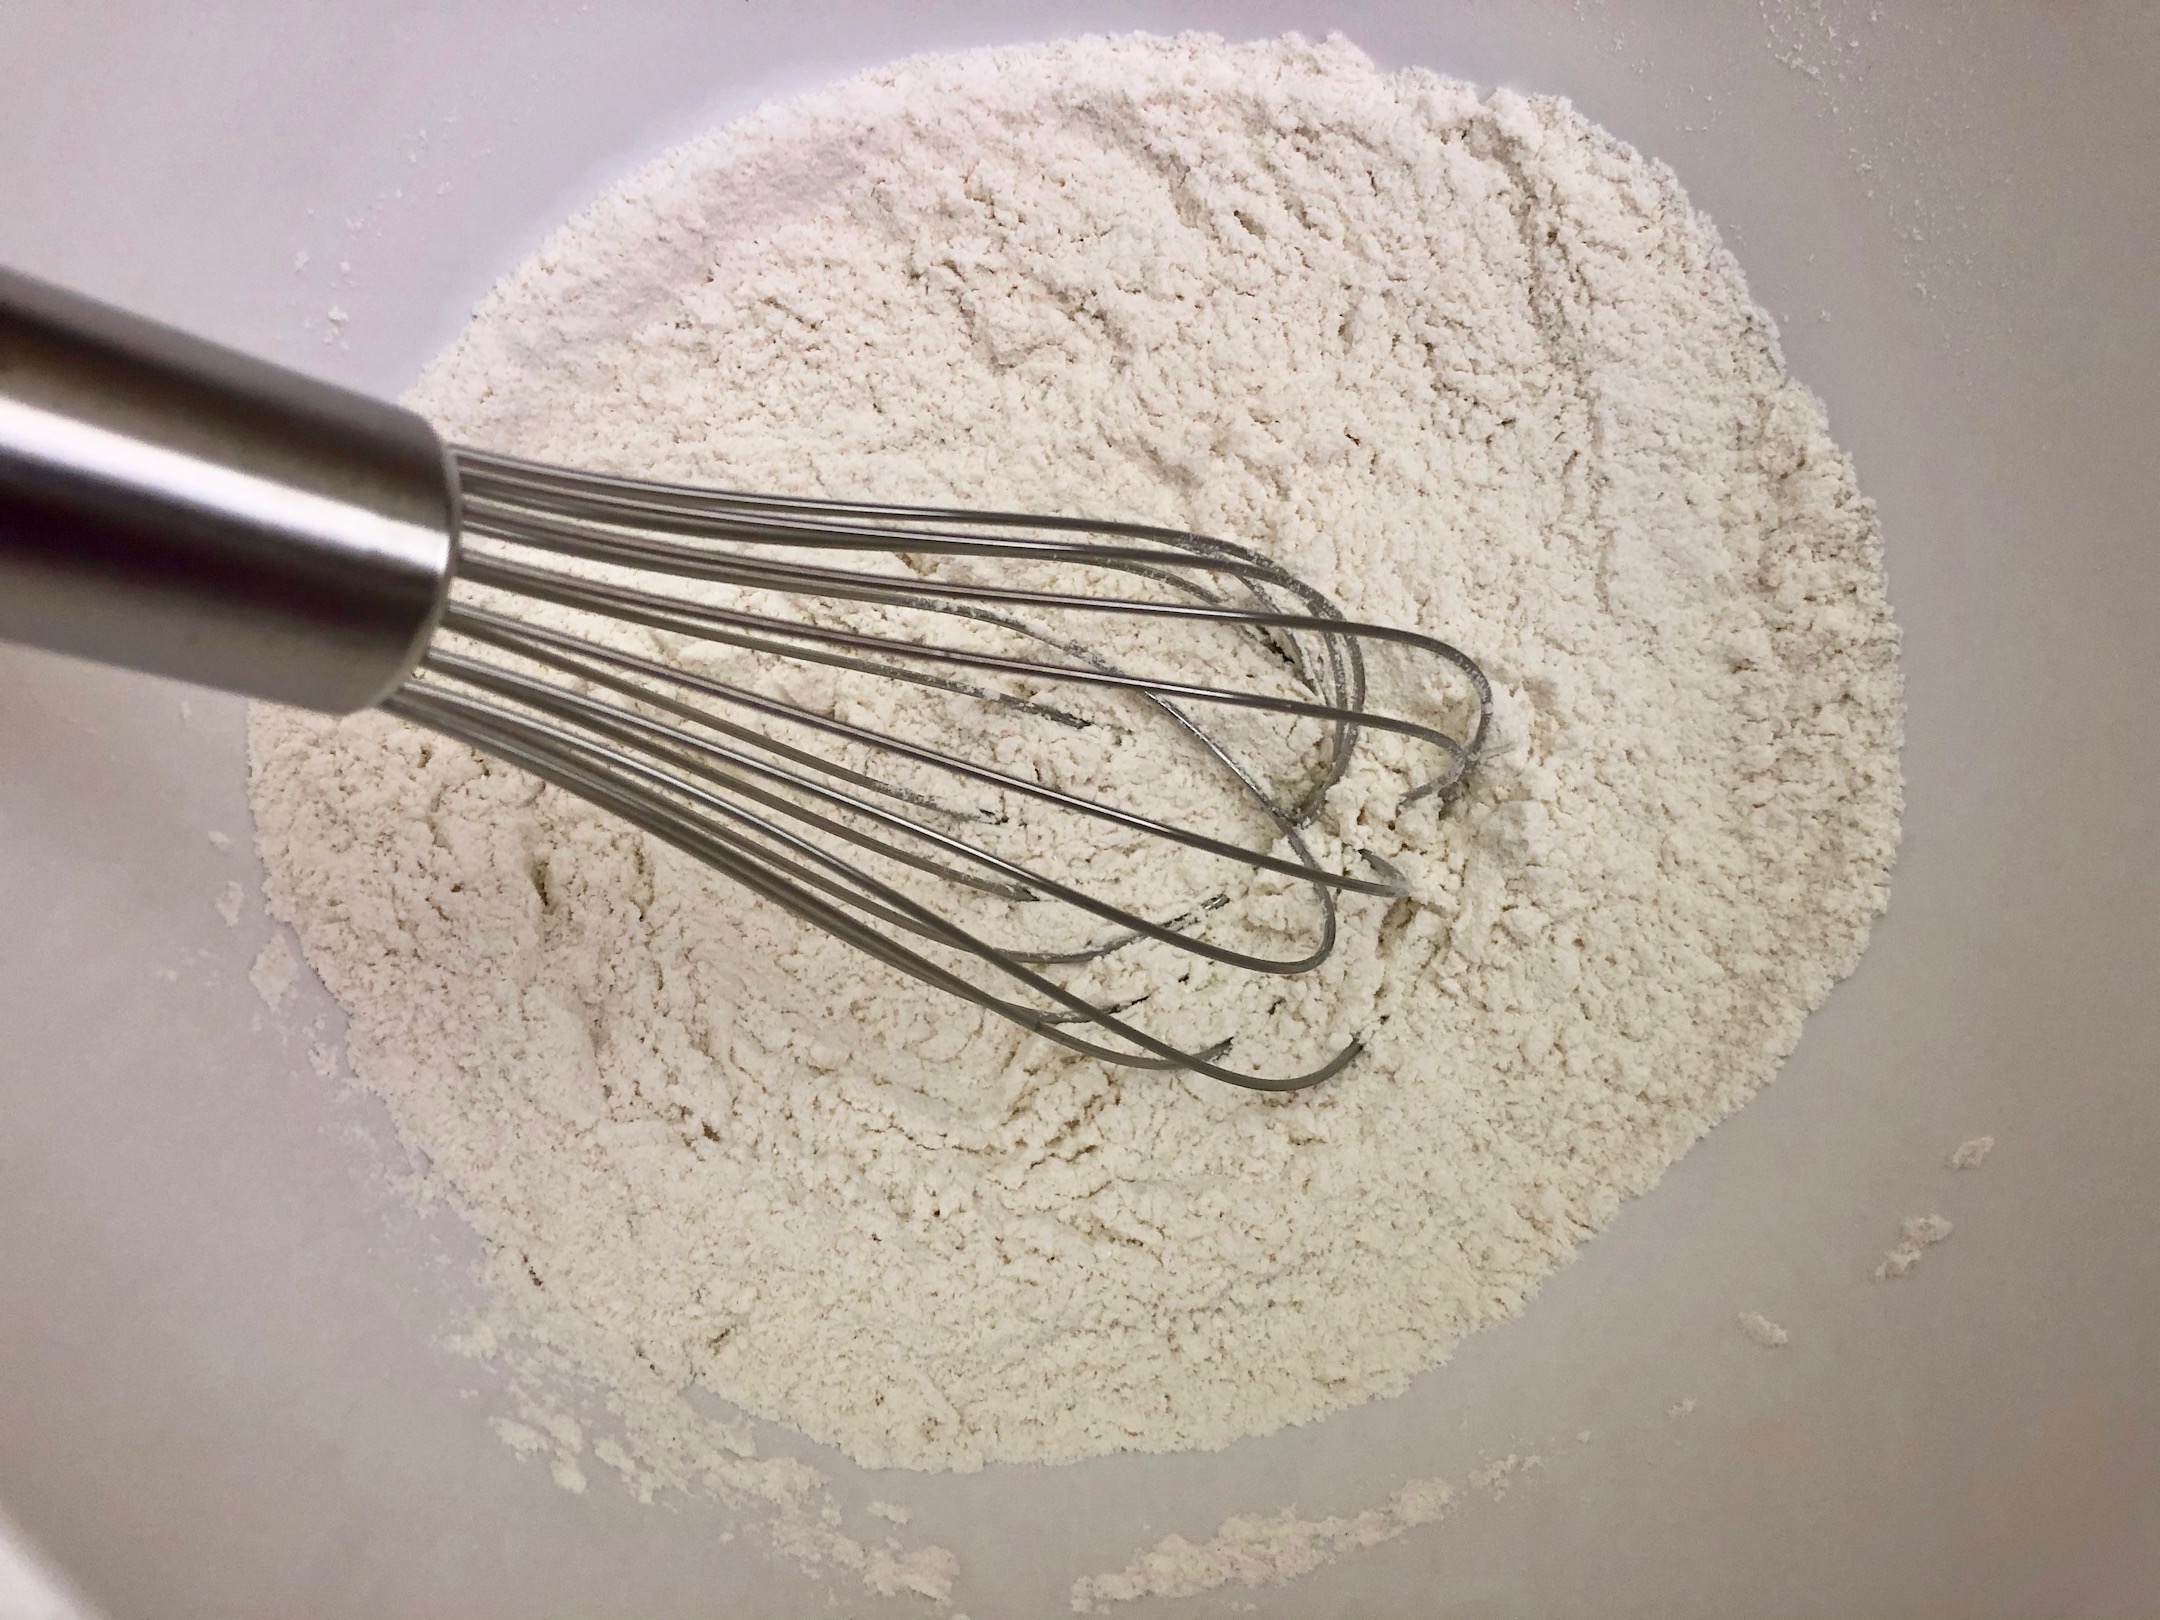
In a large bowl, add the flour, baking soda, and salt. Whisk together.
Separate the eggs; add the egg yolks to one bowl and the egg whites to another bowl.
In the same bowl as the egg yolks, add the sugar, ¼ cup water, melted butter, and vanilla. Stir to combine.


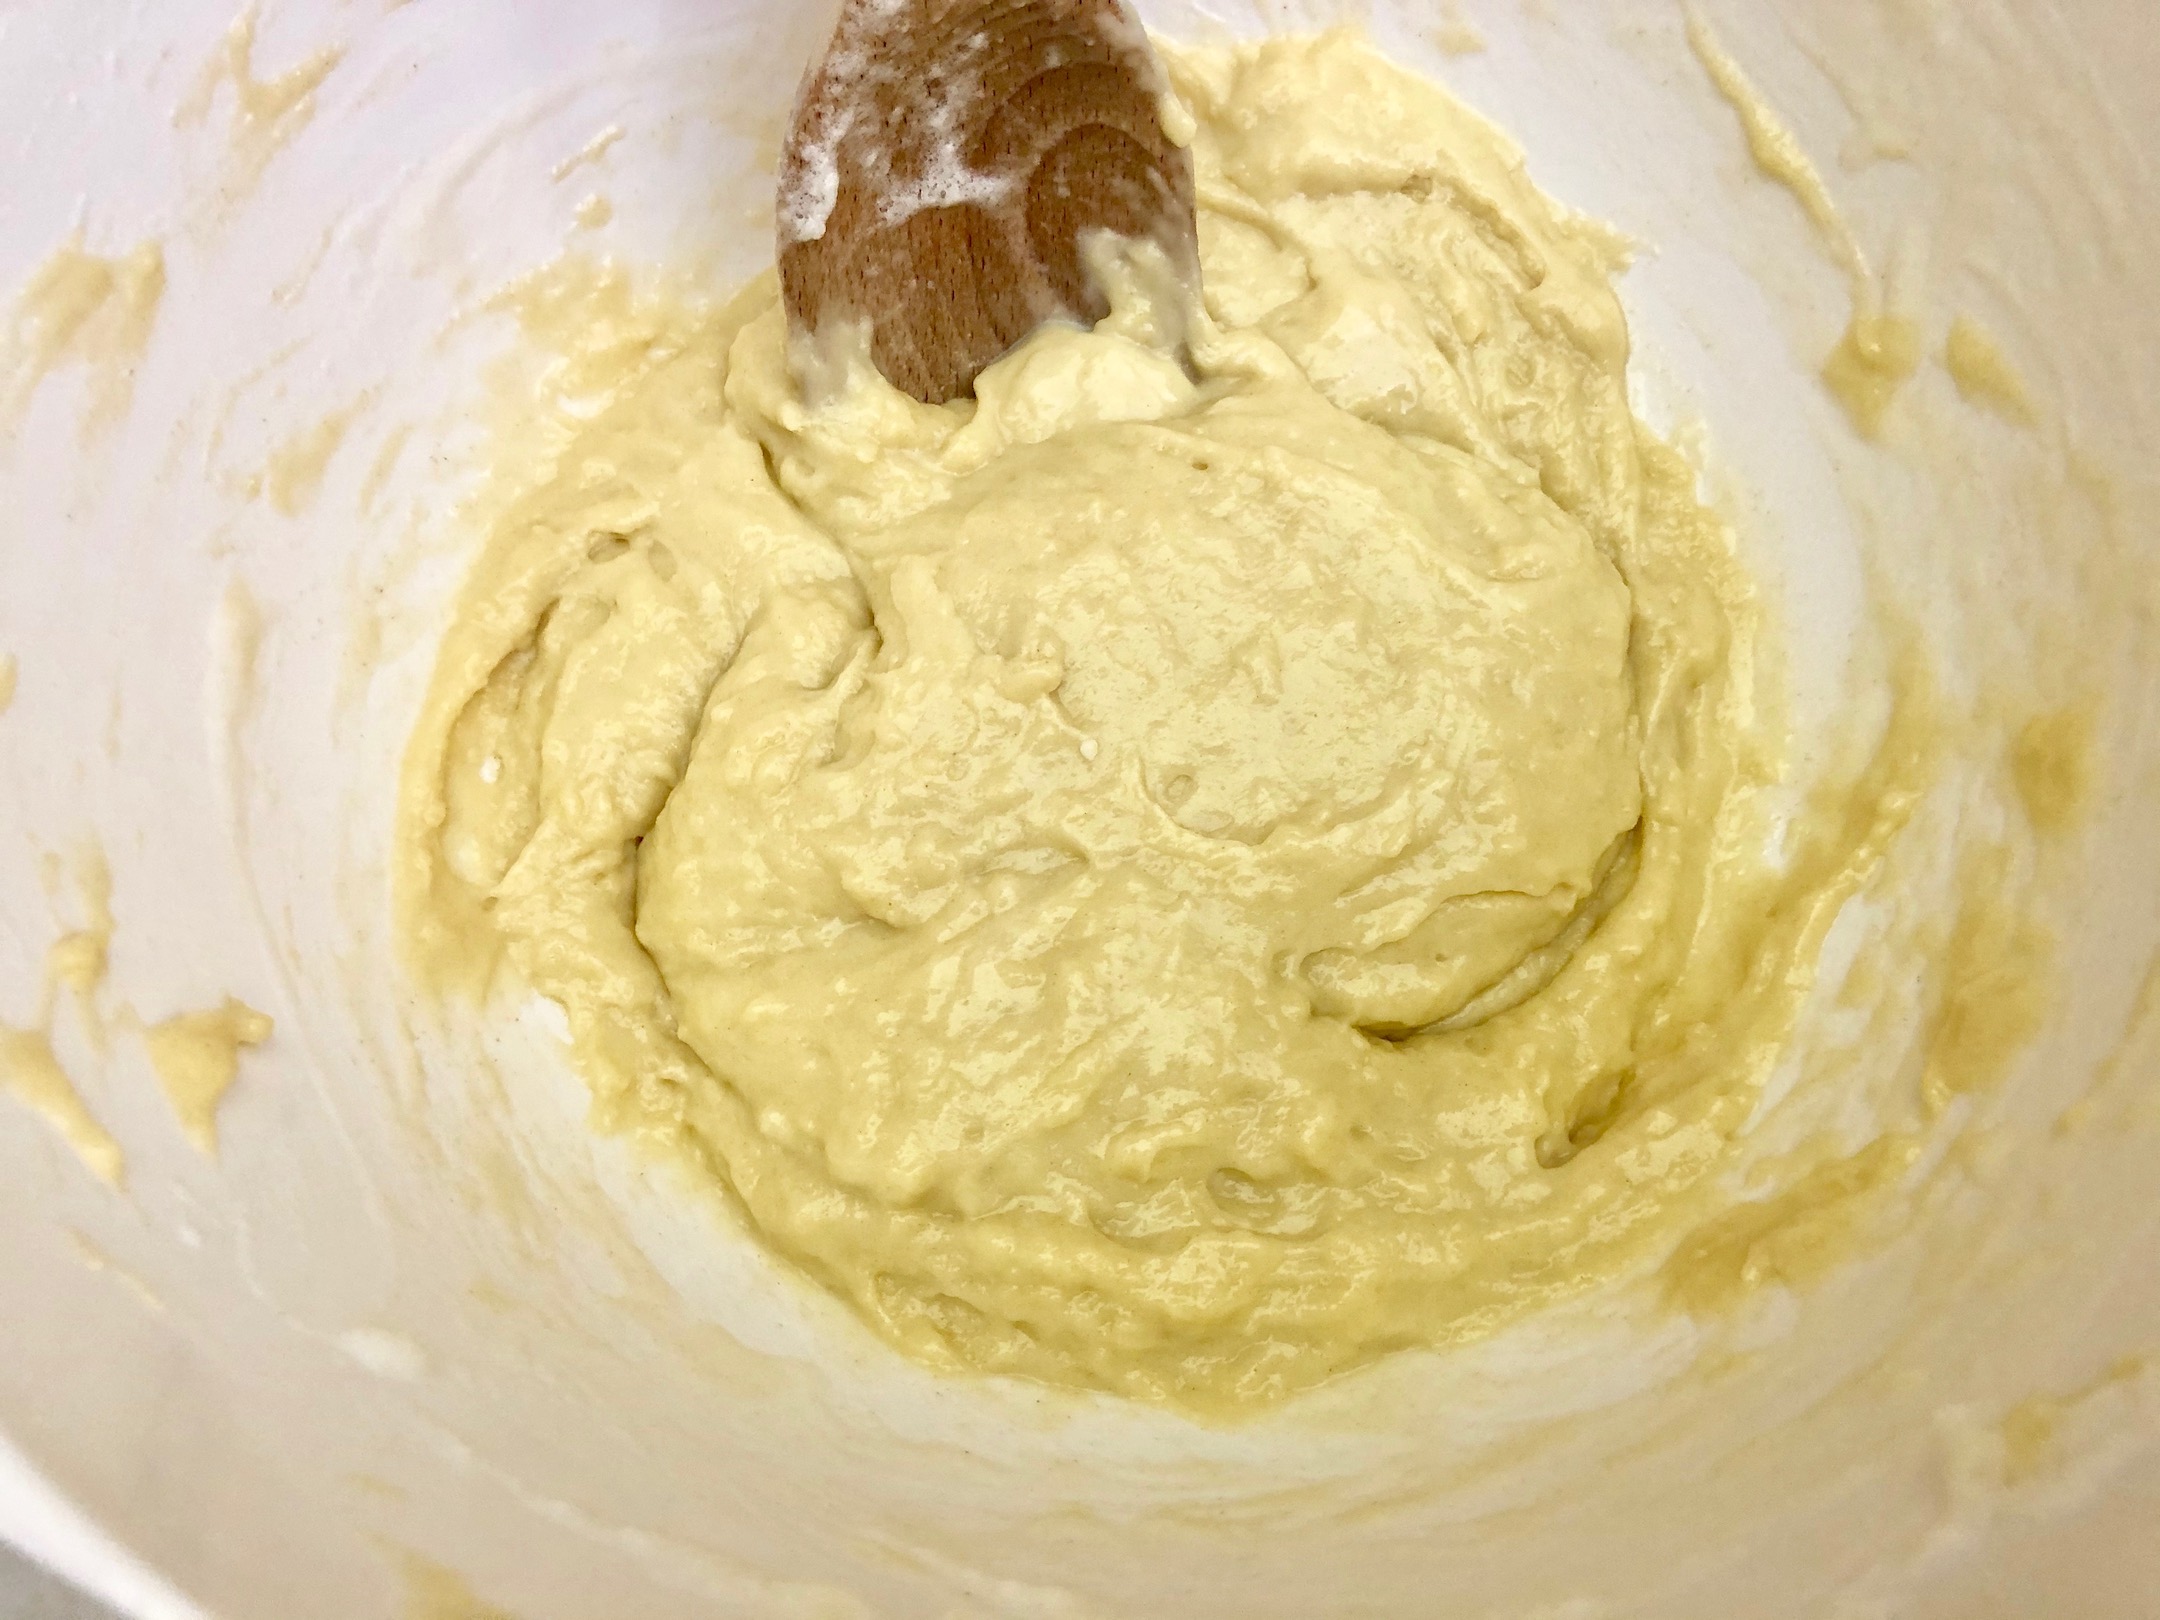
Add the wet ingredients (not the egg whites) to the dry ingredients and stir to combine.


Use a hand mixer to beat the egg whites until soft peaks form. Then, fold the egg whites into the batter.


Add 2-3 inches of canola oil to a large pot or Dutch oven. Heat the oil to 375 degrees F. Use a cookie scoop to drop small scoops of batter into the hot oil (about 4-5 scoops at a time). I have to admit, the first few donuts I made did not turn out as planned. The batter was sticking to the cookie scoop and didn’t have the perfect round shape. I was disappointed and thought the donuts wouldn’t work out but found another solution. If you dip the cookie scoop in water between each scoop, the batter will slide right out not stick. You will have perfectly round donuts every time. Game changer.
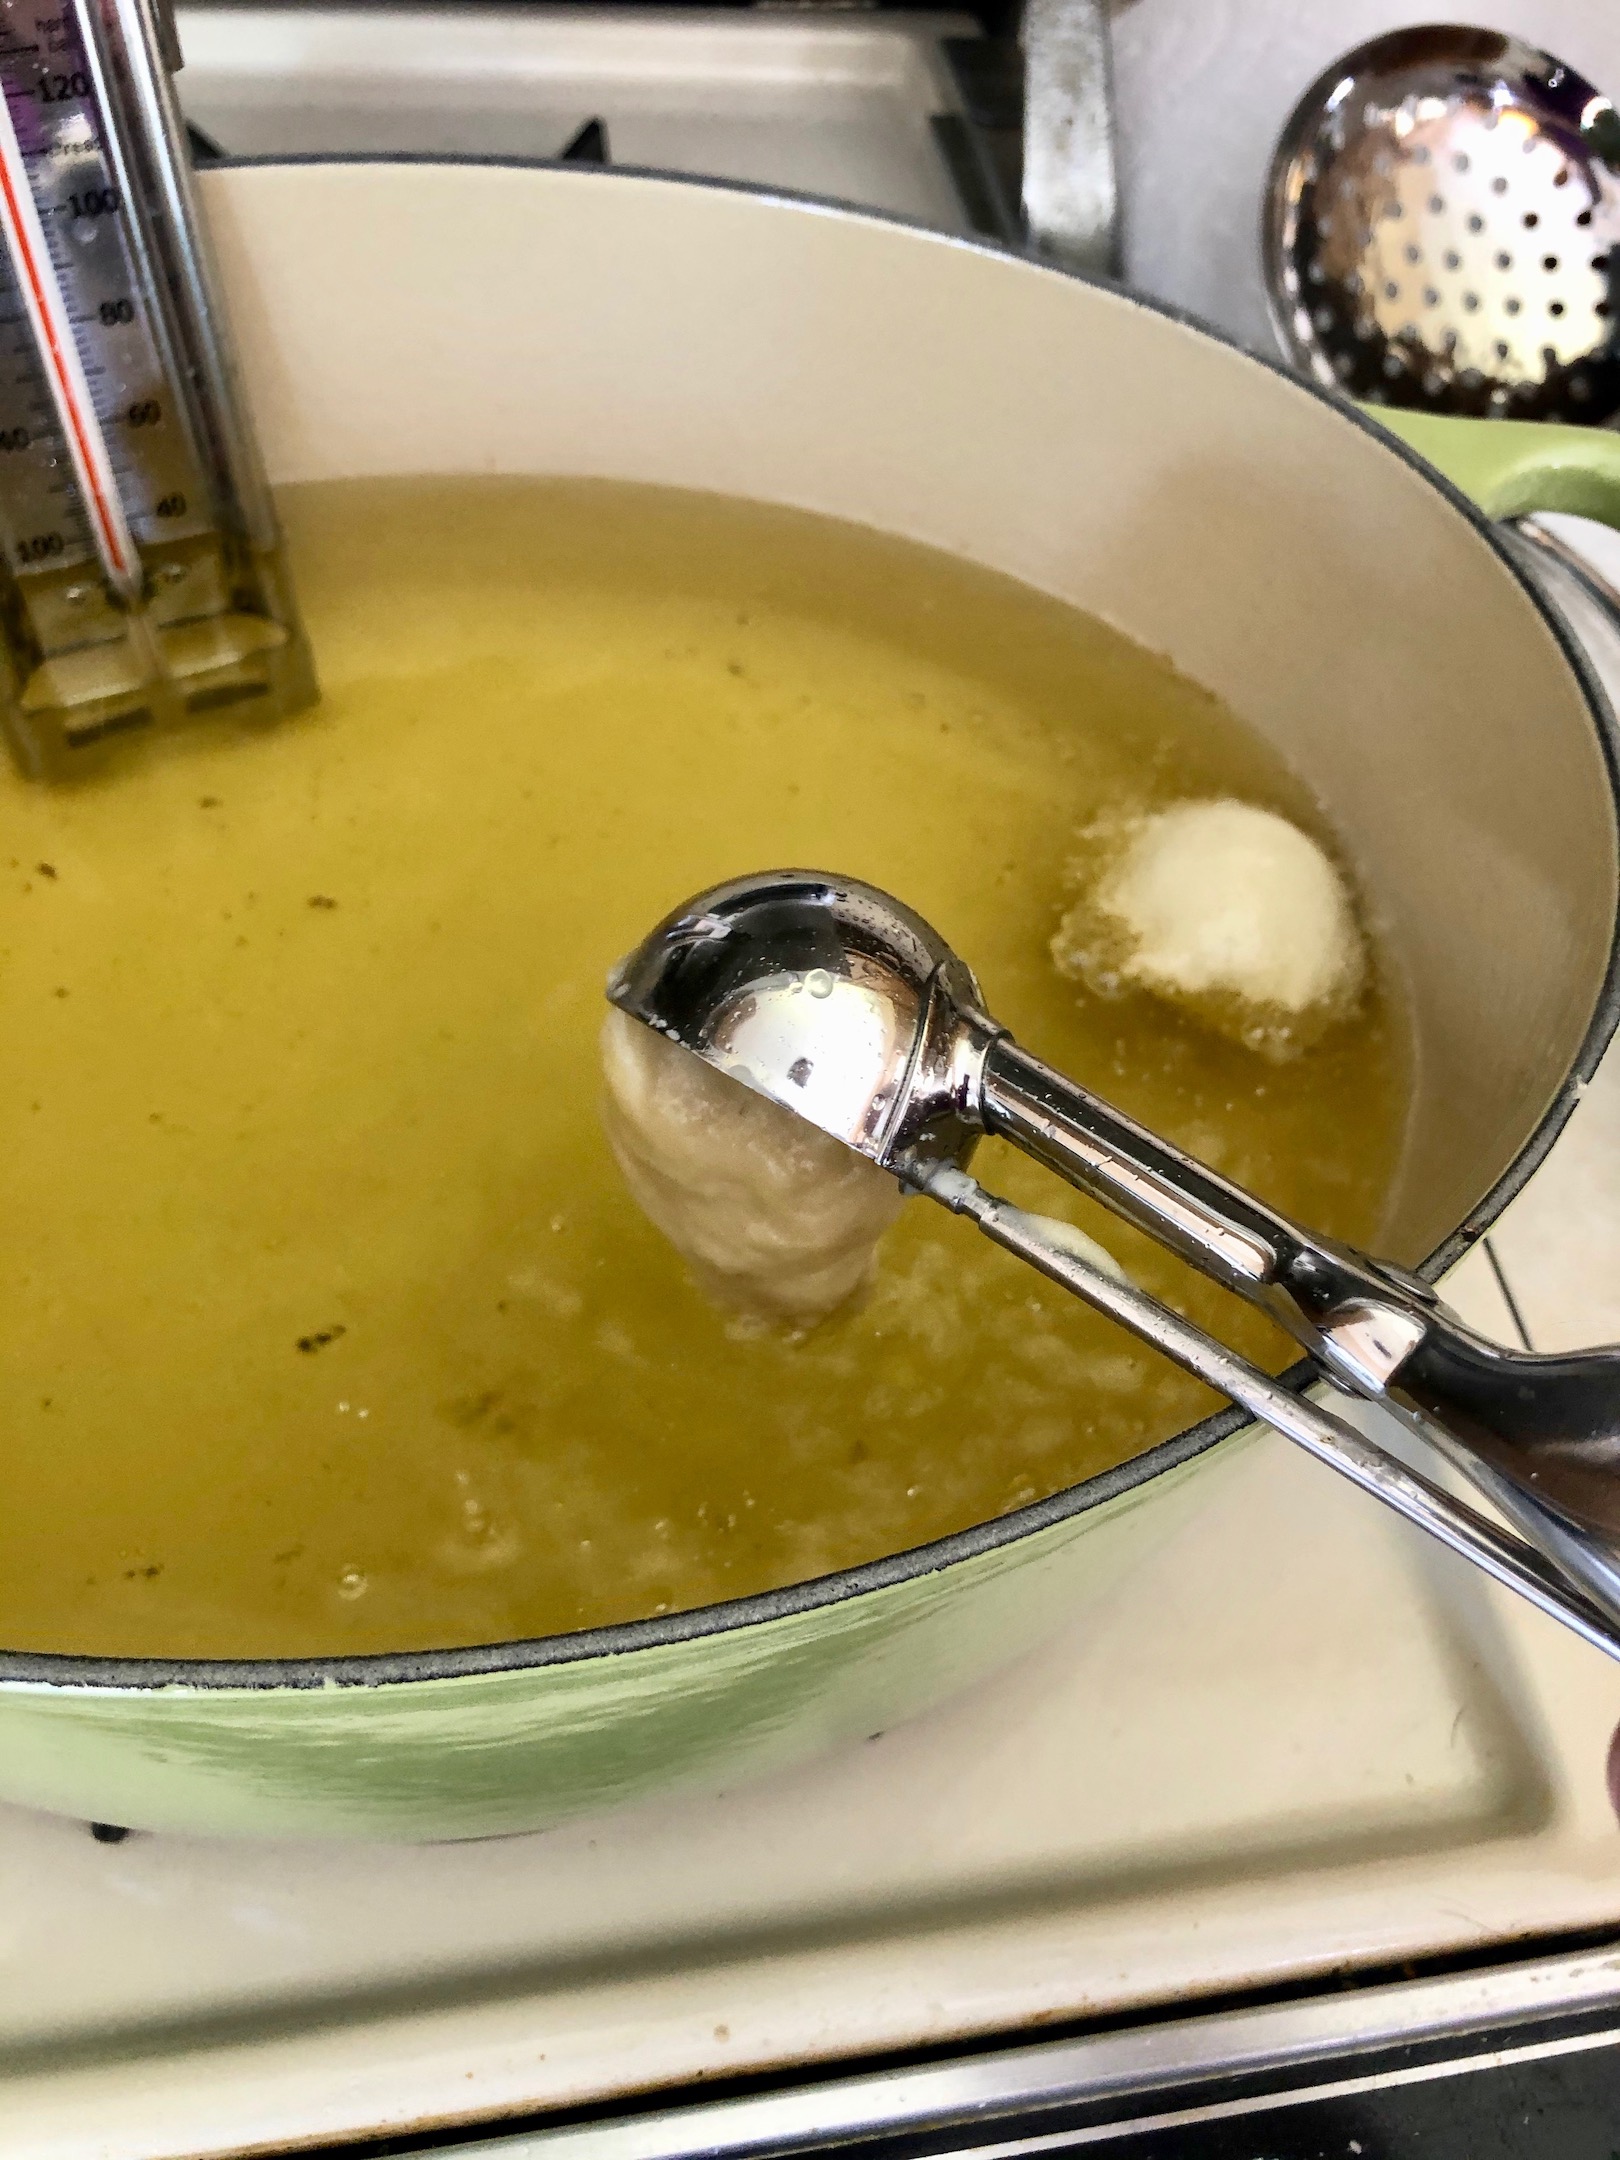

Fry the donuts until golden brown and the dough is cooked through, about 4-5 minutes. Use a slotted spoon to remove the donuts from the hot oil and transfer to a paper towel lined plate. Repeat this until all the batter has been used. You will have enough batter for about 15 donuts so make sure to double the recipe if you need more.


Combine about ½ cup of sugar with ½ tsp cinnamon in a small bowl (you don’t need exact measurements). Roll the donuts in the mixture to make cinnamon sugar-coated donuts. Or, sprinkle powdered sugar over the top of the donuts. Serve warm.


Hot, chewy, and delicious…these are sure to fill your craving!

The recipe can be found here.
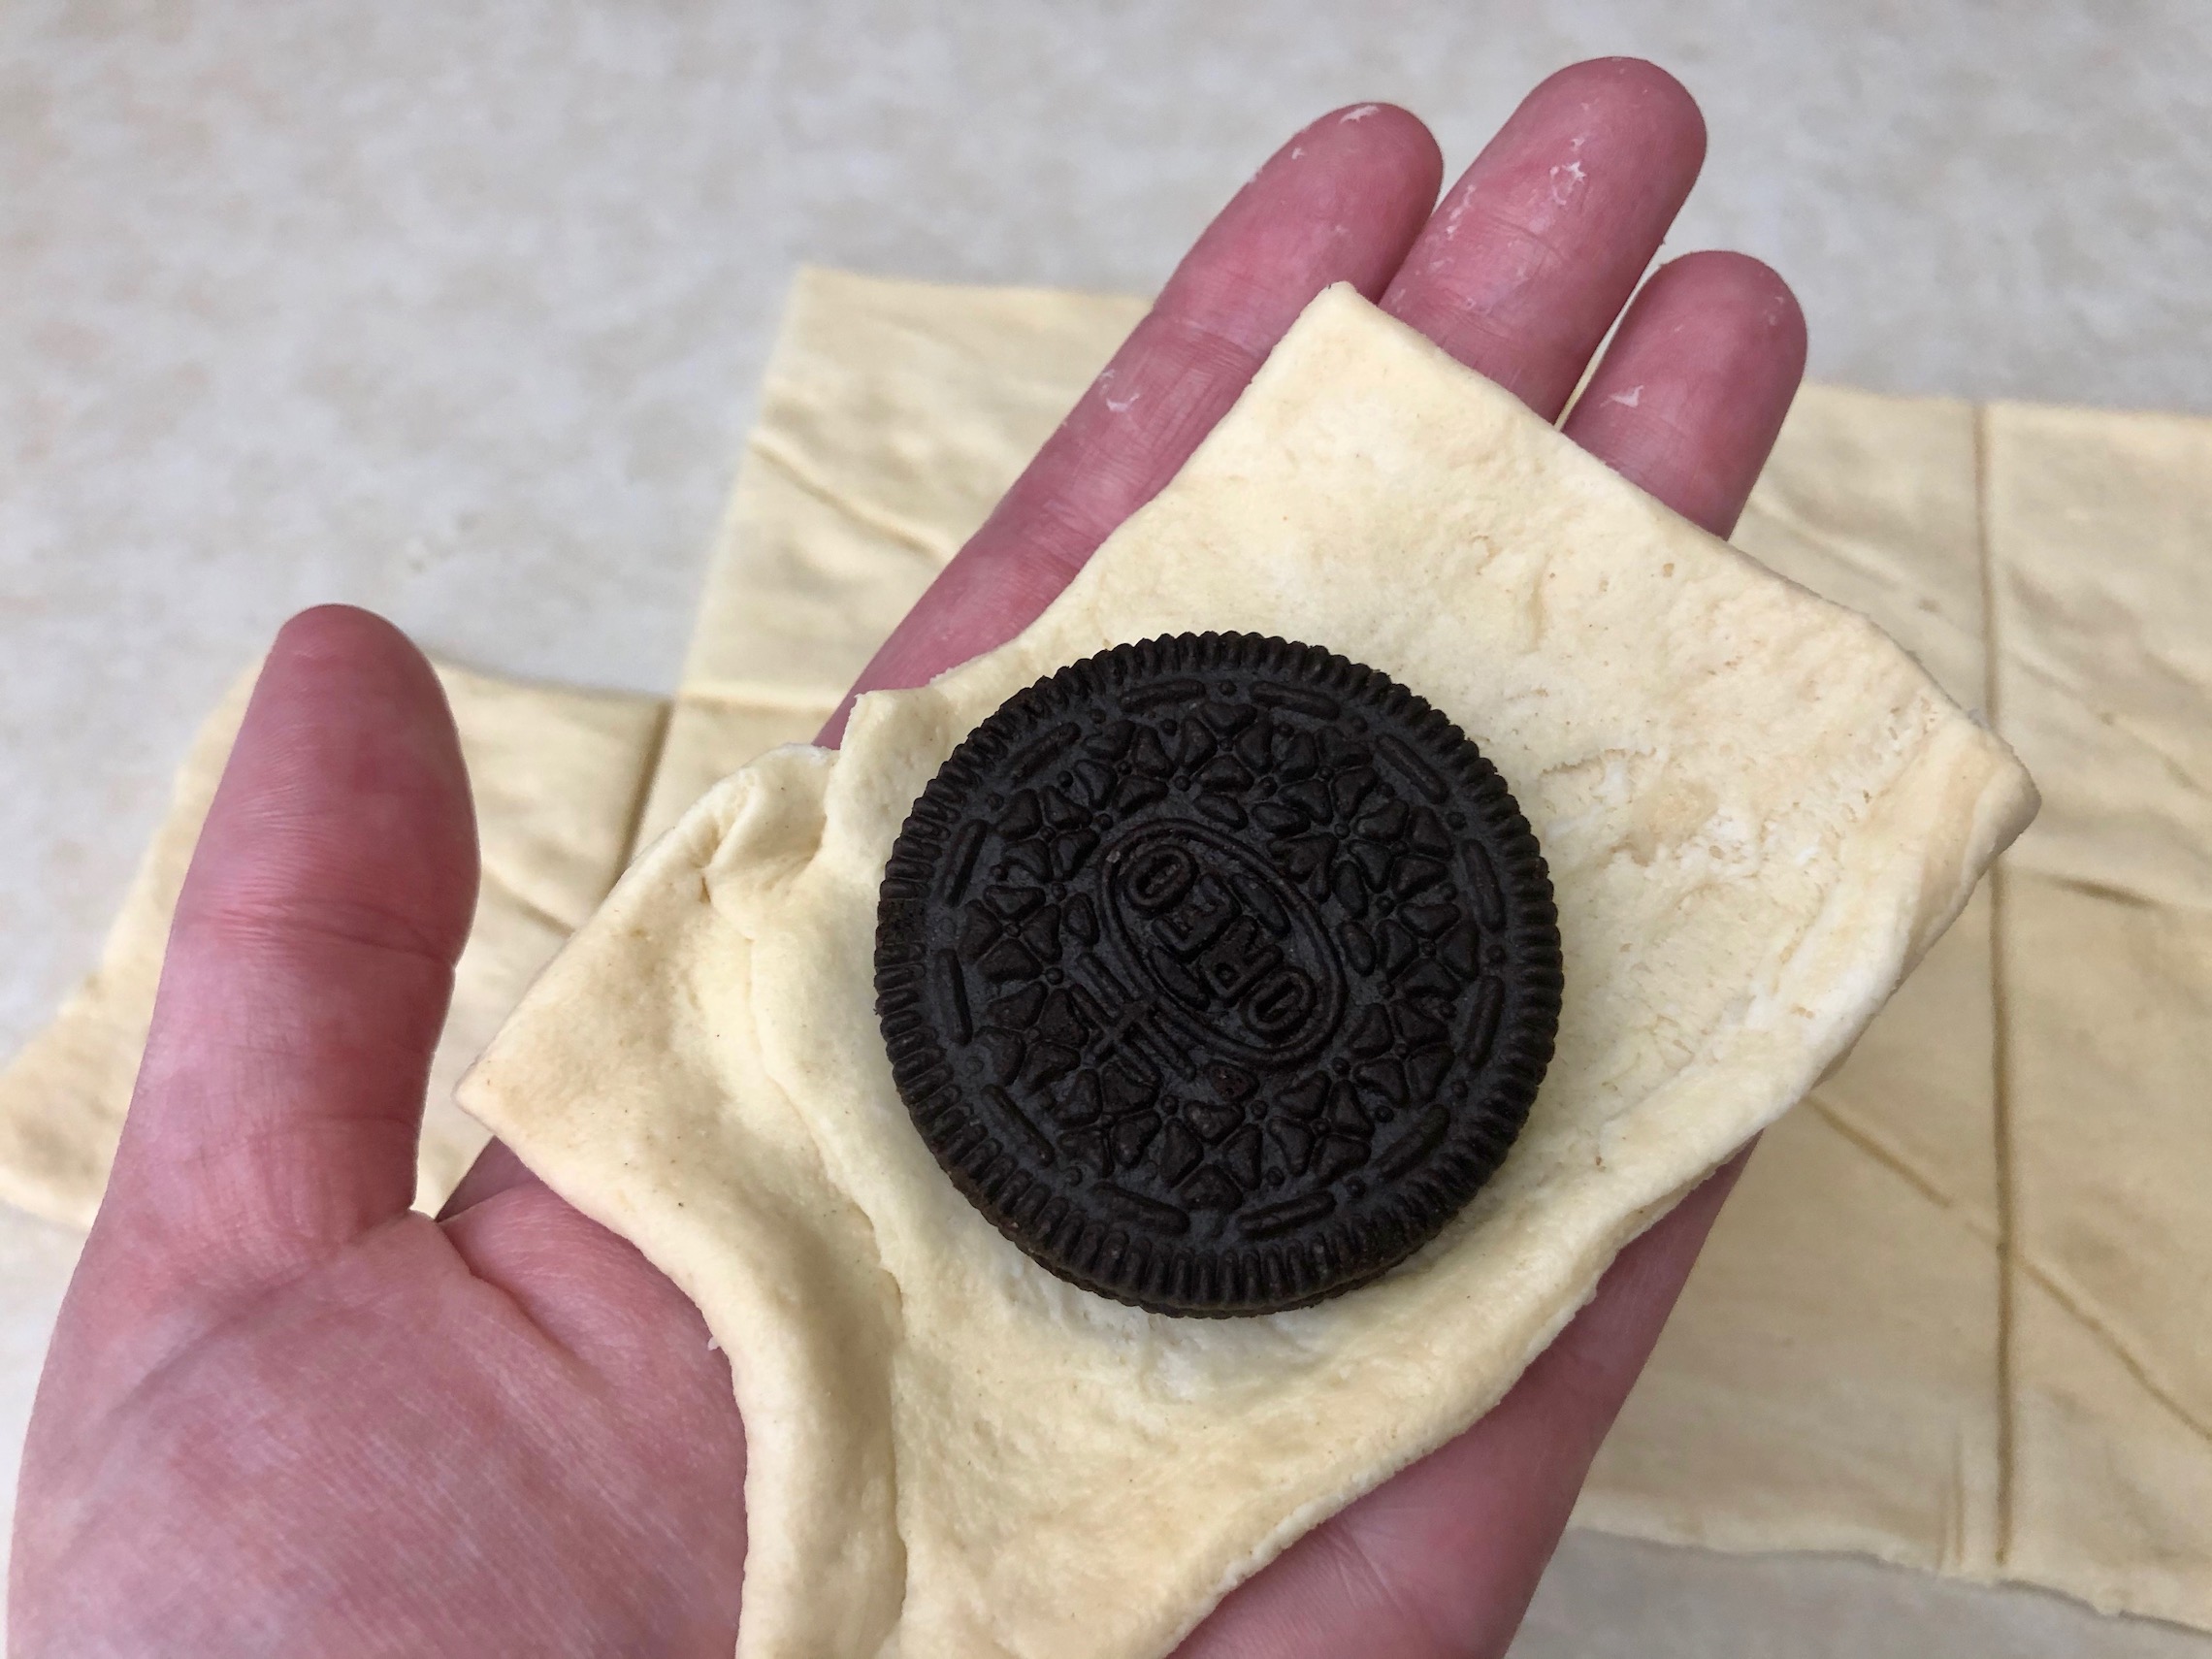
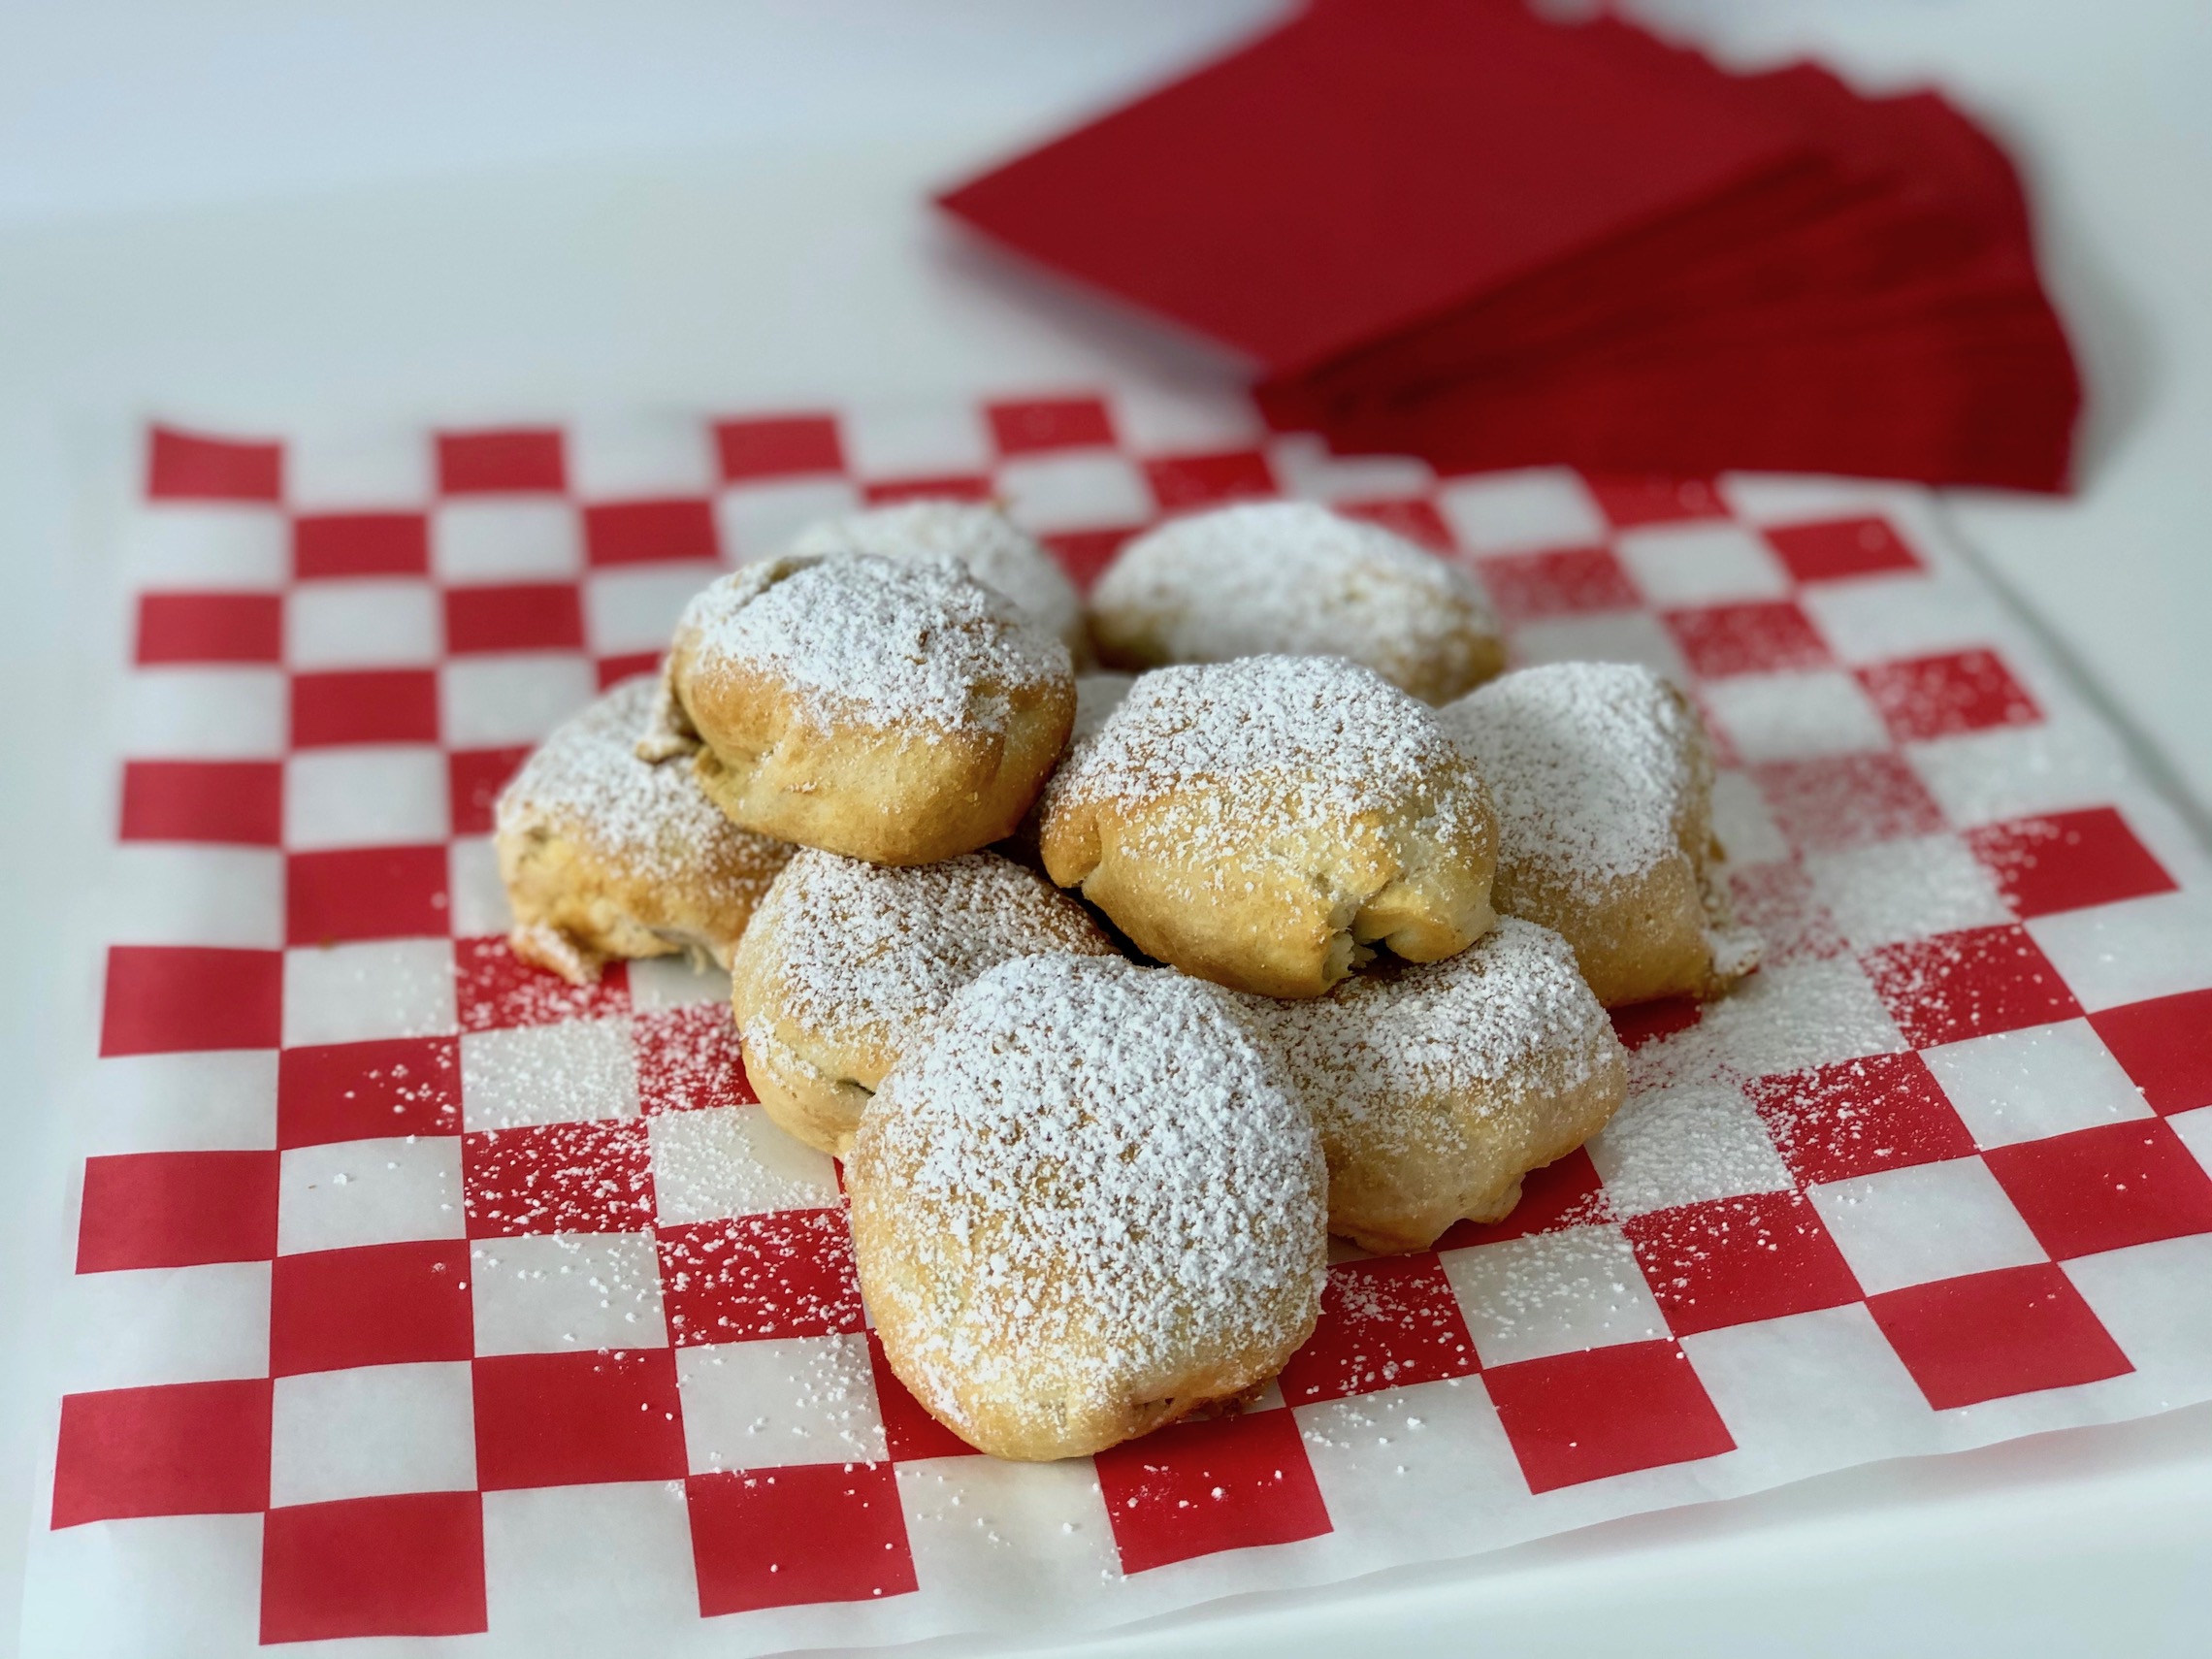
Air Fryer Fried Oreos are my version of a deep-fried candy bar on a stick, although no frying is required. You are left with a soft and chewy cookie, encased in a sweet and delicate breading. These are incredible and you barely have to do any prep work.


The recipe can be found here.
Open the crescent rolls and lay the dough flat on the counter. Use your fingers to seal any seams or holes. You want one full sheet. Don’t worry if it’s not perfect, the dough is pretty stretchy and will be forgiving in the next steps.

Use a knife or pizza cutter to cut the dough into 10 even squares.

Wrap each Oreo in the dough, making sure to fully enclose each cookie. This is where the stretchy dough comes in handy 🙂

Spray the top and bottom of each Oreo with cooking spray. This will help prevent the dough from sticking in the air fryer when cooking.
Place in the air frying in a single layer. You will only be able to fit about 5 cookies at a time. Air fry for 5 minutes at 350 degrees F.
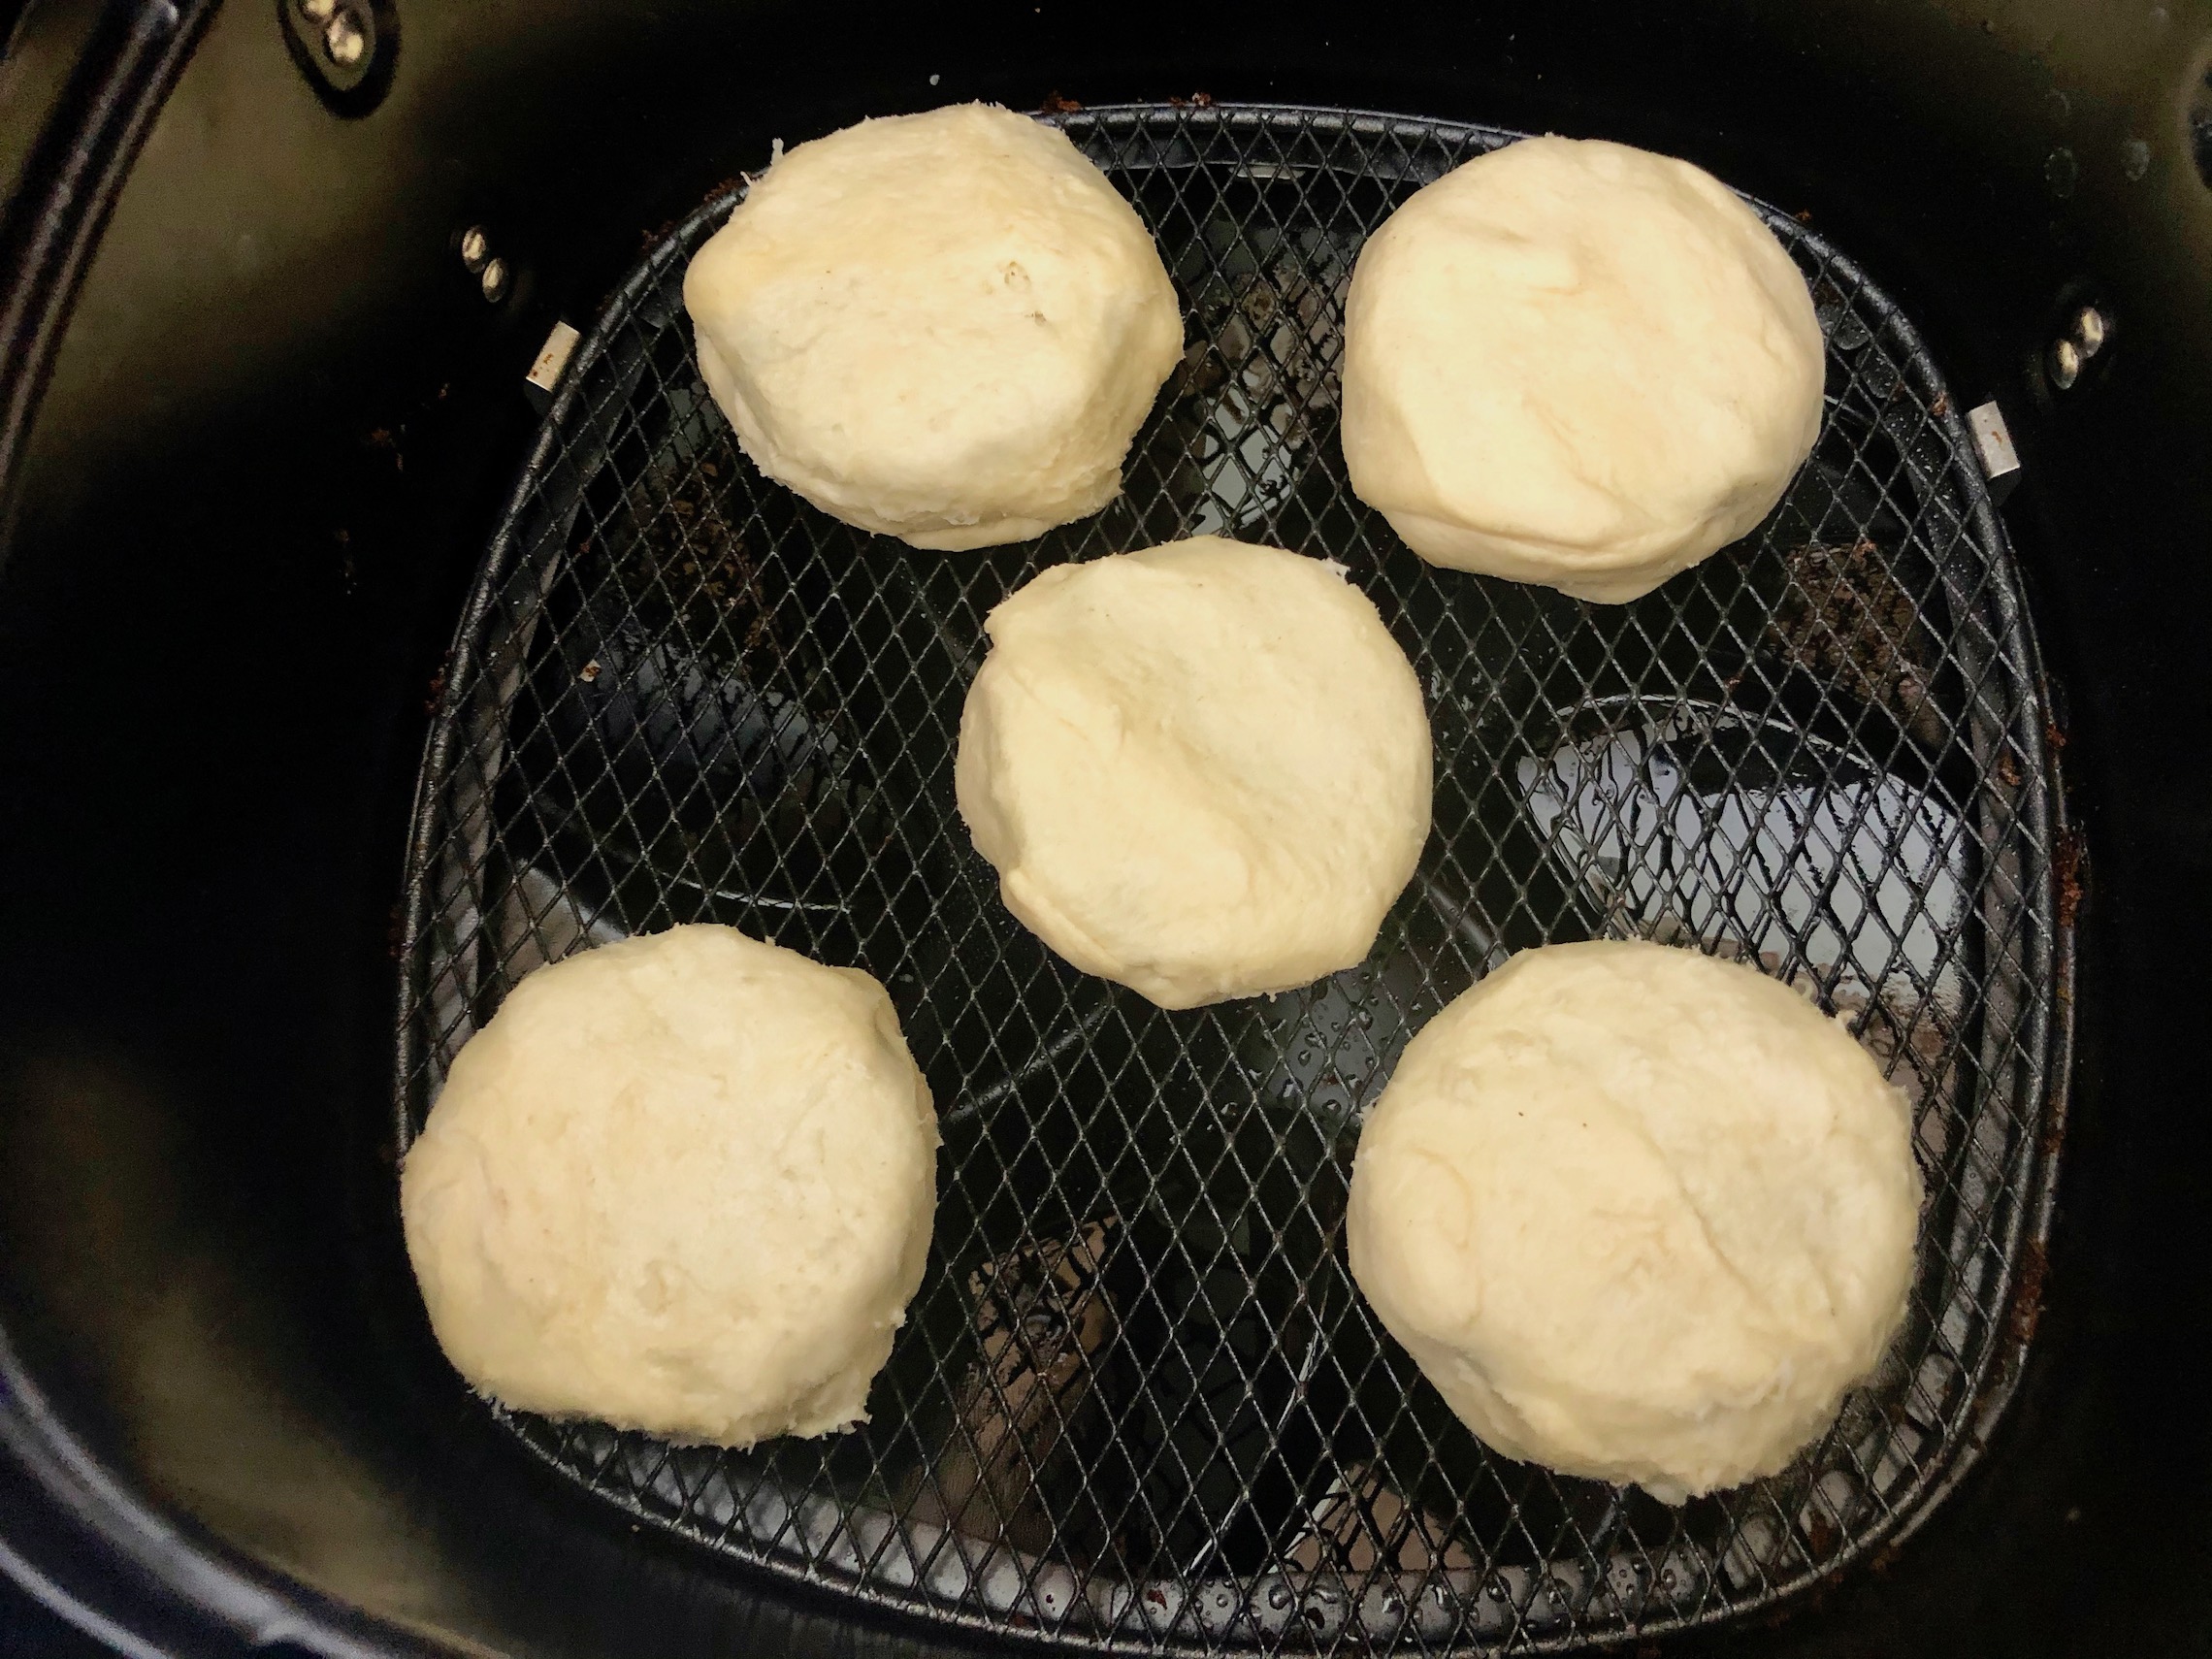
Remove the cookies and add the second batch. Air fry for 5 minutes at 350 degrees F.


Dust the top of each Oreo with powdered sugar and serve warm. The best dessert!


The recipe can be found here.
Sweet Martha’s Cookies are exactly what you think they are. However, these are not served in a giant bucket with a glass of milk 🙂 These are found in the freezer section in a variety of flavors. All you have to do is place the dough onto baking sheets and bake according to package instructions. The dough is already cut to size so most of the hard work is already done for you. Easy peasy!
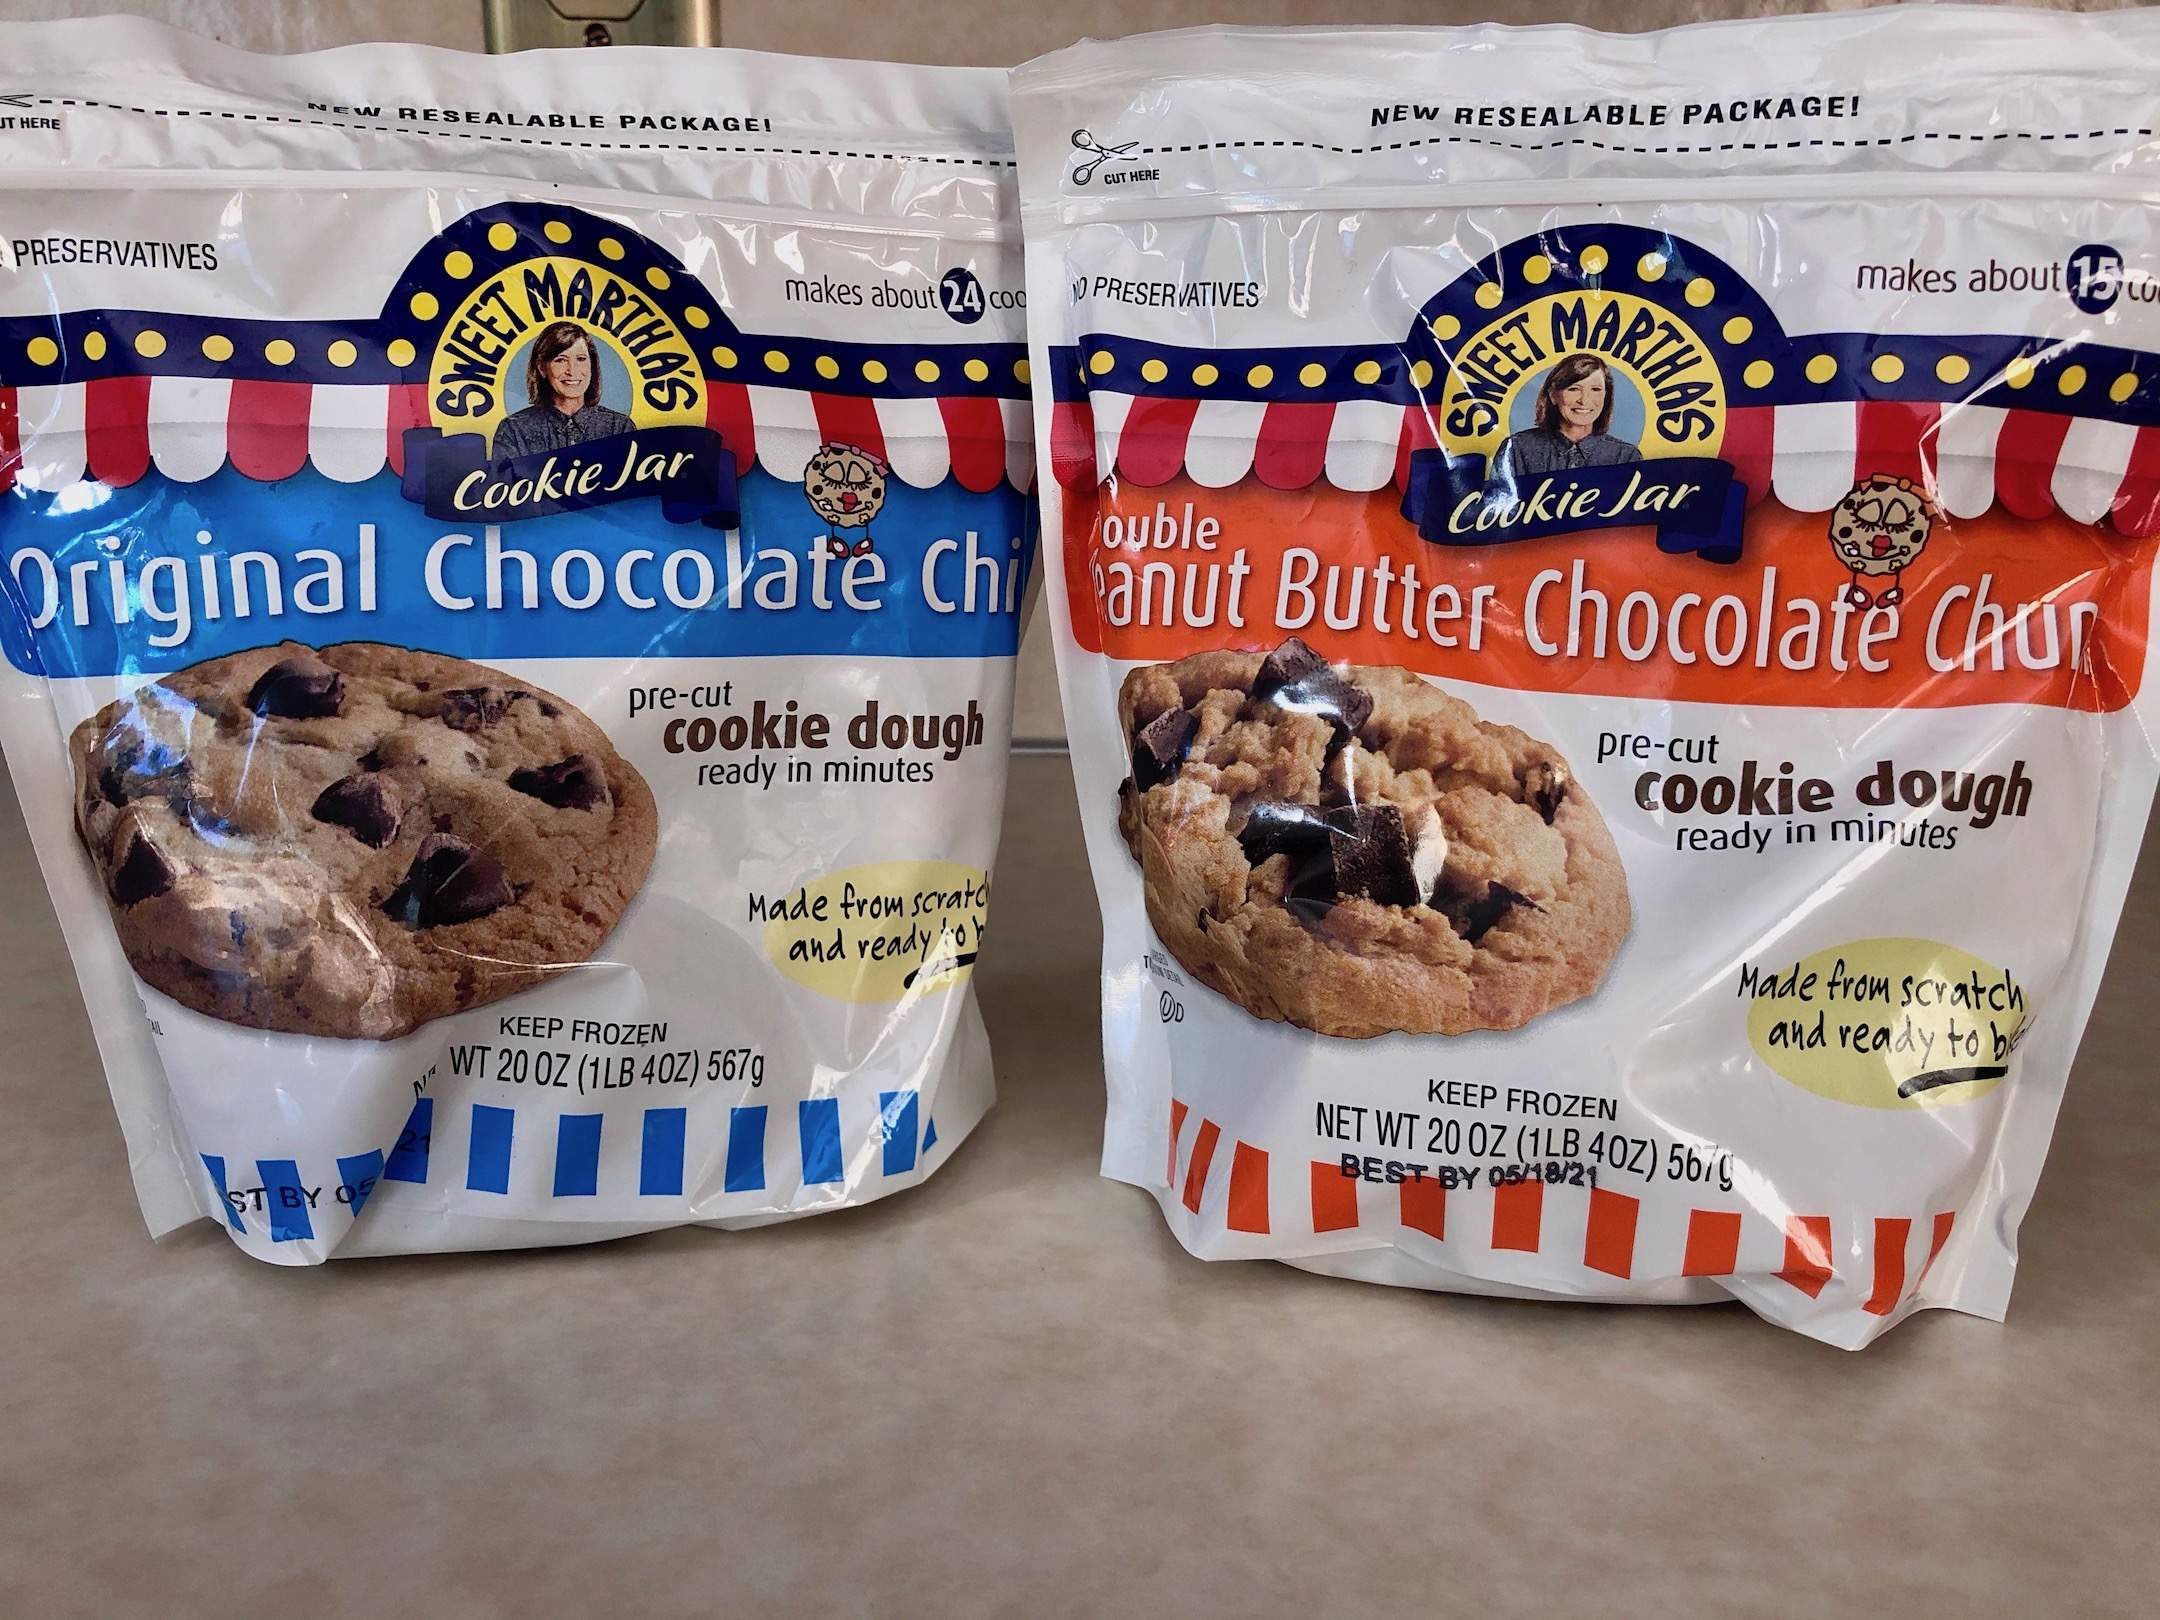


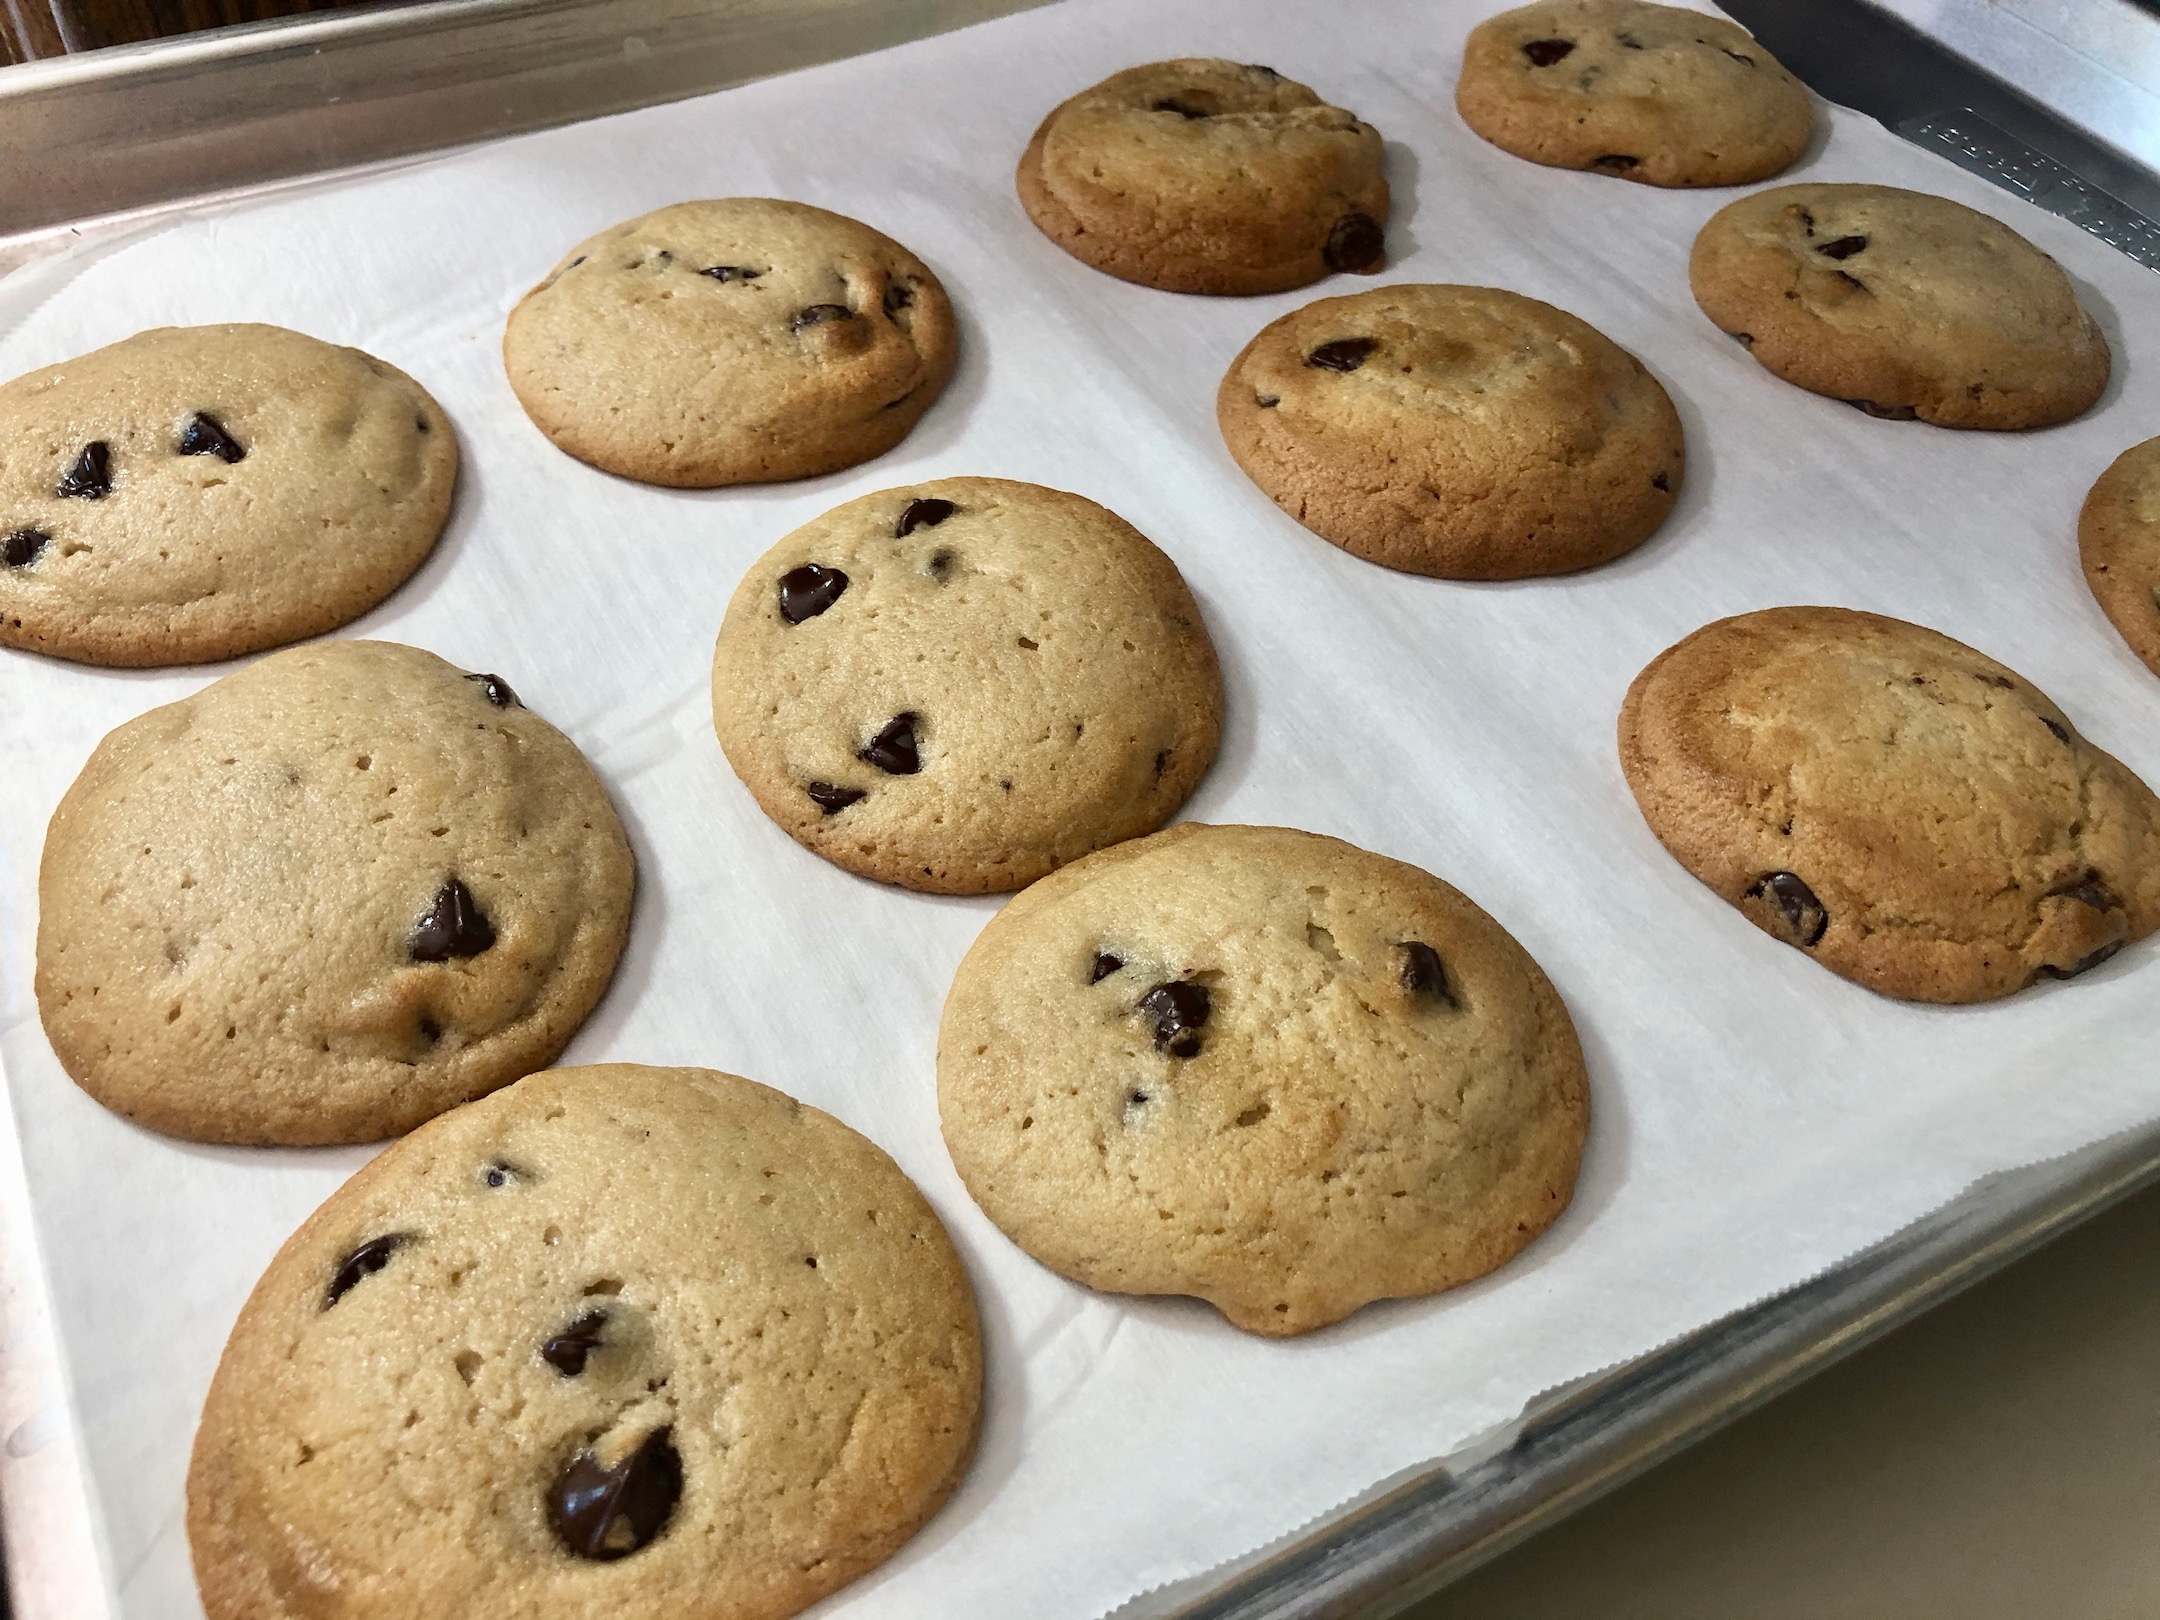
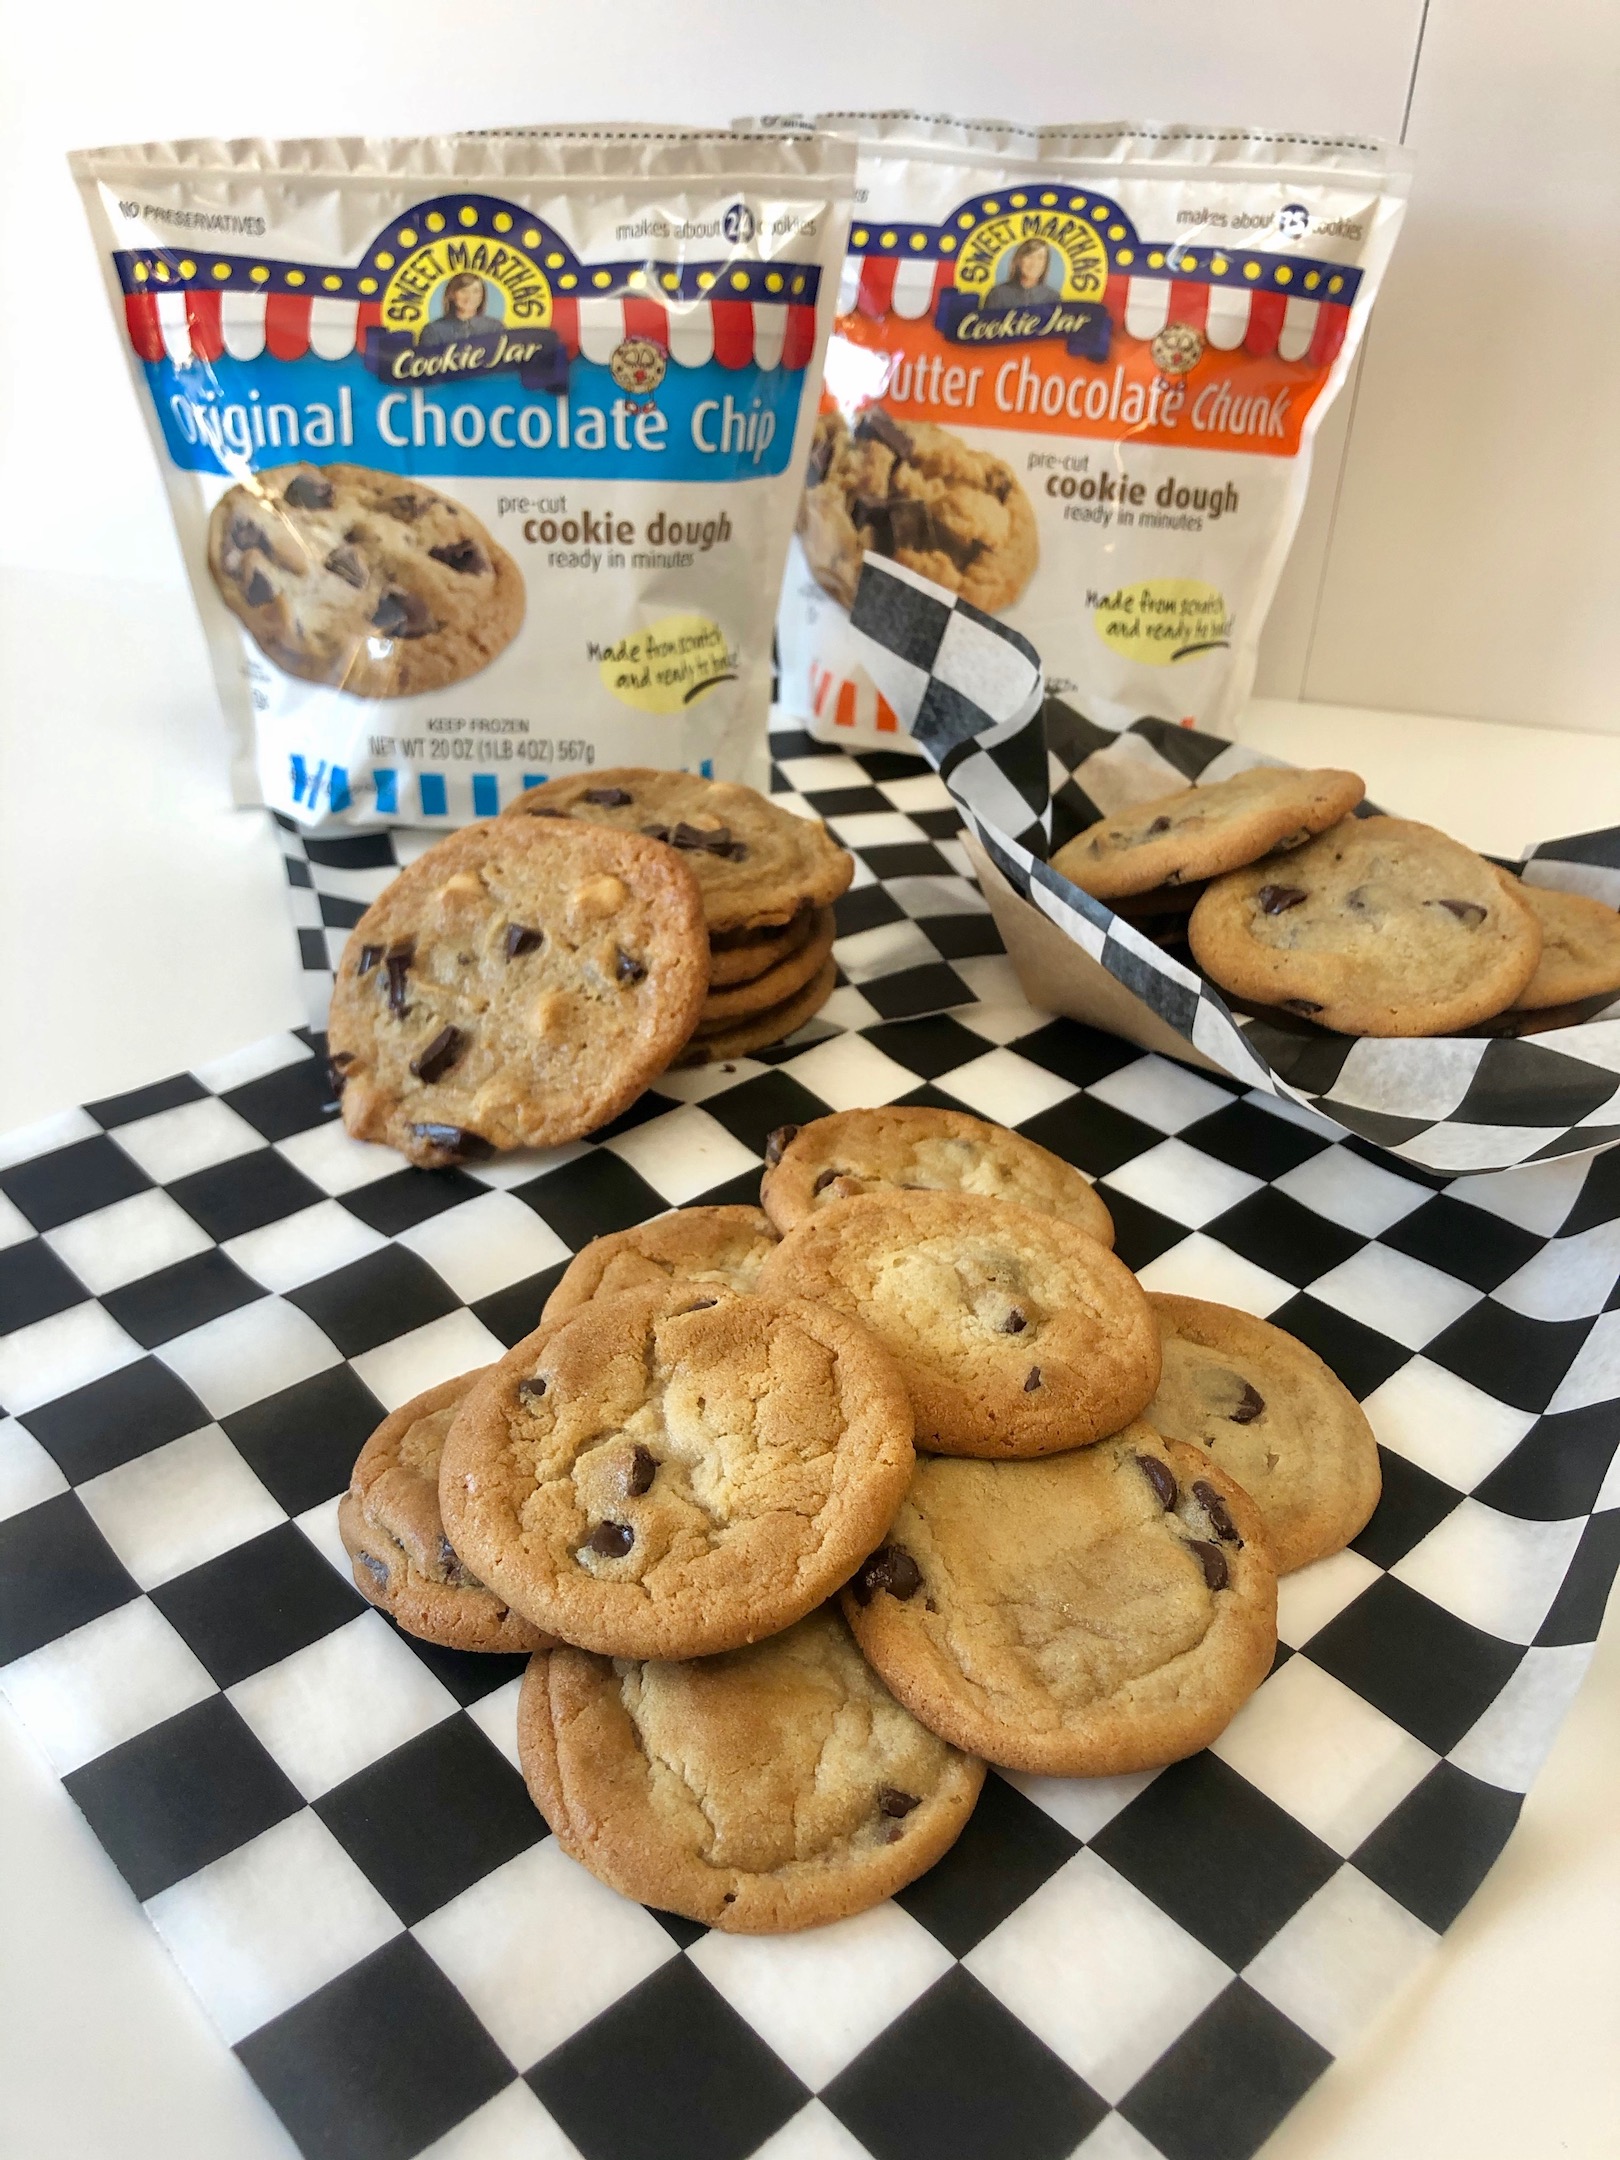

These are great to enjoy any time of year when you have a craving for some cookies or when you’re missing the state fair and need a little pick-me-up!
Beverages are last but not least! You can’t go to the fair without consuming some fresh lemonade, beer, milk from the dairy barn, etc. It’s hard to bring some of the fair options to your house but you can get creative and enjoy a few of the traditions.
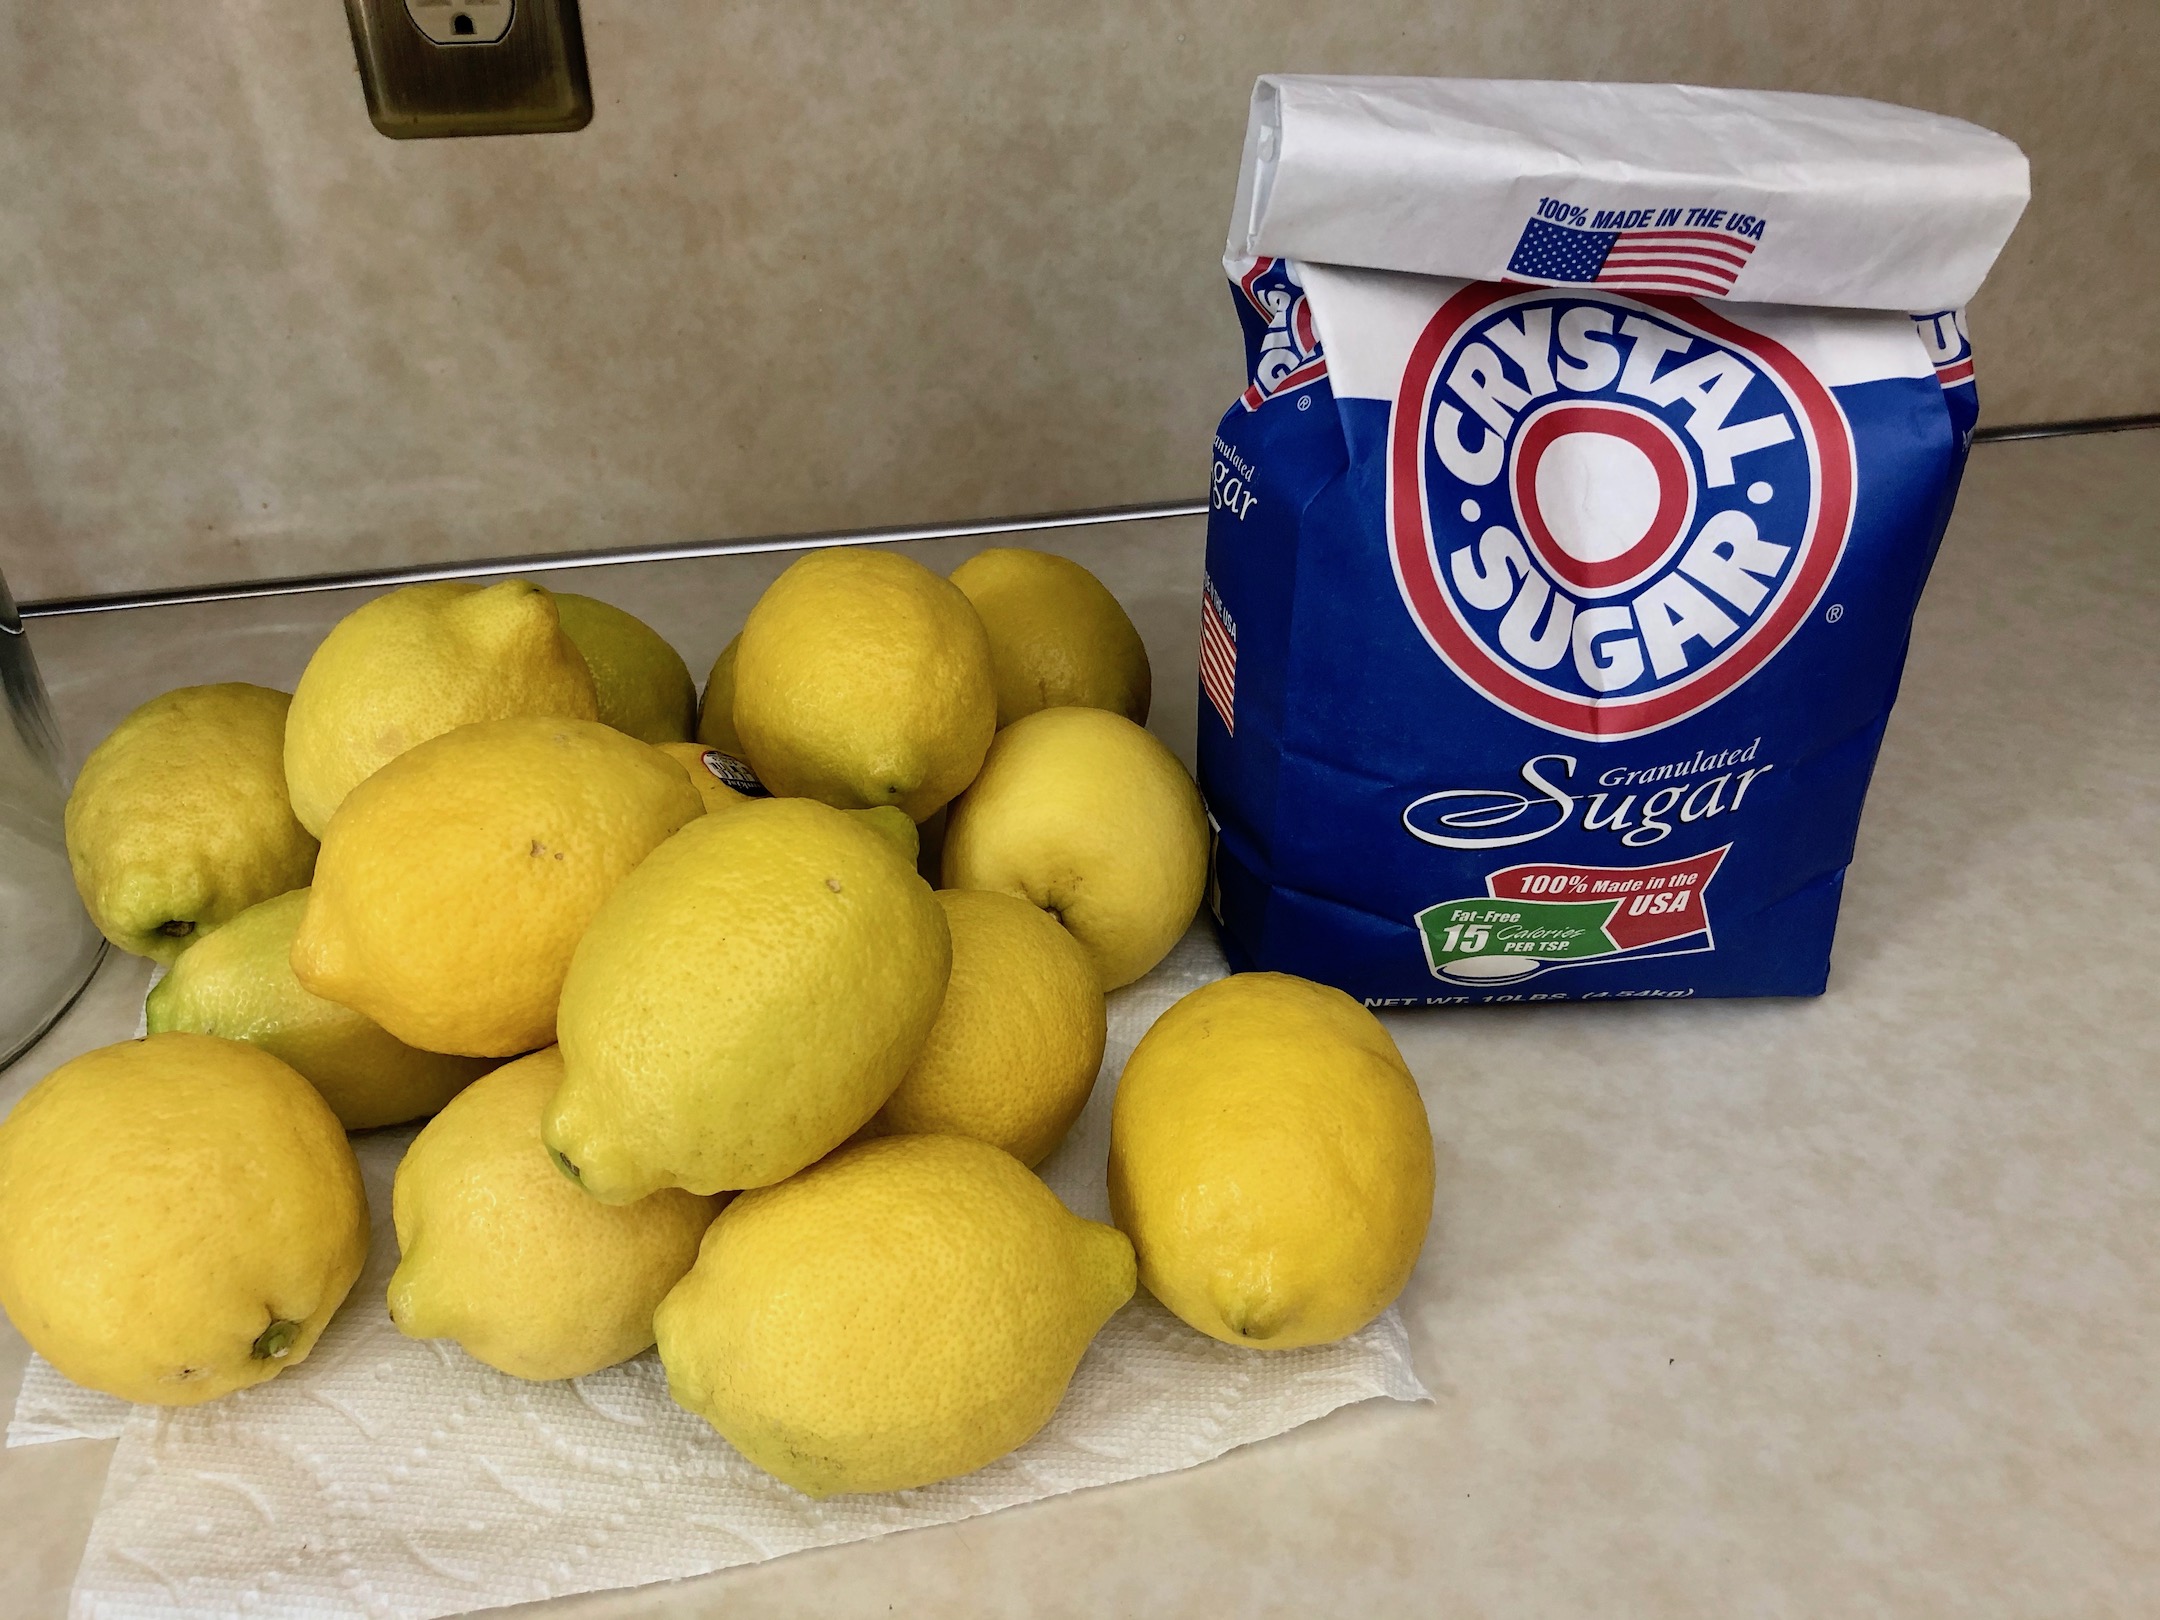
Fresh Squeezed Lemonade is incredibly refreshing and will remind you of those giant cups you get at the fair. It’s a little sour, but I think lemonade should be, or it wouldn’t quench your thirst.

The recipe can be found here.
Start by making the simple syrup. In a large saucepan, add the sugar and 4 cups of water. Bring to a boil and continue to stir until the sugar dissolves. Once dissolved, remove from the heat and let cool completely.


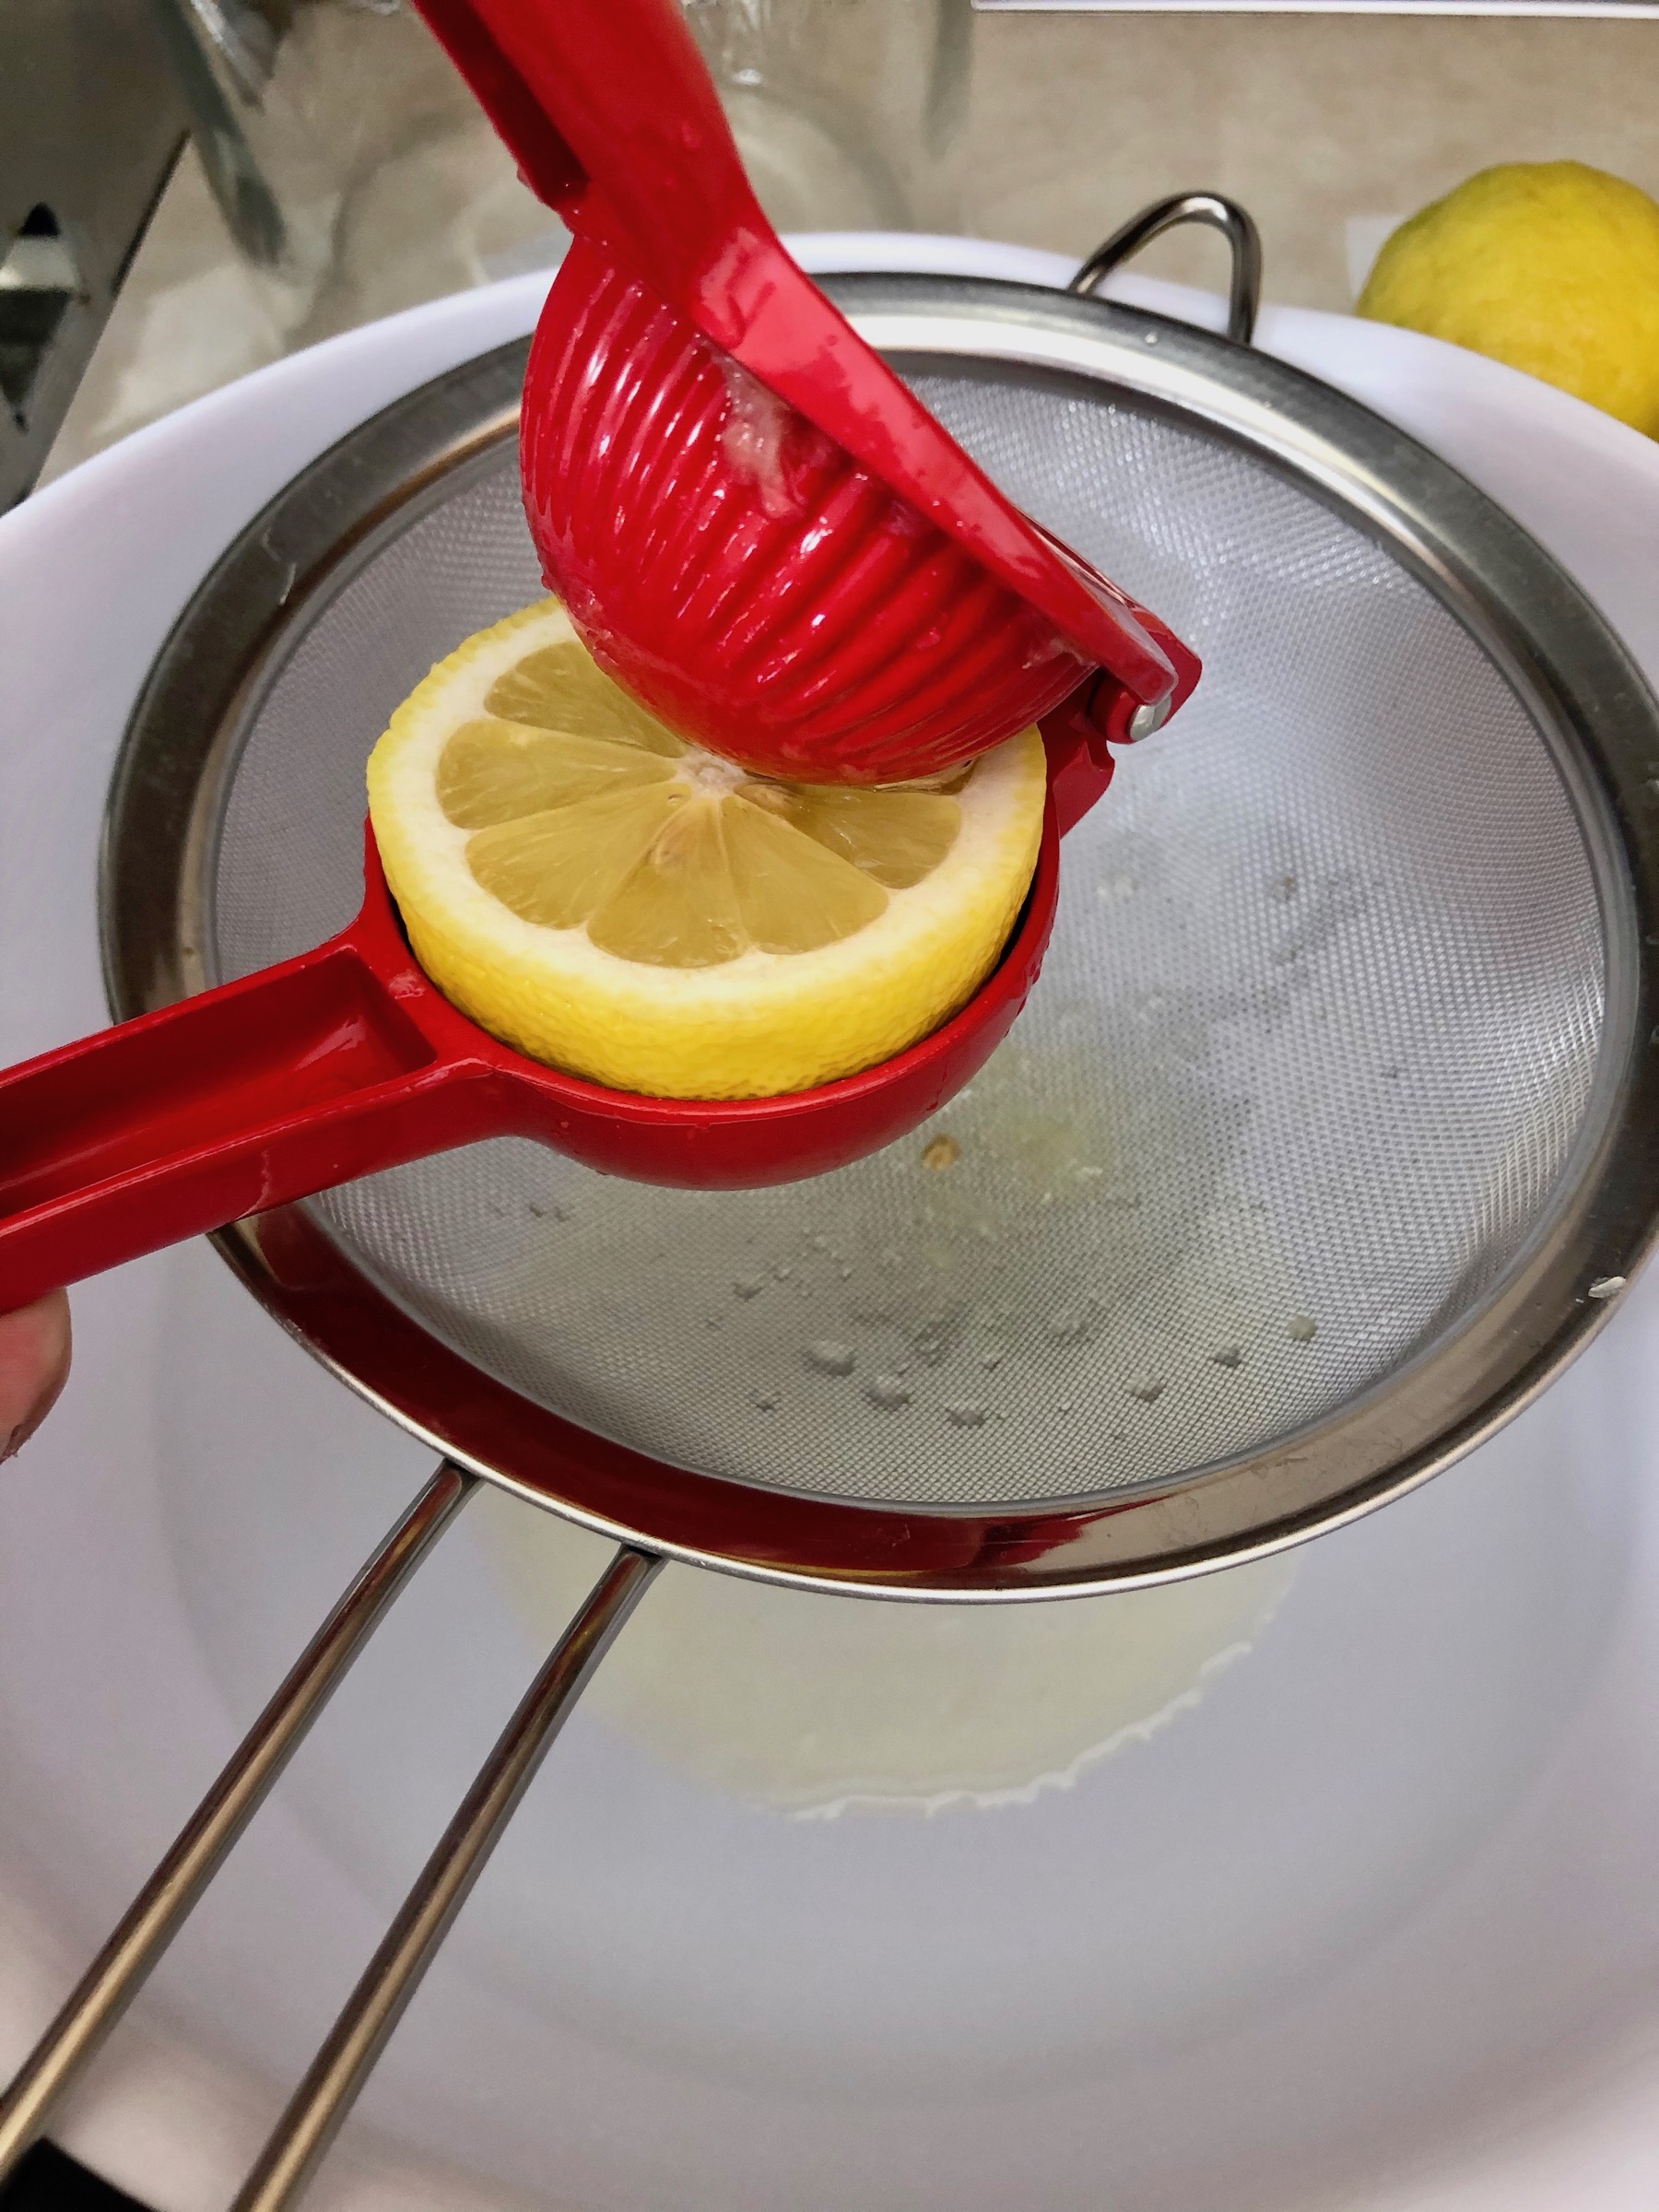
Squeeze the juice from all 16 lemons into a pitcher over a mesh strainer. The strainer will catch the pulp and any seeds. This is the tough part! I had to take a few breaks to give my arms a rest because you get quite the workout!
Add the simple syrup to the pitcher with the lemon juice and stir to combine.
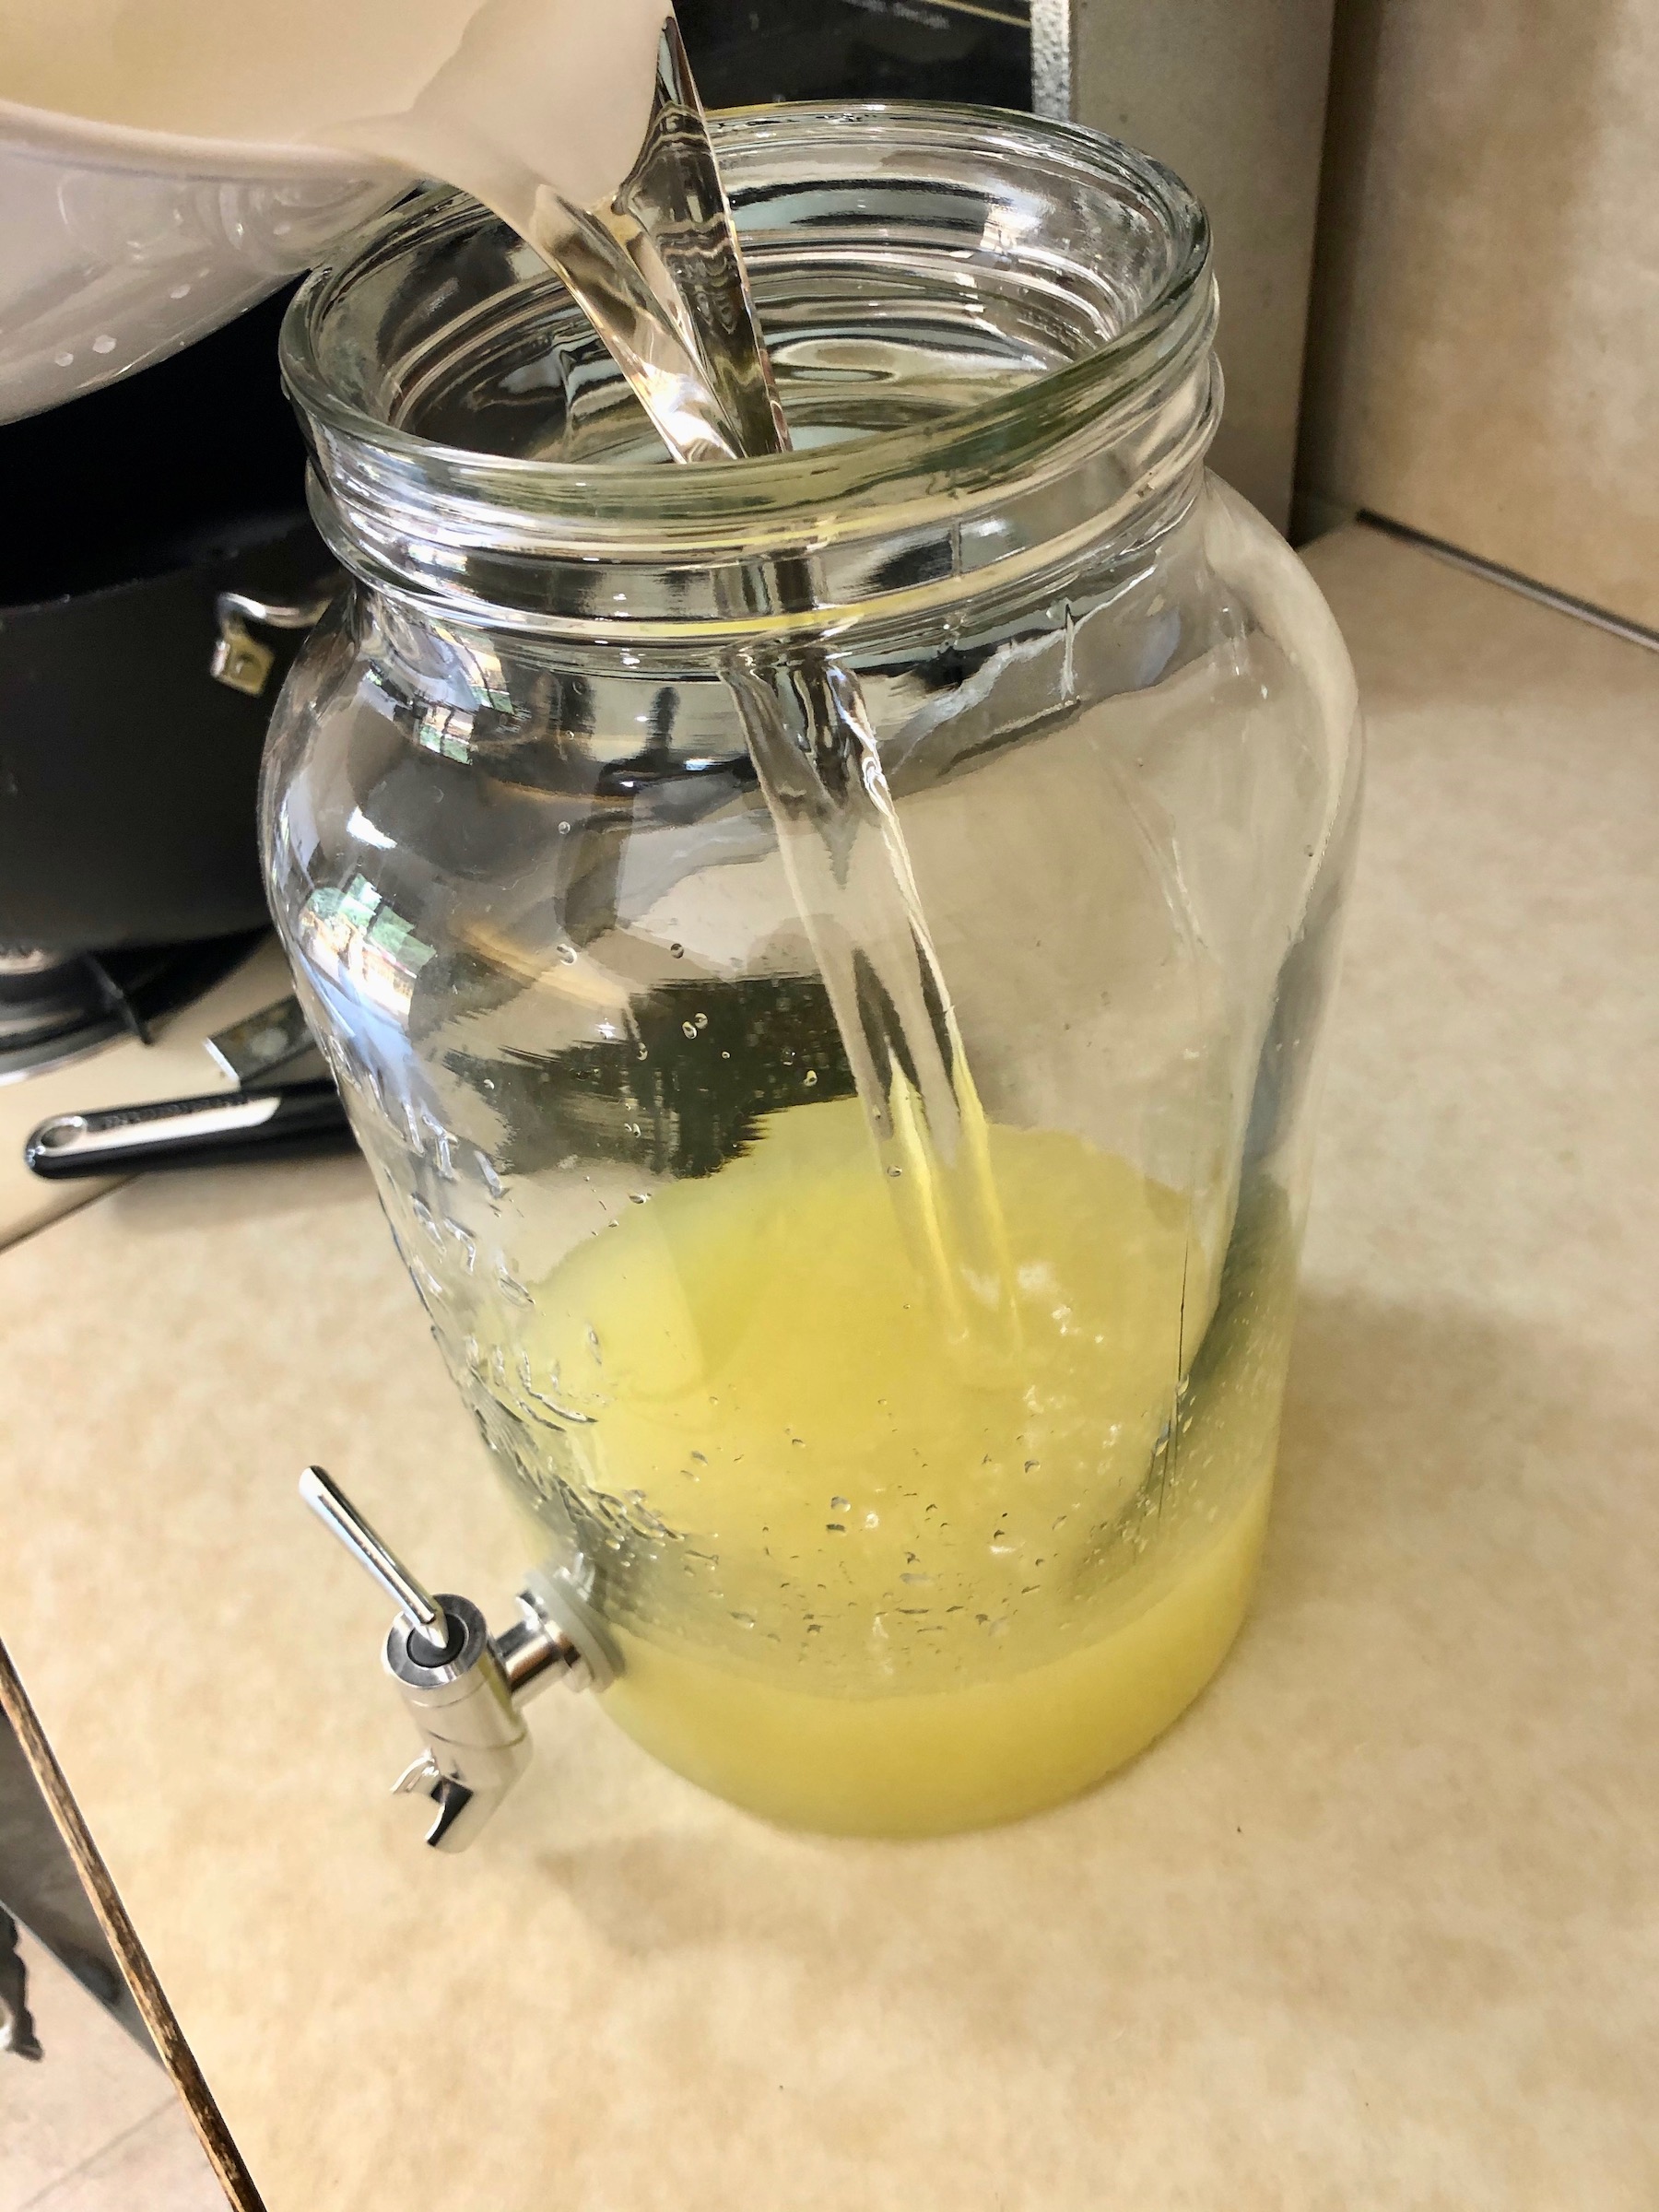
Add 6 cups of cold water to the pitcher and stir.

Either chill in the fridge or enjoy immediately over ice. If you have any lemons left, garnish with lemon wedges.
Crips and refreshing! As you can see, I purchased some of the MN State Fair cups to enjoy the fresh squeezed lemonade in. It felt more like the fair, tasted more like the fair, and made me look forward to next year’s fair!

The recipe can be found here.
One of our traditions at the fair is to sample craft beer, either the MN State Fair exclusive beers or random beer from various vendor. We also like to swing by the Wine Country building and sample wines from MN. Both of these traditions are easy to pull off at home.
Grab a few your favorite beers or try something new. Pour a few ounces into each cup and create your own beer flight at home.

Same with the wine, either purchase wine from MN wineries or get a variety of flavors to sample. Pour a few ounces into each cup and create your own wine flight at home.

Both the beer and wine pair really well with the food options listed above.
Are you even Minnesotan if you don’t spend at least one day shuffling through hot, crowded streets, while indulging on fried food and too many calories? Since that isn’t an option this year, you can eat and drink your way through your “homebound state fair experience”.
Happy Cooking! Looking forward to the MN State Fair in 2021!


Recent Comments