 order online
 weekly specials
Baking is one of my favorite things to do but baking Christmas cookies is extra meaningful to me. I used to spend a few days with my mom in the kitchen before the holidays baking her traditional cookies. It was always so much fun…and something I looked forward to helping with every year. Nowadays, I help when I can, but also like to bake a few batches of my own.
I like to create new recipes or put a holiday spin on an existing recipe. It’s fun to be creative and I love hearing reactions to the different goodies. It doesn’t hurt that I have a sweet tooth so if no one else wants the cookies, I sure do! This year, I’m making 5 different holiday treats to share with friends and family.
- Christmas Cookie “Charcuterie” Board
- No Bake Mint Oreo Truffles
- No Bake Butterscotch Clusters
- Holly Ginger Cookies
- Homemade Turtles
A Christmas Cookie “Charcuterie” board is a spin on a traditional charcuterie board, which usually consists of various meats and cheese. Mine will be filled with Christmas cookies and candy, with a holiday theme. I like to use rosettes, candy canes, peanut brittle, fudge, spiced drops, and chocolate covered pretzels.

All of these items can be found at your local Festival Foods. You can also add Christmas cookies (homemade or store bought), peppermint bark, Hershey kisses (a holiday classic), chocolate Santa’s, truffles, caramels, etc. Make the board your own! I love these boards because you can make one for almost any occasion and it comes together with little effort. It’s a great centerpiece or display item on your dessert table!
No Bake Mint Oreo Truffles are incredibly easy to make and don’t require any baking (if you aren’t a baker). They have a sweet outer chocolate shell and moist, minty filling. They are a no fuss, highly addictive, treat that tastes like cake!

The recipe can be found here.
Use a food processor to pulse the Oreos into fine crumbs.


Add the Oreo crumbs, cream cheese, and peppermint extract to a bowl. Mix together until well blended. I like to use my hands to combine the mixture because I think it blends together better than when using a spoon. It’s a little messy but worth it! Don’t be afraid to get your hands dirty 🙂


Use a cookie scoop to scoop the mixture into even sized balls and place on a baking sheet. Use your hands to form each scoop into smooth balls.
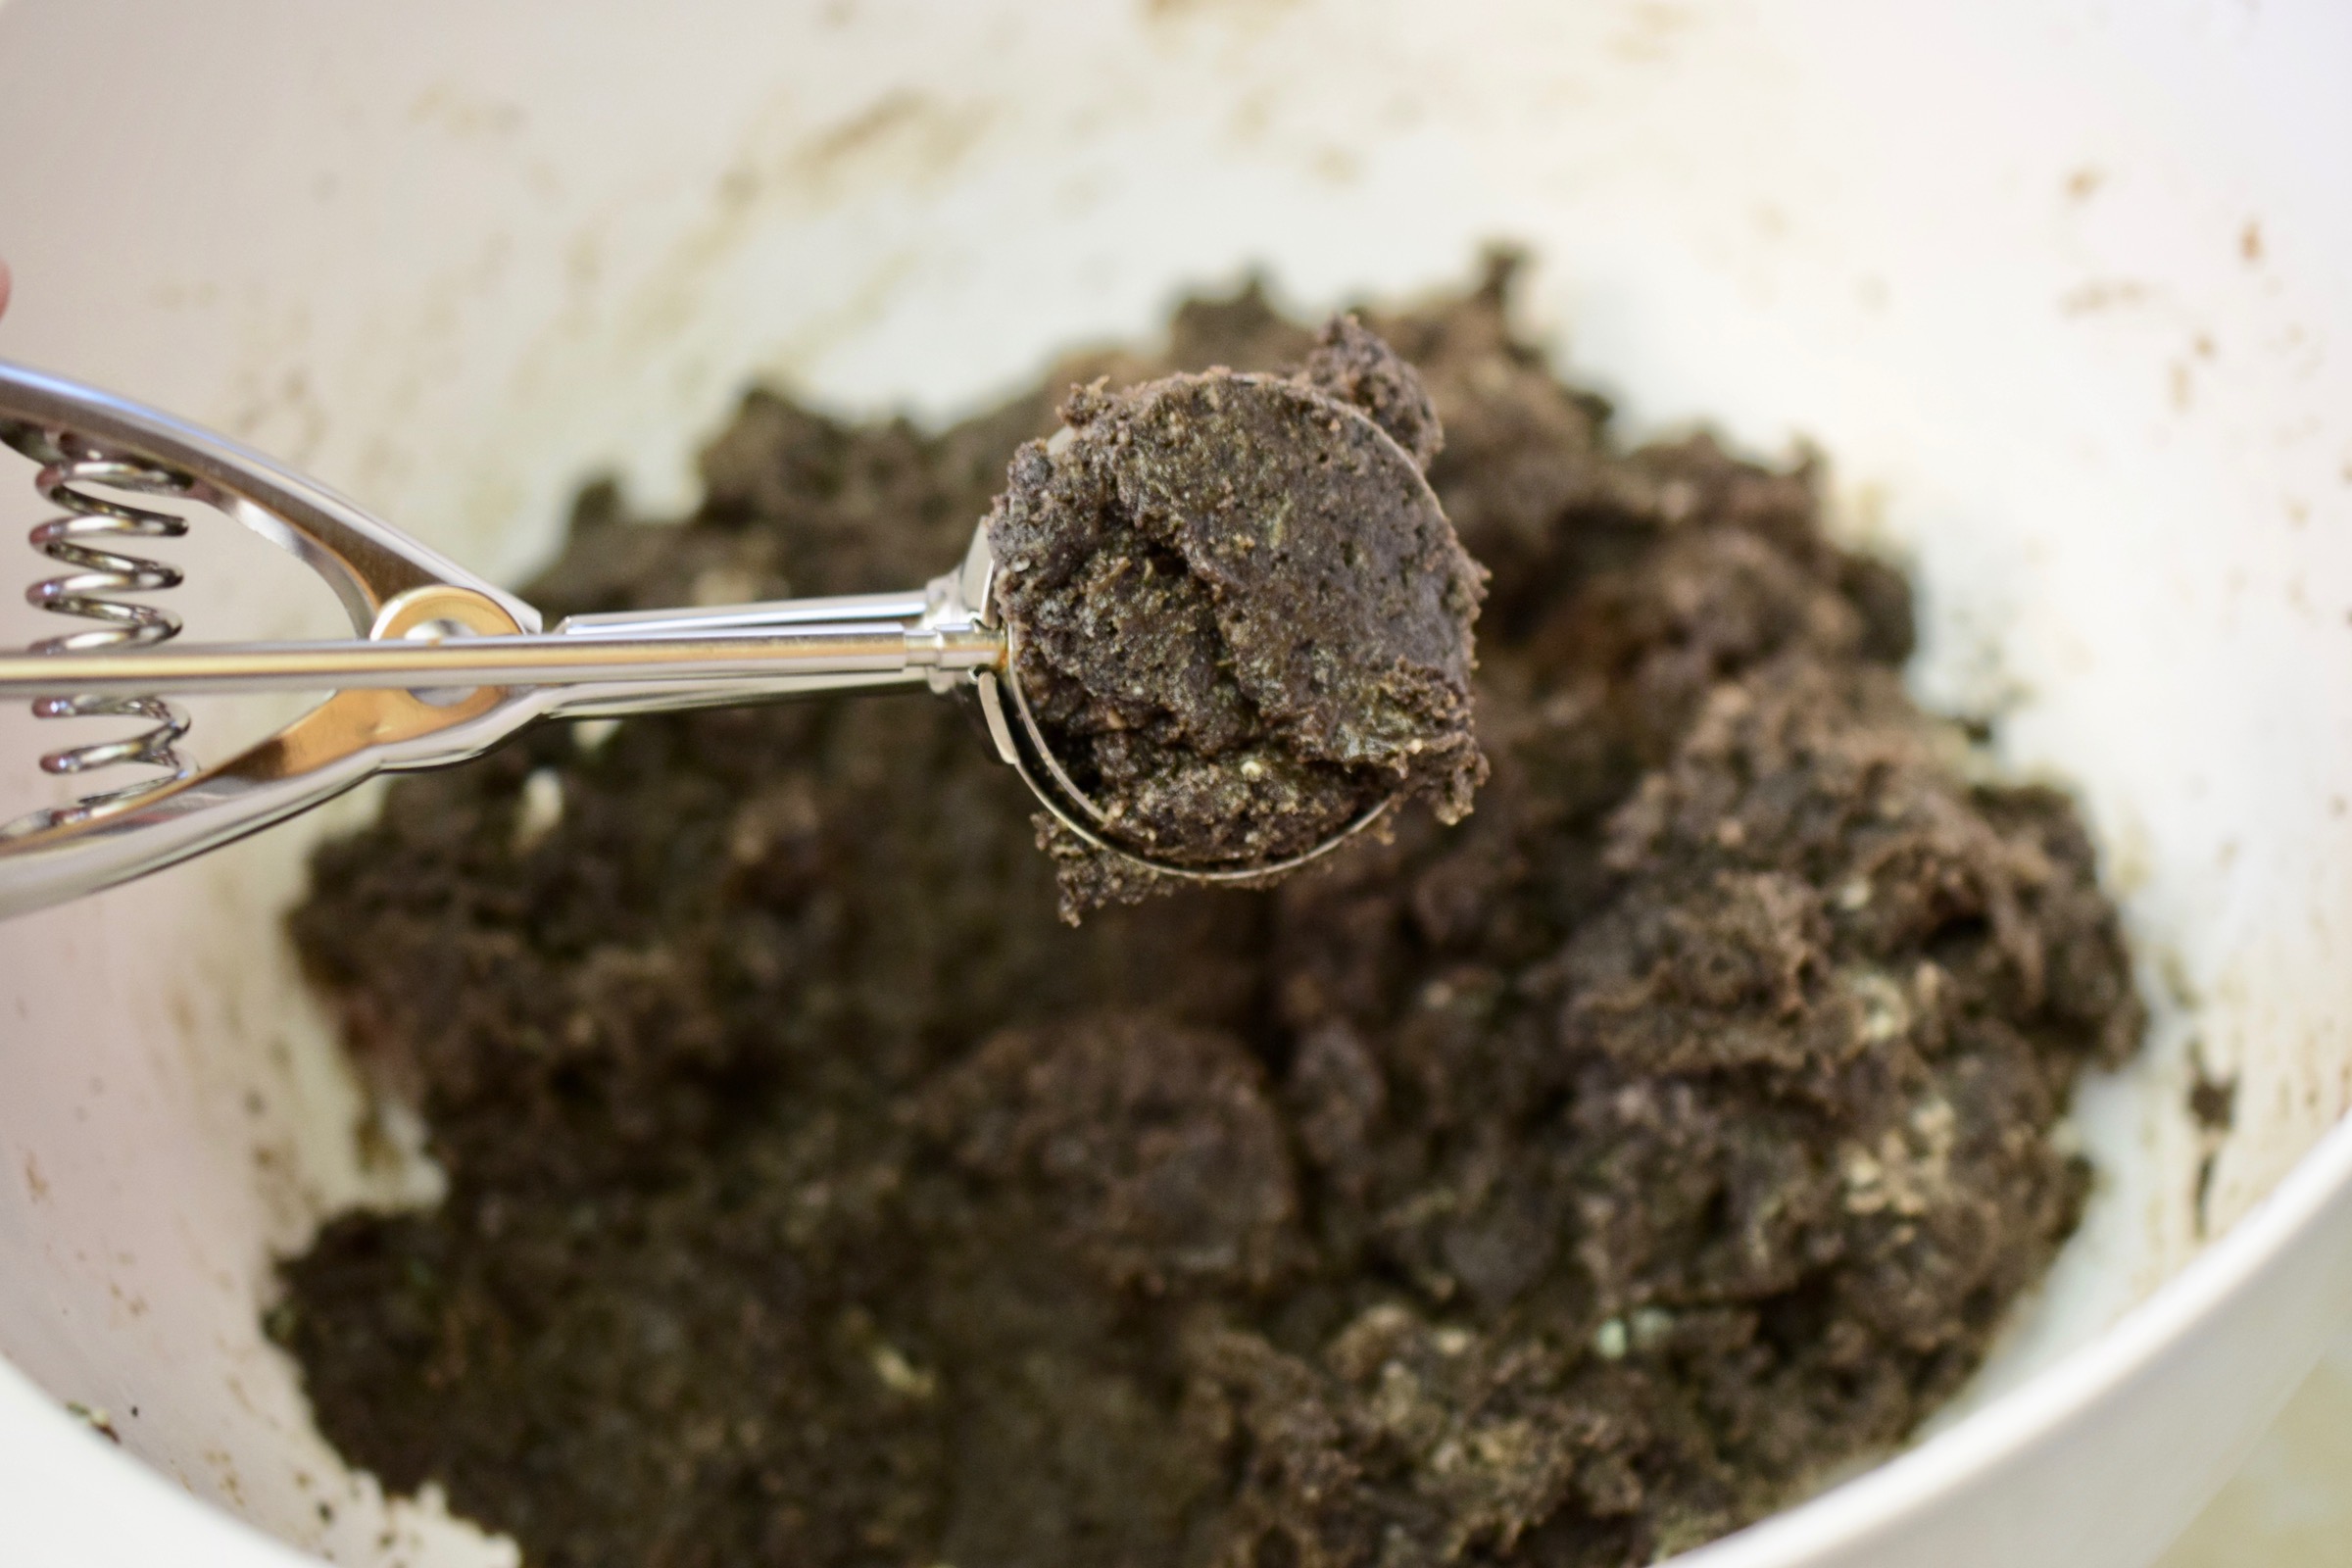

Place the baking sheet in the fridge to chill for at least 1 hour but preferably 2 hours. You want to do this so the Oreo balls are very firm before coating in melted chocolate or they will start to crumble and fall apart.
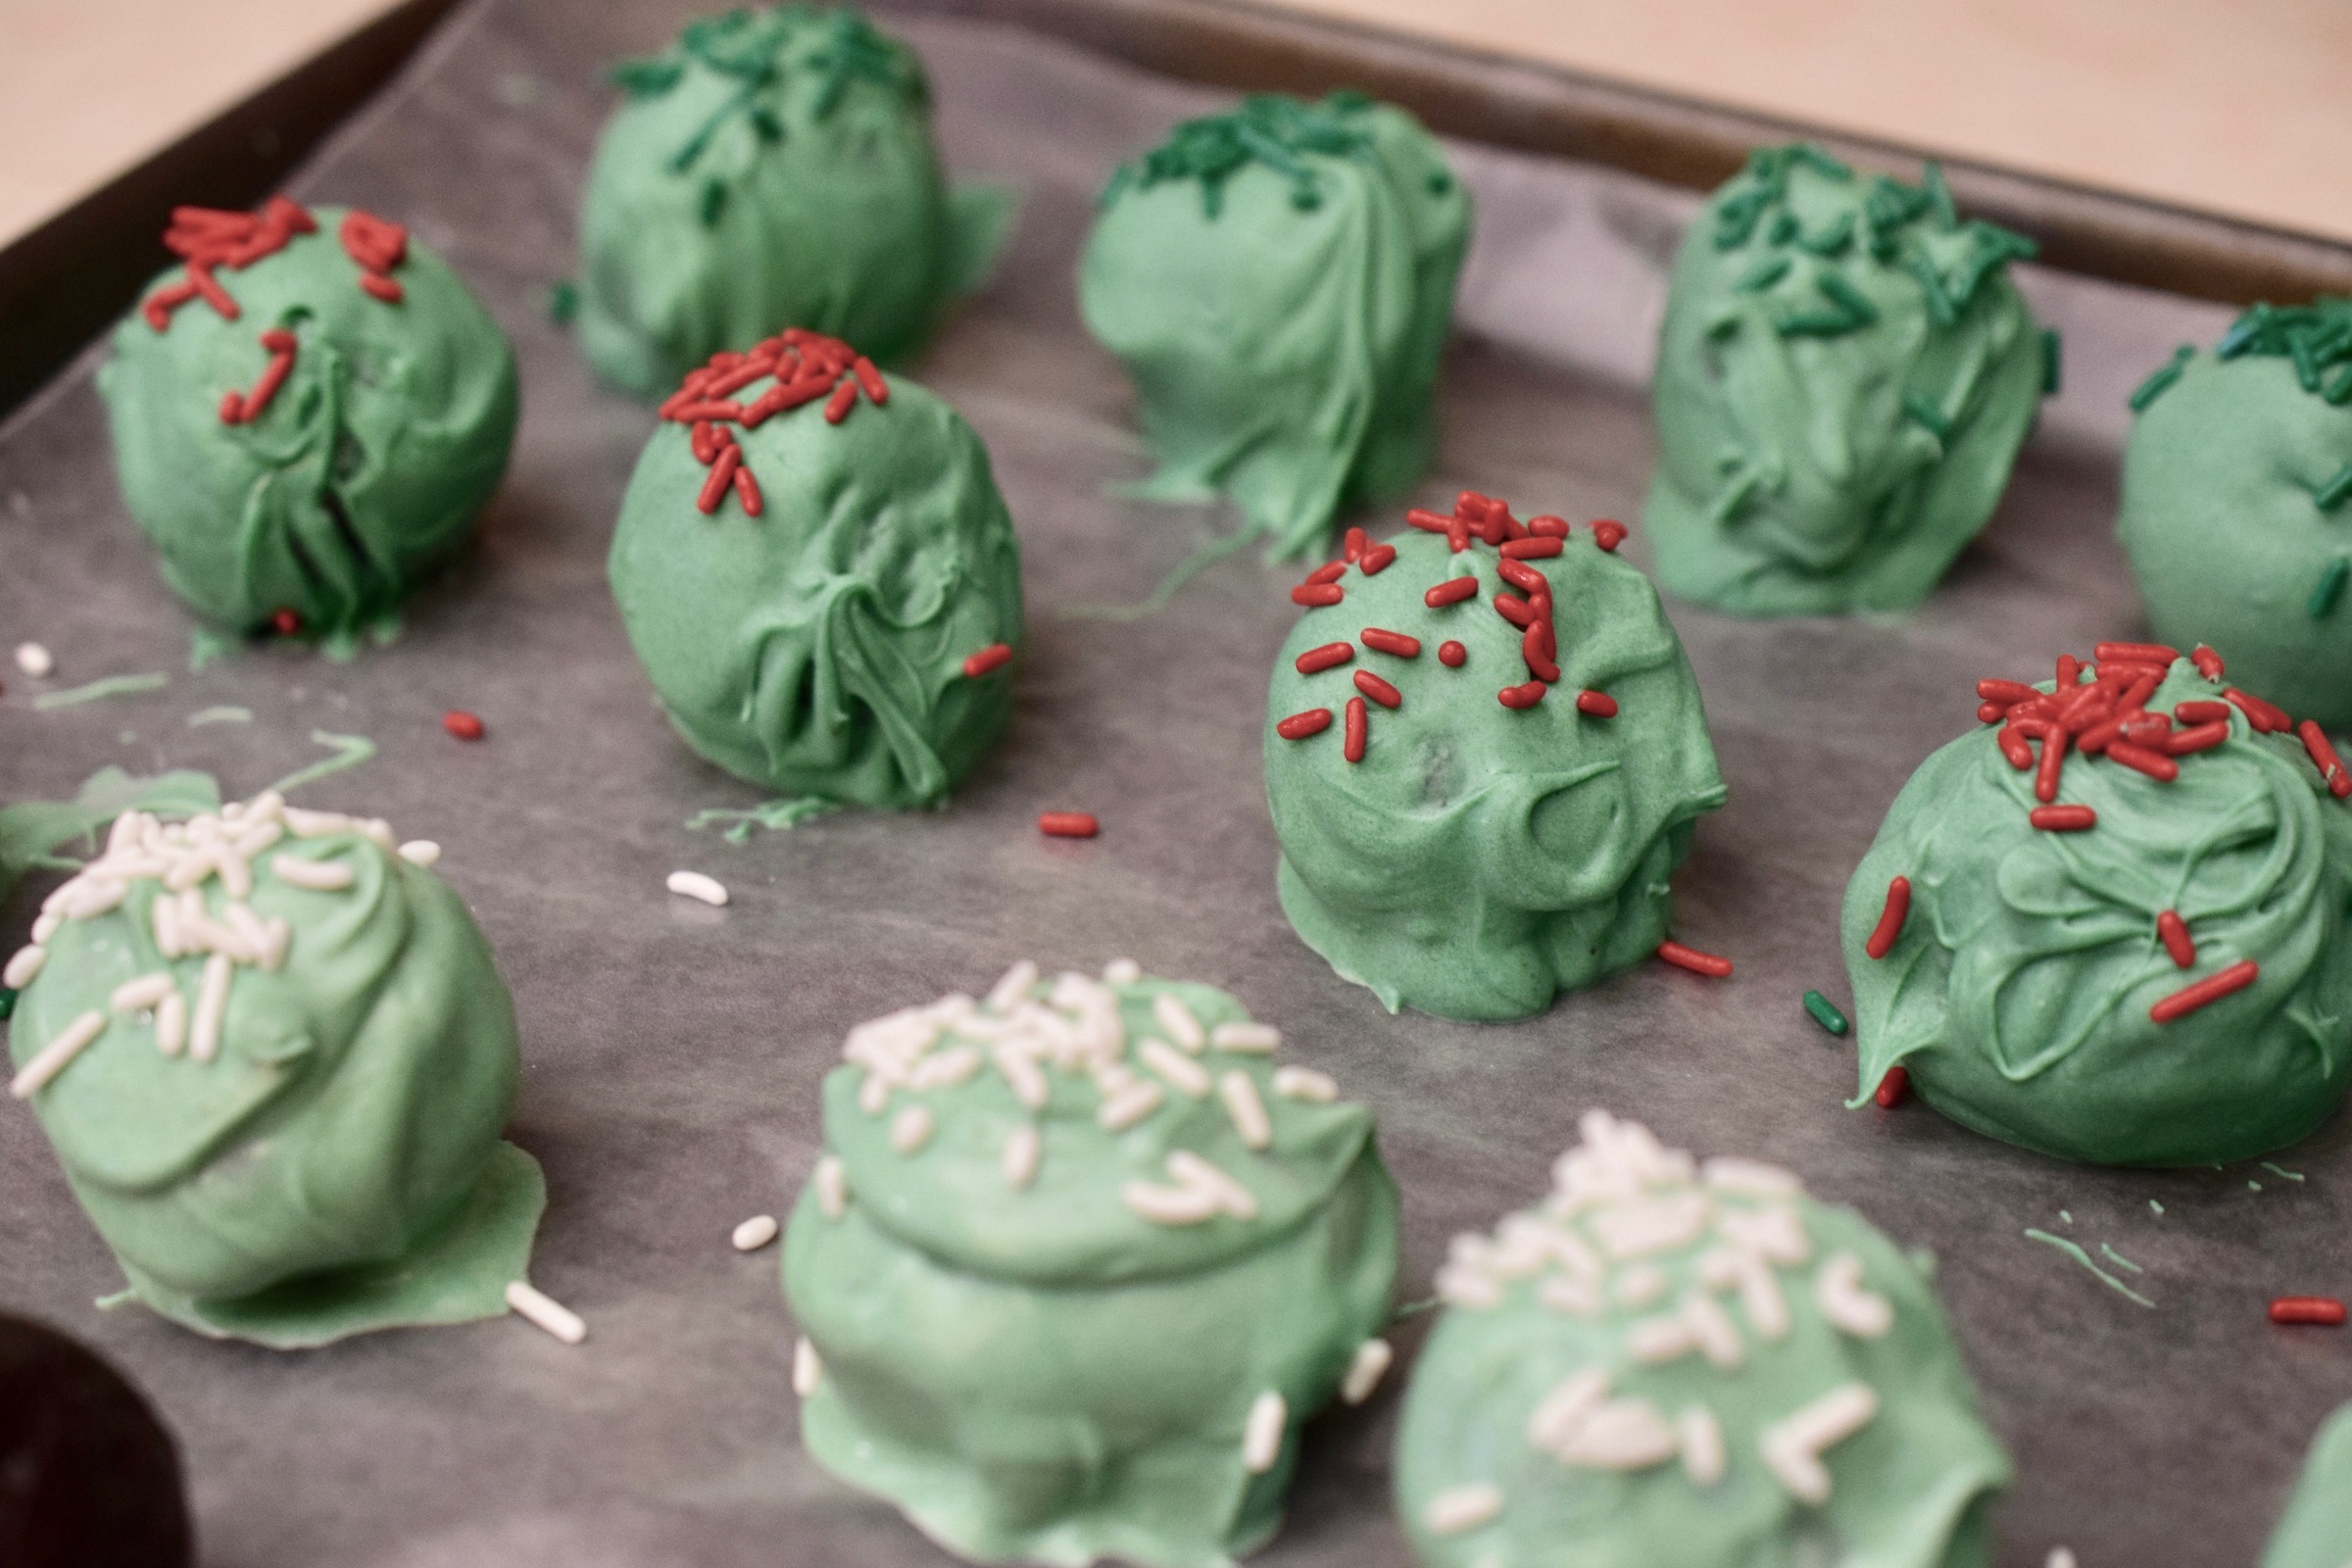
Once chilled, break the almond bark apart and place in a microwave safe bowl. Microwave on high in 30 second intervals, stirring in between, until the chocolate is melted and smooth. Add a few dabs of the green food coloring gel and stir to combine.


**Make sure to use food coloring GEL. The food coloring liquid containers can sometimes react with the chocolate and leave you with a curdled mess! The gel will blend nicely with the chocolate. **
Dip each truffle into the melted chocolate, one at a time, removing with a fork so the excess chocolate can drip off. I like to use a spoon to dip the truffles and then lift out with a fork – do whatever is easiest for you. Place the truffles back on the baking sheet for the chocolate to harden.

But before the chocolate hardens, add sprinkles to each truffle. Then refrigerate again to allow the chocolate to completely harden.

Serve and enjoy! Store in an airtight container in the fridge.

The recipe can be found here.
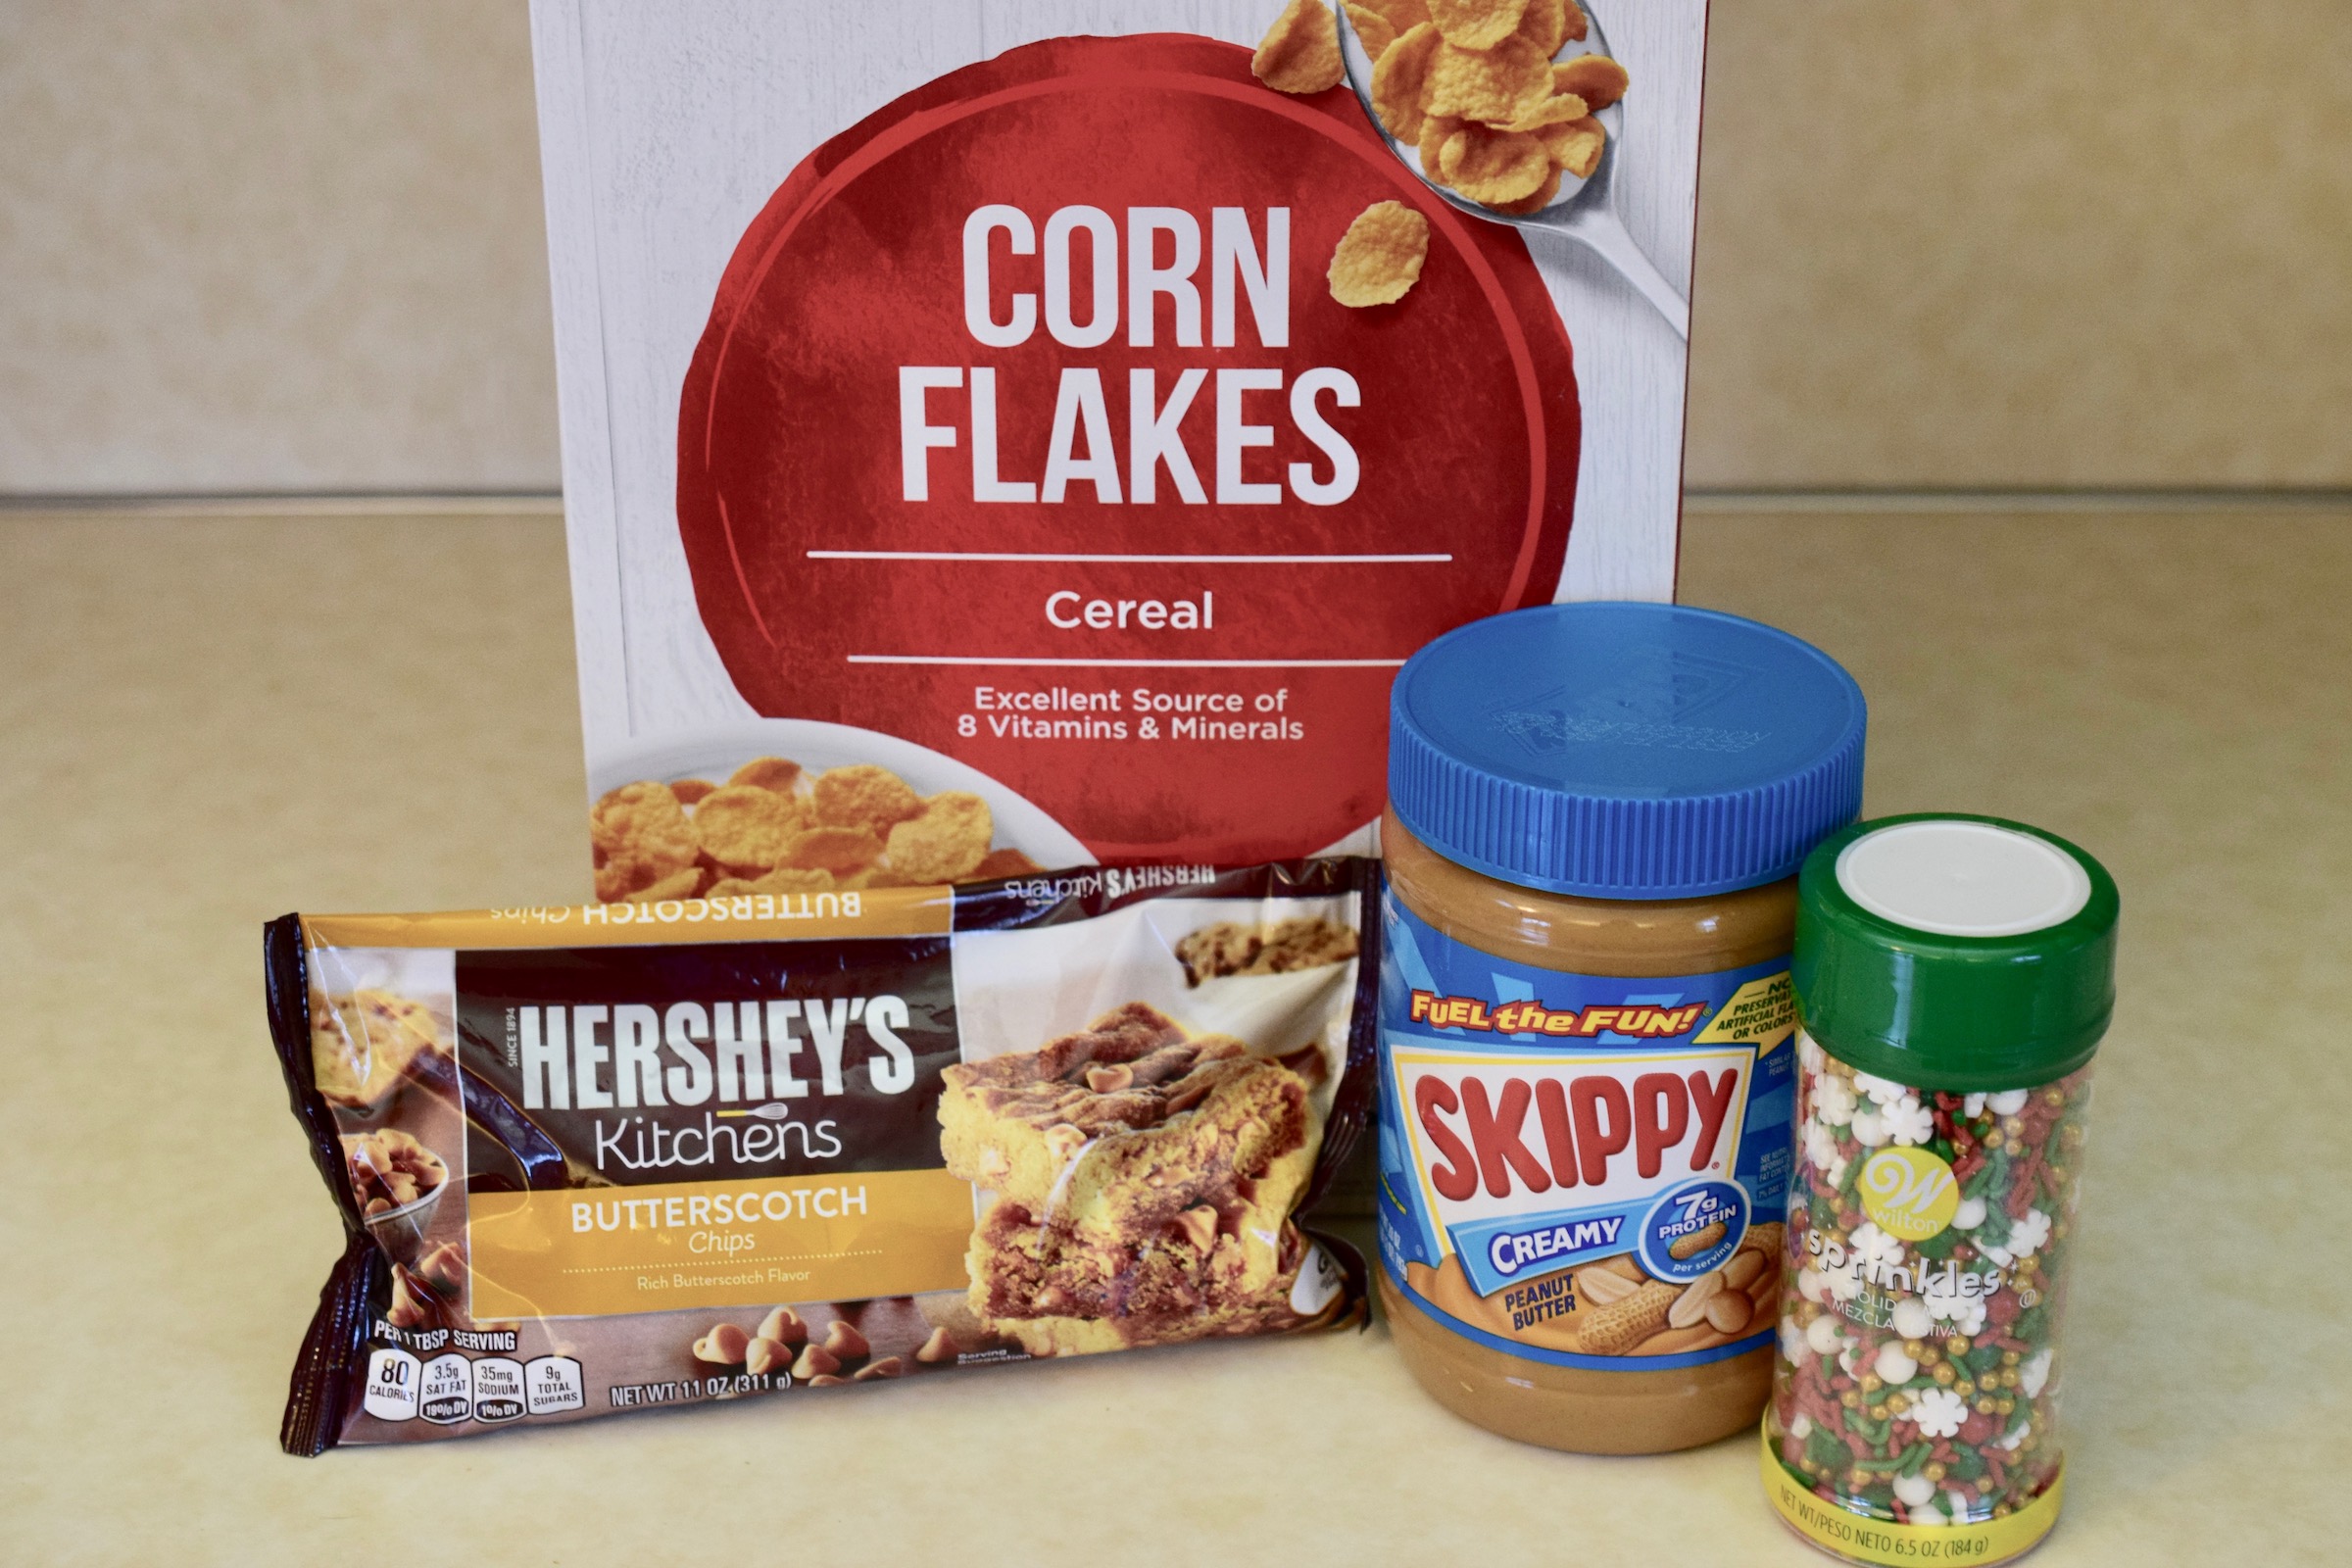
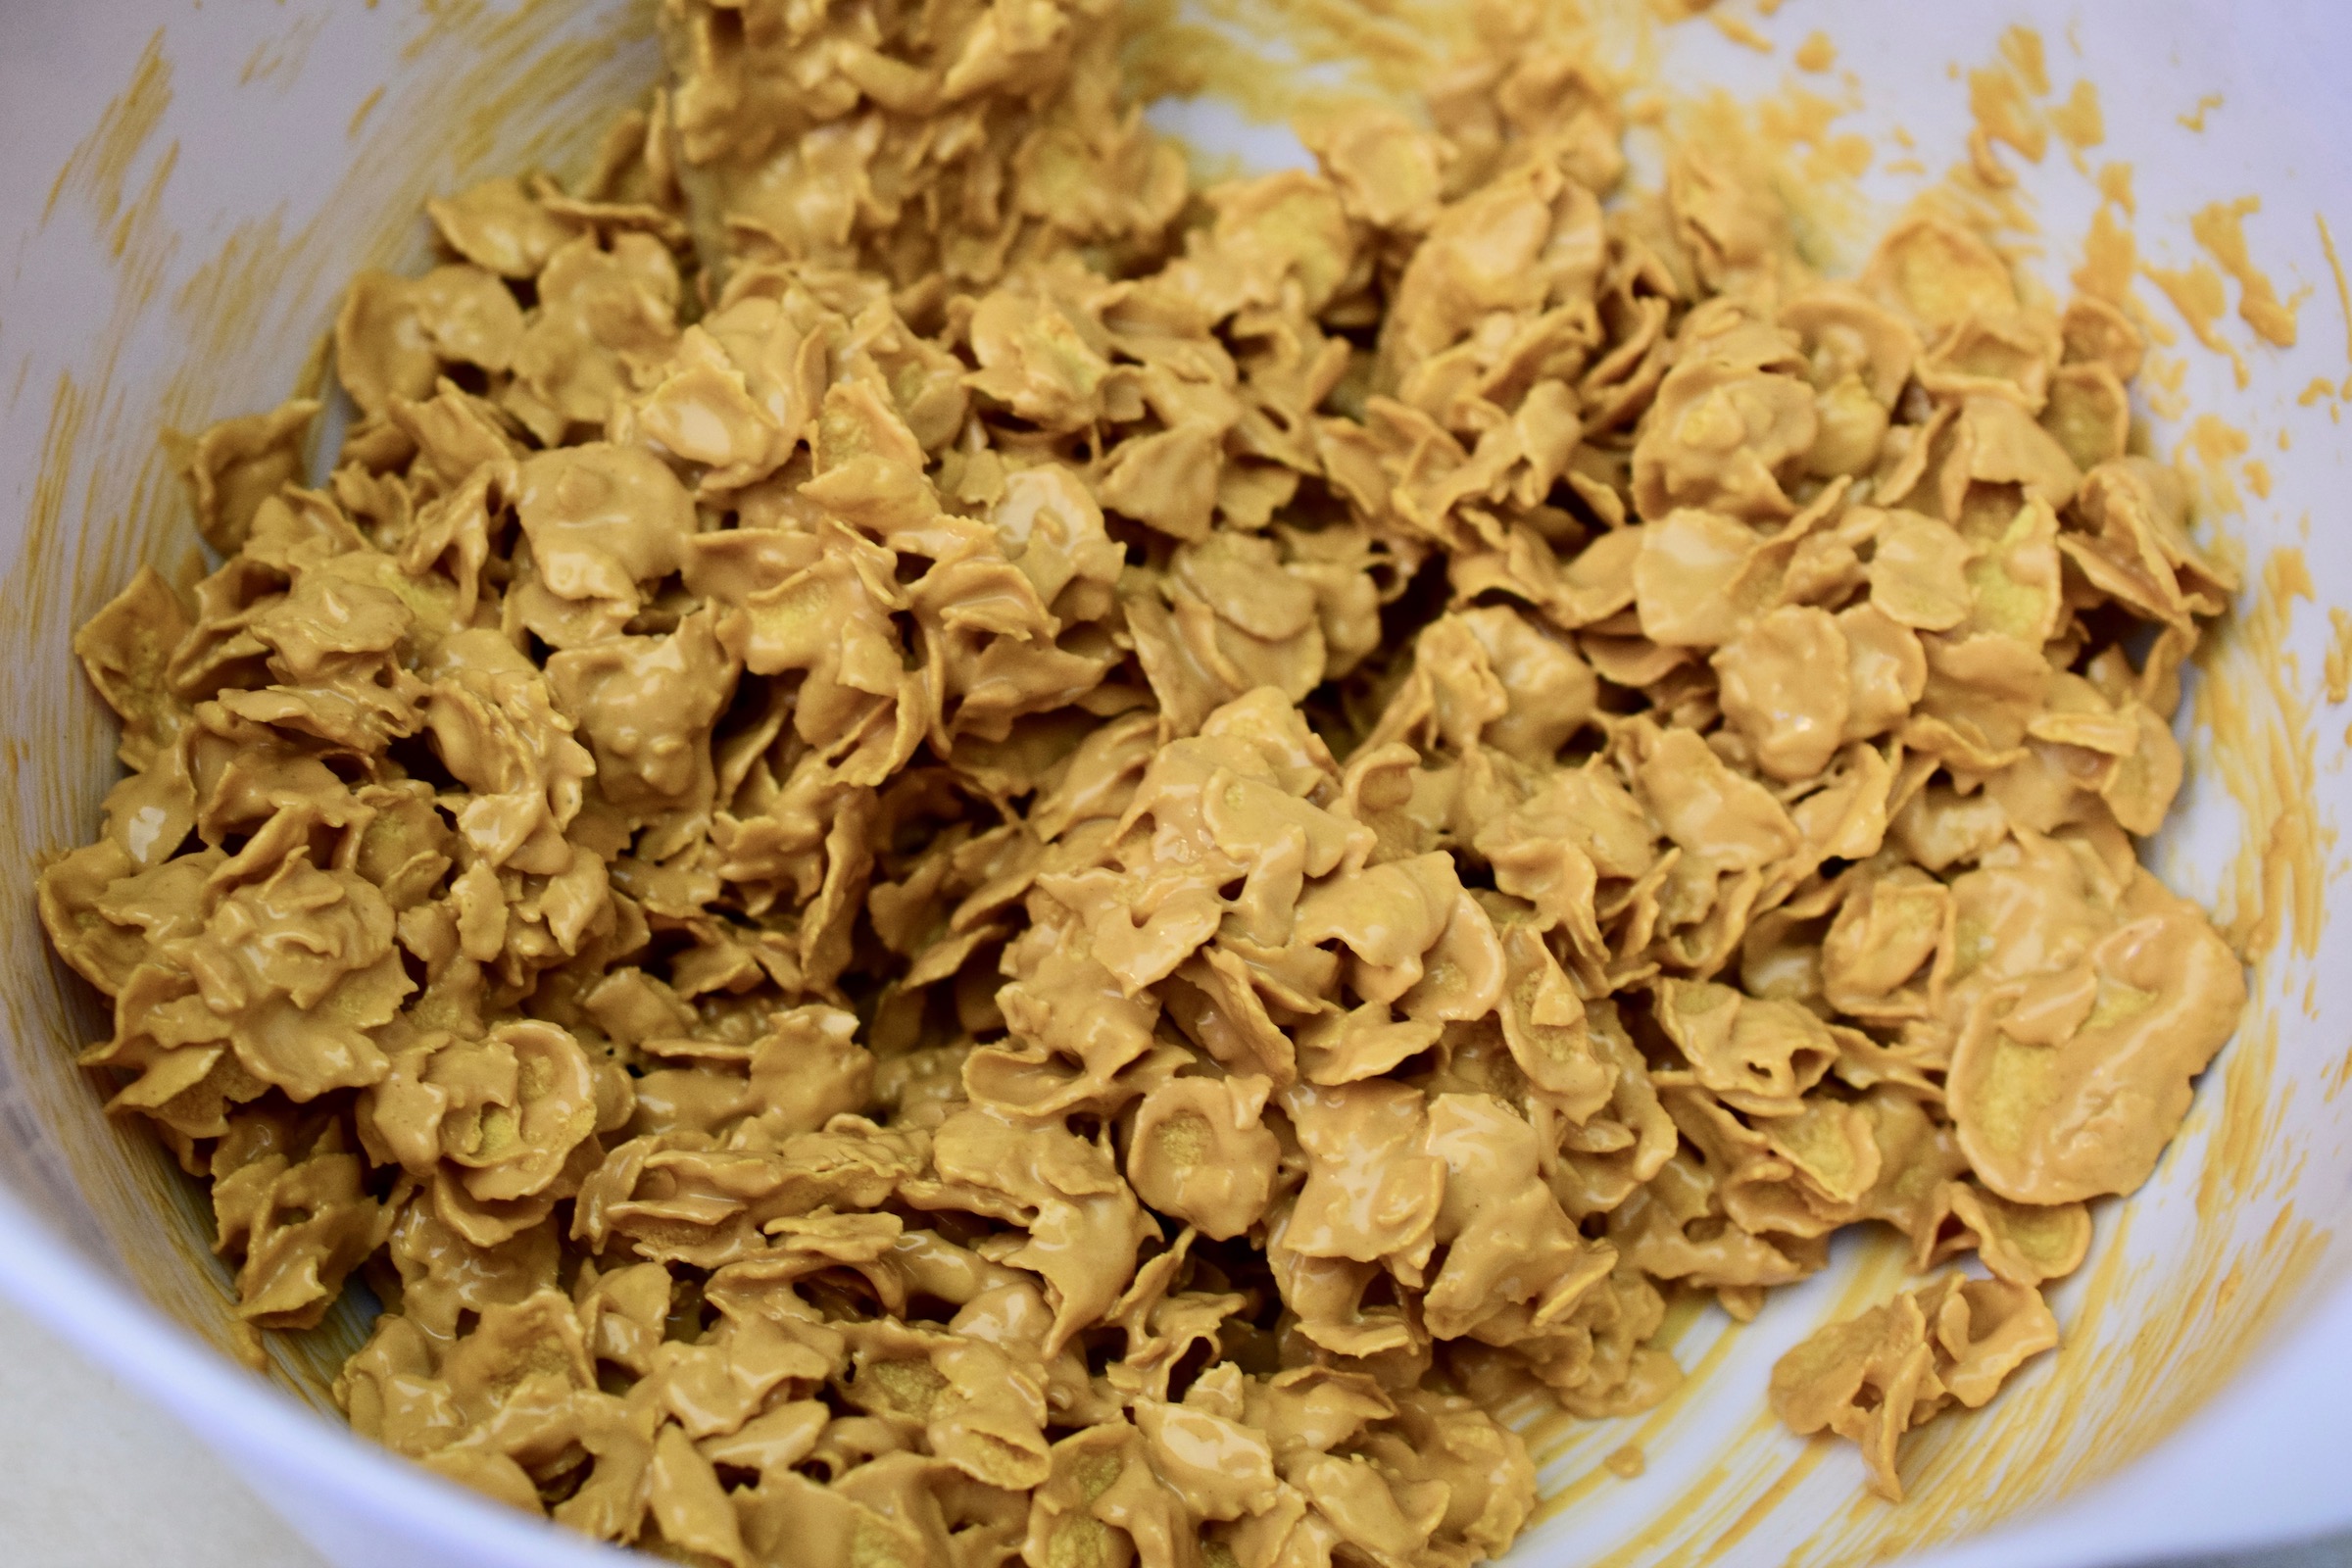
No Bake Butterscotch Clusters are made with just 3 ingredients. And, they are no bake, easy to make, fun for kids to help with, and D-E-L-I-C-I-O-U-S! The corn flakes add a nice crunch, the butterscotch add a wonderful savory flavor, and the sprinkles on top make these cookies extra festive.
The recipe can be found here.
Start by lining 2 baking sheets with parchment paper. Add the corn flakes to a large mixing bowl and set aside.

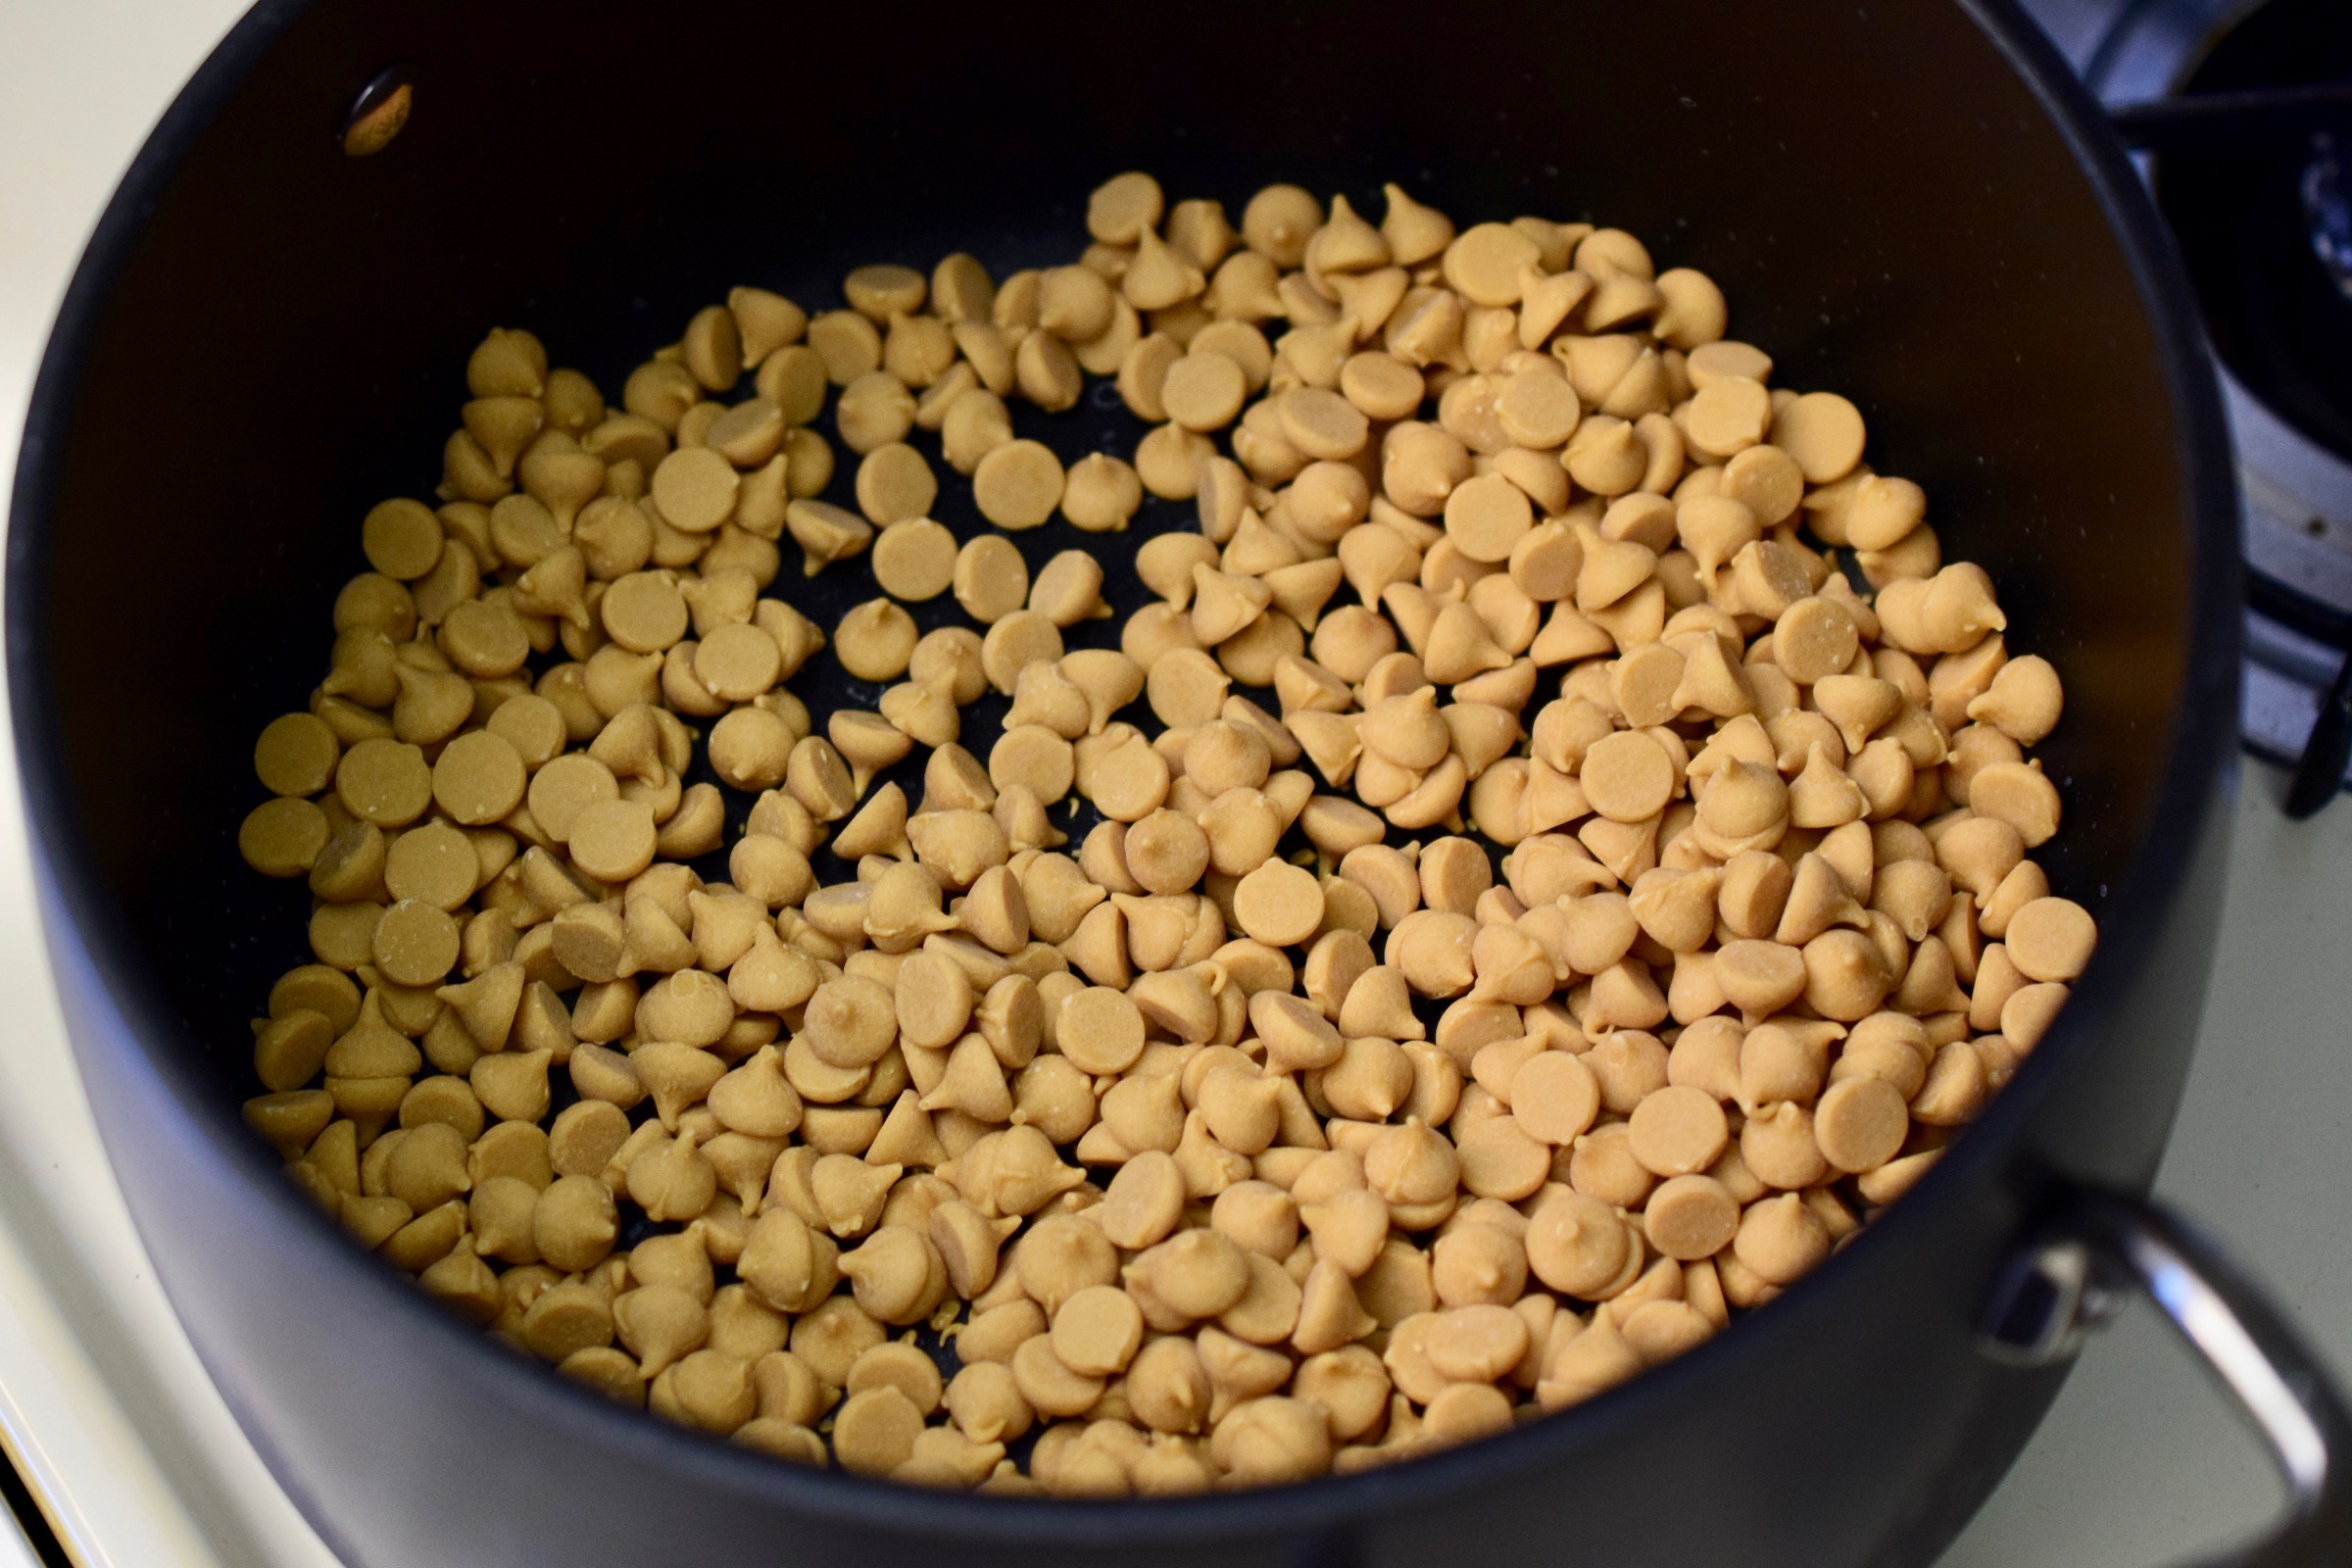
Add the butterscotch chips and peanut butter to a saucepan. Heat over medium-low heat until completely melted. It smells so yummy! I like to have a little taste just in case…. for quality purposes 🙂


Pour the mixture over the corn flakes and stir to completely coat. It will look like you don’t have enough liquid to cover all the corn flakes but don’t fear! Just keep stirring and all the corn flakes will eventually be coated.

Use a spoon to drop piles of the mixture onto each cookie sheet to create clusters. Use your hands to help form the clusters if needed. Then top with Christmas sprinkles.

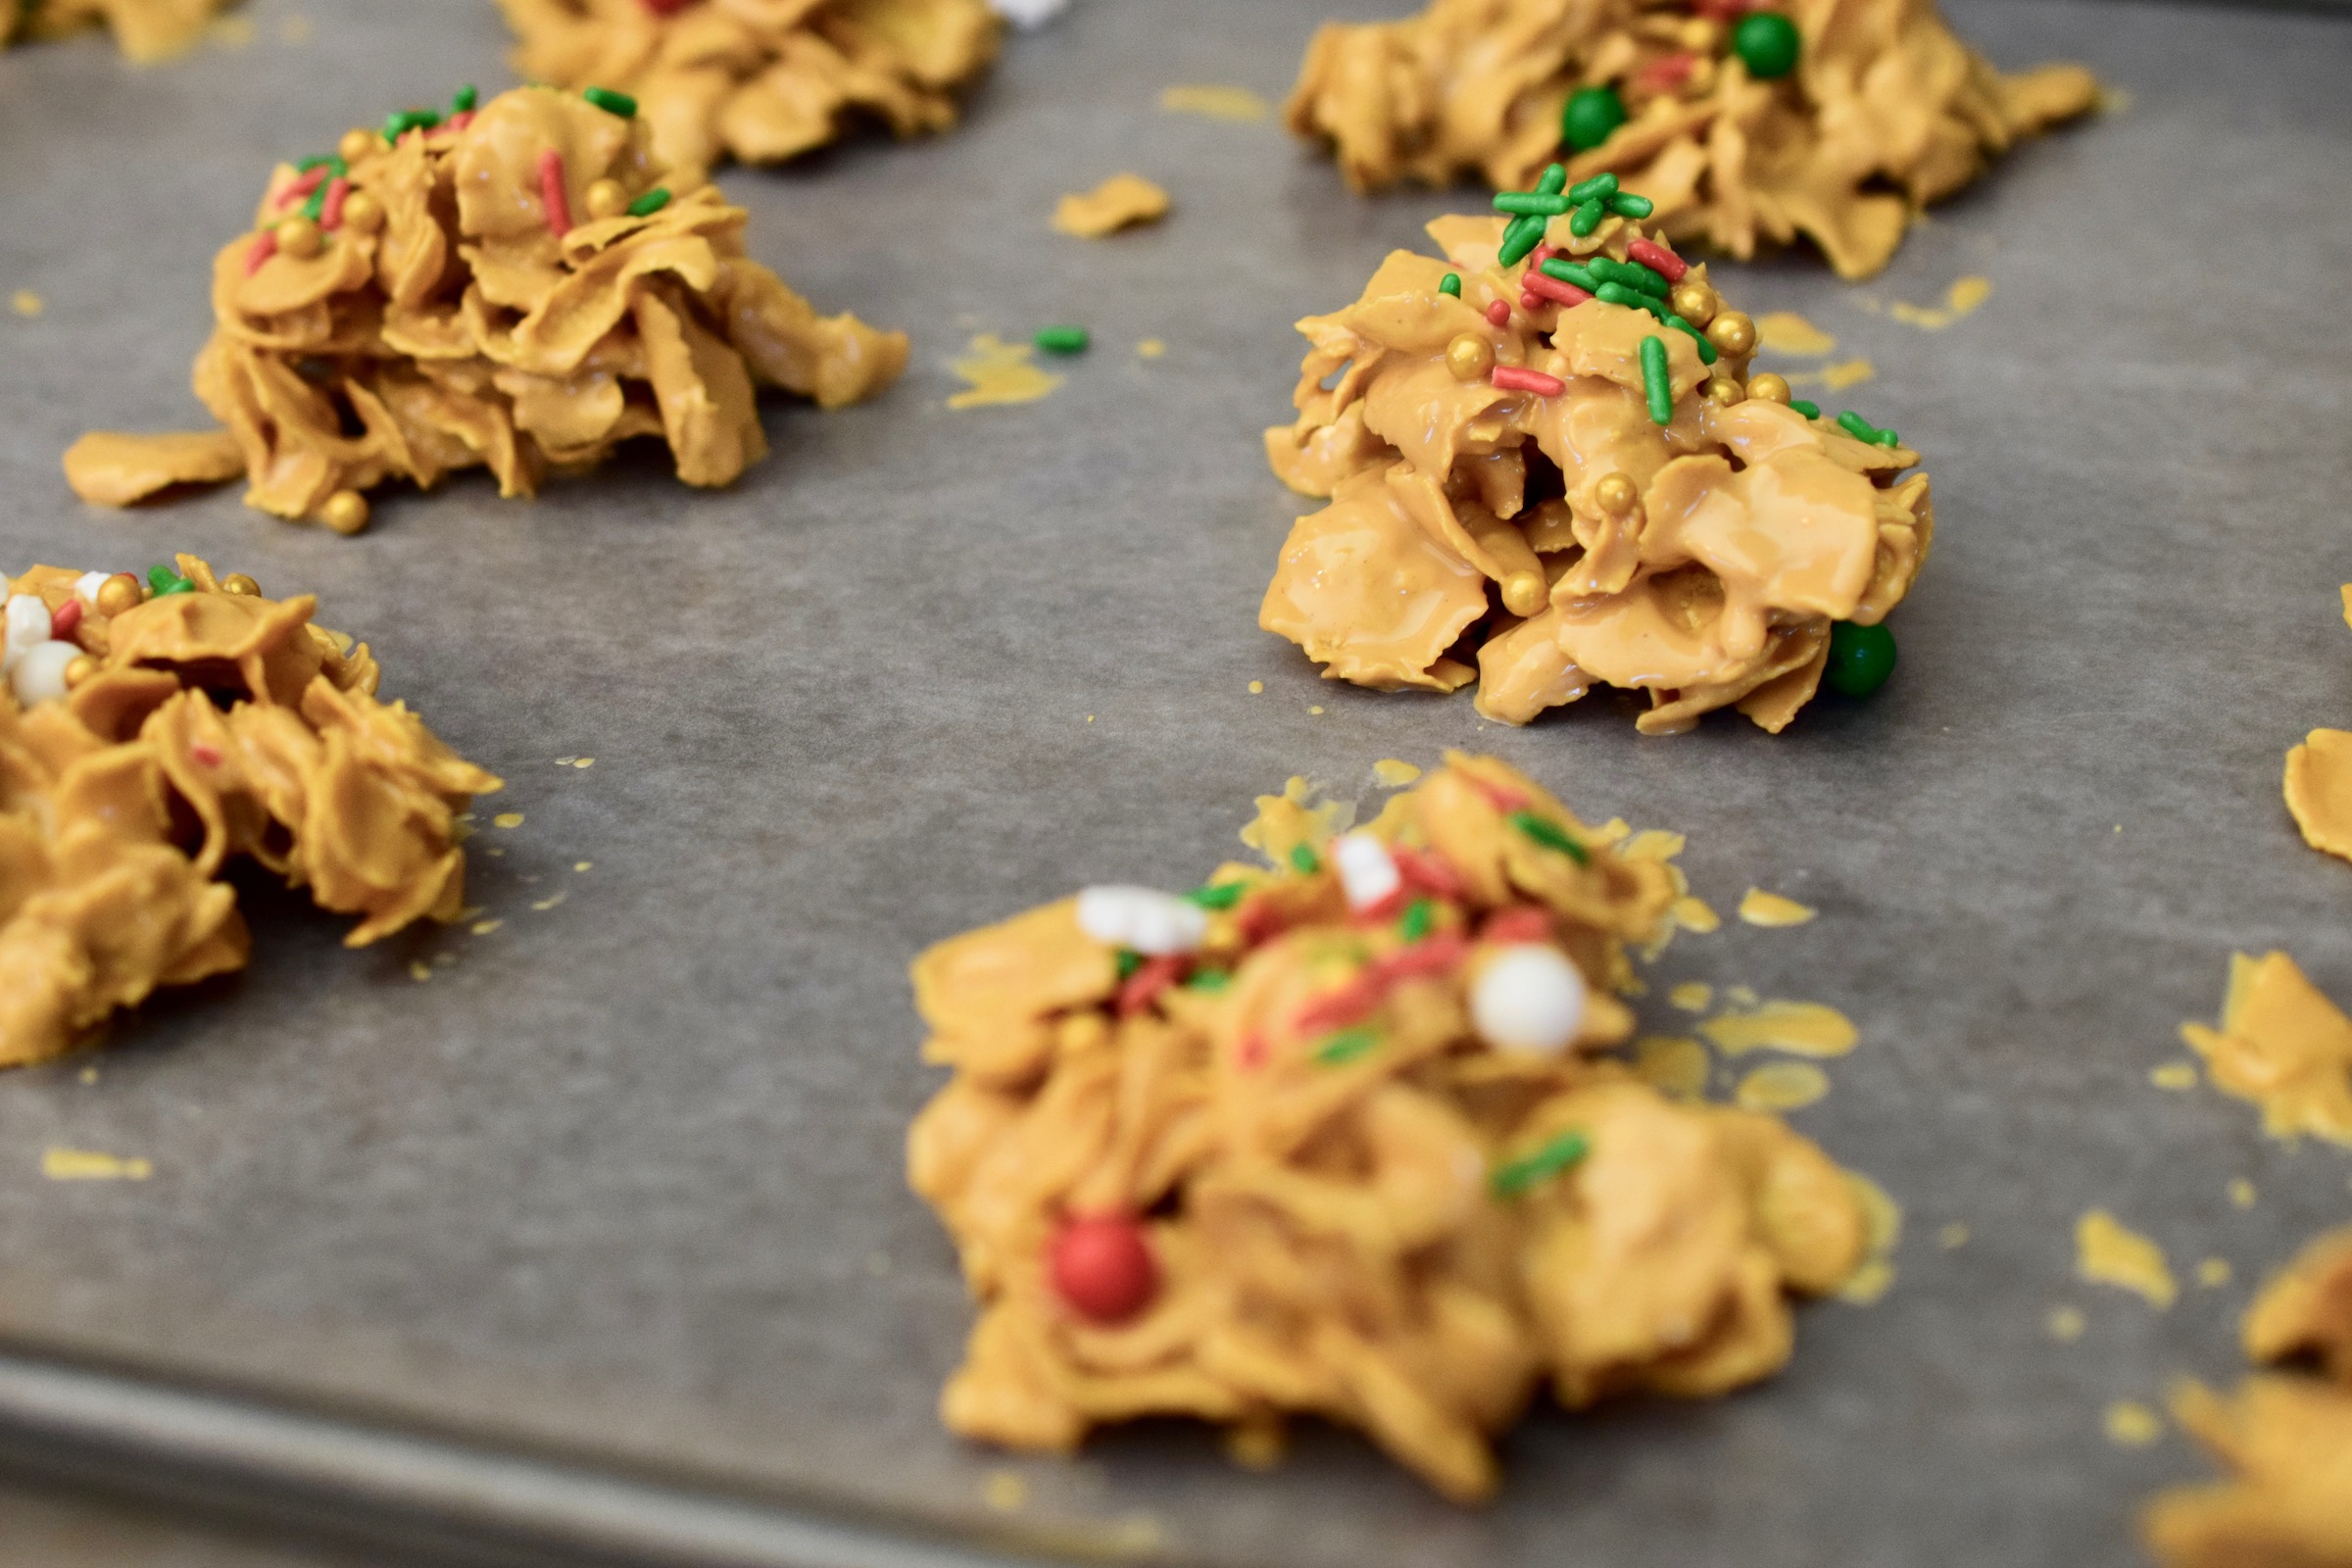
Refrigerate for about 10 minutes or until the clusters are firm. Serve and enjoy! Store in an airtight container in the fridge.

The recipe can be found here.
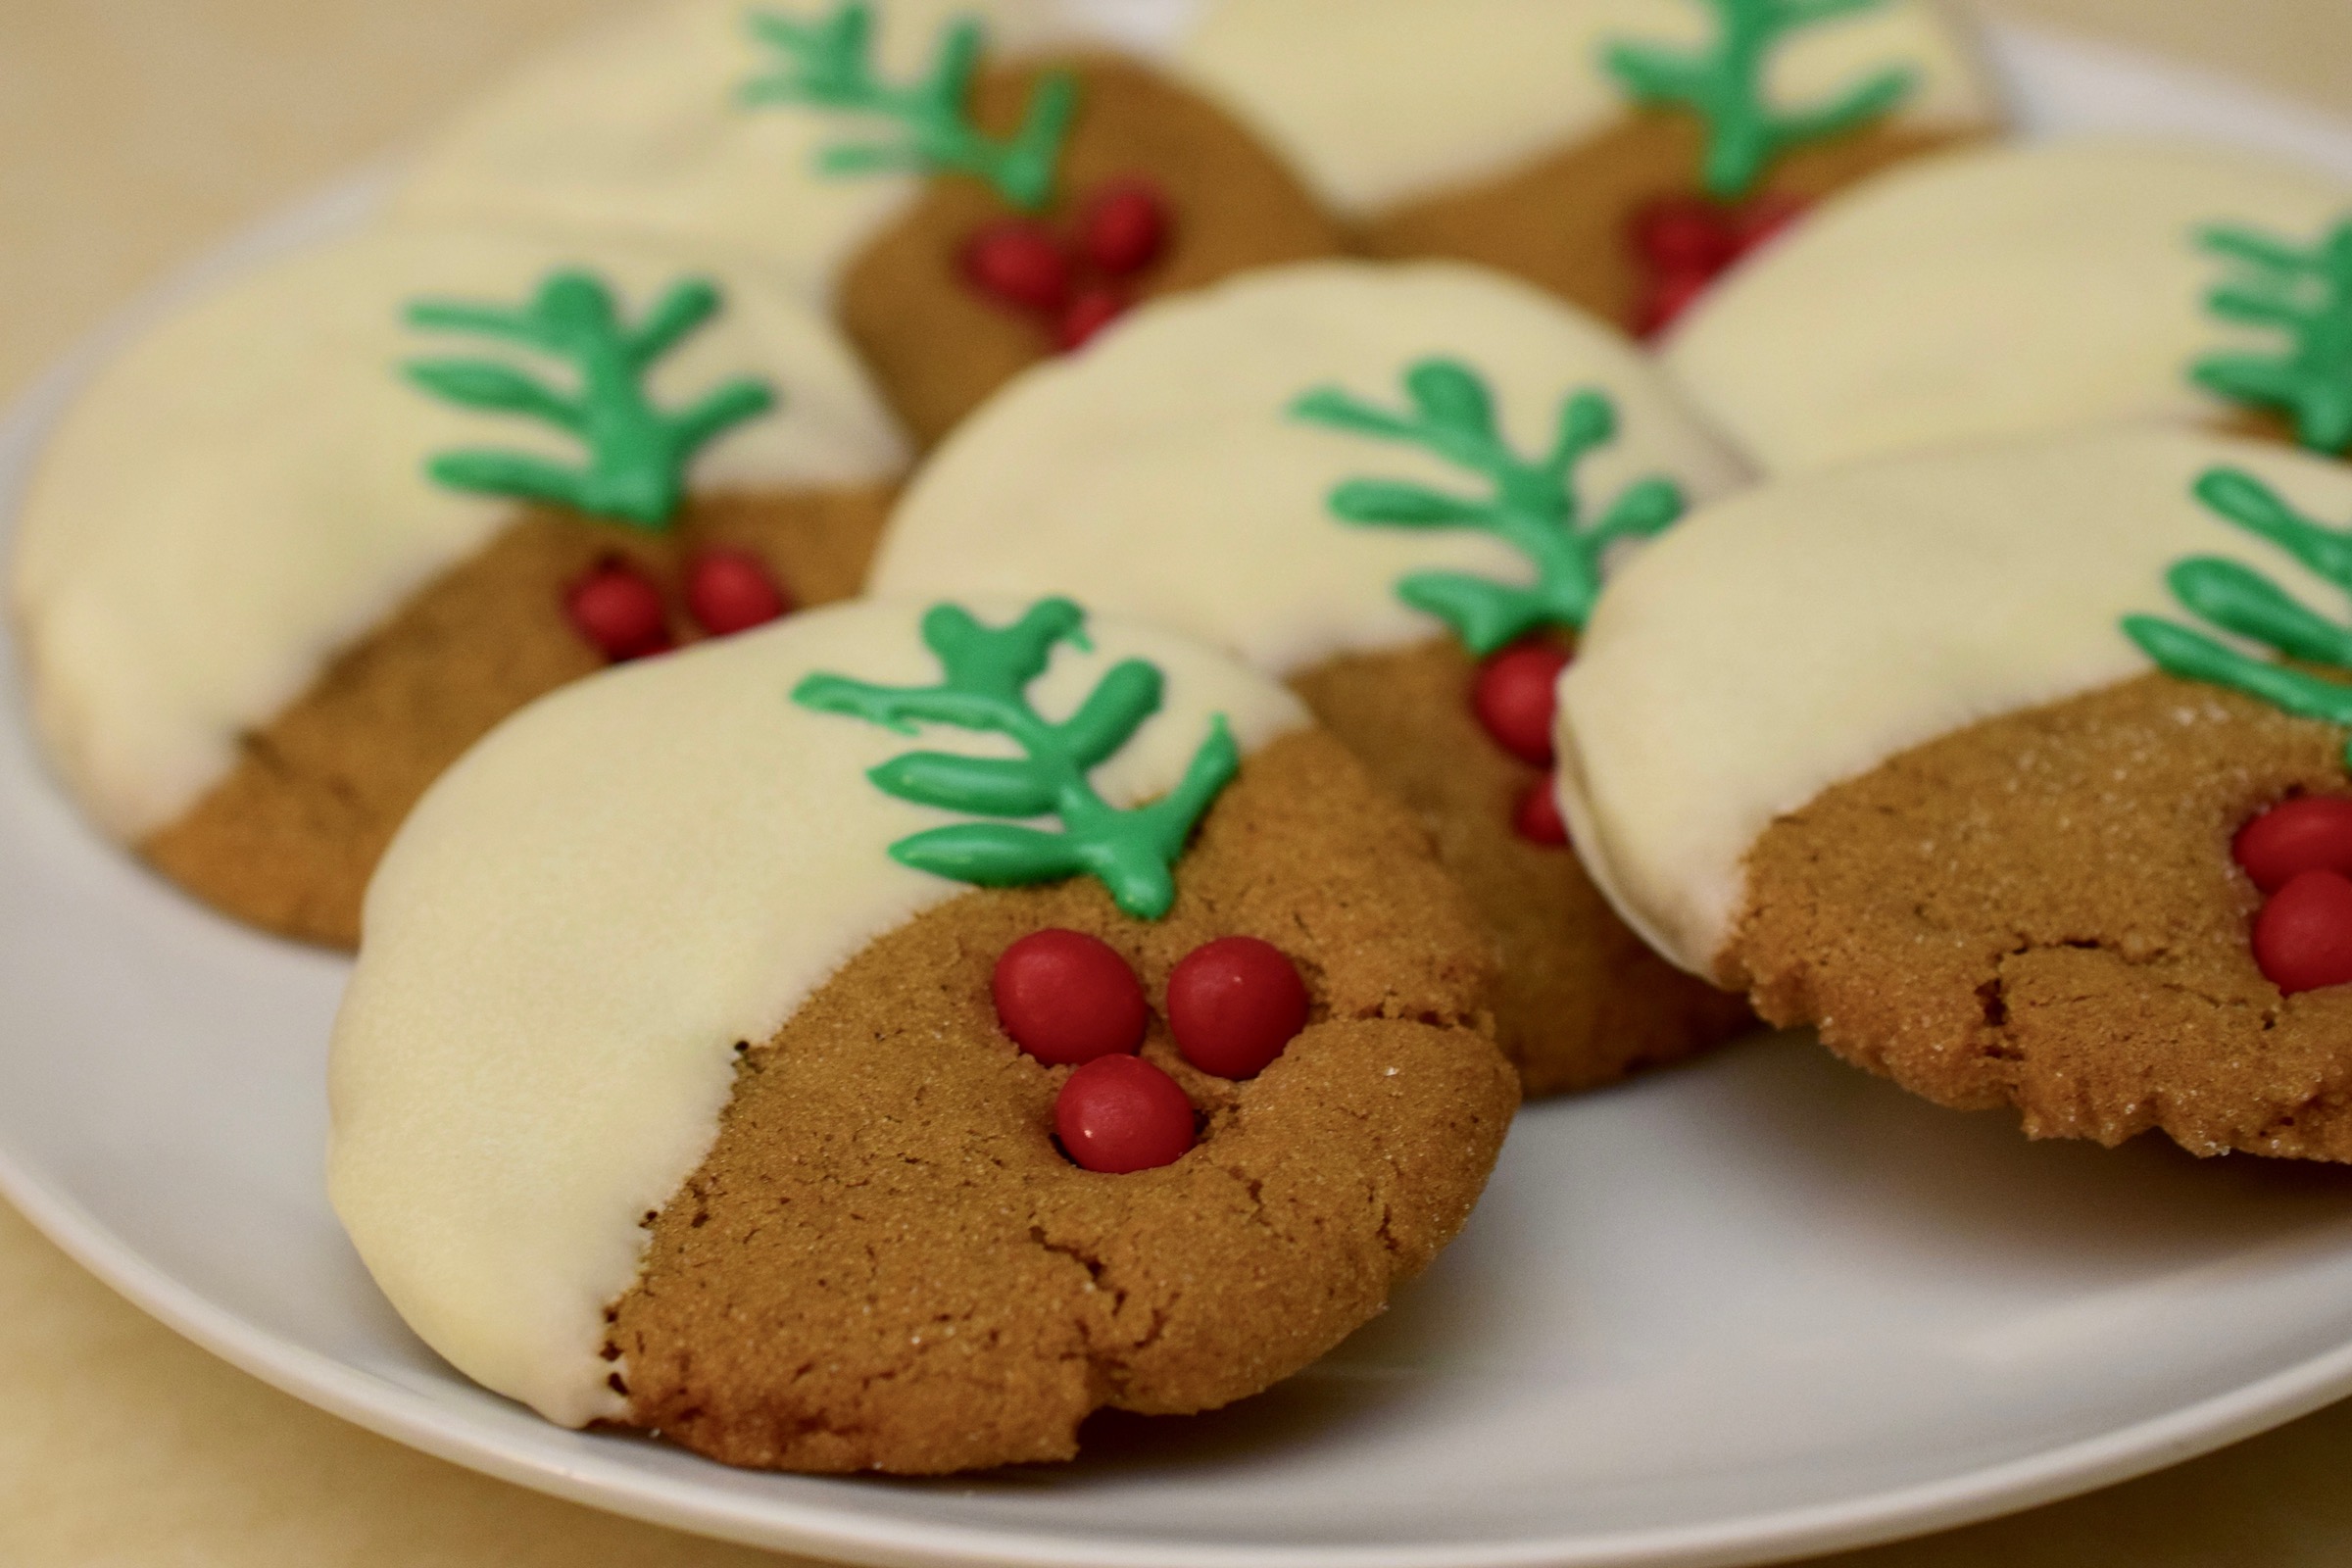
Holly Ginger Cookies are super soft and chewy, and very festive. They have a melt-in-your-mouth texture and the perfect amount of spice. You can make these cookies plain by leaving off the frosting if you want a soft ginger cookie, but the white chocolate adds some nice texture and the sweet and spicy flavors complement each other very nicely.

The recipe can be found here.
Use a large mixing bowl to whisk together the flour, baking soda, salt, ginger, cinnamon, cloves, and nutmeg. Set aside.


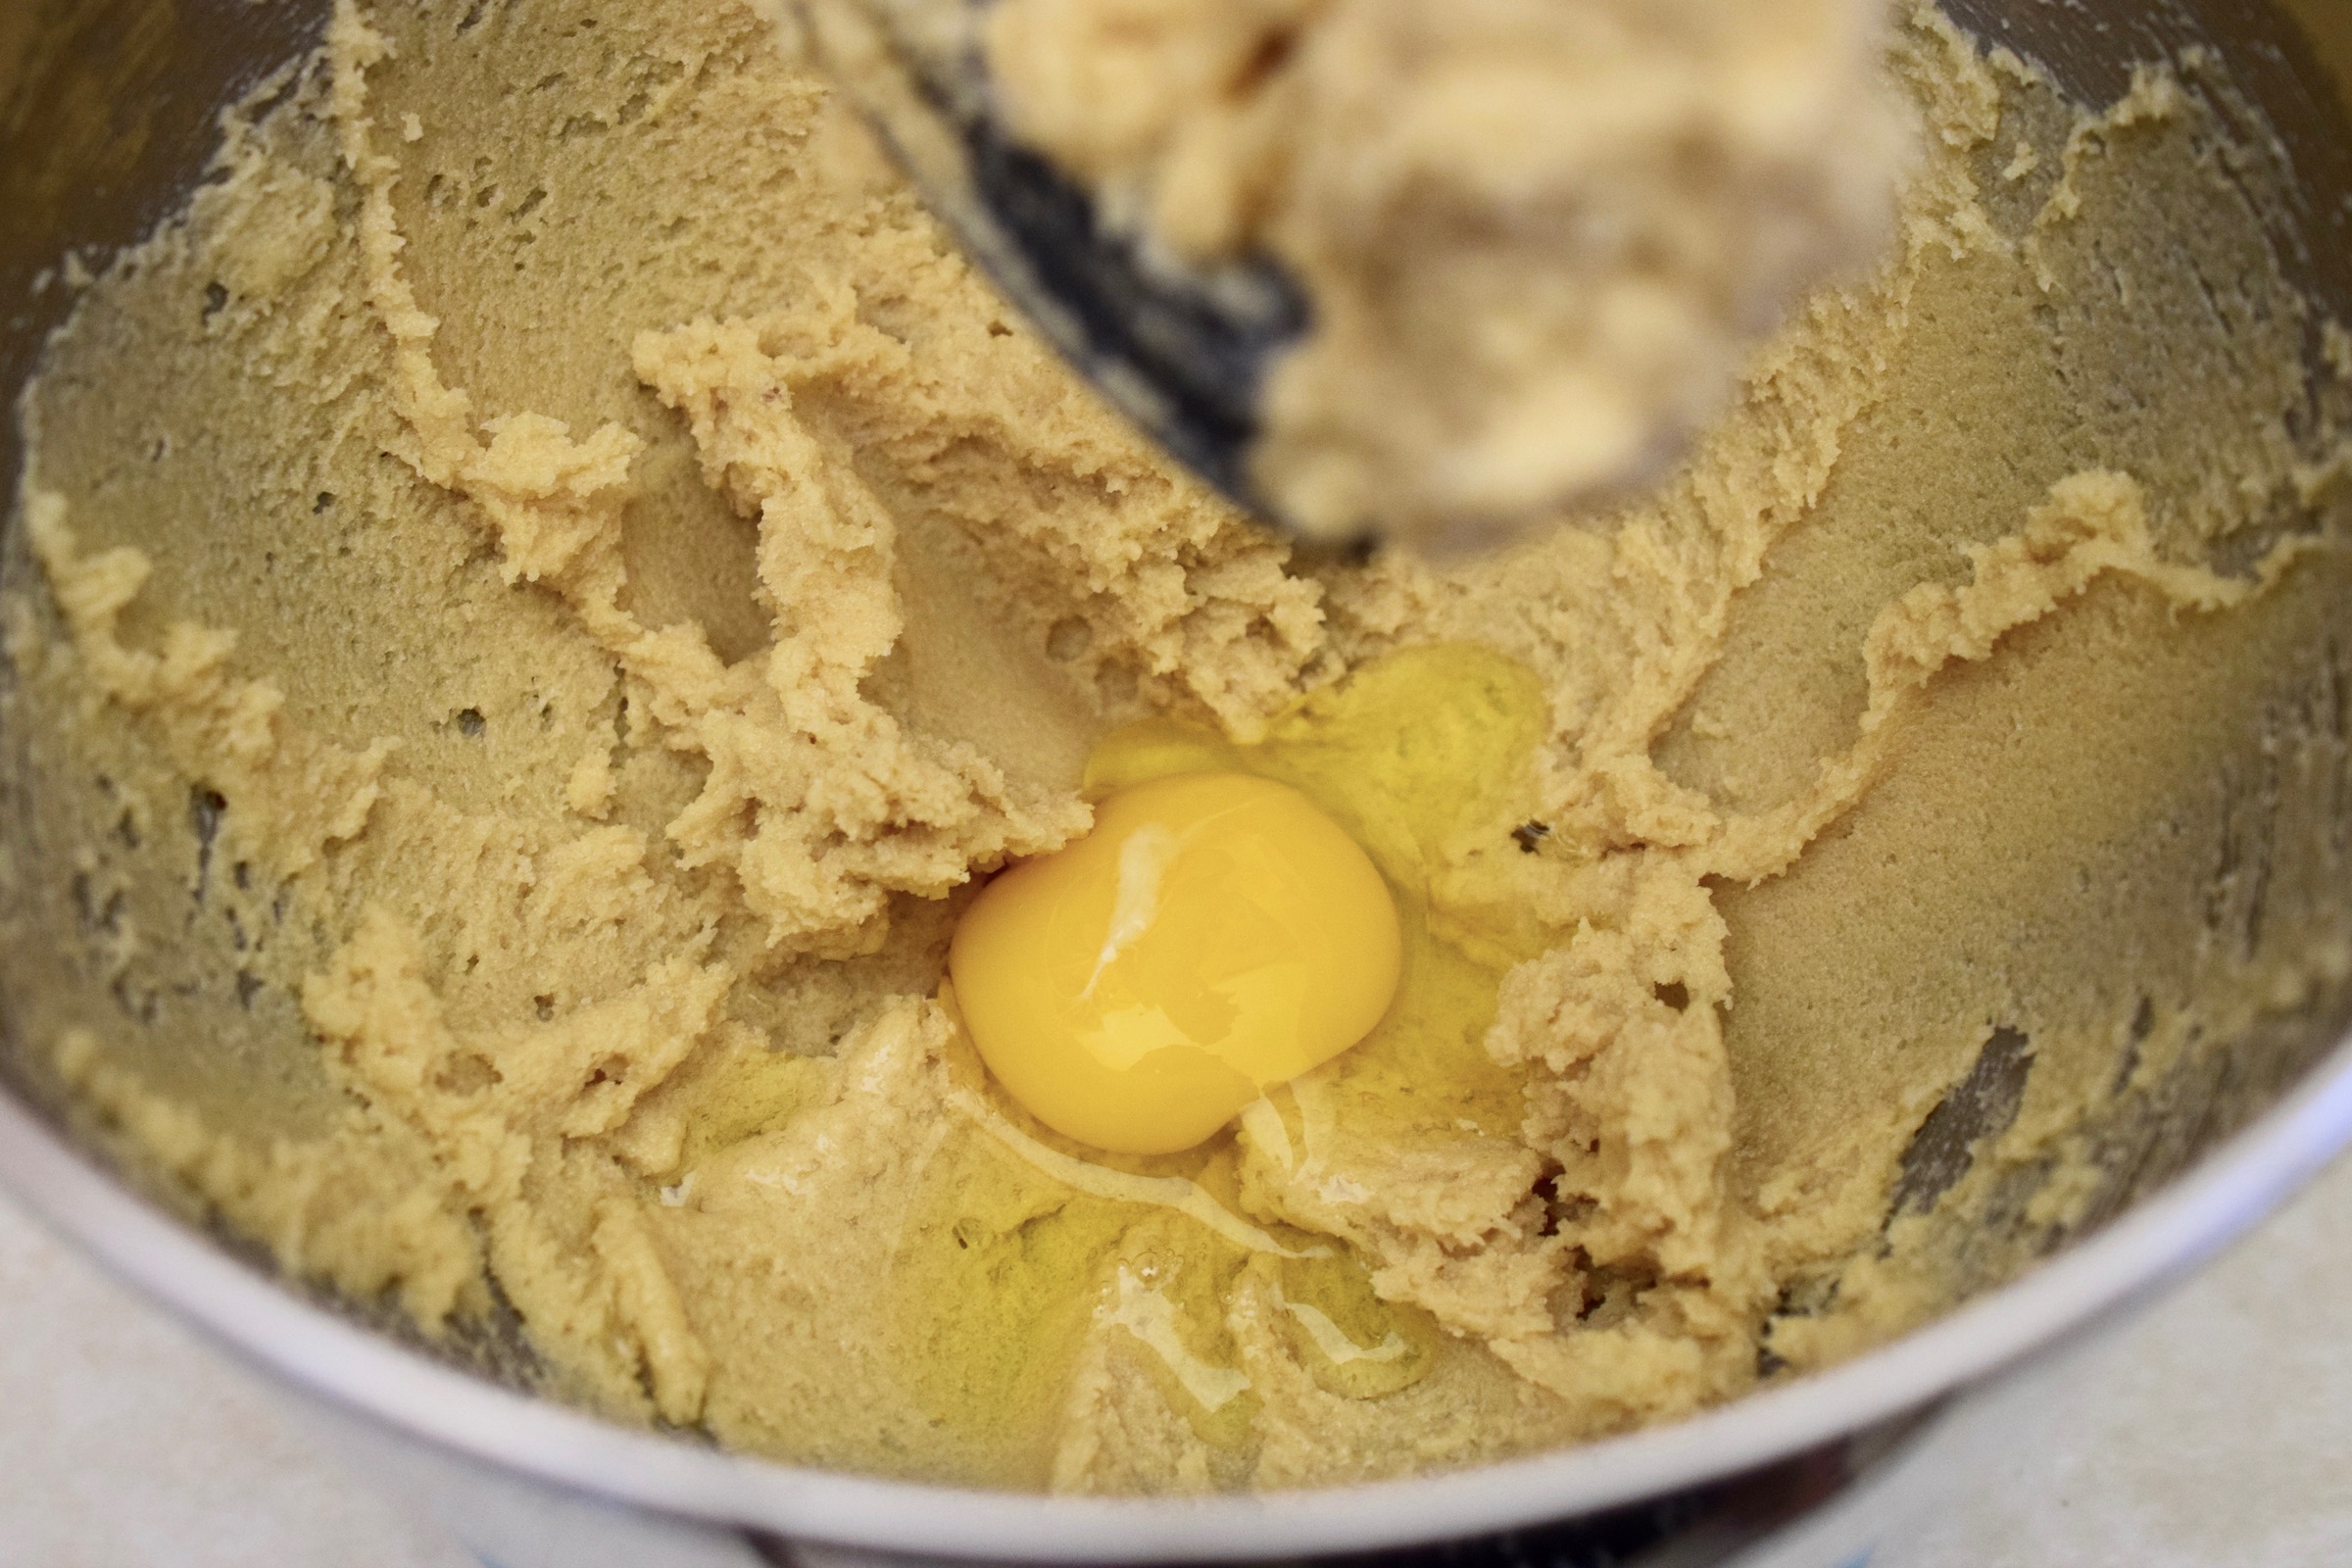
In the bowl of a stand mixer, add the butter, sugar, and brown sugar. Use the paddle attachment to mix well. Add the egg and mix again. Then add the molasses and vanilla and mix until fully incorporated.


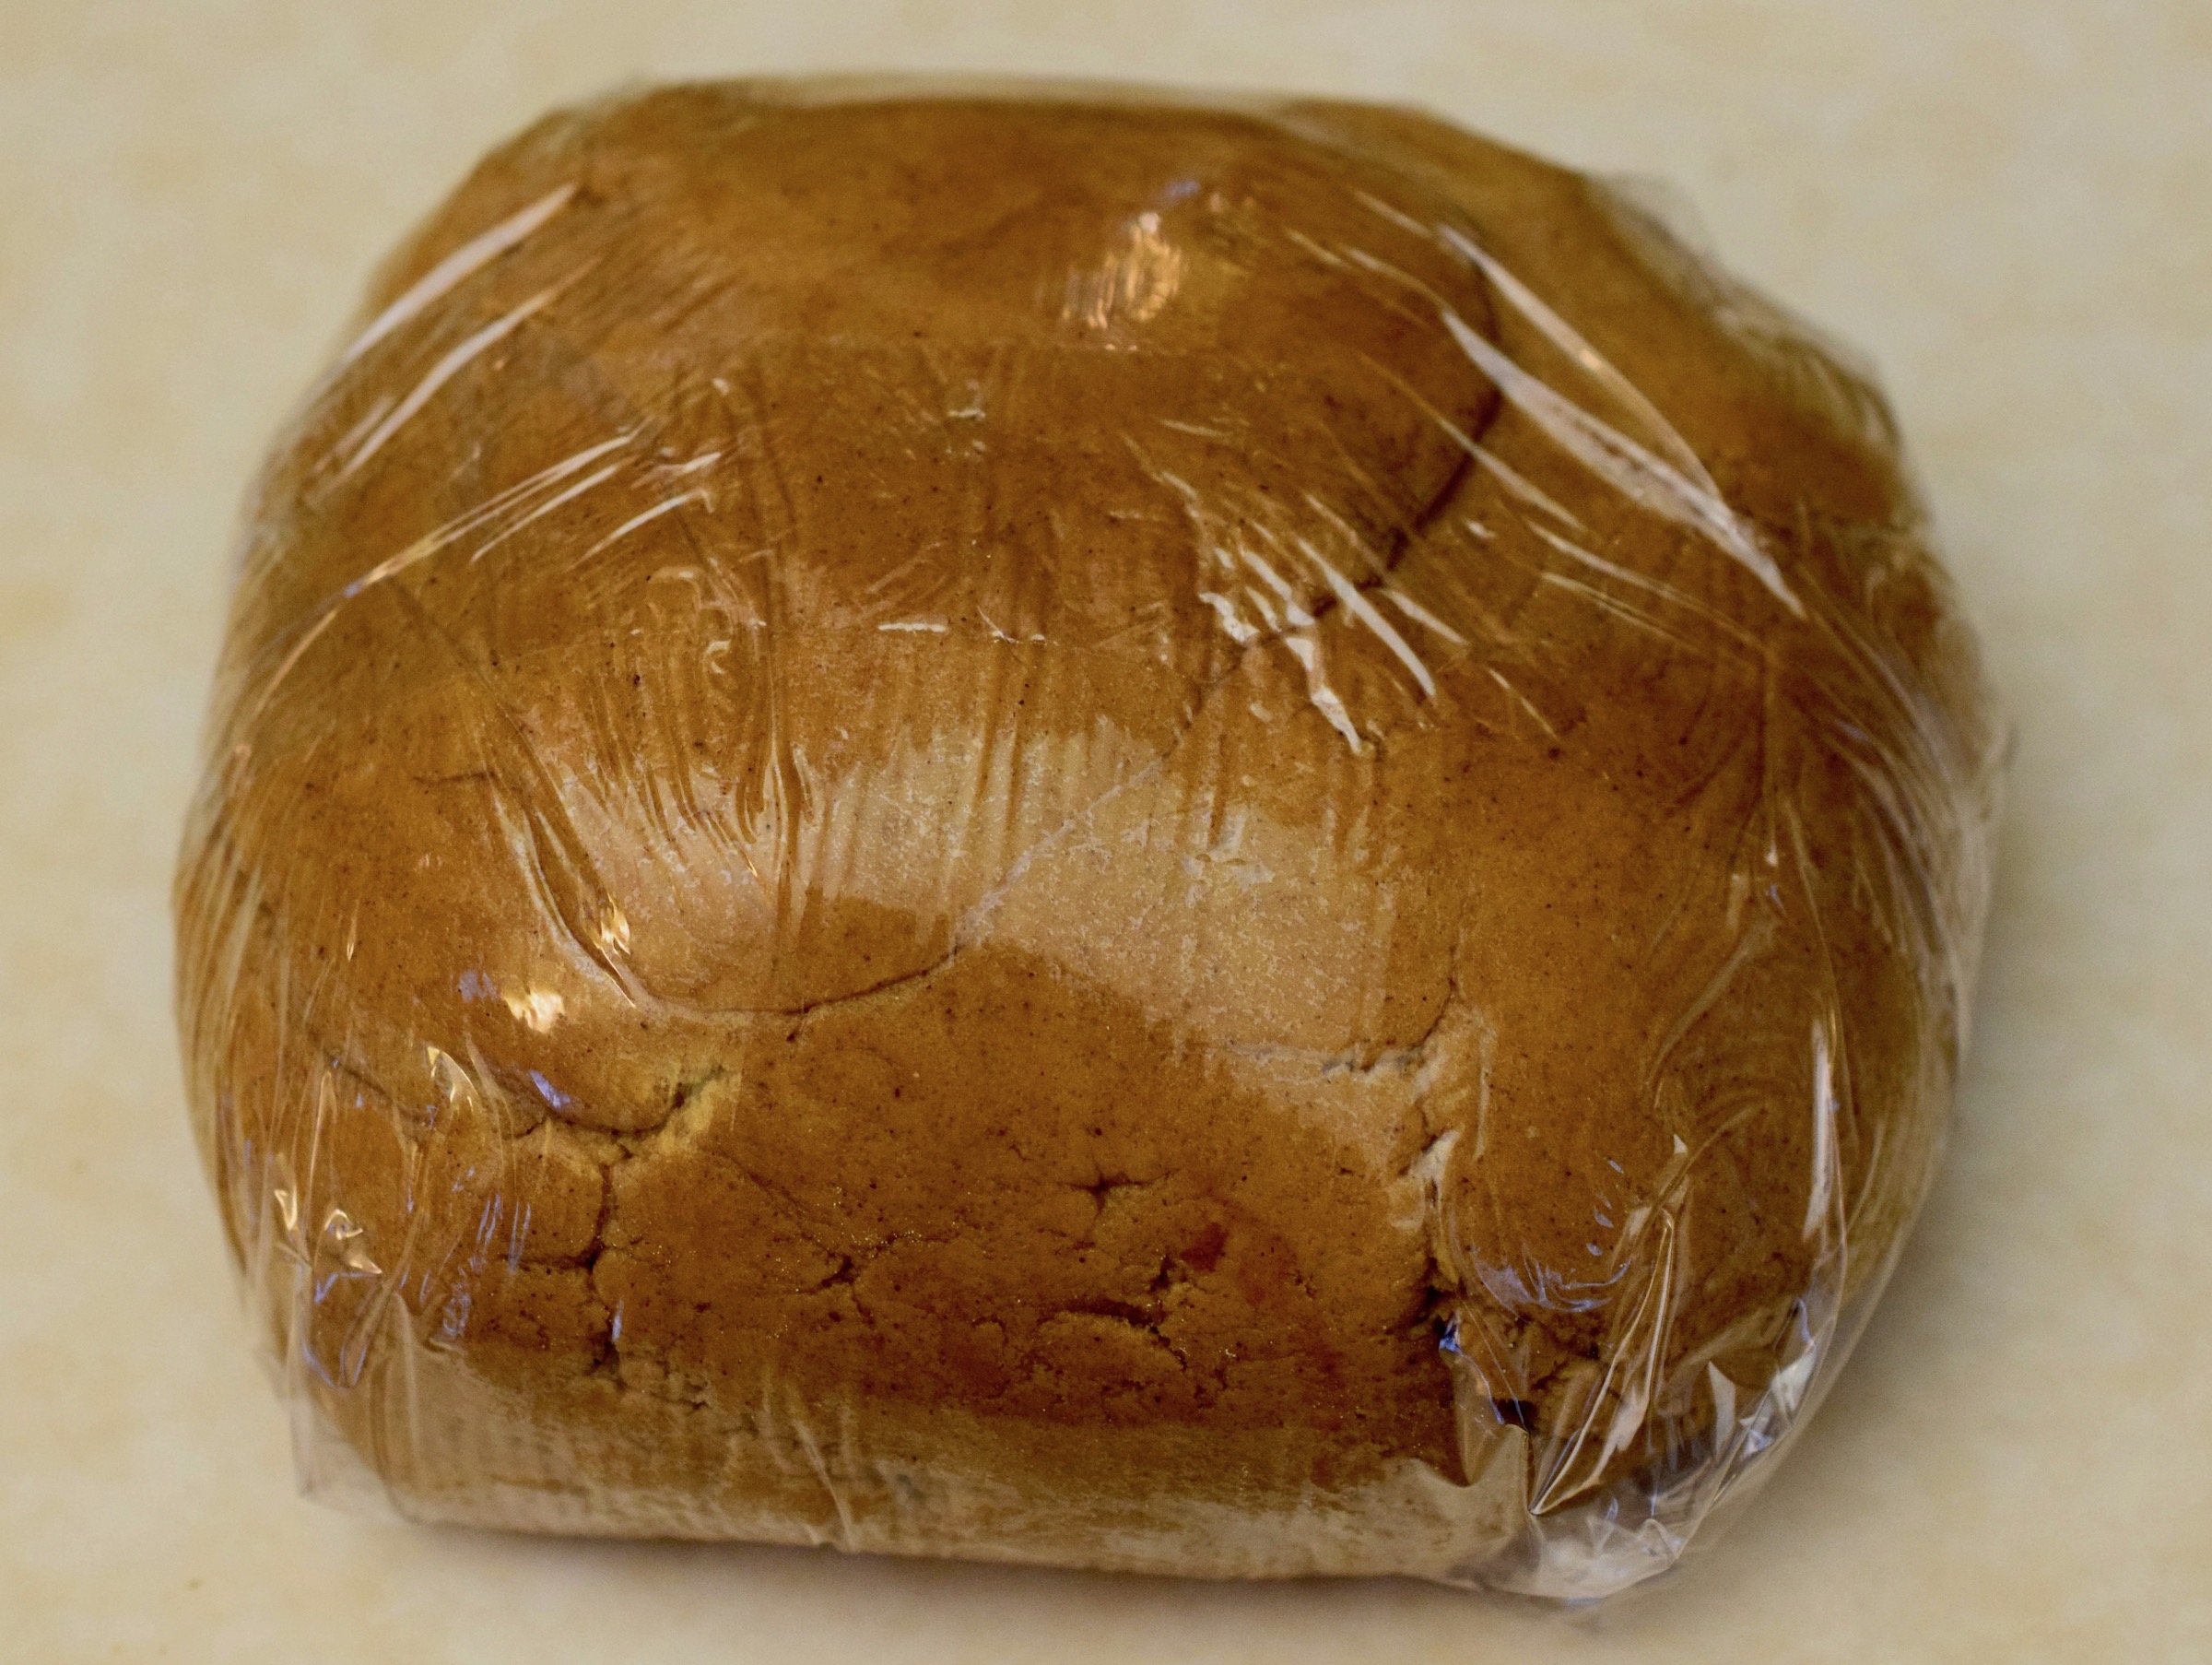
With the mixer on low speed, slowly pour in the dry ingredients. Mix until combined. Remove the dough from the bowl, form into a ball, and tightly cover with plastic wrap. Refrigerate for 30 minutes to allow the dough to chill.


Once the dough has chilled, preheat the oven to 350 degrees and line 2-3 baking sheets with parchment paper.
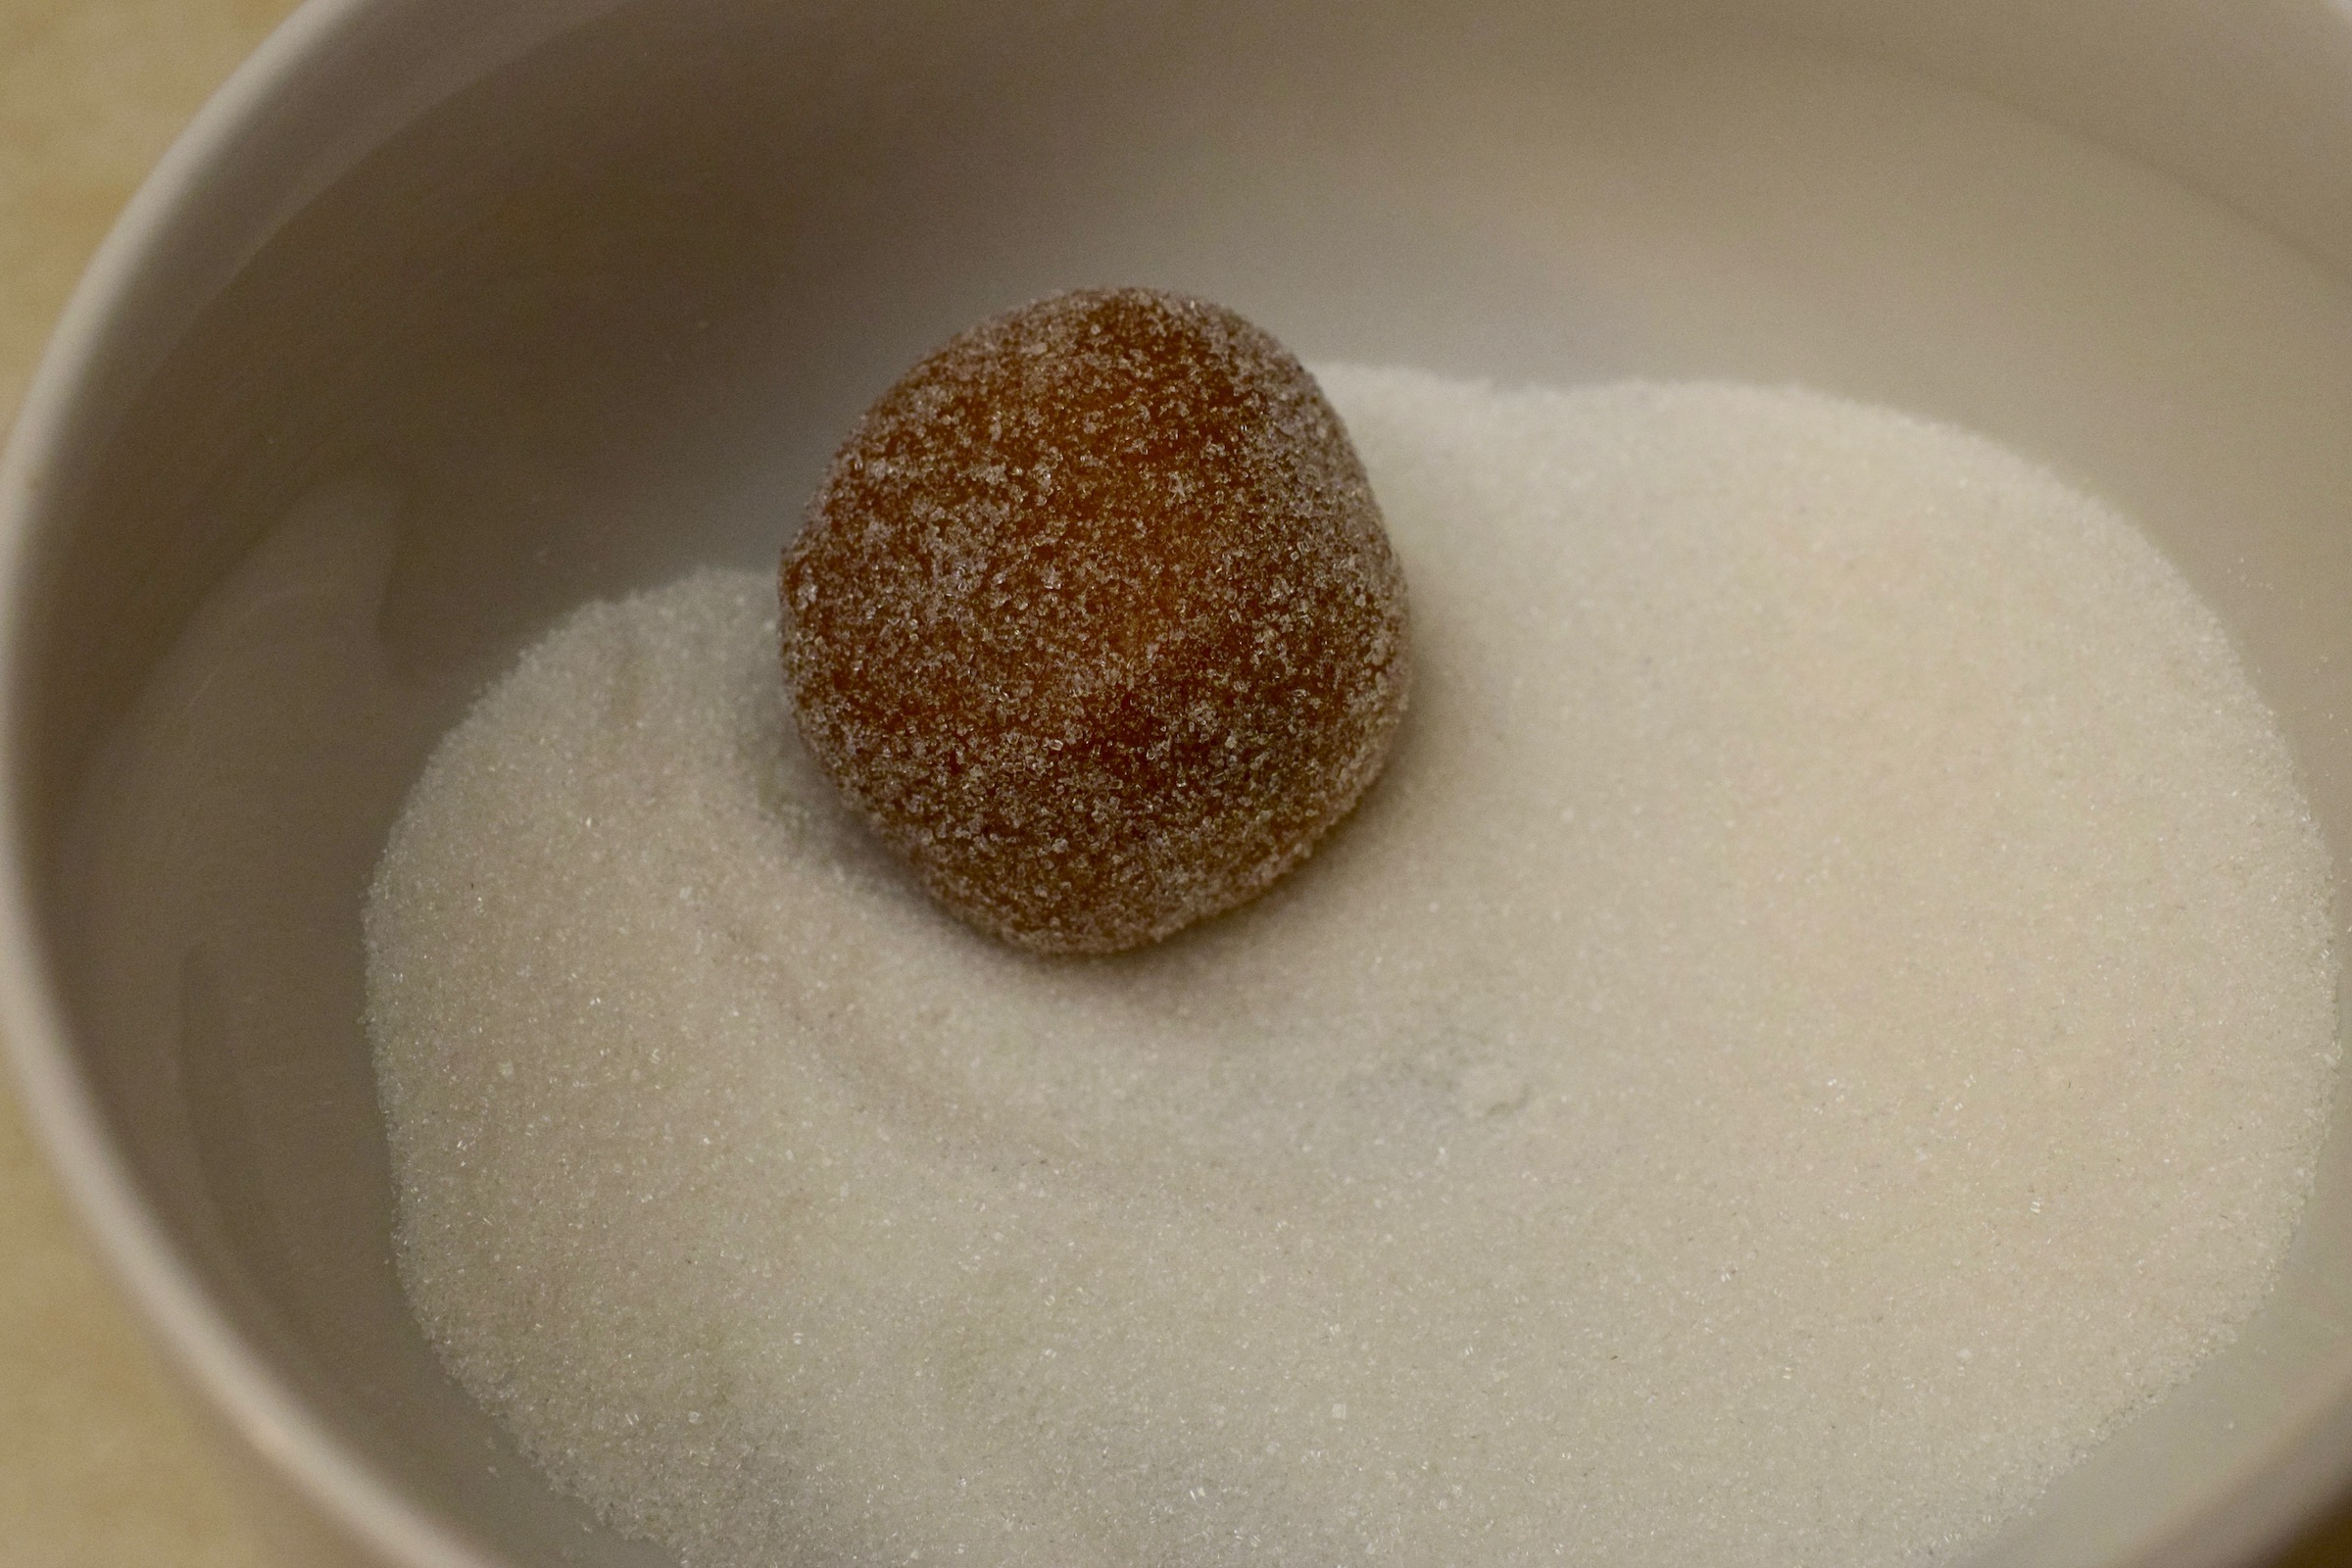
Scoop about 1 ½ Tbsp of dough at a time and form into a ball. Set each ball on the counter until all the dough is used. I like to set the dough balls on wax paper, so the counter doesn’t get sticky, but placing them directly on the counter is fine too!

Roll each ball in sugar and set on a prepared baking sheet, about 2 inches apart. Gently press down to slightly flatten the tops. You want each cookie to be approximately the same thickness as this will help the dough bake evenly.


Bake for 8-9 minutes. Remove from the oven and press 3 cinnamon candies into each cookie. The warm cookie will help the cinnamon candies stick and not fall out once cooled. Let the cookies cool for a few minutes then remove to a cooling rack to finish cooling.


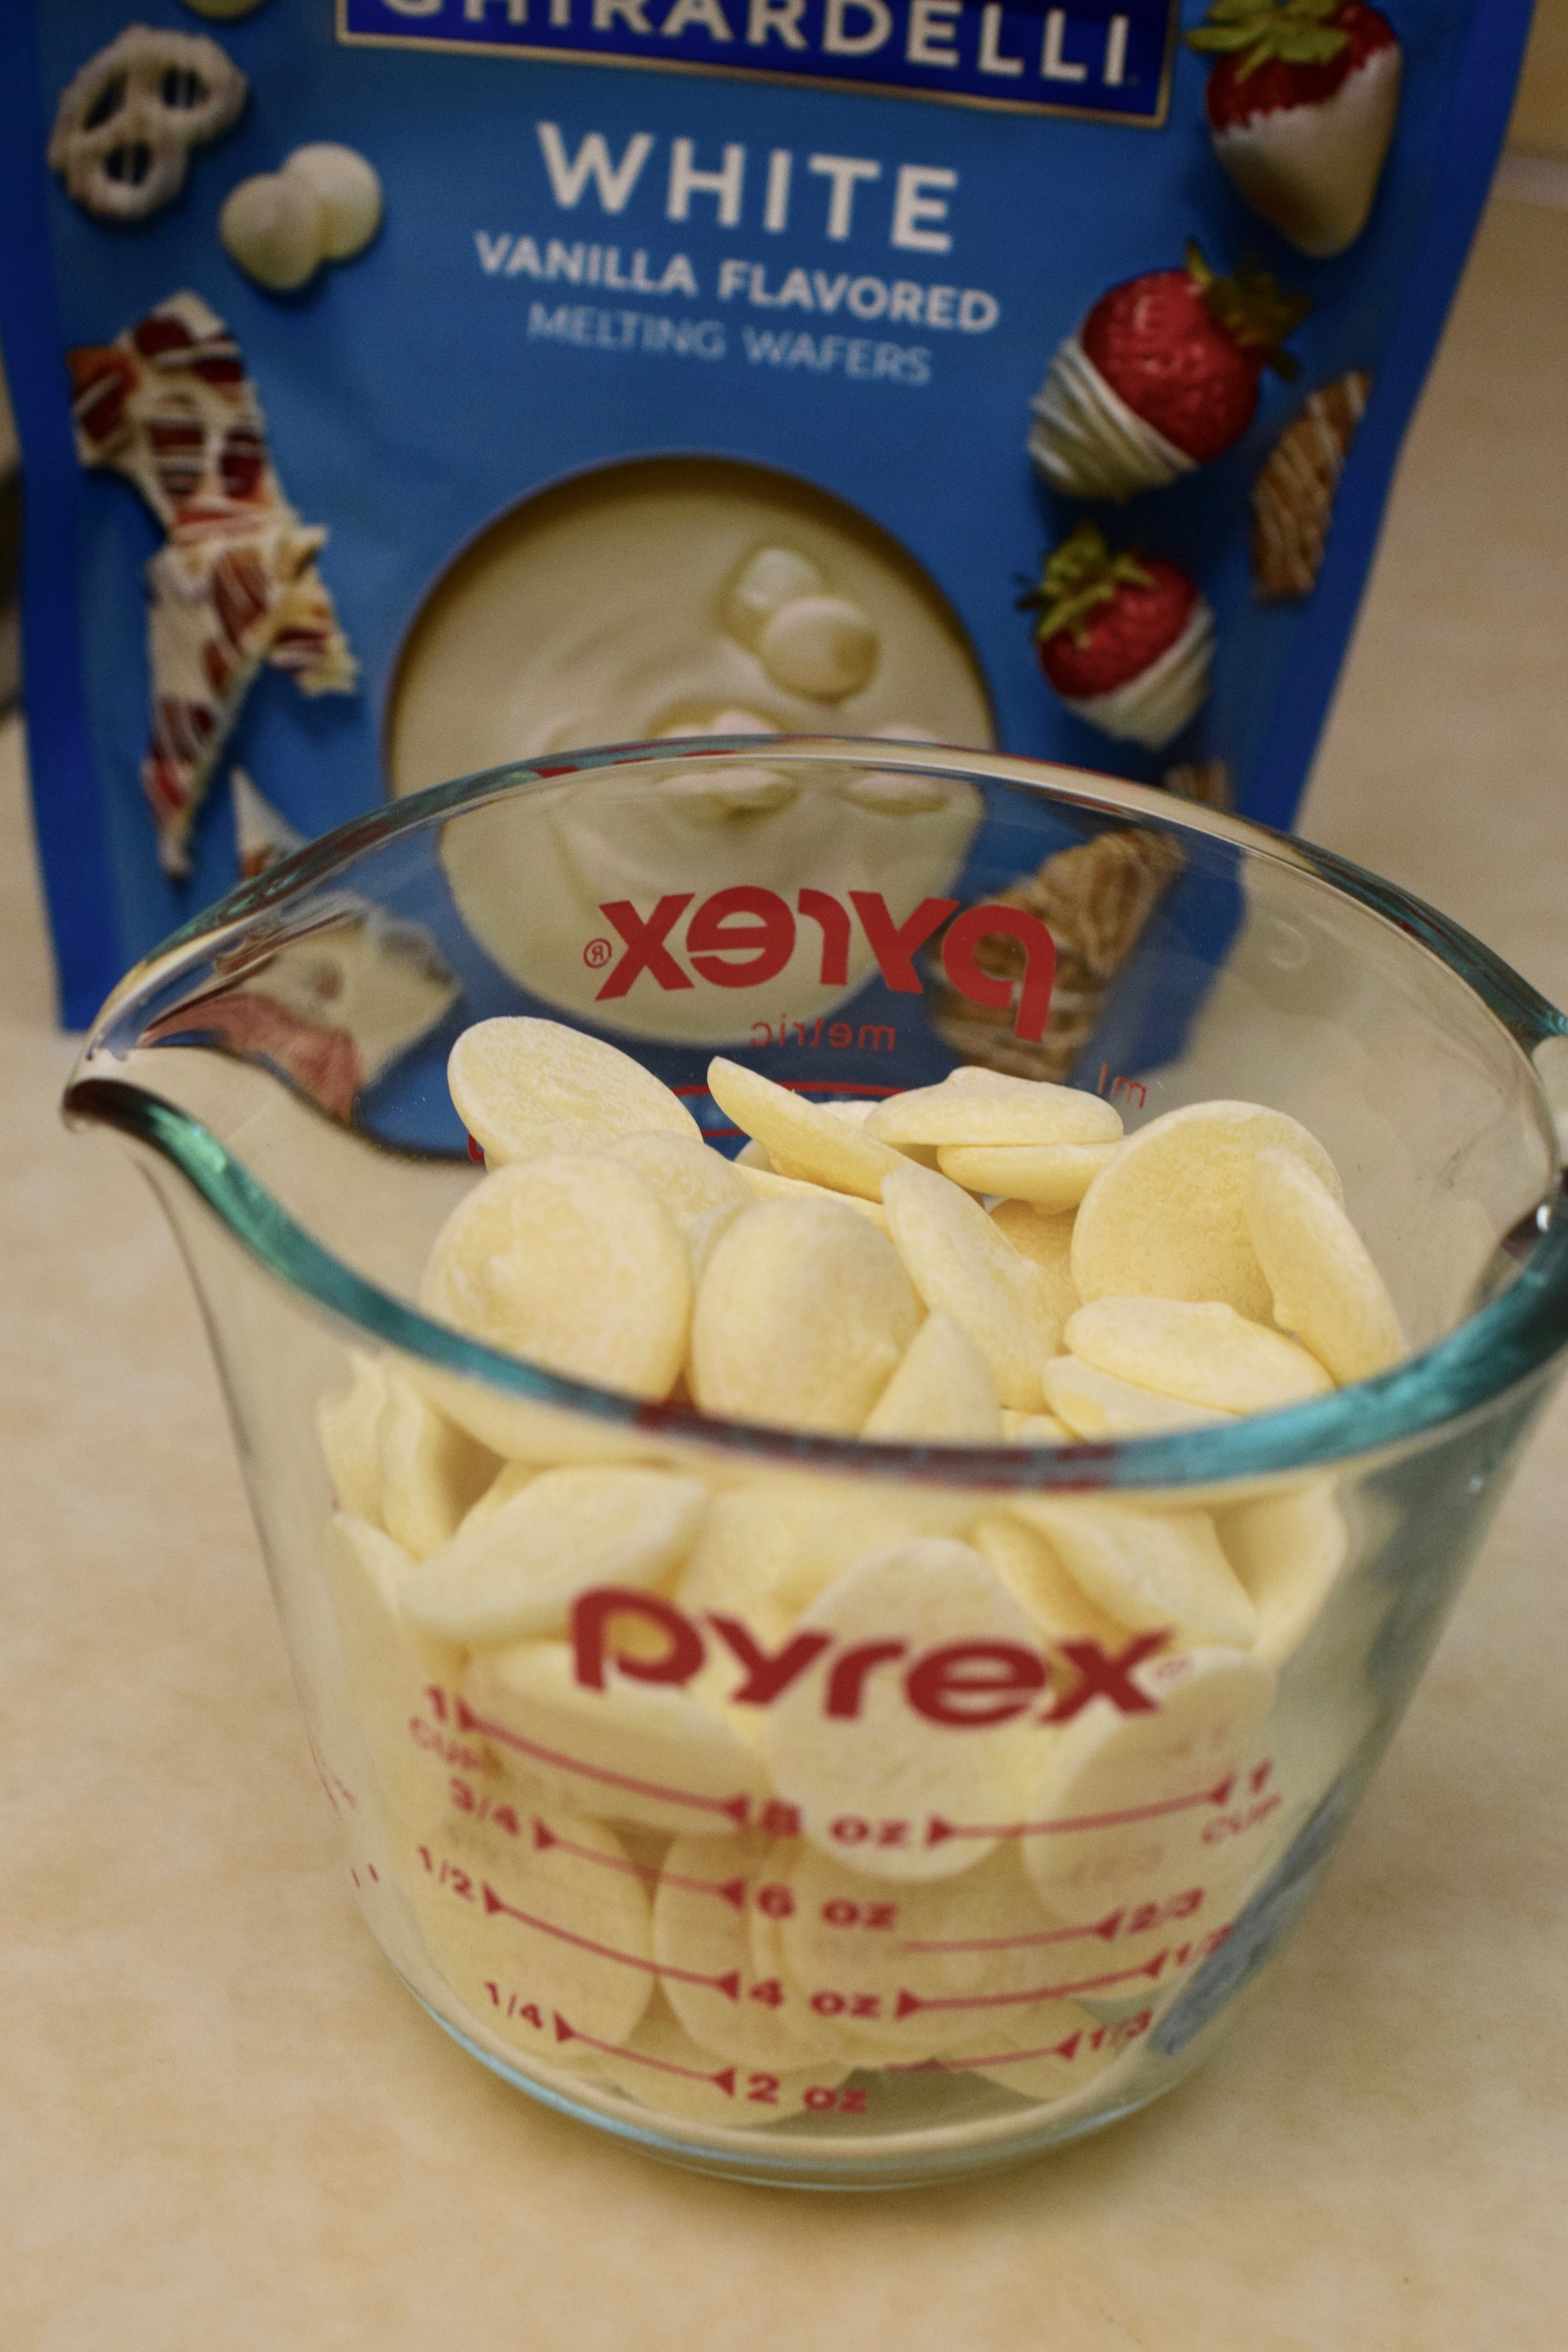
Once the cookies have cooled, add the vanilla wafers to a microwave safe dish. Microwave for 30 seconds, then stir, and continue to microwave in 15 second increments until melted. Do not overheat or the chocolate will burn!

Dip each cookie halfway into the vanilla and place on the baking sheet to harden. It doesn’t take long for the chocolate to cool and set!


Use green cookie icing to draw a leaf shape onto each cookie to resemble holly. Let the frosting harden. You can also place the cookies in the fridge to help speed along the hardening process.

Serve and enjoy! Store in an airtight container.
The recipe can be found here.
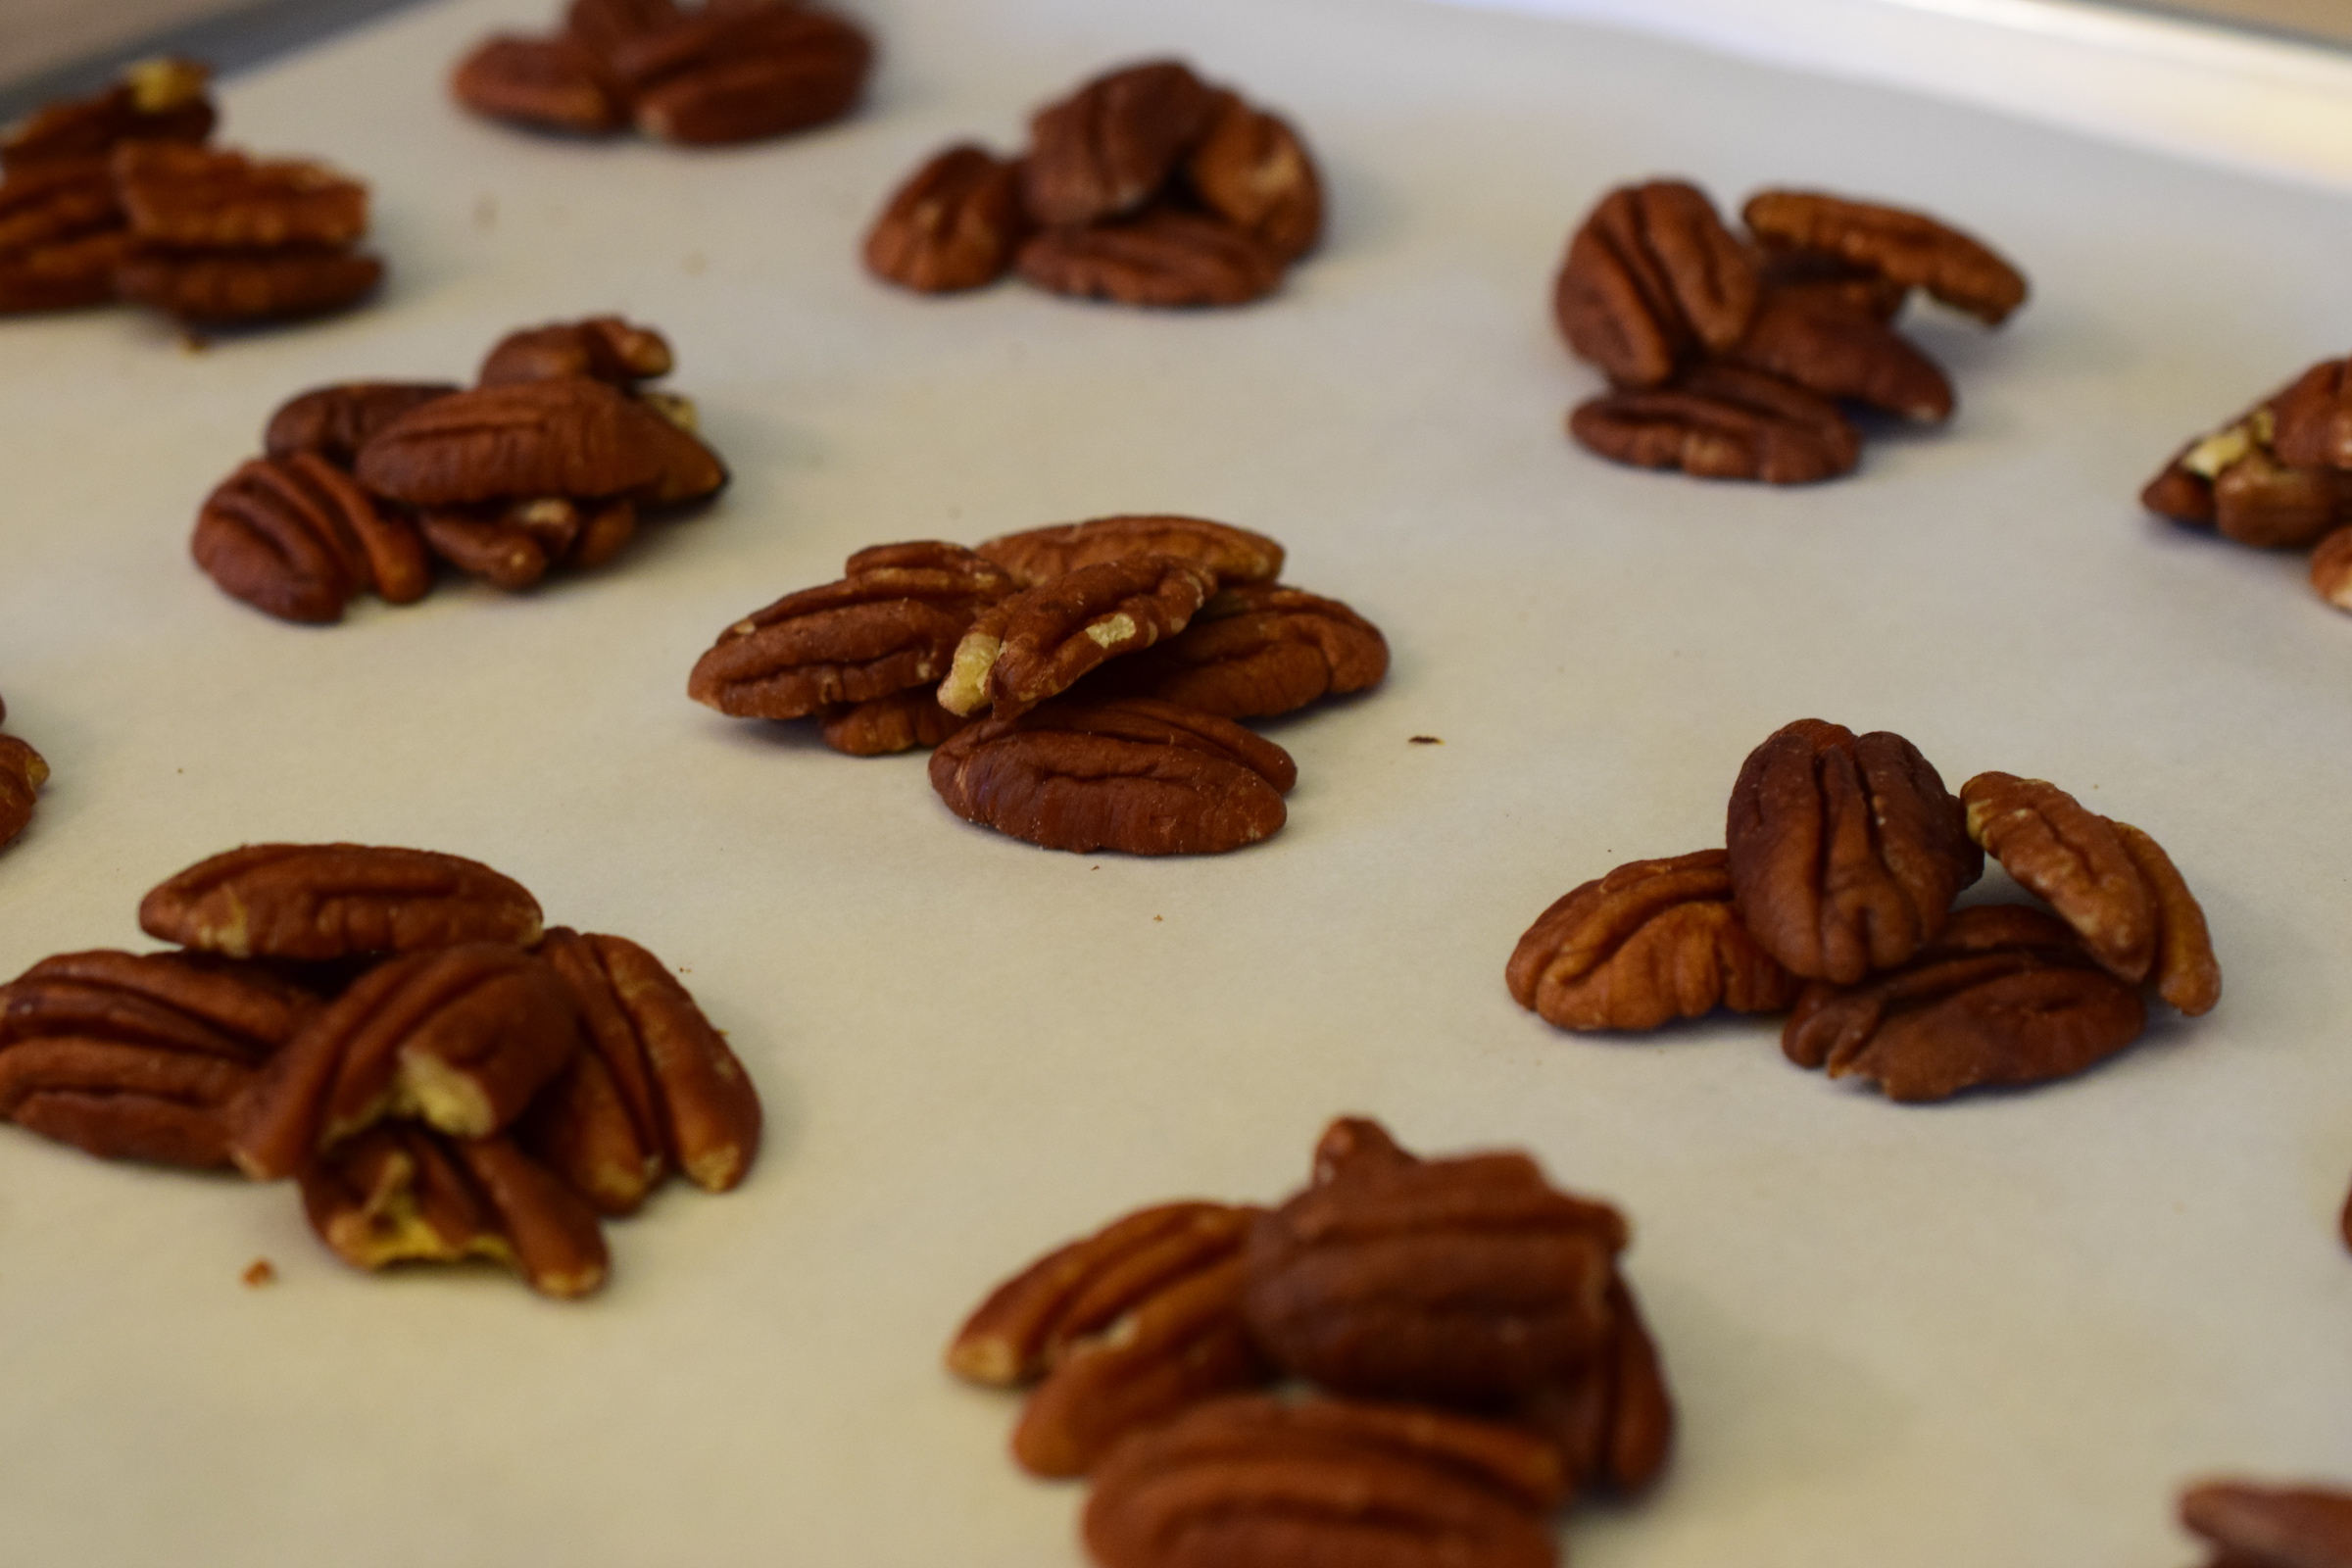
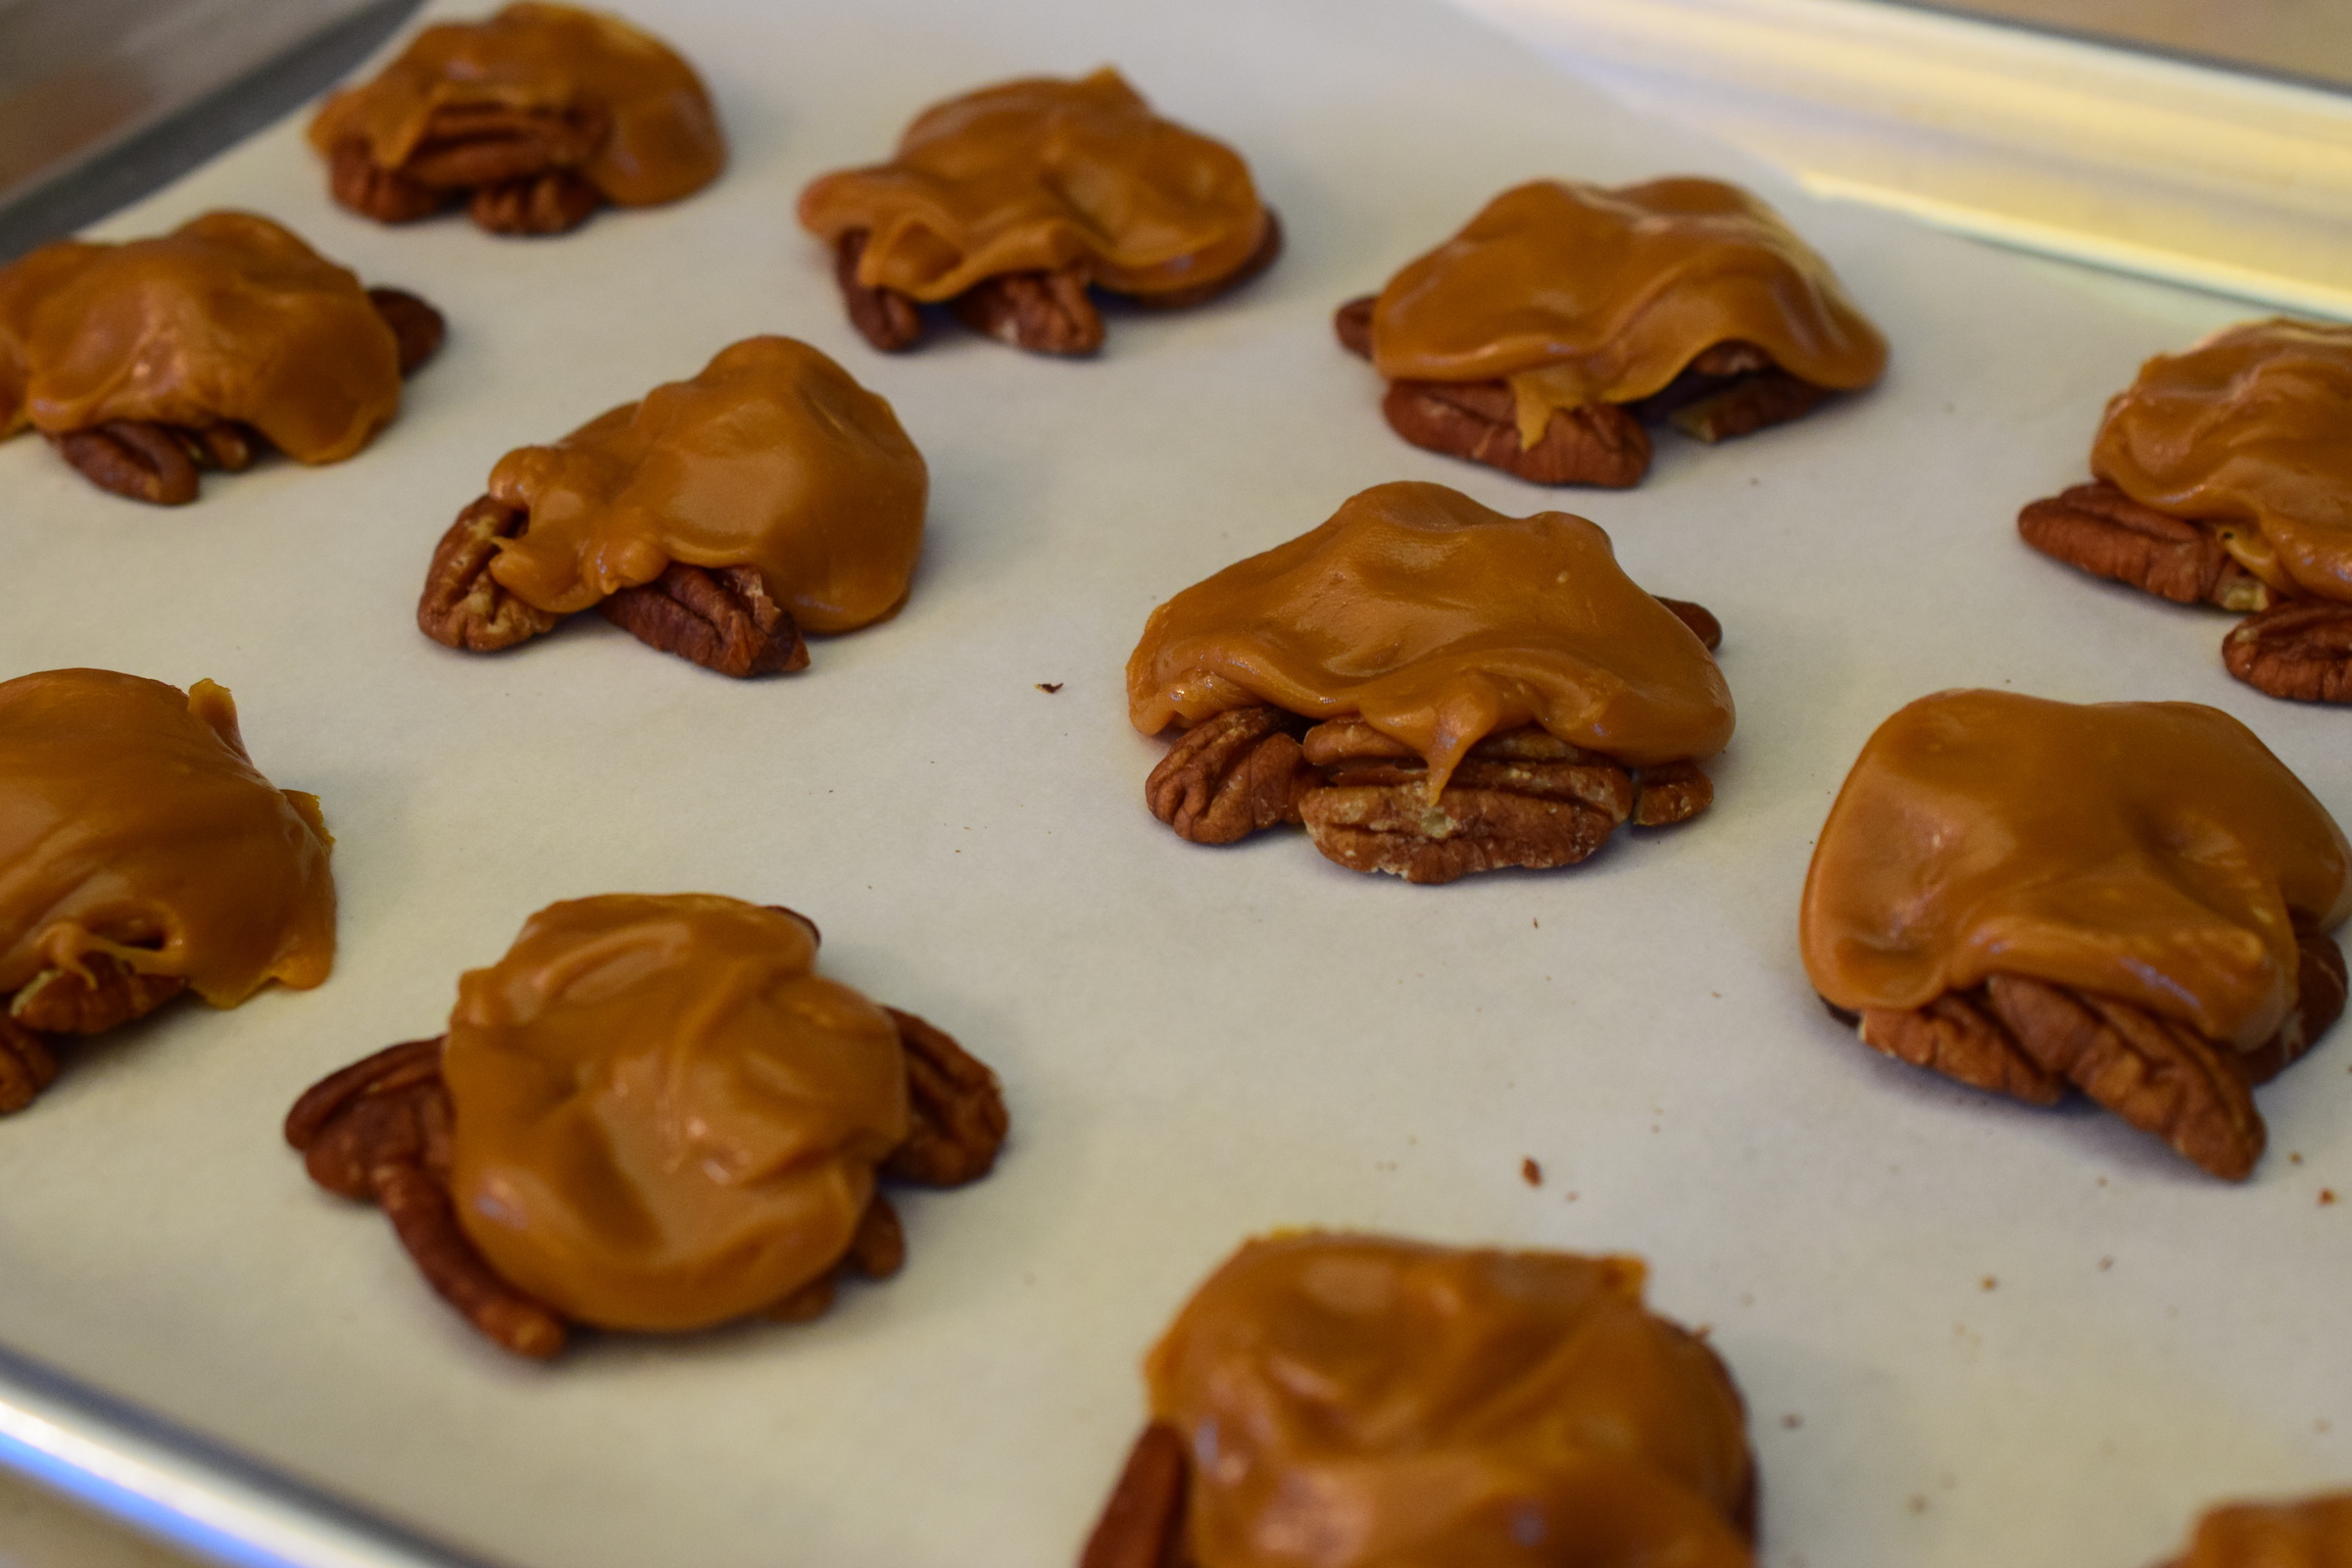
Homemade Turtles are sweet and crunchy with decadent caramel, smooth, creamy chocolate, and a hint of sea salt. And, you guessed it, only 3 ingredients (or 4 if you include sea salt). They make great gifts if you are looking for a little homemade something to pass out!

The recipe can be found here.
Line 2 baking sheets with parchment paper. Then make piles of pecans, using 4-5 per pile. Use more or less pecans depending on the size of turtle you want to make. I like to make larger sized turtles (because I love sweets). Make sure to overlap the pecans so they look like clusters and hold together when drizzled with caramel.
Add the caramel bits to a microwave safe bowl and heat on high for 30 seconds, then stir. Continue to heat in 30 second intervals until completely melted.


Add about 1 Tbsp melted caramel to the top of each cluster. Let the caramel drip down and around the pecans as this will help hold them together.
Break apart the almond bark and place in a microwave safe bowl. Heat on high in 30 second intervals, stirring between each 30 seconds. You want the chocolate to be completely melted.


Add about 2 Tbsp melted chocolate on top of each cluster. Use a spoon to help the chocolate fall down the sides to completely coat each cluster.


Completely optional, but you can sprinkle sea salt over the top for a sweet and salty treat. I like to add sea salt to half of the turtles in case some people like the salt and other don’t. It’s nice to have options!

Place in the fridge for about 30 minutes to allow the caramel and chocolate to set. Store the turtles in an airtight container on the counter. You won’t be able to easily bite into them right out of the fridge so make sure to let the turtles come to room temperature before serving. Enjoy!

The recipes can be found here.
Happy Holidays and Happy Cooking!


Recent Comments