 order online
 weekly specials
Who doesn’t love a good Christmas cookie? Christmas cookies are something I look forward to every year and probably eat more than my fair share. There are quite a few kinds of cookies my family makes every year, the “tradition cookies” if you will, but I like to make a few new recipes each year too. It’s fun to try something different and I often share these cookies with others to spread some holiday joy 🙂

Today I am going to share with you the new recipes I created for this year. Not every recipe is for an actual cookie, because I like variety in my treats, but all are festive and will be a hit at your holiday gatherings.
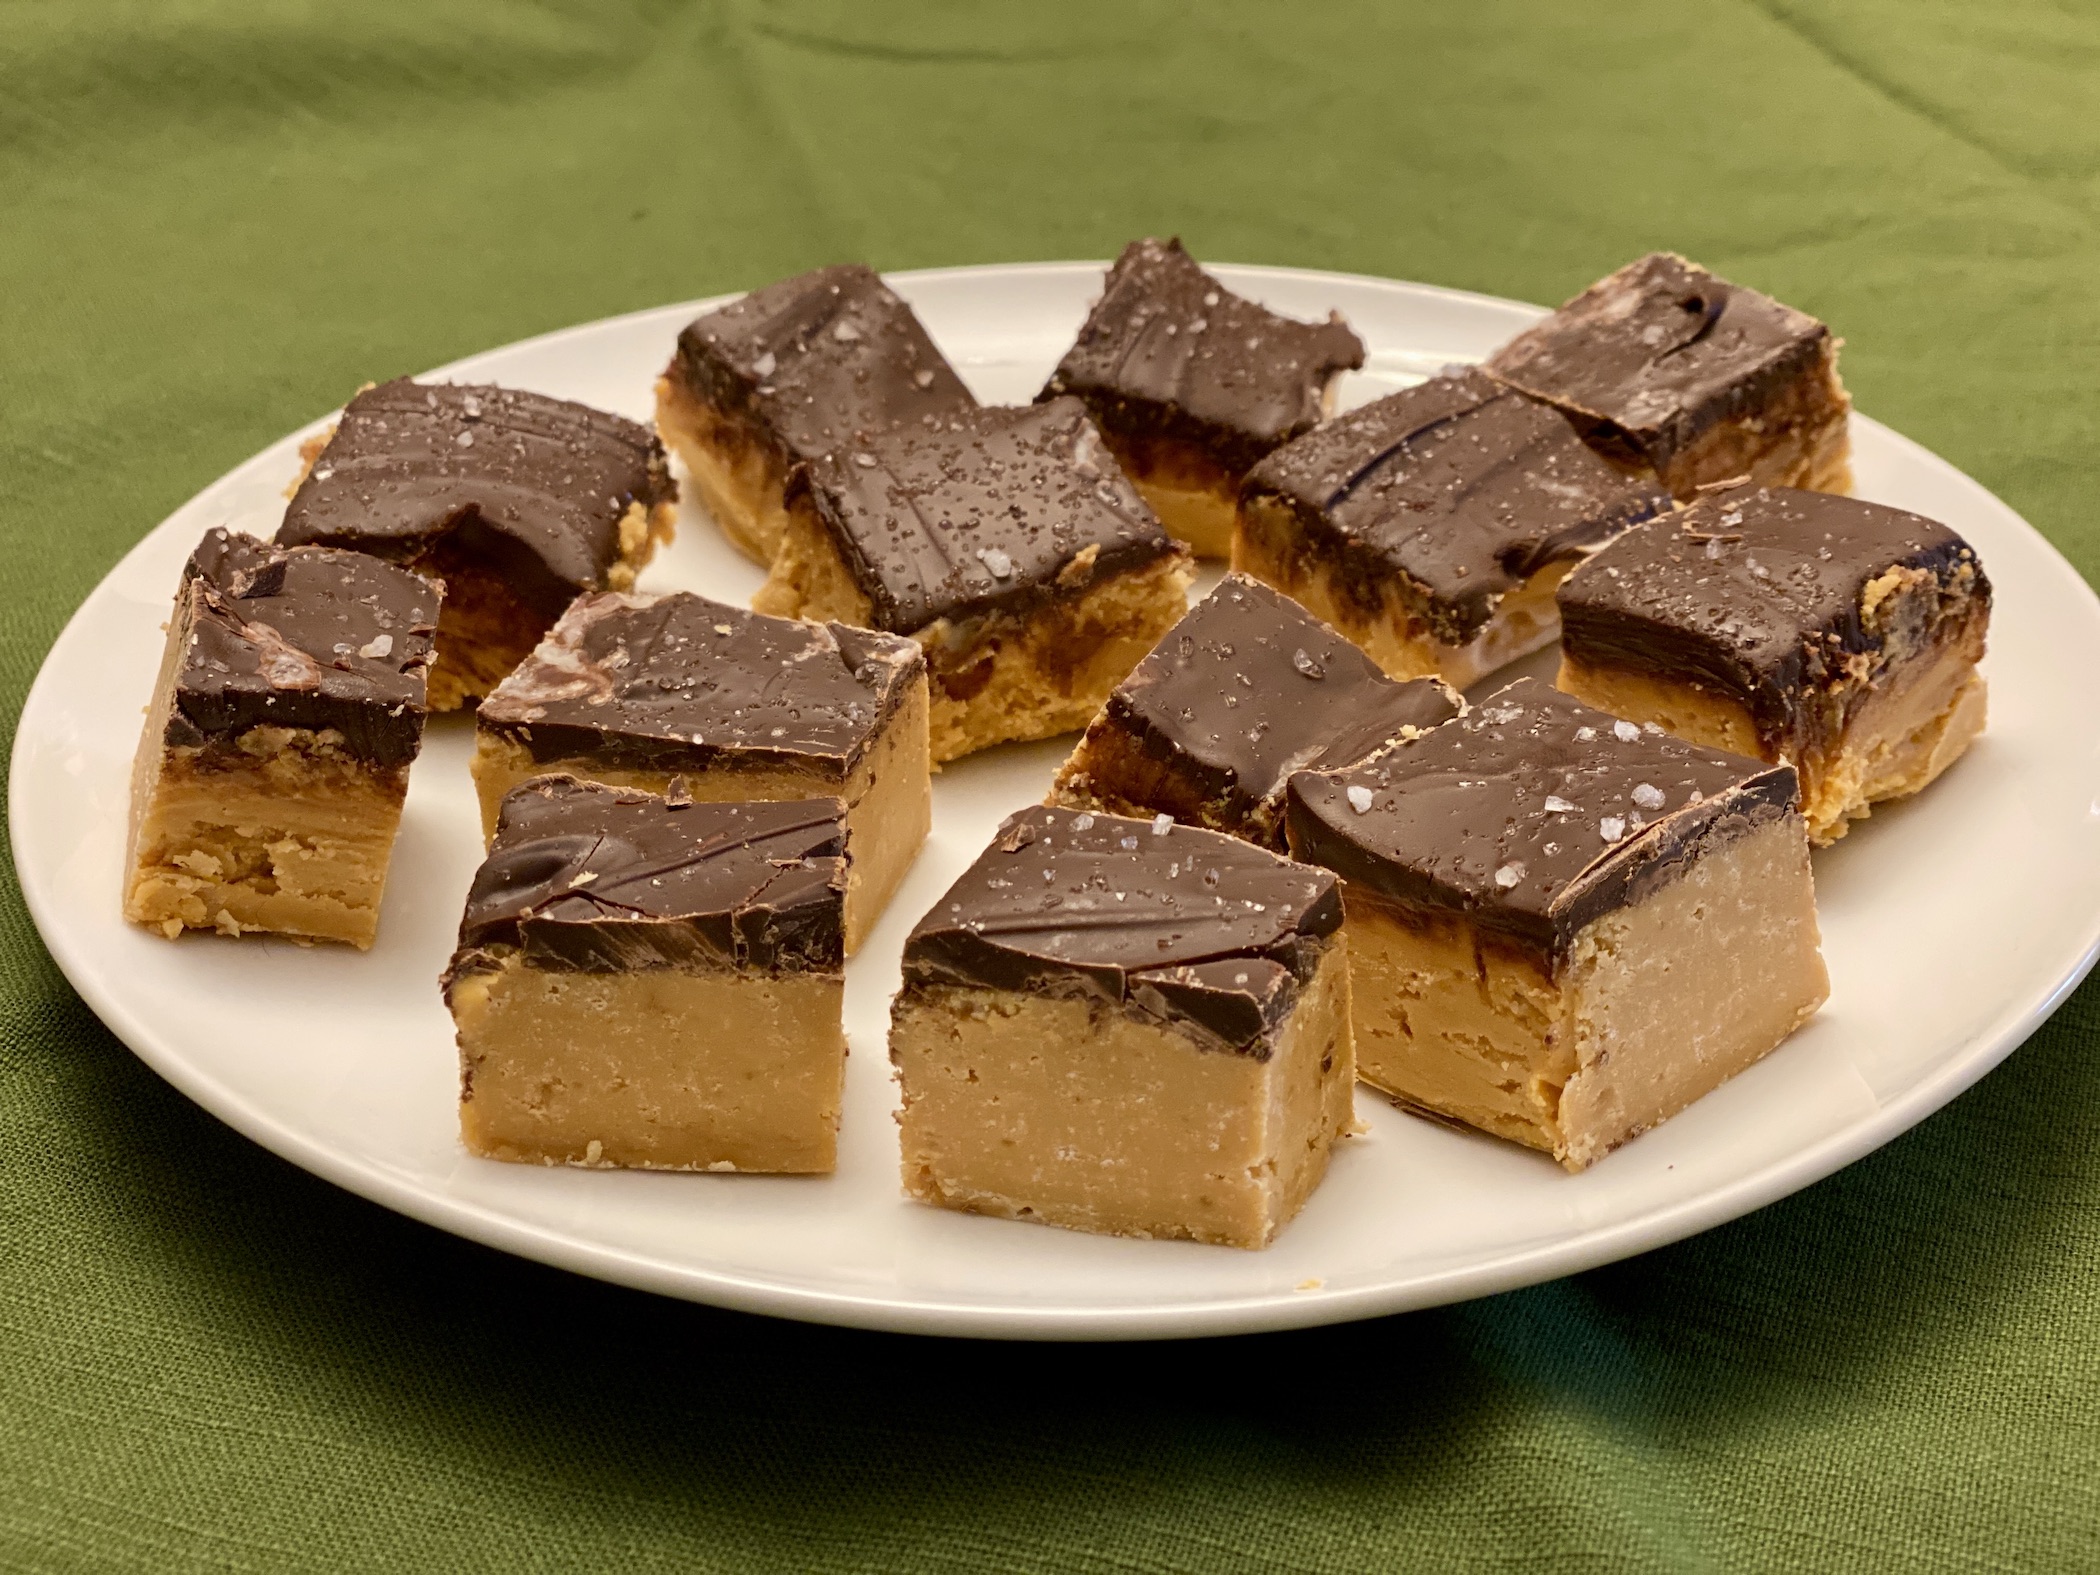
Let’s start with the Salted Caramel Fudge. This fudge is easy to make and the perfect combination of sweet and salty. The salted caramel base is smooth and creamy. The thin chocolate layer adds a bit of sweetness that is cut by the sea salt on top. It’s delicious and you will want more than one piece! It also makes a great gift.
The recipe can be found here.

Start by lining an 8×8 baking dish with parchment paper. Lightly spray the parchment paper with cooking spray. Set aside.
Add the almond bark to a saucepan. I recommend separating the almond bark into individual pieces because it will melt a lot faster! Heat over low heat, stirring gradually, until the chocolate is completely melted.


Add the entire can of Dulce de Leche and a pinch of sea salt. Stir to combine. The mixture will be thick but continue to stir until fully combined.


Pour into the prepared baking dish and spread into an even layer.

Add the chocolate chips to a separate small saucepan. Heat over low heat, stirring occasionally, until the chocolate is completely melted. You can also use chocolate almond bark if you prefer.

Pour the chocolate over the fudge and spread evenly over the top.

Sprinkle sea salt all over the top.

Let cool at room temperature for 3-4 hours or until completely firm. You can speed up the process by placing the baking dish in the fridge for about 1 hour.
Use the parchment paper to lift the fudge out of the baking dish. Place on a cutting board and slice into 1-inch pieces then serve. Enjoy!

The recipe can be found here.
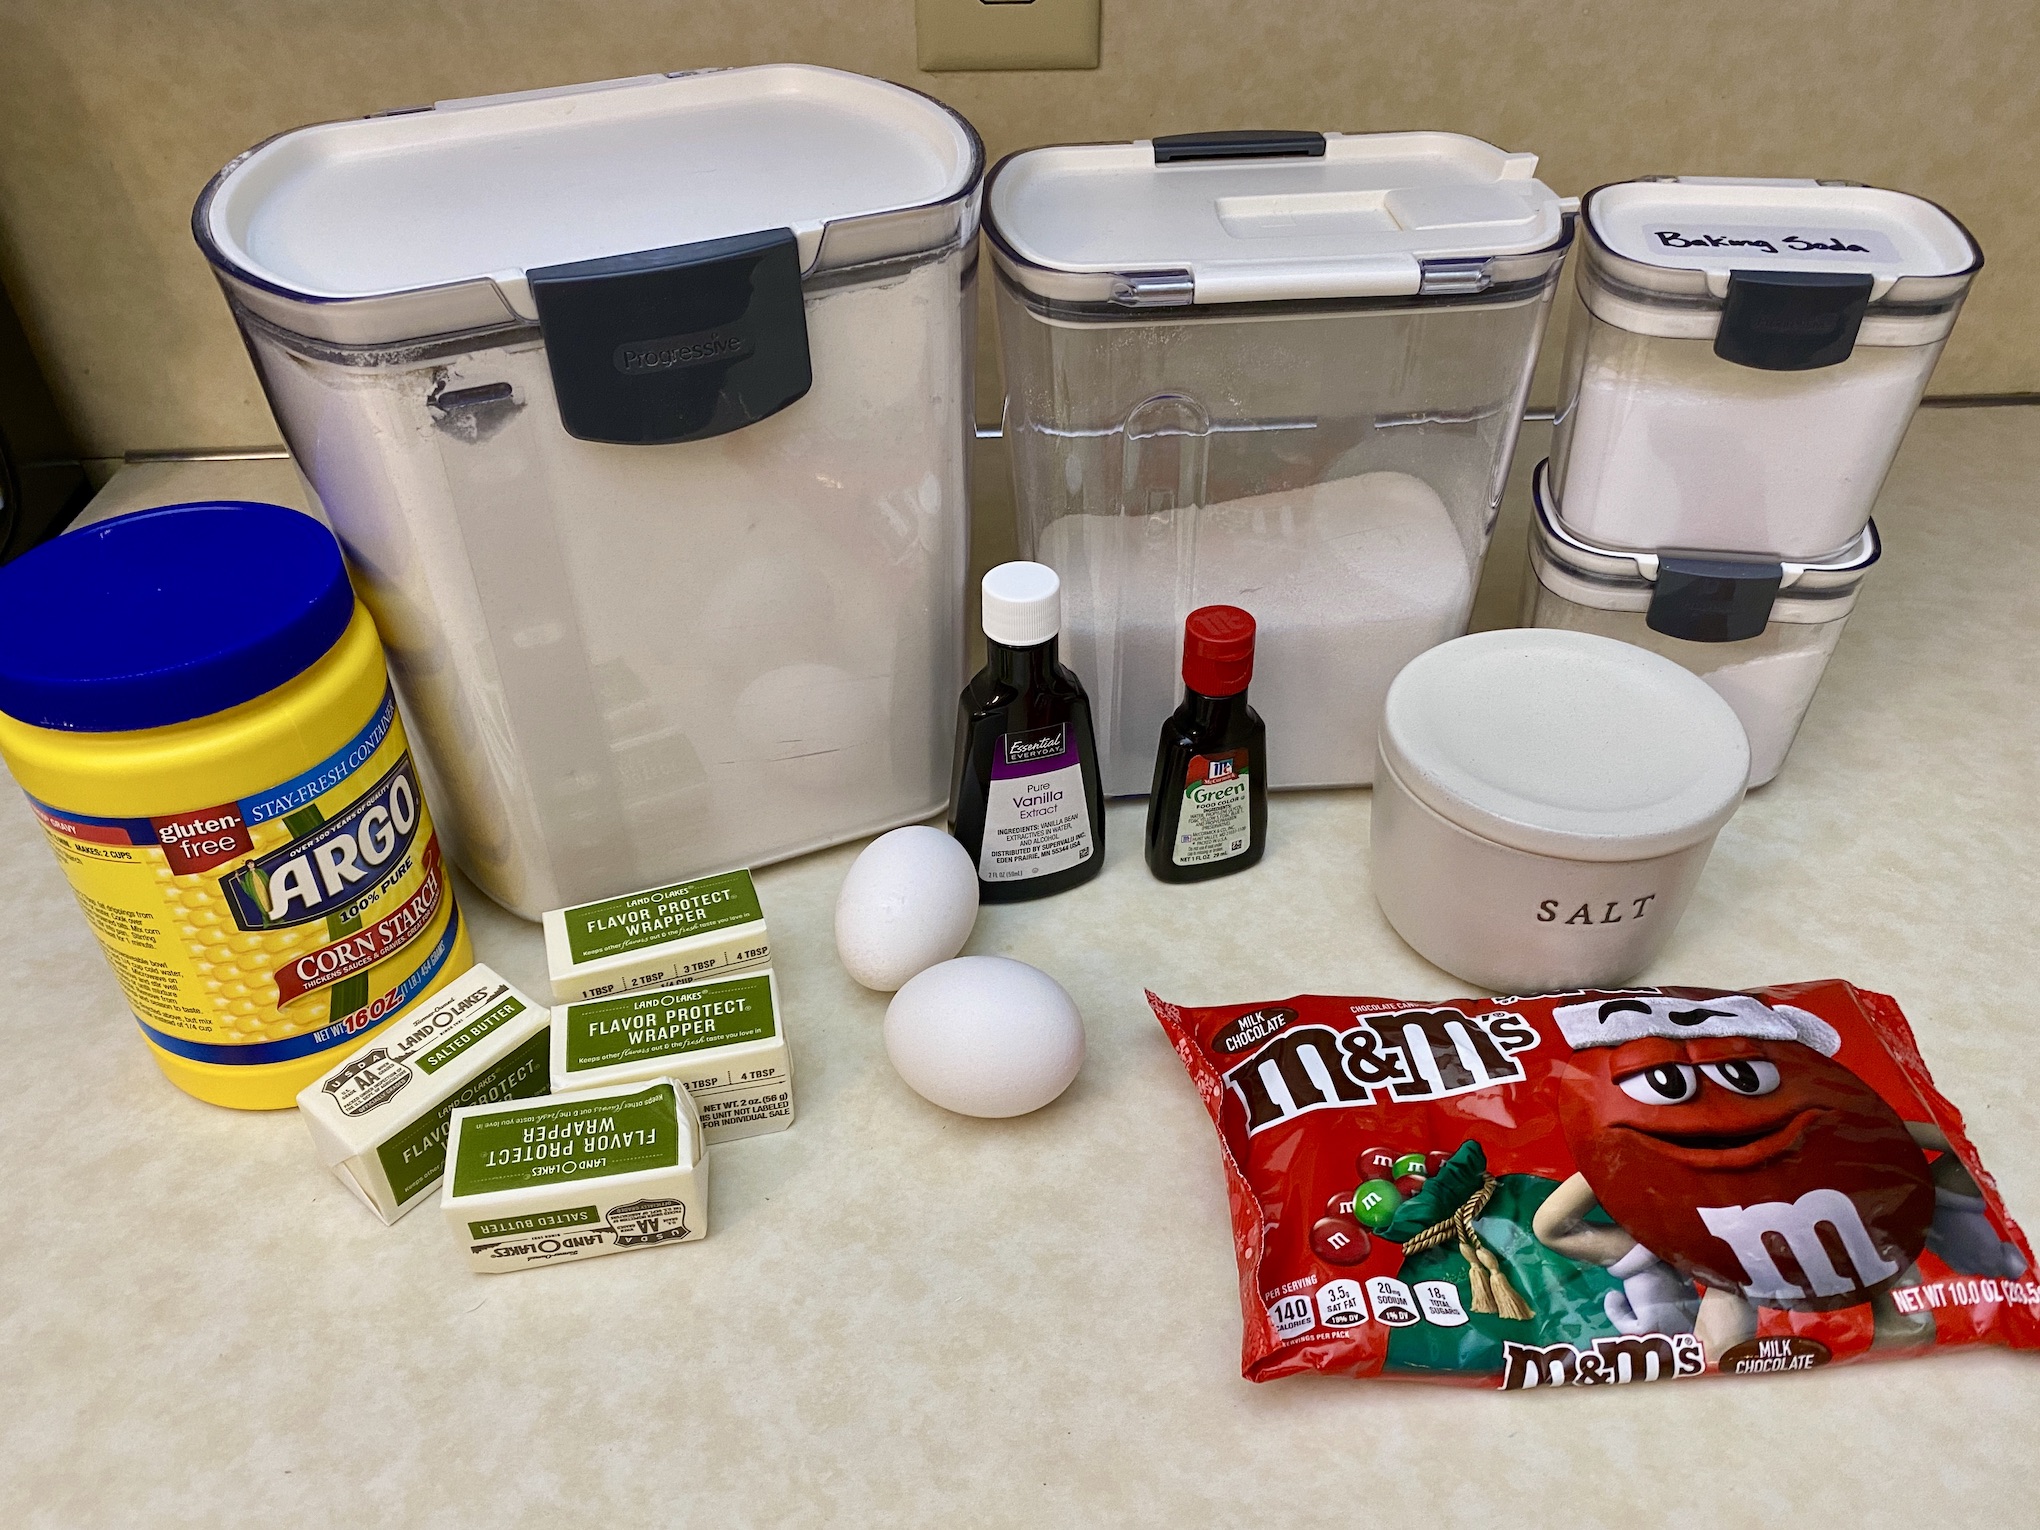
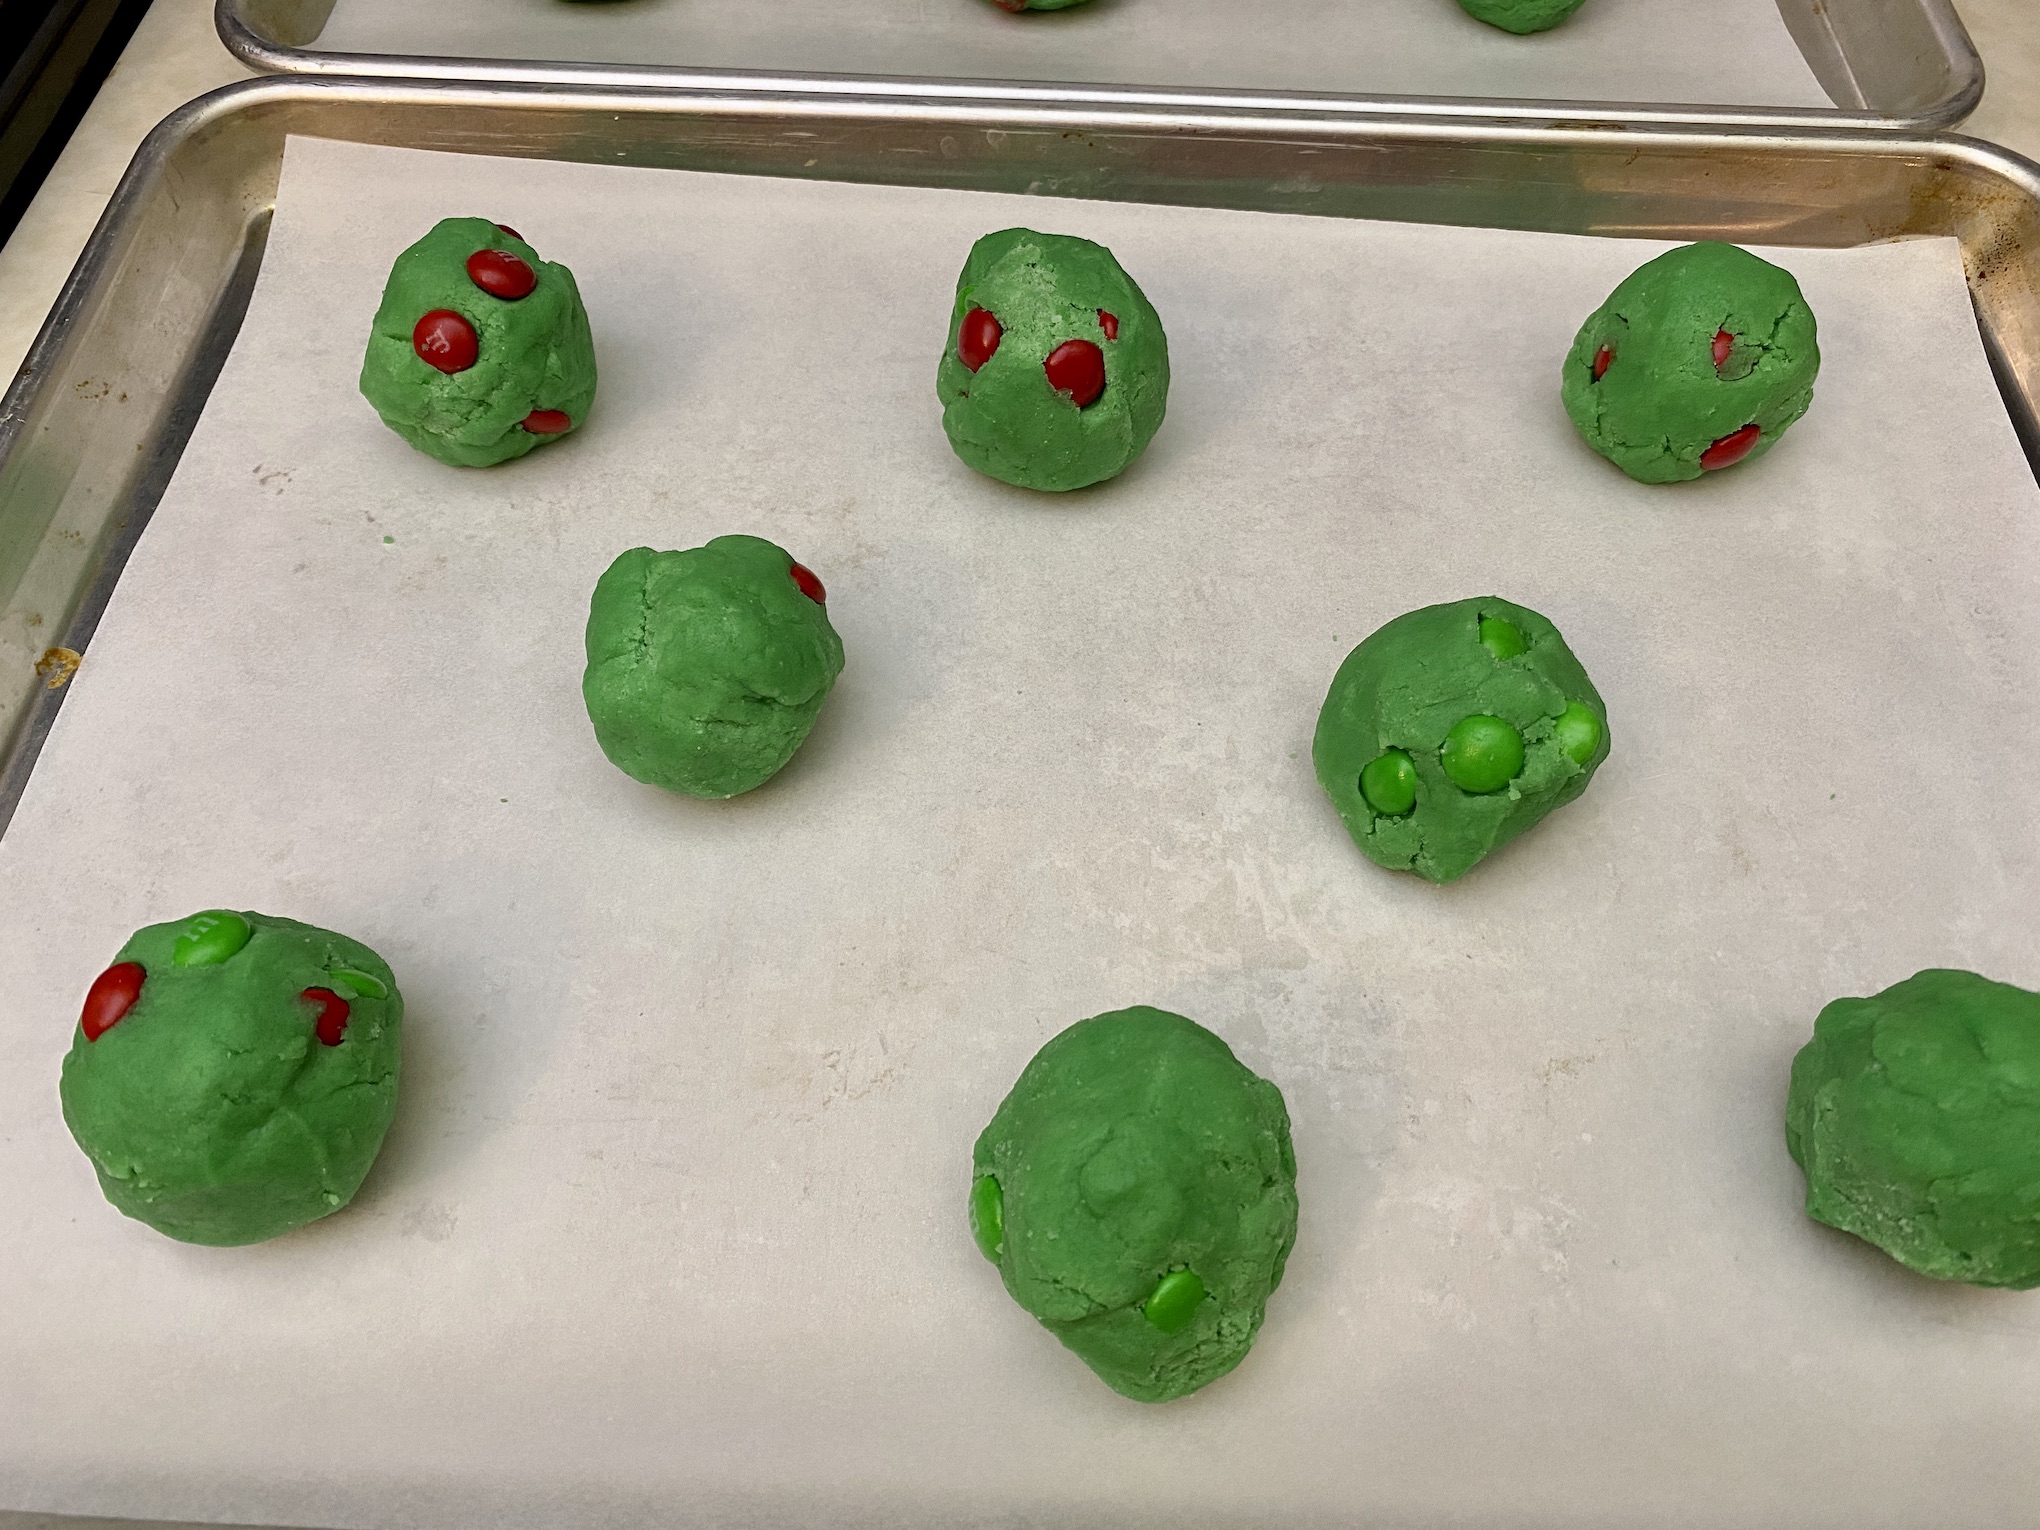
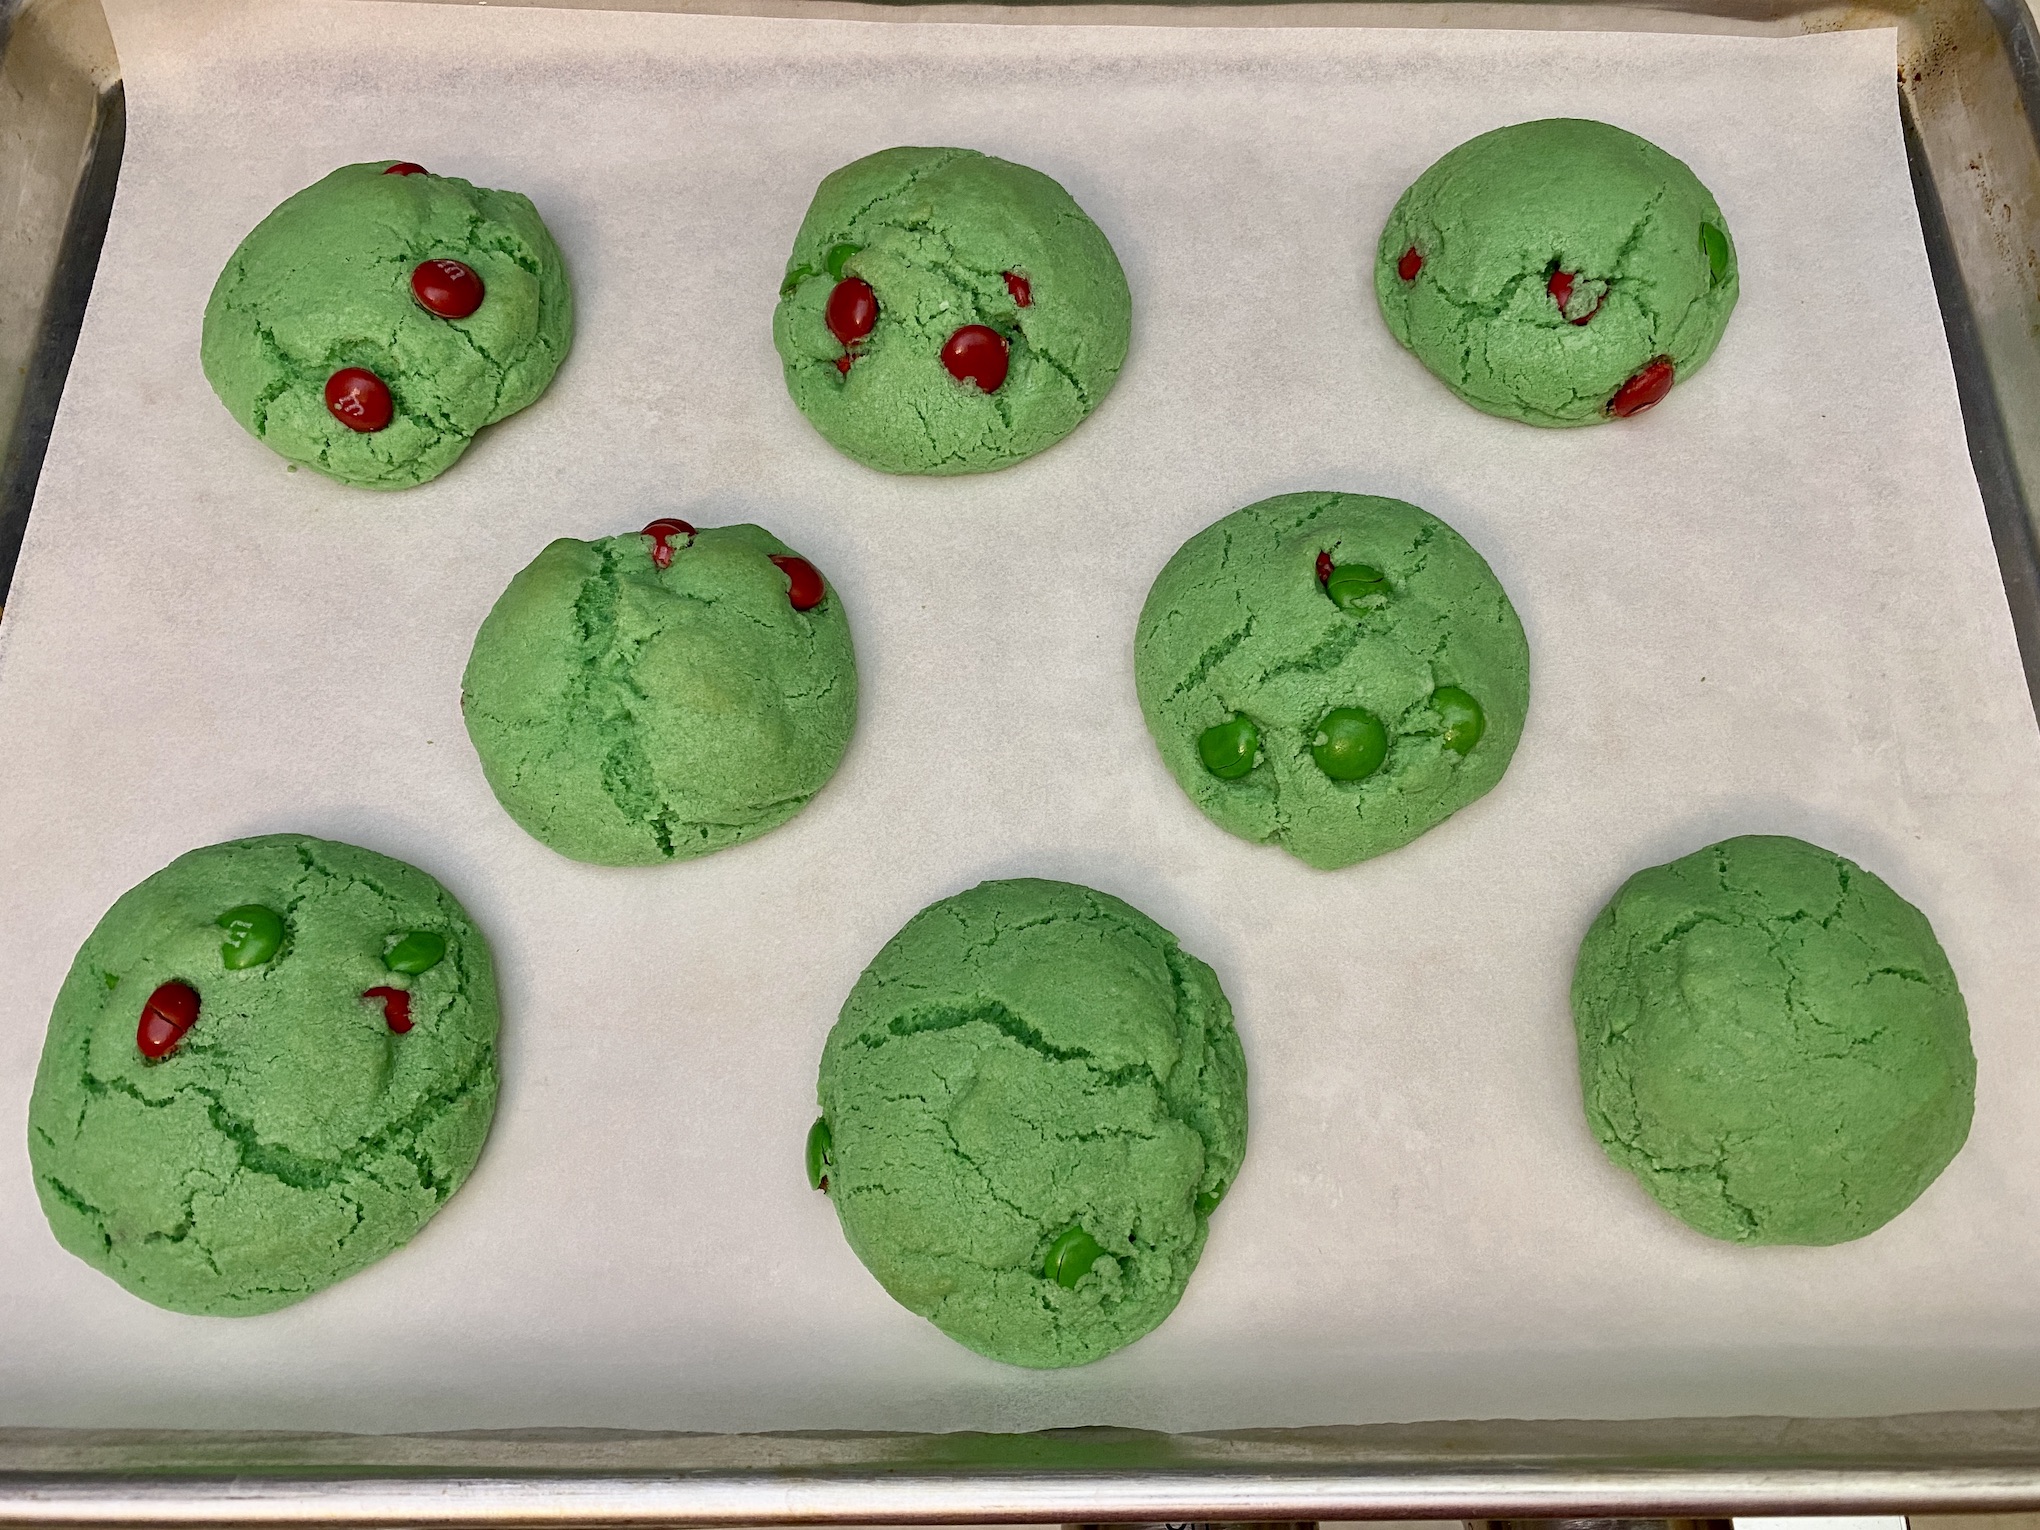
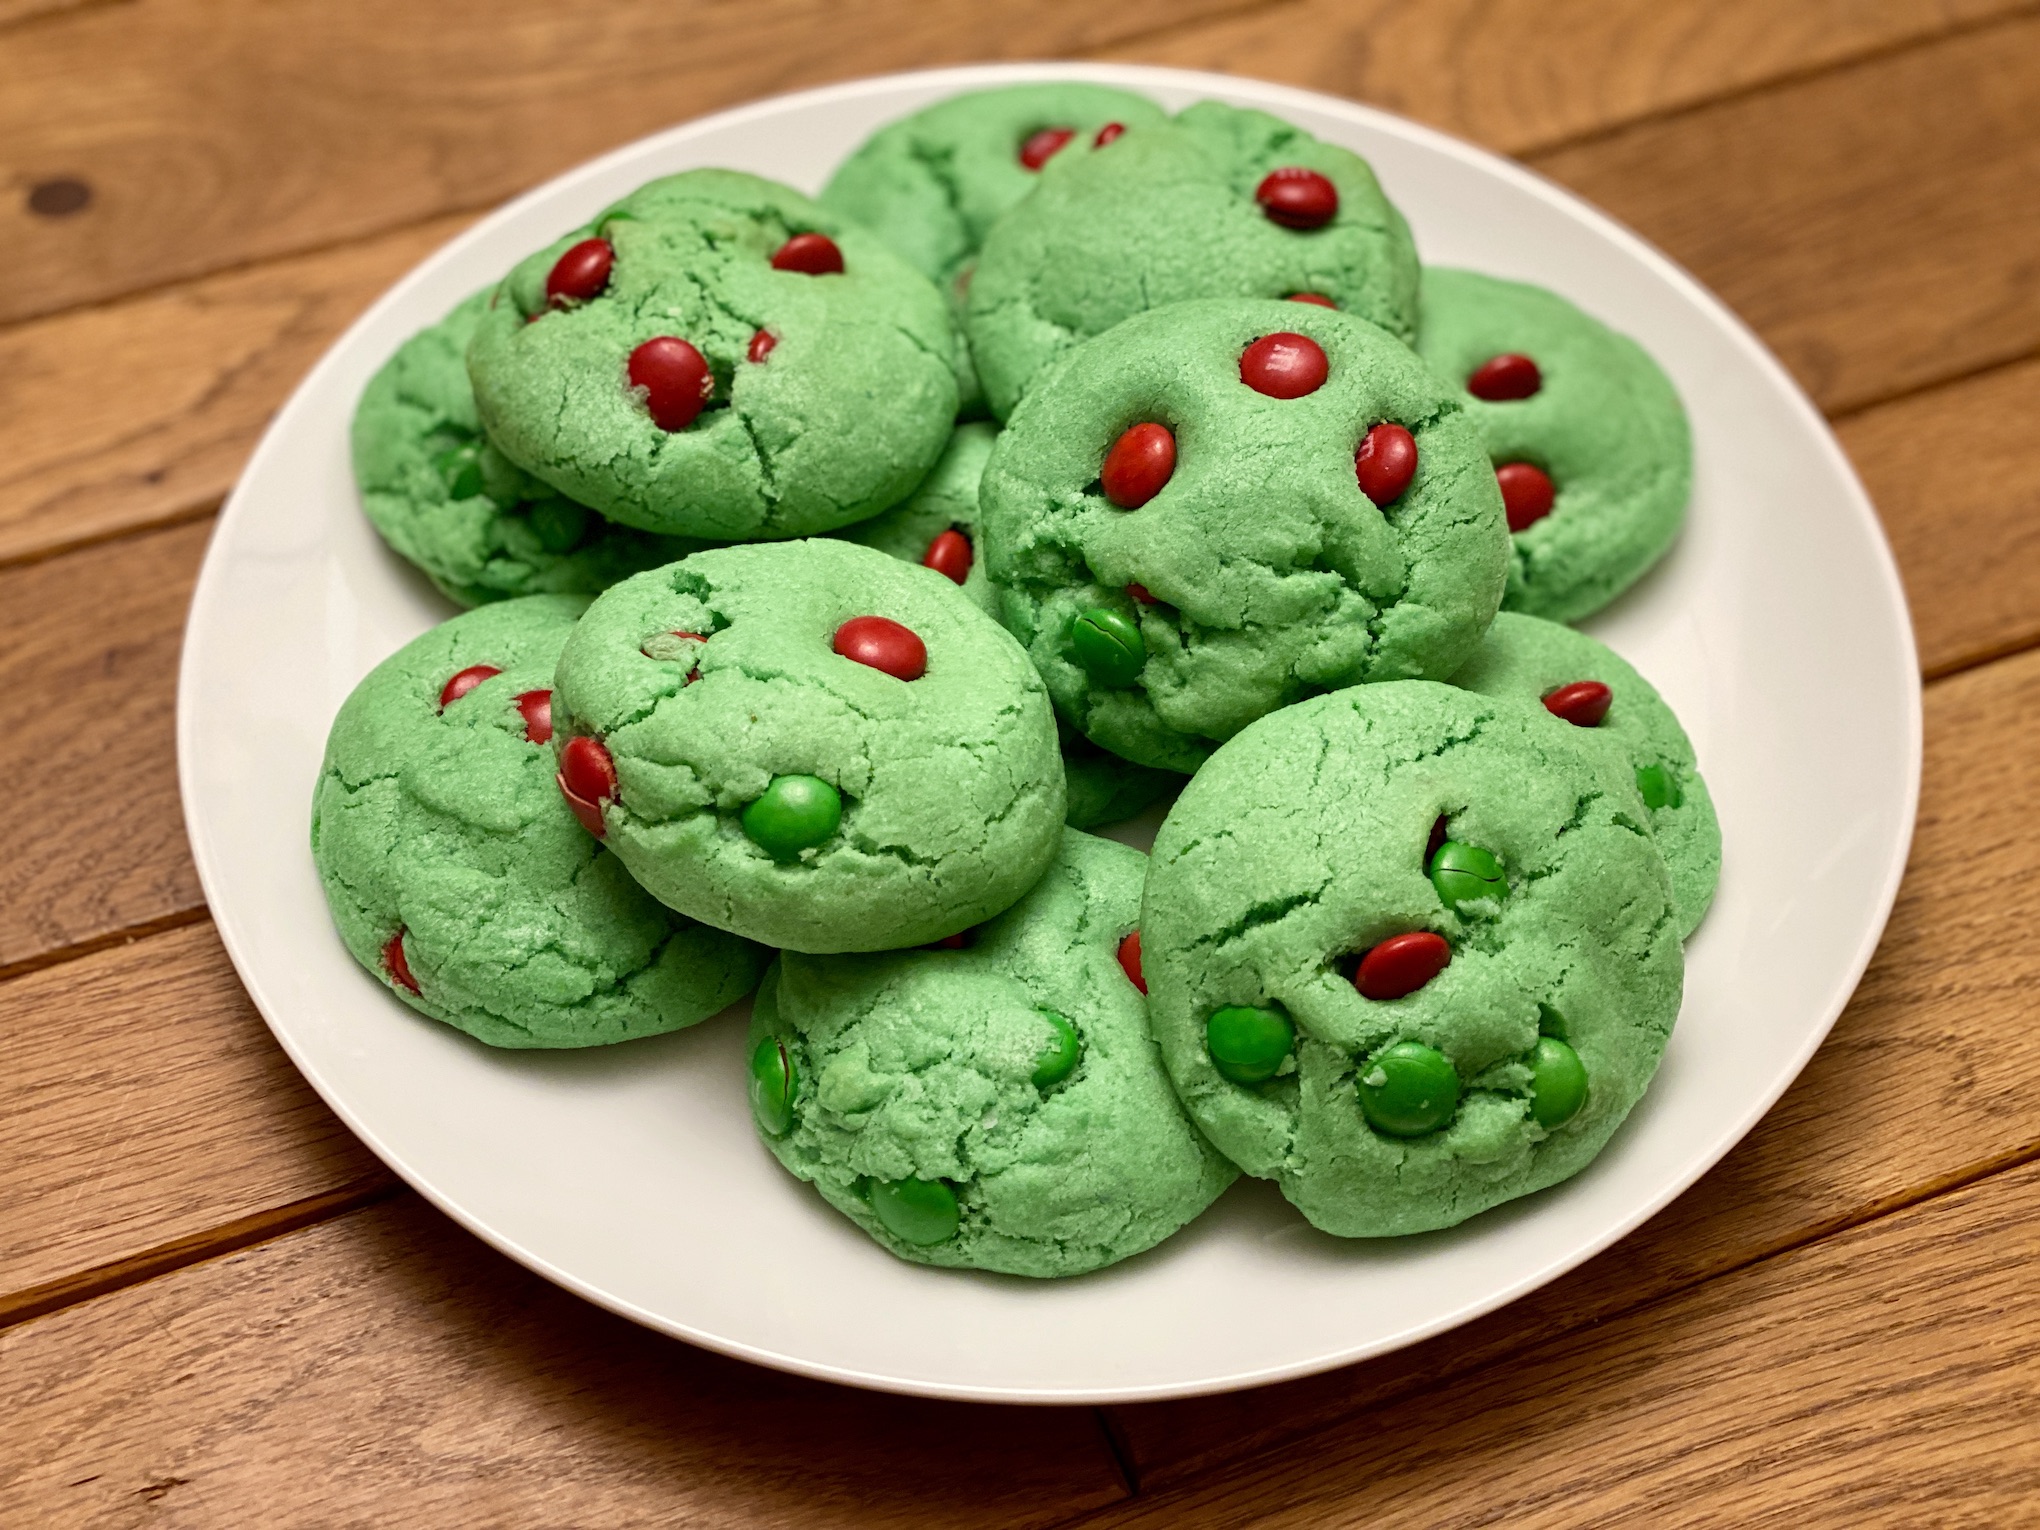
Next up is Grinch Sugar Cookies. These are soft and chewy on the inside and crispy on the outside. I suggest enjoying them while you watch the Grinch or other Christmas movies 🙂 If you can find heart shaped sprinkles or little candies, those would be perfect to use! Otherwise, you can use red and green M&M candies.

The recipe can be found here.
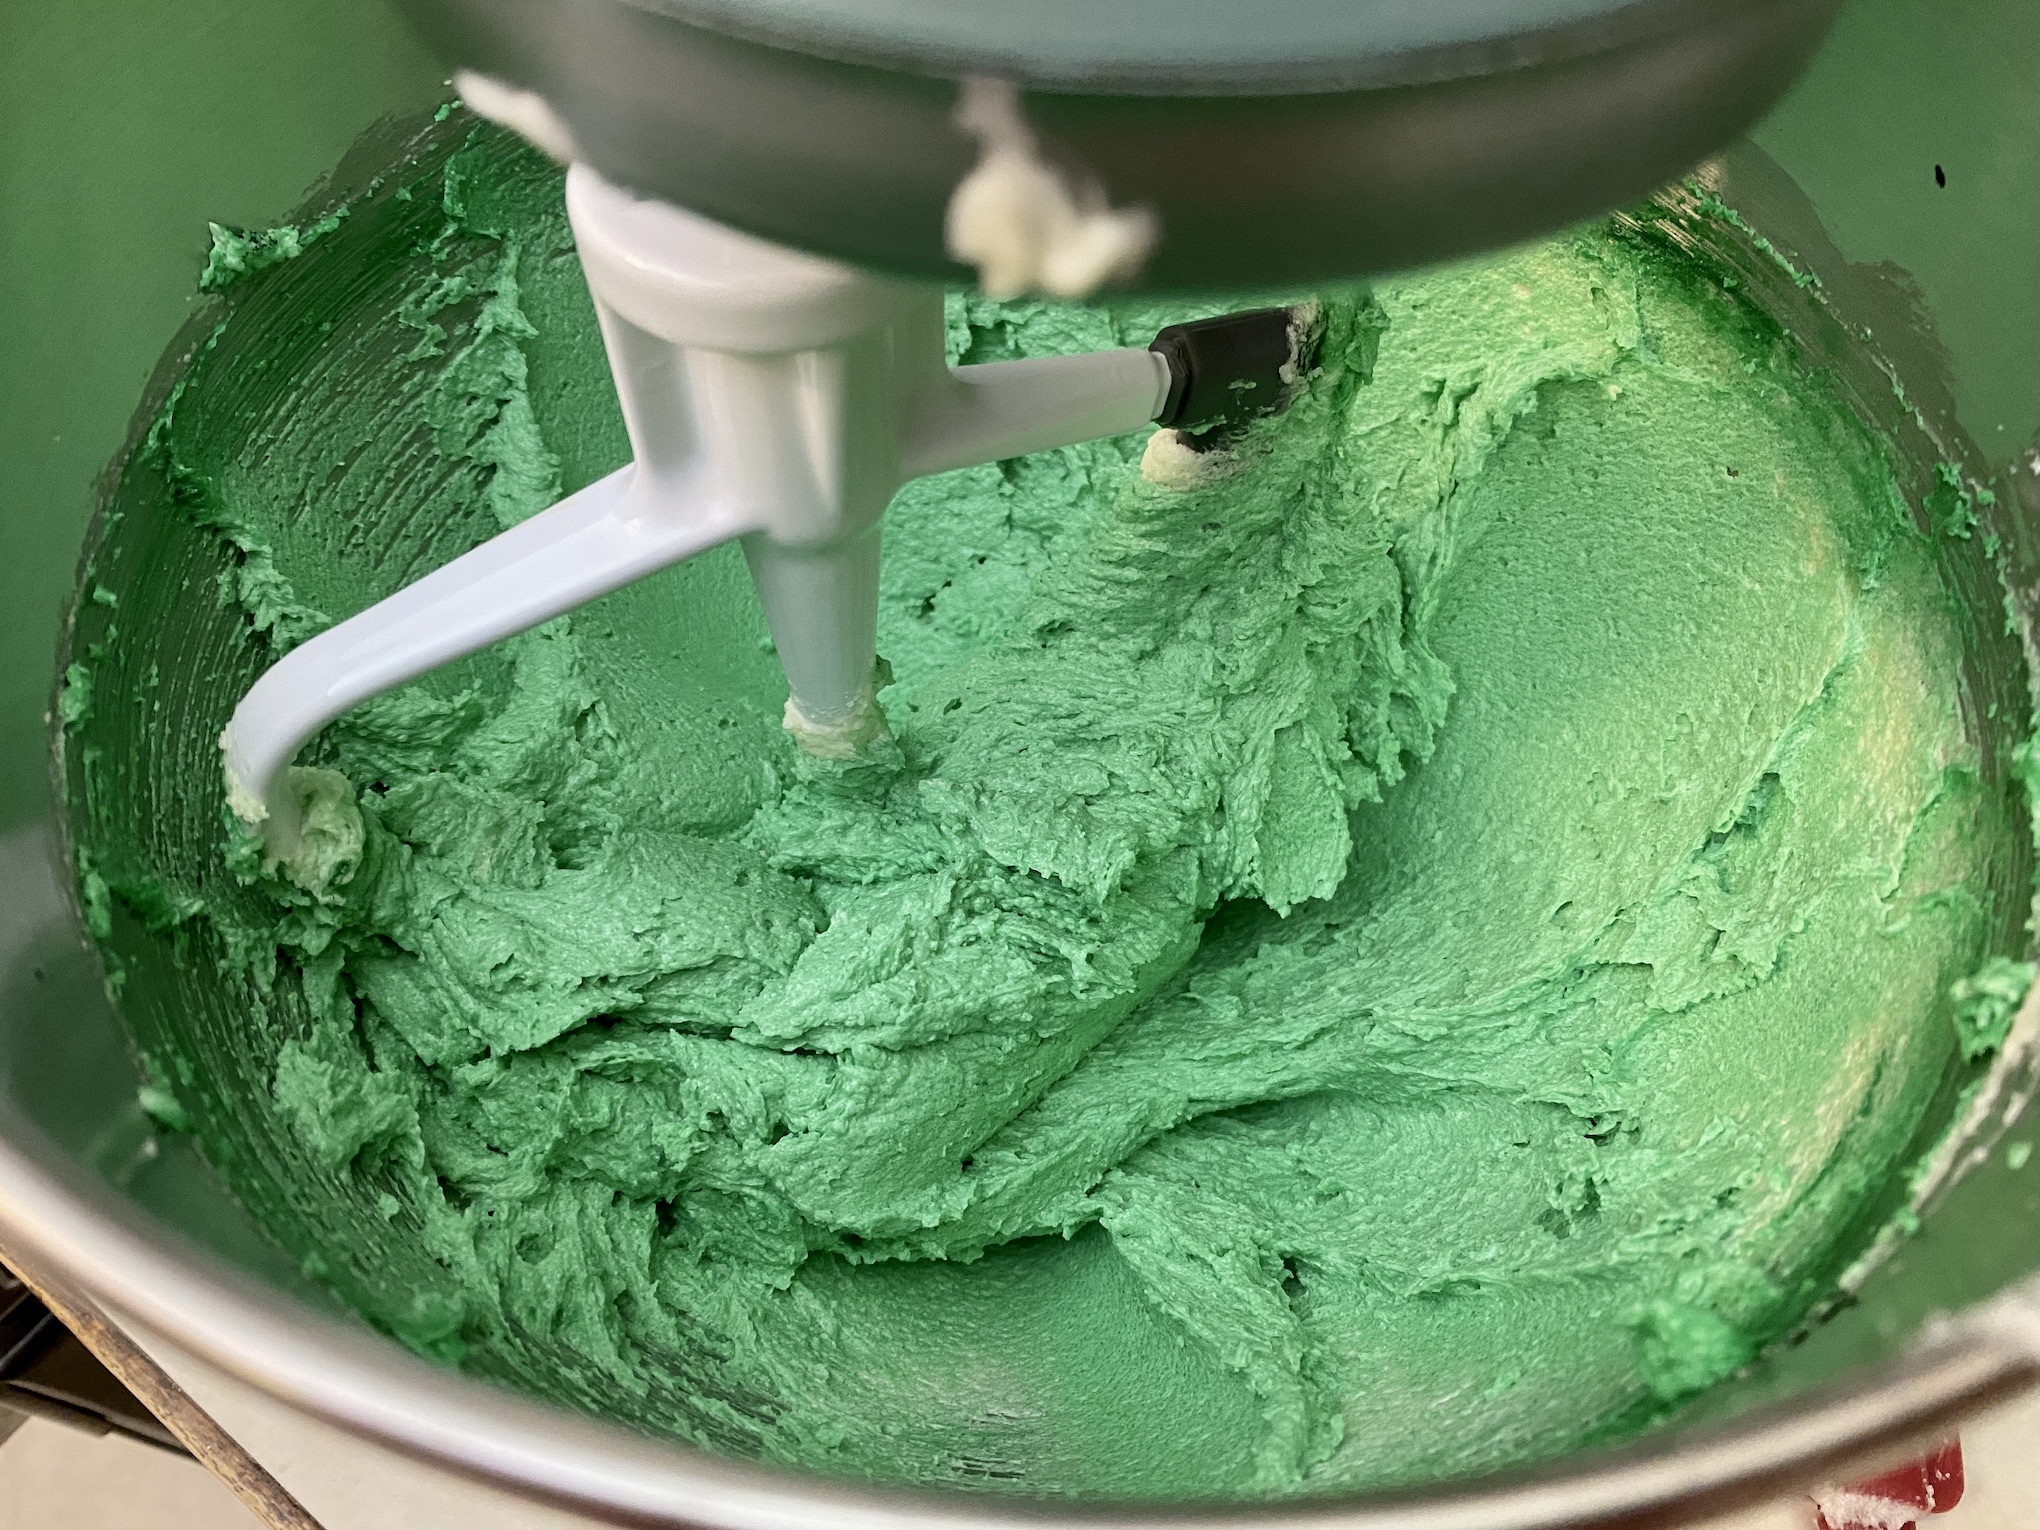
Start by adding the butter and sugar to the bowl of a stand mixer. Beat on medium speed until light and fluffy and well combined.


Add the eggs, one at a time, and continue to mix until well combined.


Add the vanilla and food coloring and mix until well combined. Add additional food coloring for a deeper green color.

In a separate bowl, whisk together the flour, cornstarch, baking powder, baking soda, and salt.


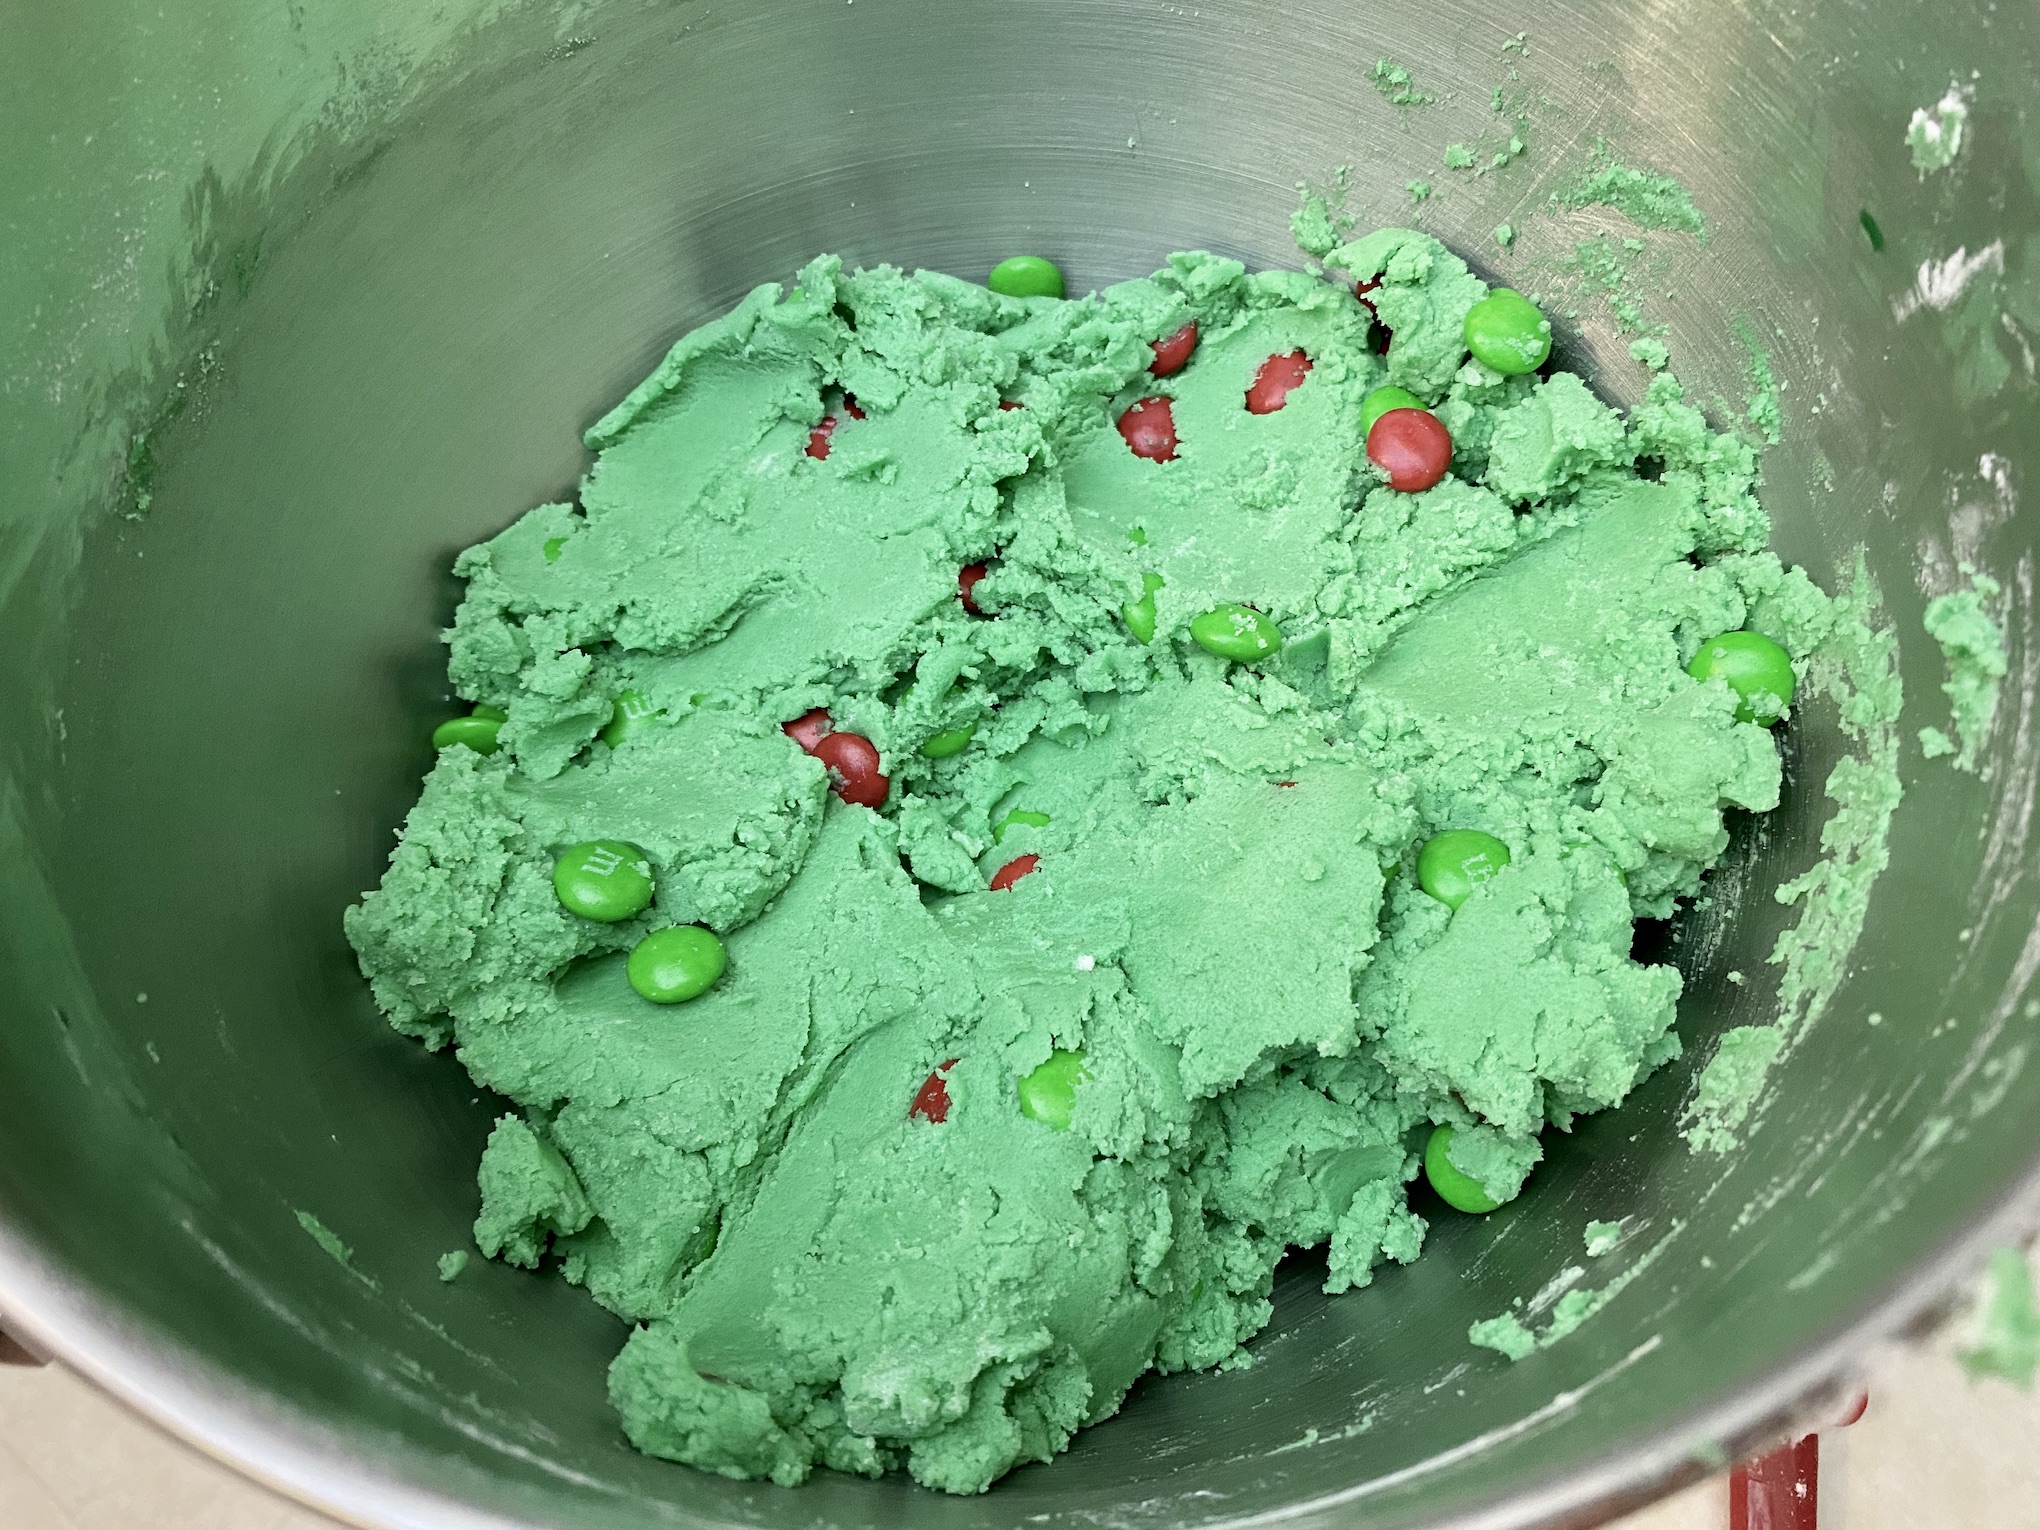
Turn the stand mixer on low. Gradually add the dry ingredients and continue to mix until well incorporated.

Add 1 cup of the M&Ms and stir to combine. Cover the bowl with plastic wrap and refrigerate for 30 minutes to chill the dough.

Preheat the oven to 350 degrees F. Line 2 baking sheets with parchment paper.
Scoop the cookie dough into 1 ½ Tbsp sized balls and place on the baking sheets.
Bake for 12-15 minutes. Add the remaining M&Ms to the top of each cookie, while the cookies are still warm.

Cook for 2-3 minutes then transfer to a cooling rack to cool completely. I always like to sample the cookies before they are completely cooled. You know, for quality assurance 🙂
Once completely cooled, plate and serve or store in an airtight container.
The recipe can be found here.
Another suggestion is to make these cookies for other holidays. Replace the green food coloring with red and yellow to create an orange cookie. You can then use black candies to create a Halloween look. Be creative and play around with the colors for other holidays!
Next up is Hot Chocolate Cookies. These cookies taste like a cup of hot cocoa. They cookie base is soft and chewy, and very chocolaty! The marshmallow is soft and add a lovely sweetness to each bite. Don’t even get me started on the chocolate icing. I can’t describe how good it is! The icing doesn’t quite harden, so it’s a little gooey and melts in your mouth.

The recipe can be found here.

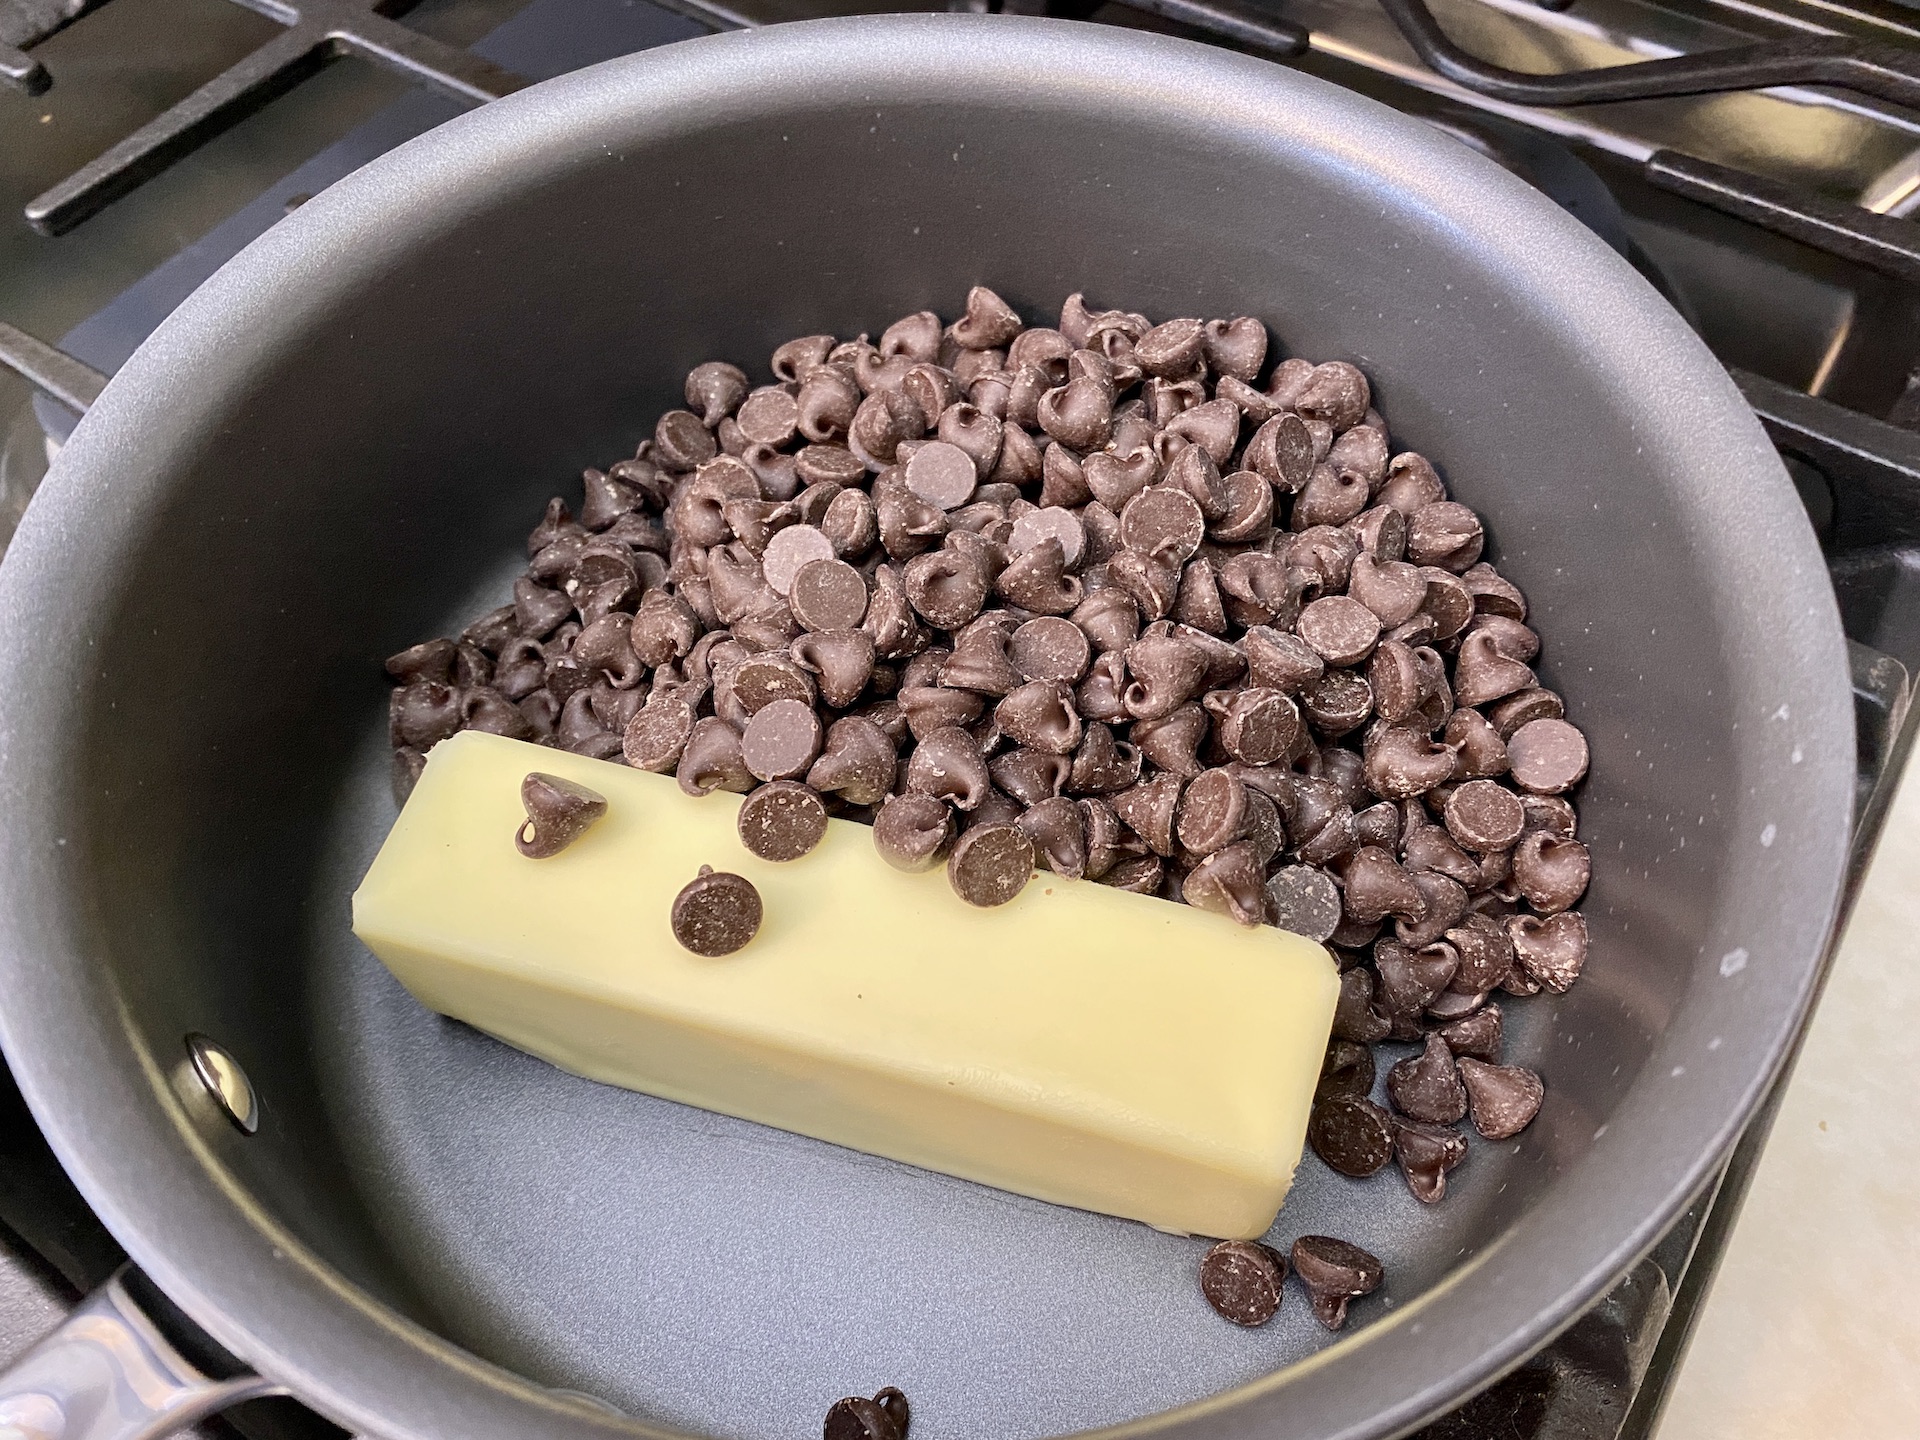
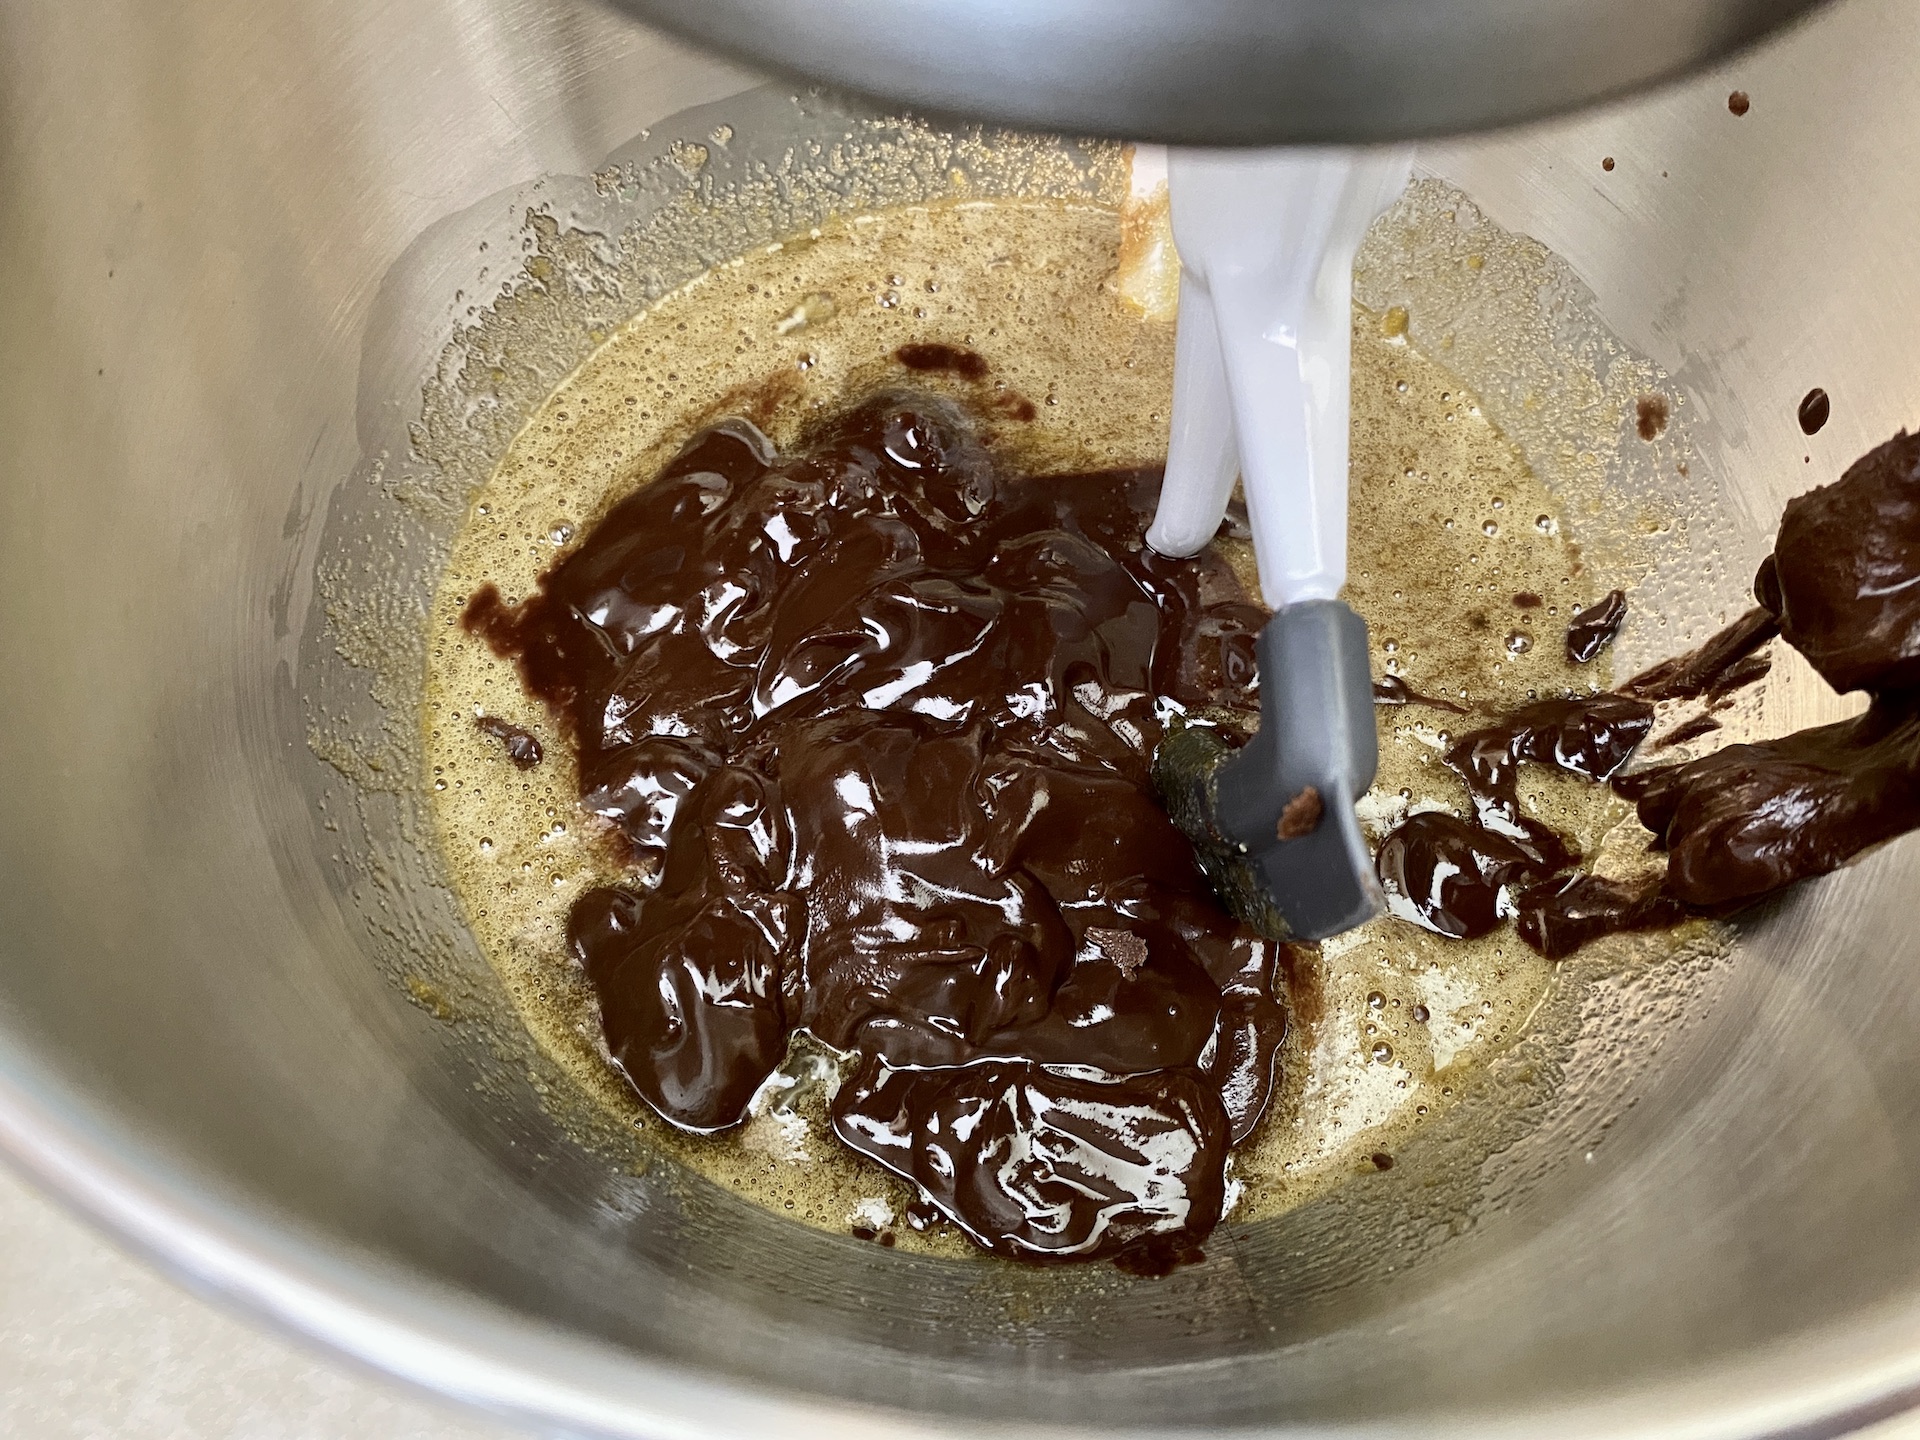
Start by making the cookies. Add a stick of butter and semi-sweet chocolate to a saucepan. Heat over medium-low heat until melted, stirring frequently. Once fully melted, set aside. It needs to cool slightly and will eventually be mixed into the cookie batter.

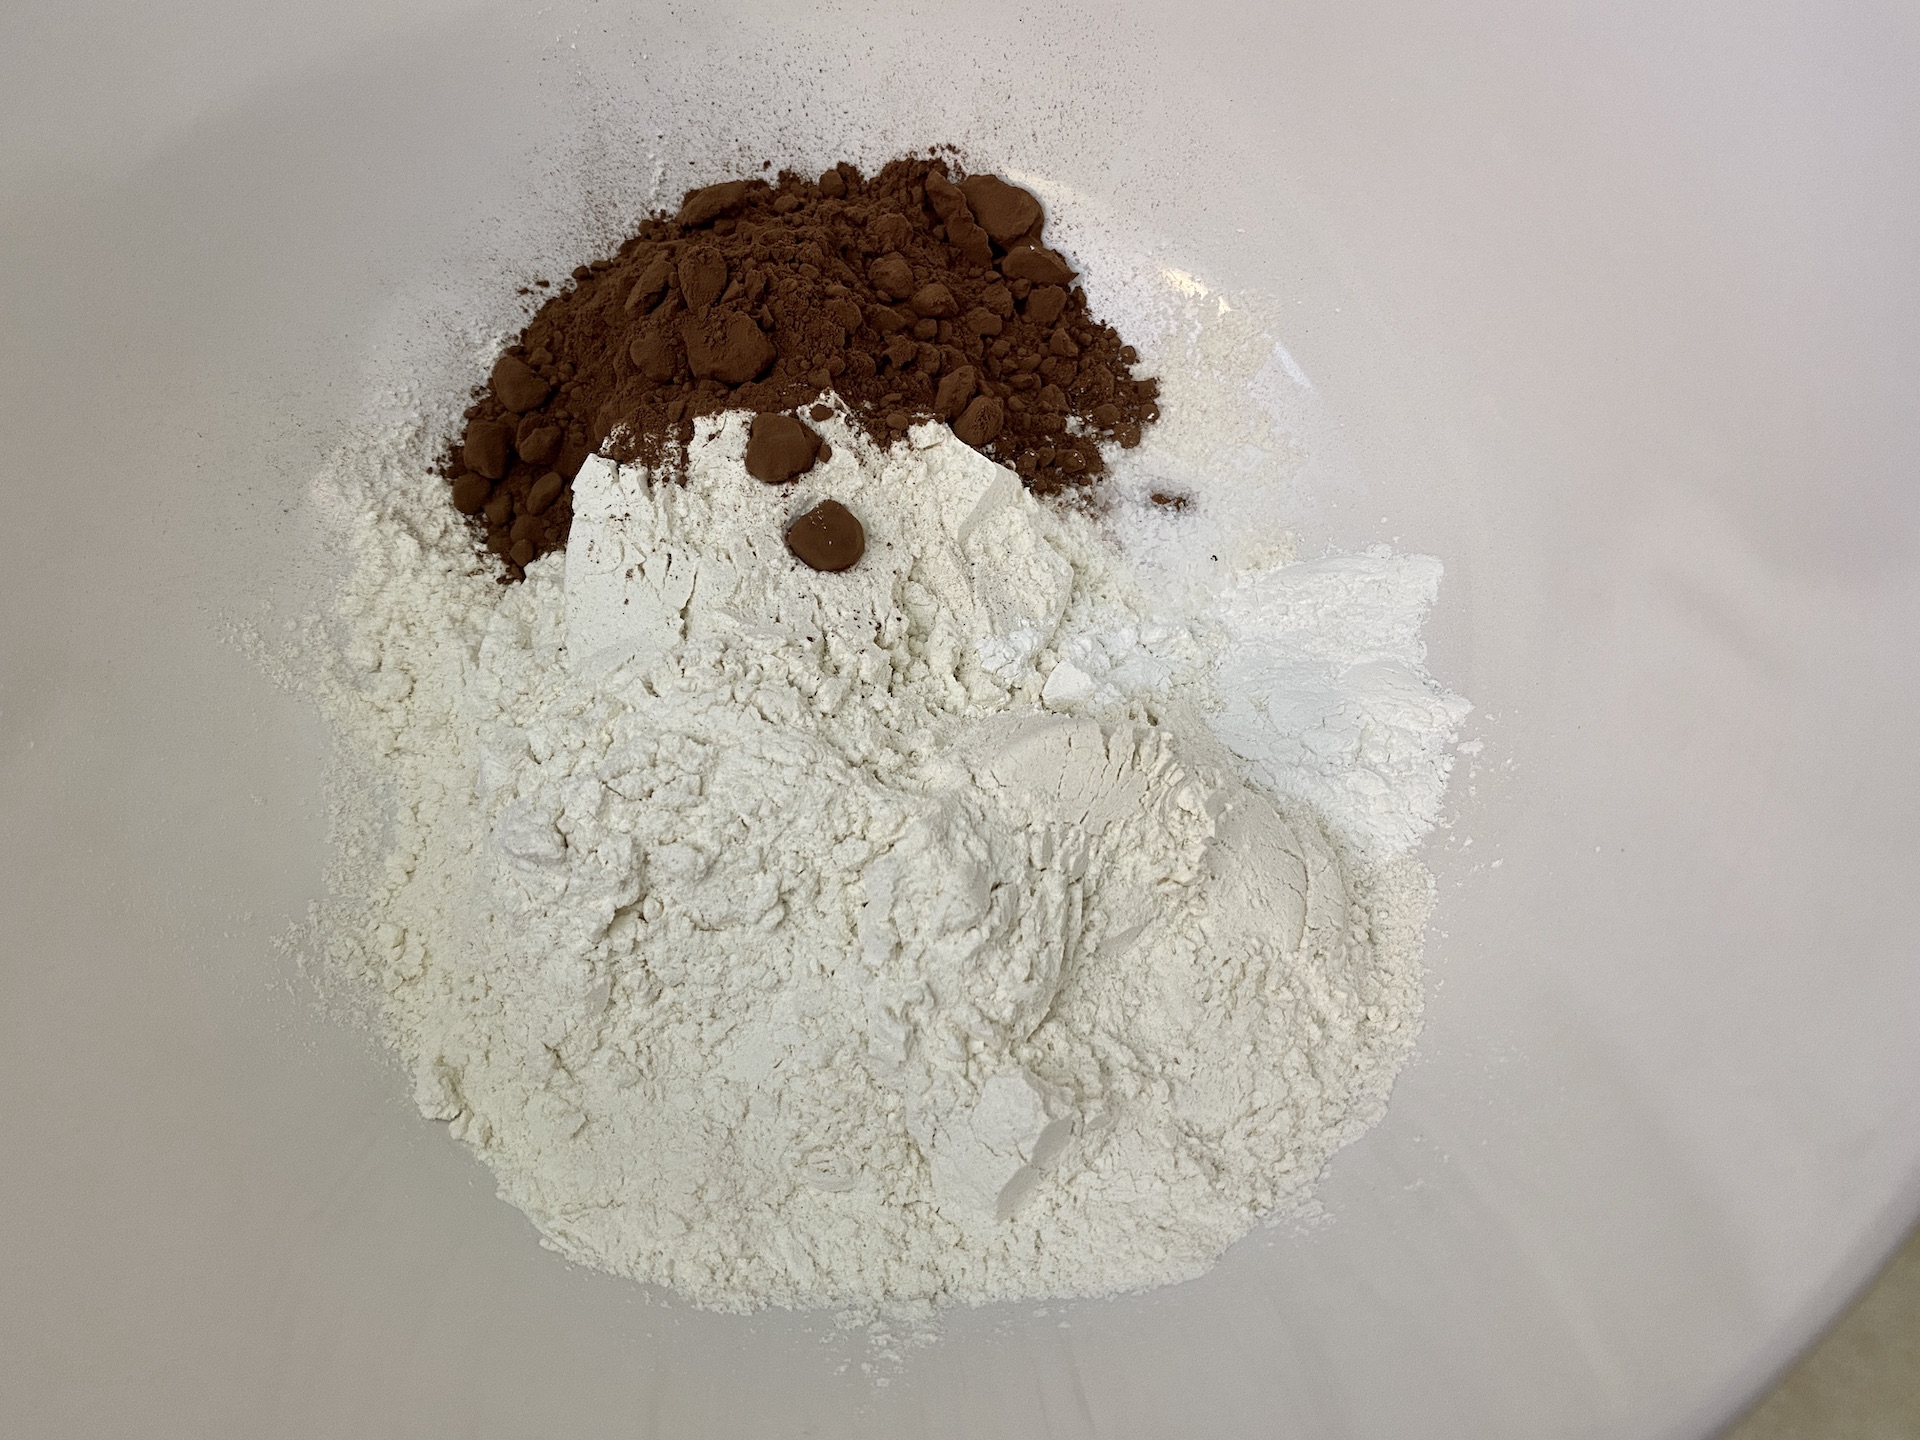
In a large mixing bowl, whisk together the flour, cocoa powder, baking powder, and salt. Set aside.

In the bowl of a stand mixer, beat the sugar, eggs, and vanilla on low speed until well combined.


Add the chocolate/butter mixture and beat until just combined.

Gradually add the flour mixture and beat until just combined.


Cover the dough and refrigerate for at least 1 hour.

Once the dough is chilled, preheat the oven to 325 degrees F. Line 2 baking sheets with parchment paper.
Use a tablespoon or cookie scoop to scoop the dough. Roll each piece of dough into a ball with your hands and place on the baking sheet. Leave about 2-inches of space between each cookie.

Bake for 12 minutes.
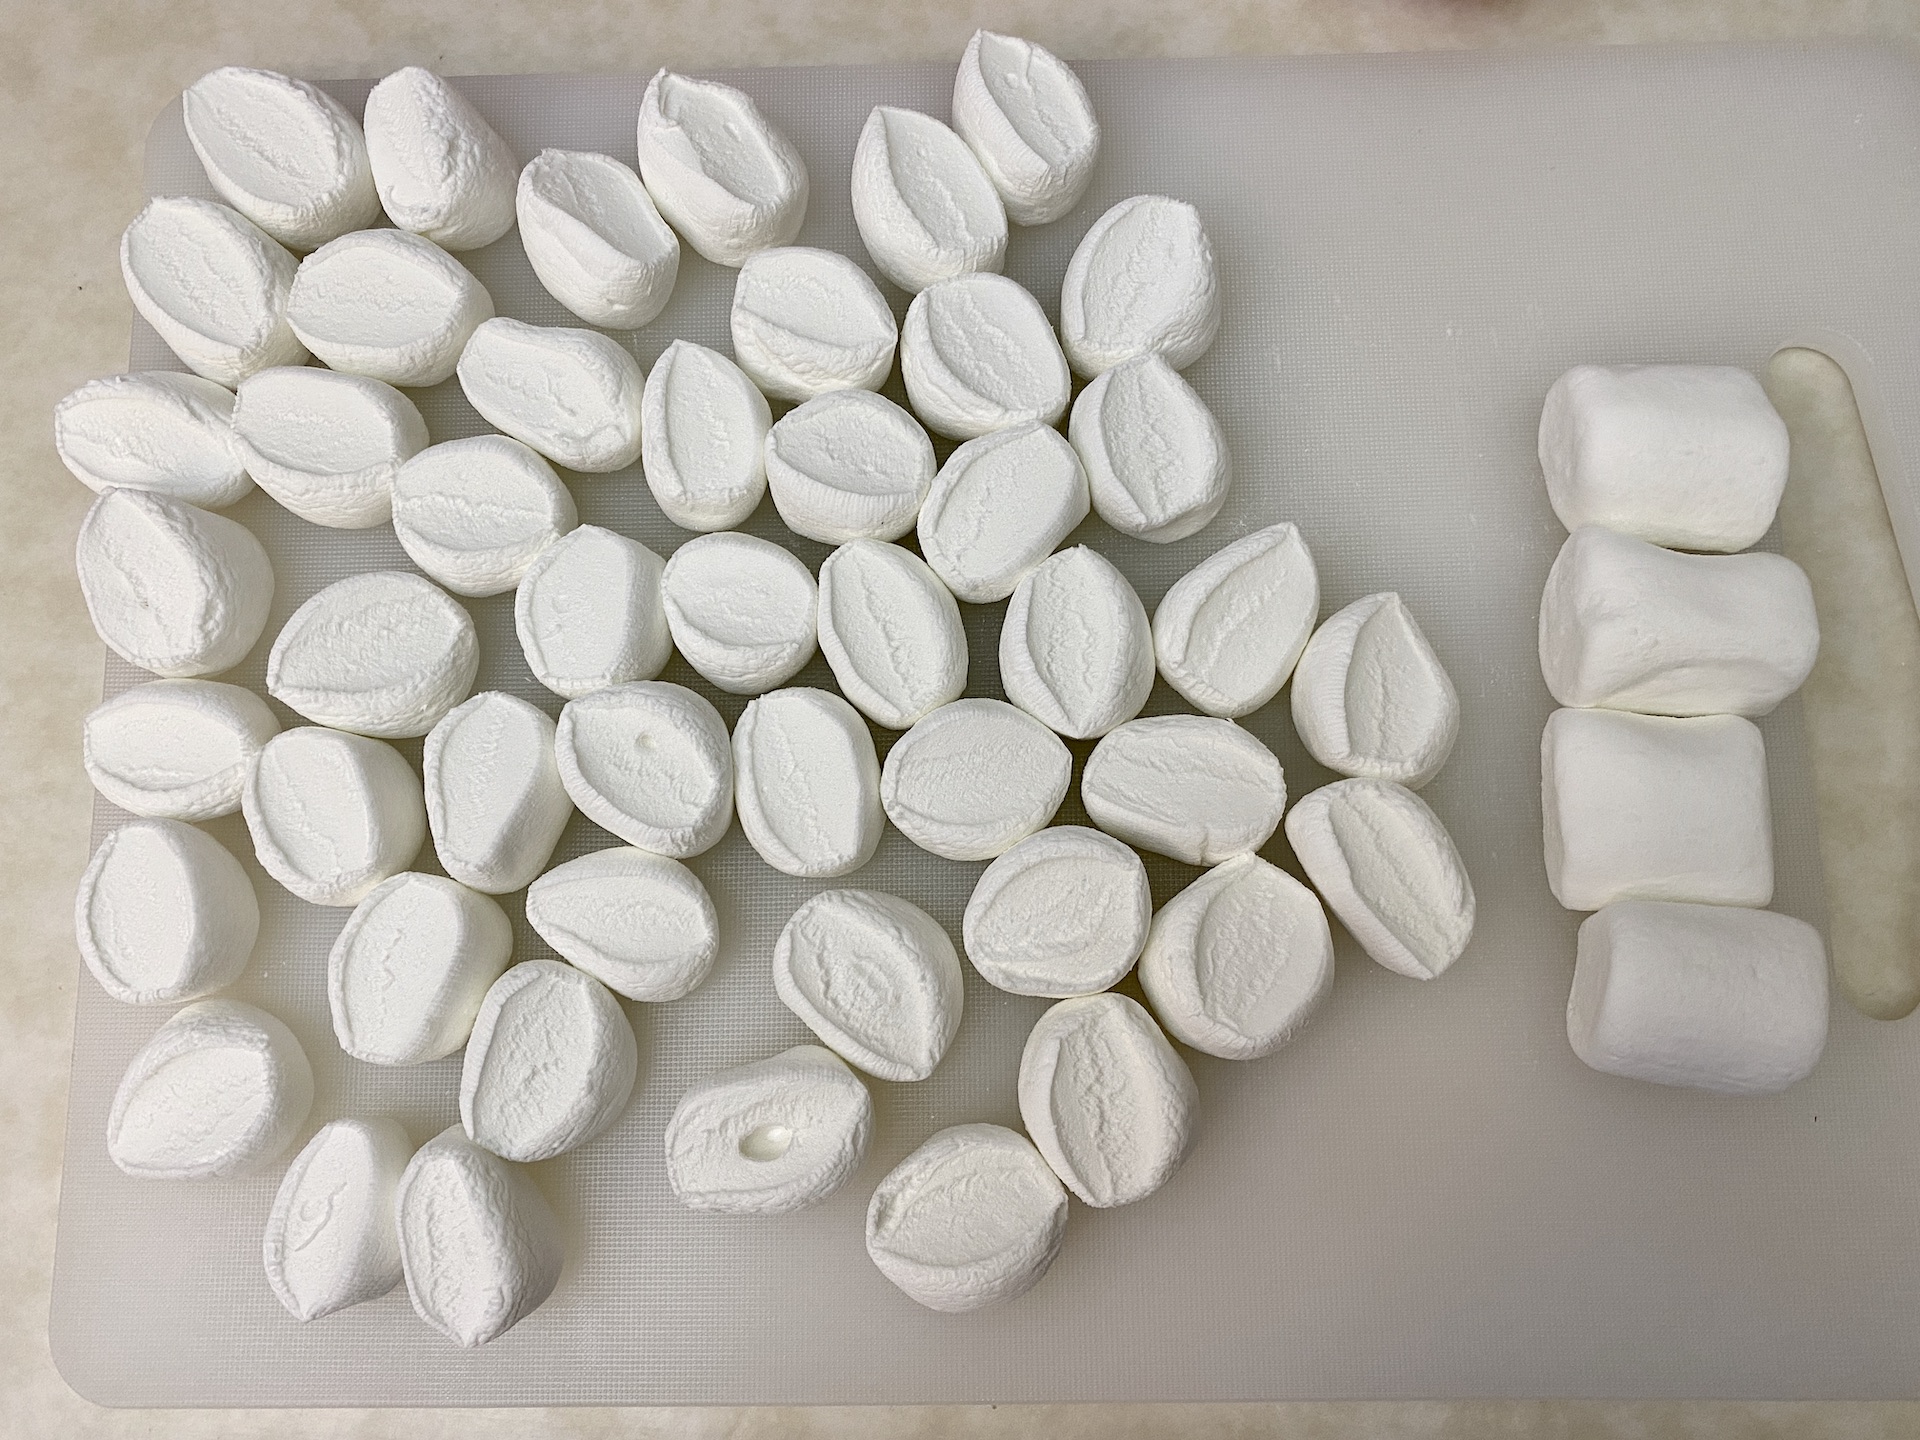
While the cookies are baking, prepare the marshmallows. Slice the large marshmallows in half, across the middle. Set aside.
When the cookies are done baking, press one marshmallow half in the center of each cookie (cut side down). Bake for an additional 2 minutes. Remove the baking sheets from the oven and allow the cookies to cool slightly.


While the cookies cool, prepare the icing. Add the powdered sugar, melted butter, cocoa powder, hot water, and vanilla to a large bowl. Whisk until well combined. Set aside.

Place wax paper on the counter and put 2-3 wire racks on top. The wax paper is to catch any icing that drips off. Transfer the cookies from the baking sheets to the wire racks.

Spoon a dollop of icing on top of each marshmallow. Help spread the icing over the top of each marshmallow/cookie with the back of the spoon. Top with sprinkles. Make sure to add the sprinkles ever 3-4 cookies so they sprinkles stick before the chocolate sets. Repeat until all cookies have been iced.


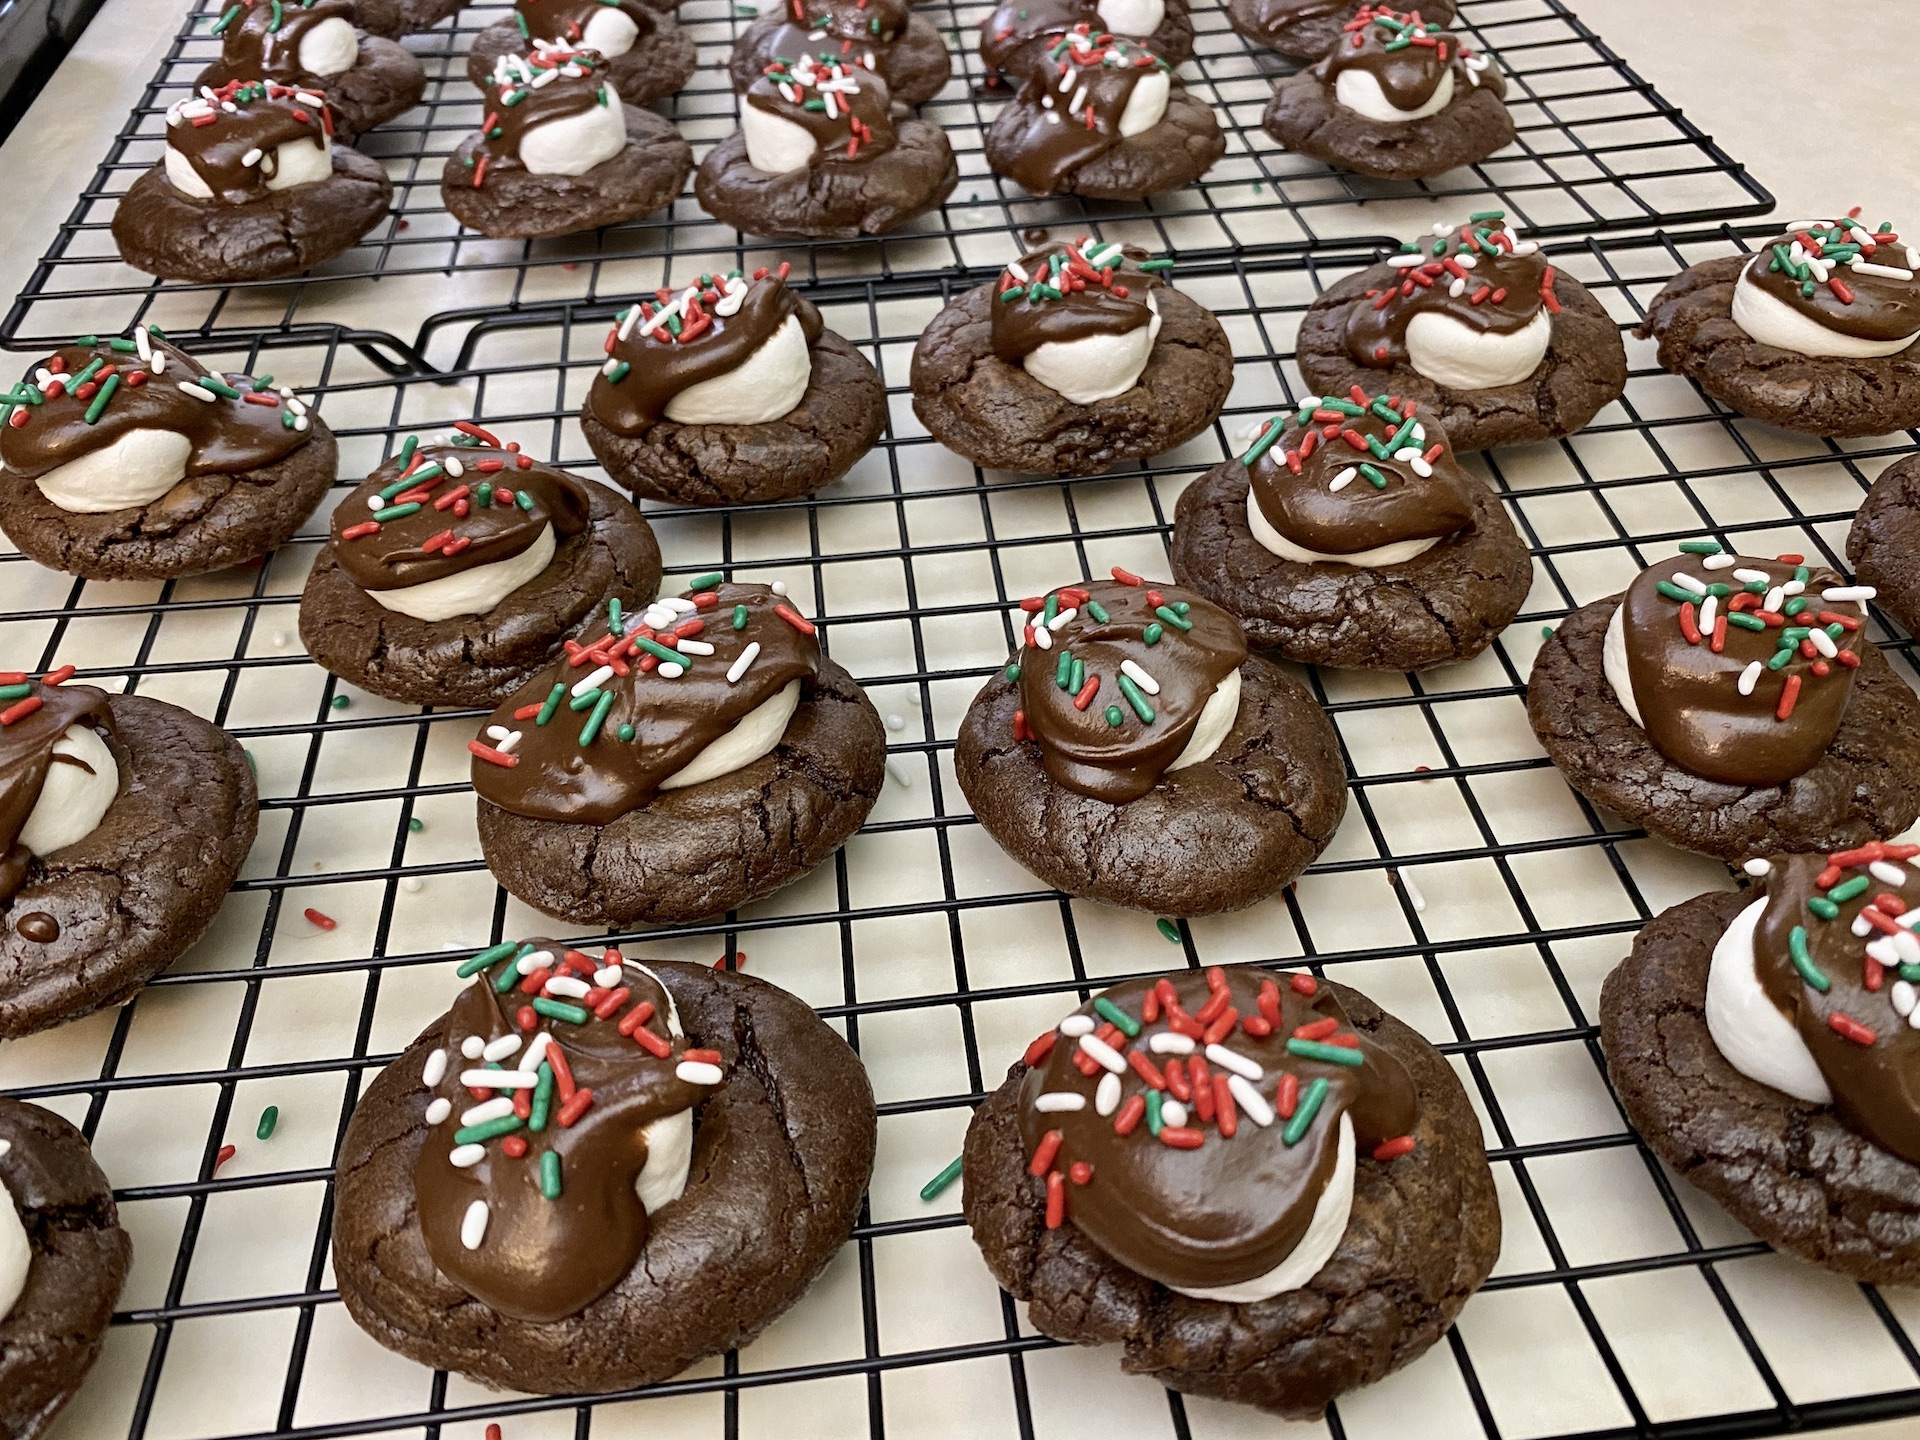
Let sit for at least 30 minutes to allow the icing to set. Enjoy (make sure to taste test) or store in an airtight container. I like to put parchment paper between the layers in the container, so they don’t stick together.

The recipe can be found here.
Lastly, we have Hot Chocolate Bombs. These aren’t exactly cookies but are a fun and festive treat. I’m sure you’ve seen them out and about at the grocery store or specialty candy shops. They are fun to make, customizable, and make a great gift. You essentially warm a glass of milk or water, place the hot chocolate bombs inside (or place inside and pour the hot liquid over the top) and watch for the shell to melt. Inside is powdered hot cocoa mix and marshmallows. All you must do is stir and enjoy!
The recipe can be found here.
You do need a special mold to make these. I purchased mine from Amazon. Click this link to be brought to the product.
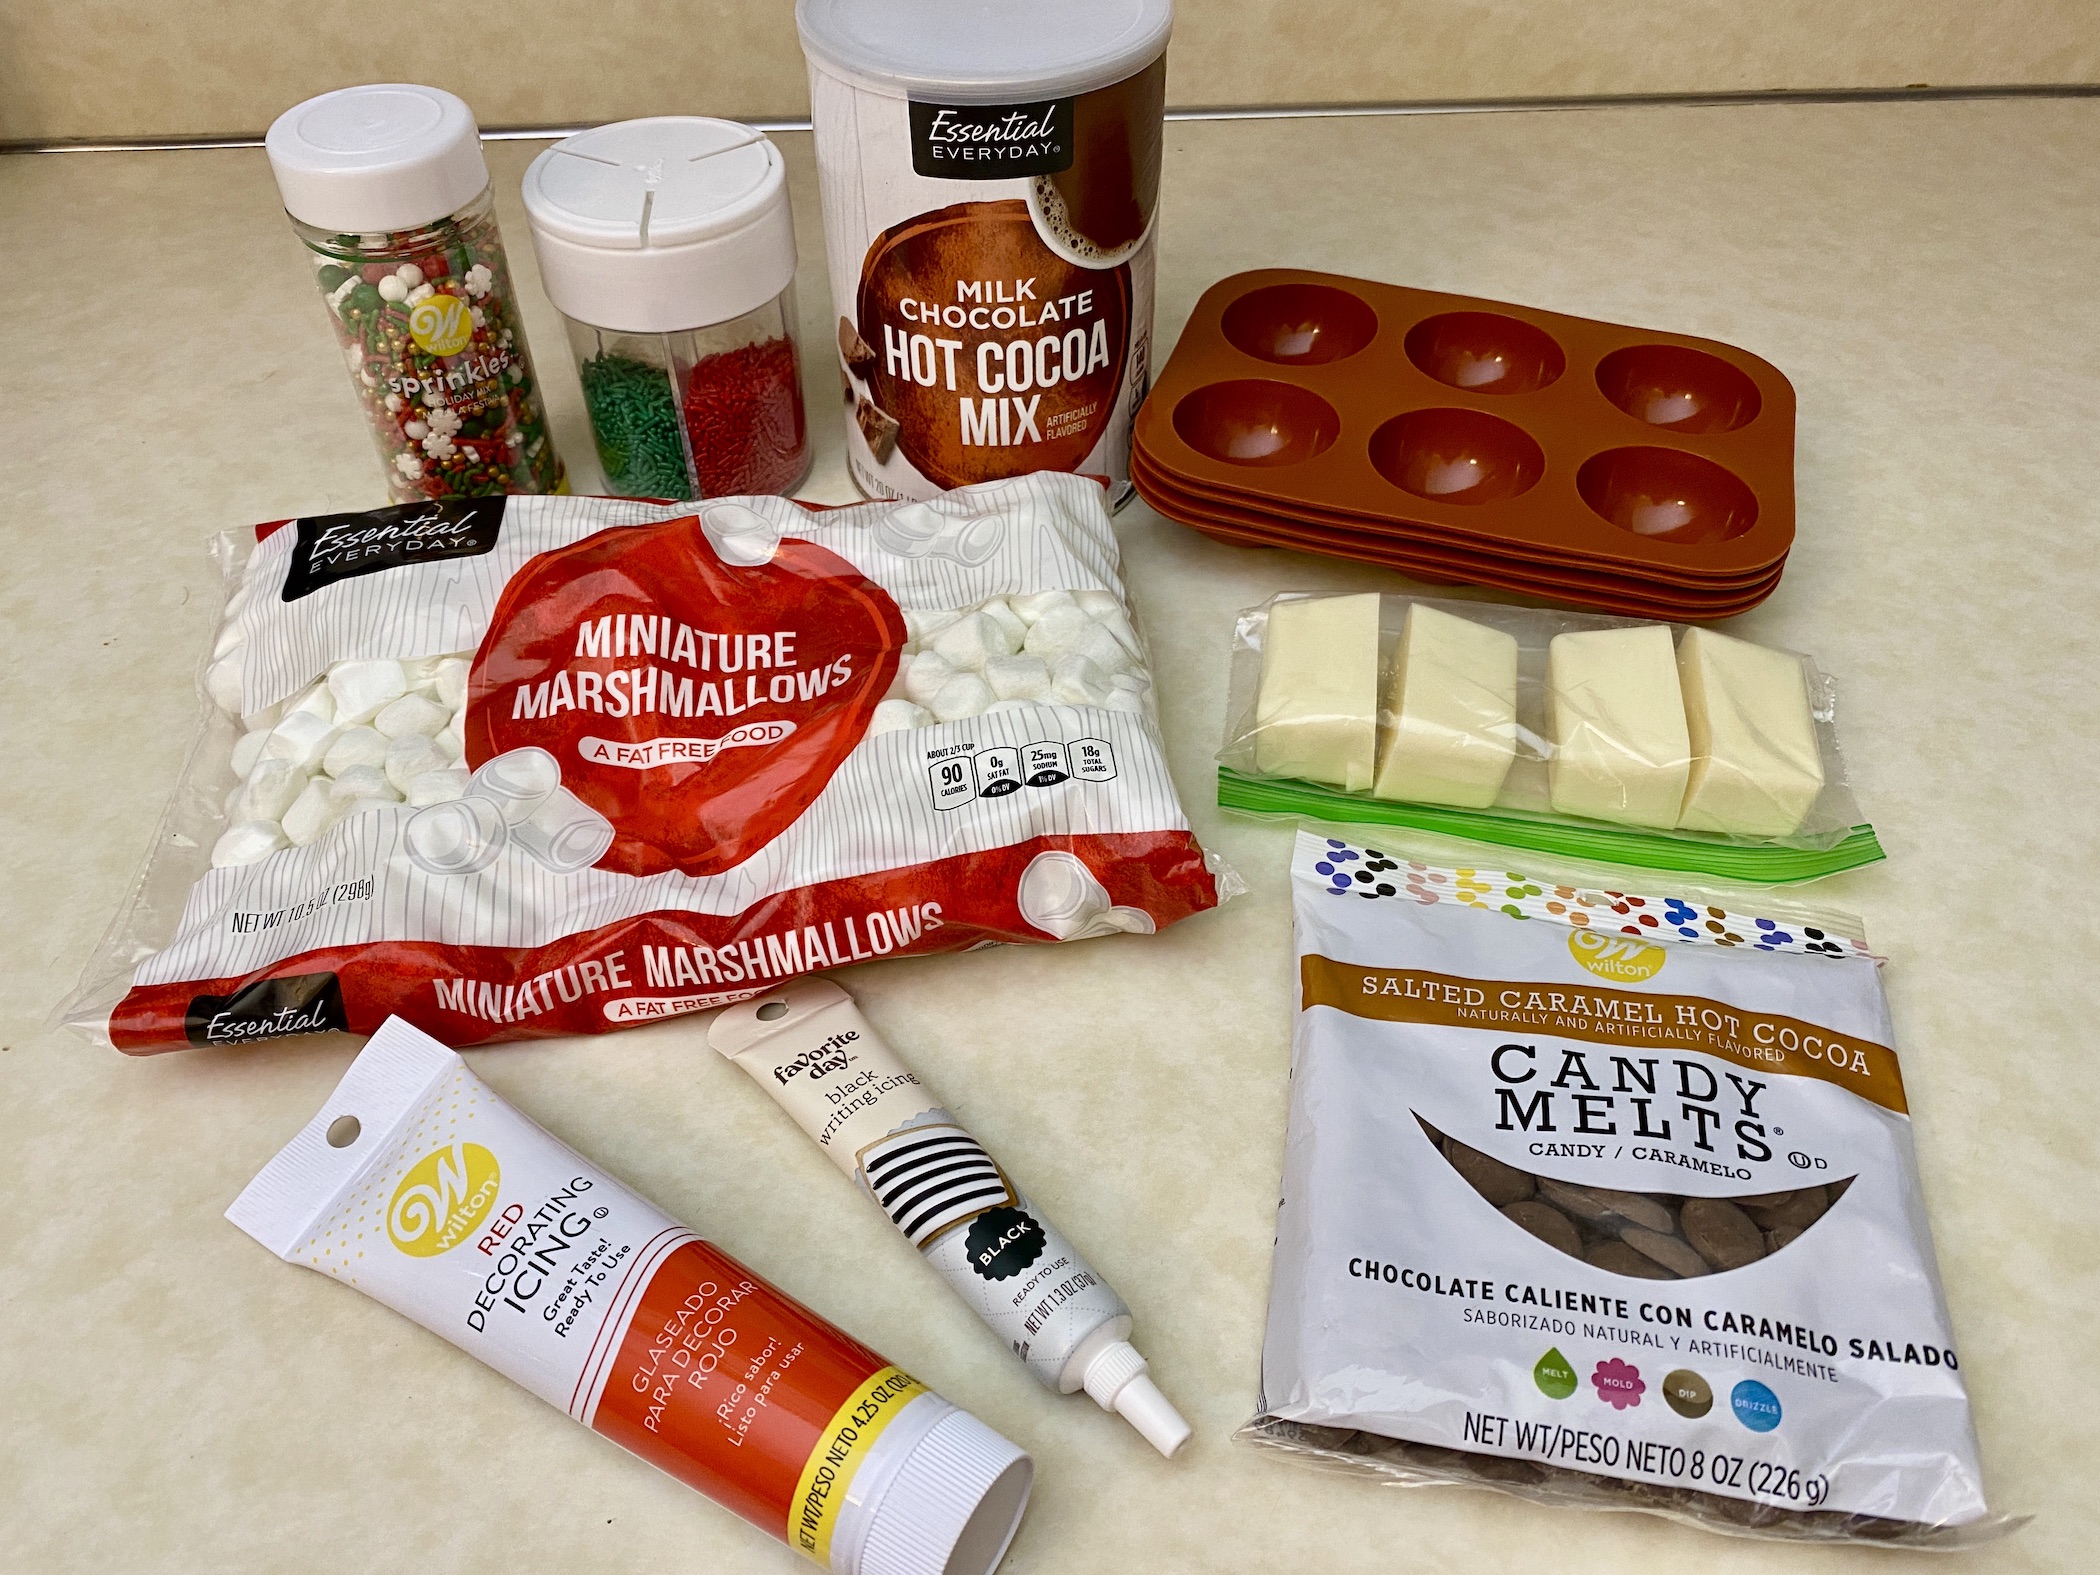
Start by prepping the chocolate for the chocolate shell. Add the chocolate to a saucepan and heat over medium-low heat. Melt the chocolate completely, stirring occasionally. Remove from the heat.


Place the molds on a baking sheet. I like to use a baking sheet because it’s easier to move the mold around while they set (you will be refrigerating them).
Use a small silicone brush to brush the melted chocolate inside each dome/cavity in the mold. Make sure to evenly coat the mold. It’s OK if you can see through the chocolate a bit because you will be adding an additional layer. So, you should only use about ½ of the melted chocolate for this step.

You can also use the back of a spoon to coat the inside of each cavity. I found this a little tricky to do but you might have better luck than I did!
Place the molds/baking sheet in the fridge for 10-15 minutes to allow the chocolate to completely harden.
Remove the molds/baking sheet from the fridge. Reheat the remaining chocolate over medium-low heat, if needed. Once melted, brush a second layer of chocolate evenly inside each dome/cavity in the mold. You can be quite liberal if needed, to ensure the molds are fully coated.

You shouldn’t need a third layer so you can use the rest of the chocolate in this step if needed. Any remaining chocolate can be discarded. You also don’t need to worry about the inside the molds looking very smooth. You won’t see this part when the hot chocolate bombs are assembled/sealed. This was my fear the first time I made these, but the outside was perfectly smooth, so it was perfect!
Place the baking sheet back in the fridge for an additional 10-15 minutes to allow the chocolate to completely harden.
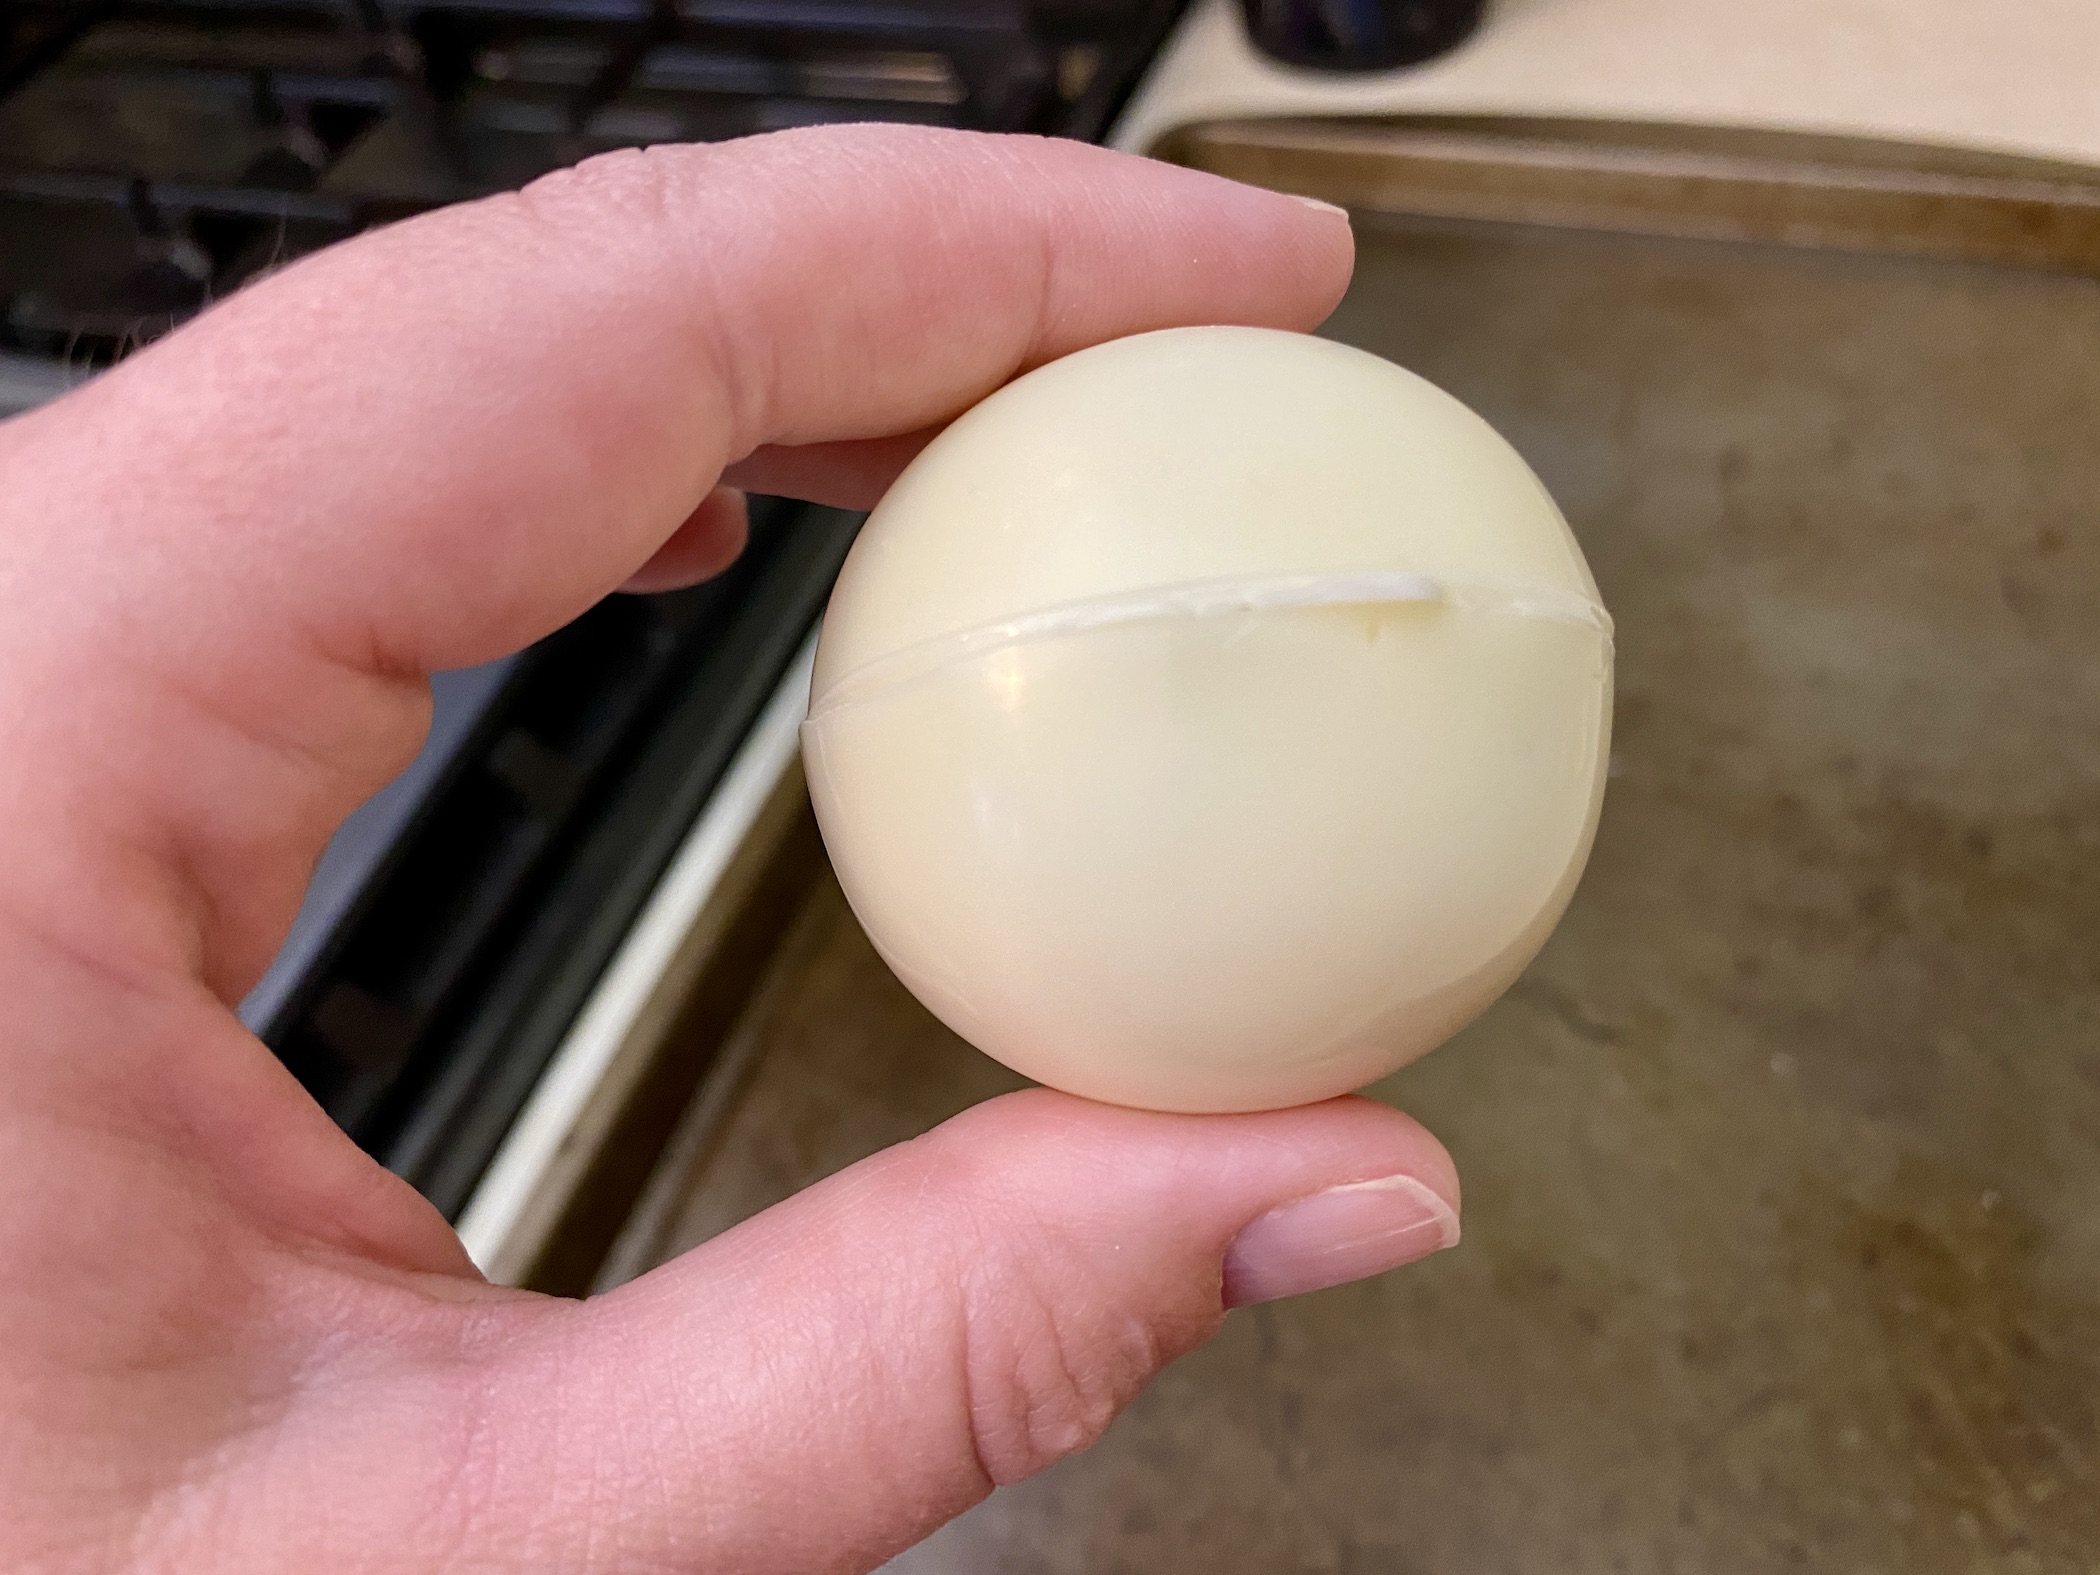
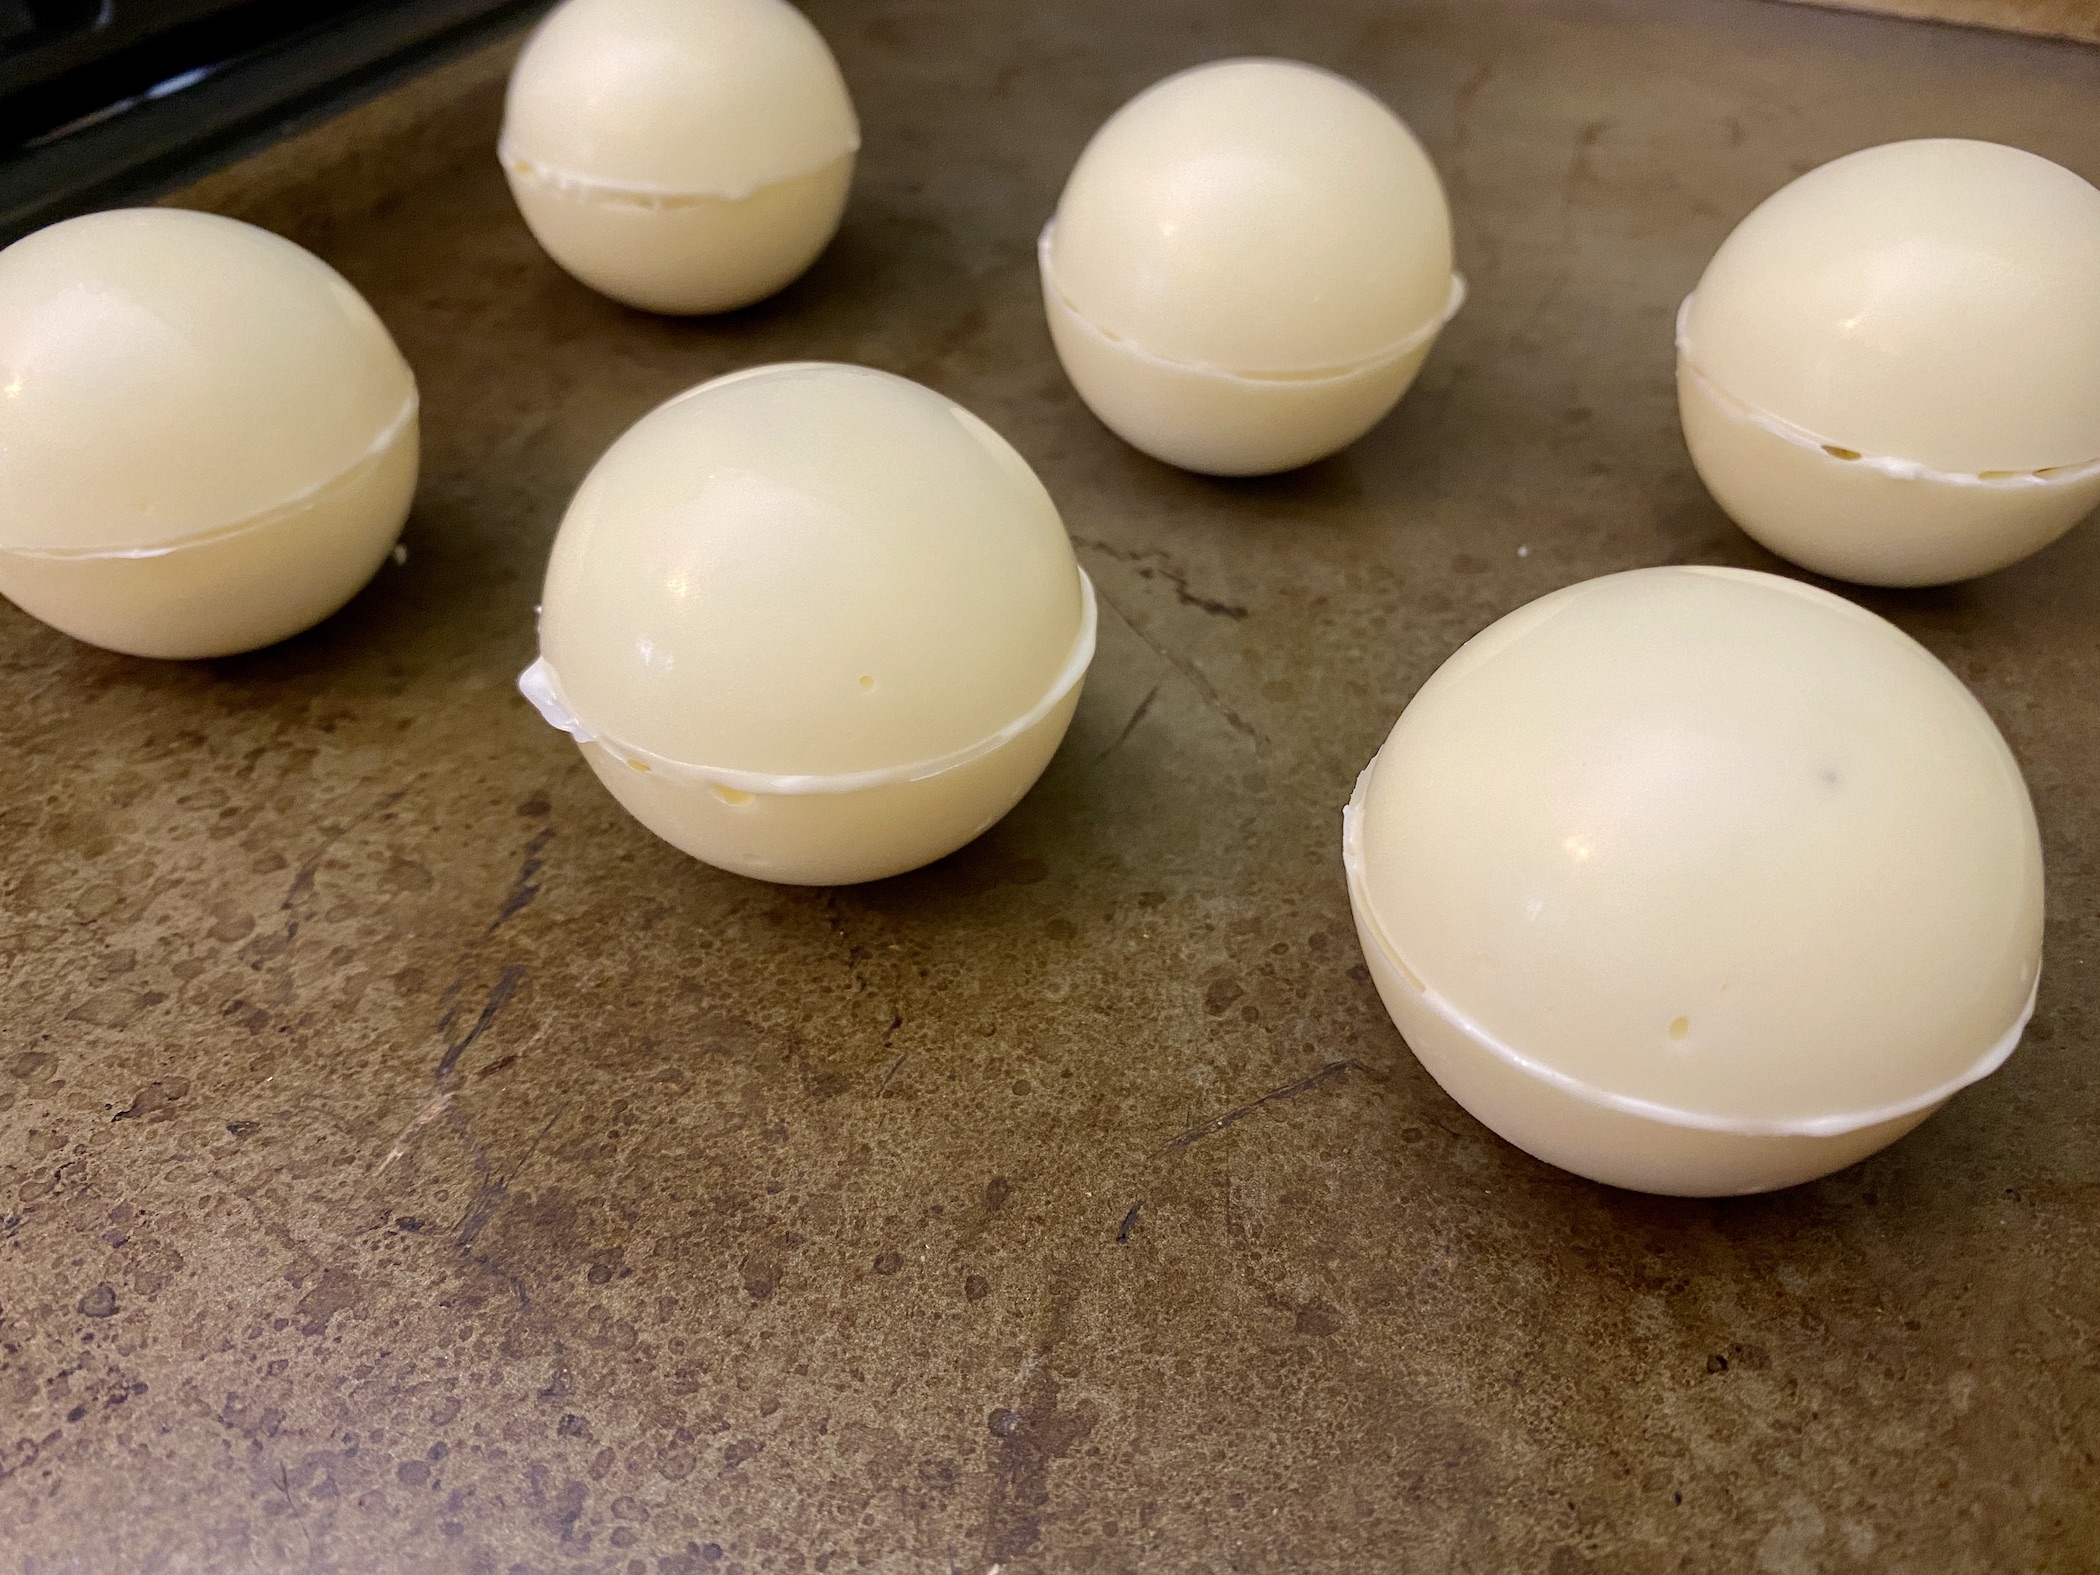
Once ready, gently remove the chocolate domes from the molds. I do this my gently pulling back on the silicone and letting the dome slide out. I had zero breakage so hopefully you do too!

Add a spoonful of hot chocolate mix to one half of the chocolate domes. Add miniature marshmallows on top of the hot chocolate mix.


Heat a small skillet over low heat. Take one of the empty dome halves and place on the hot skillet. This will melt the perimeter of the chocolate dome slightly. Do not leave the chocolate on the skillet for more than a few seconds because you don’t want it to melt too much.

Gently place the melted half on top of one of the filled chocolate domes. The melted chocolate should hold the 2 halves together. Set aside and repeat until you have assembled all your hot chocolate bombs. Let each sit for about 10 minutes to allow the chocolate to completely harden.
Now comes the fun part – decorating!
Add a small amount of red frosting to one side of the hot chocolate bomb. Then, frost a line over the top to the other side and add a small amount of frosting to the other side. The creates the earmuff look.
Add a large round sprinkle to each side of the bomb – this finishes off the earmuff look.
Use black frosting to add 2 eyes and a charcoal mouth. Add a tiny amount of frosting to the center and place an orange sprinkle on top. This will hold the “carrot” nose in place.
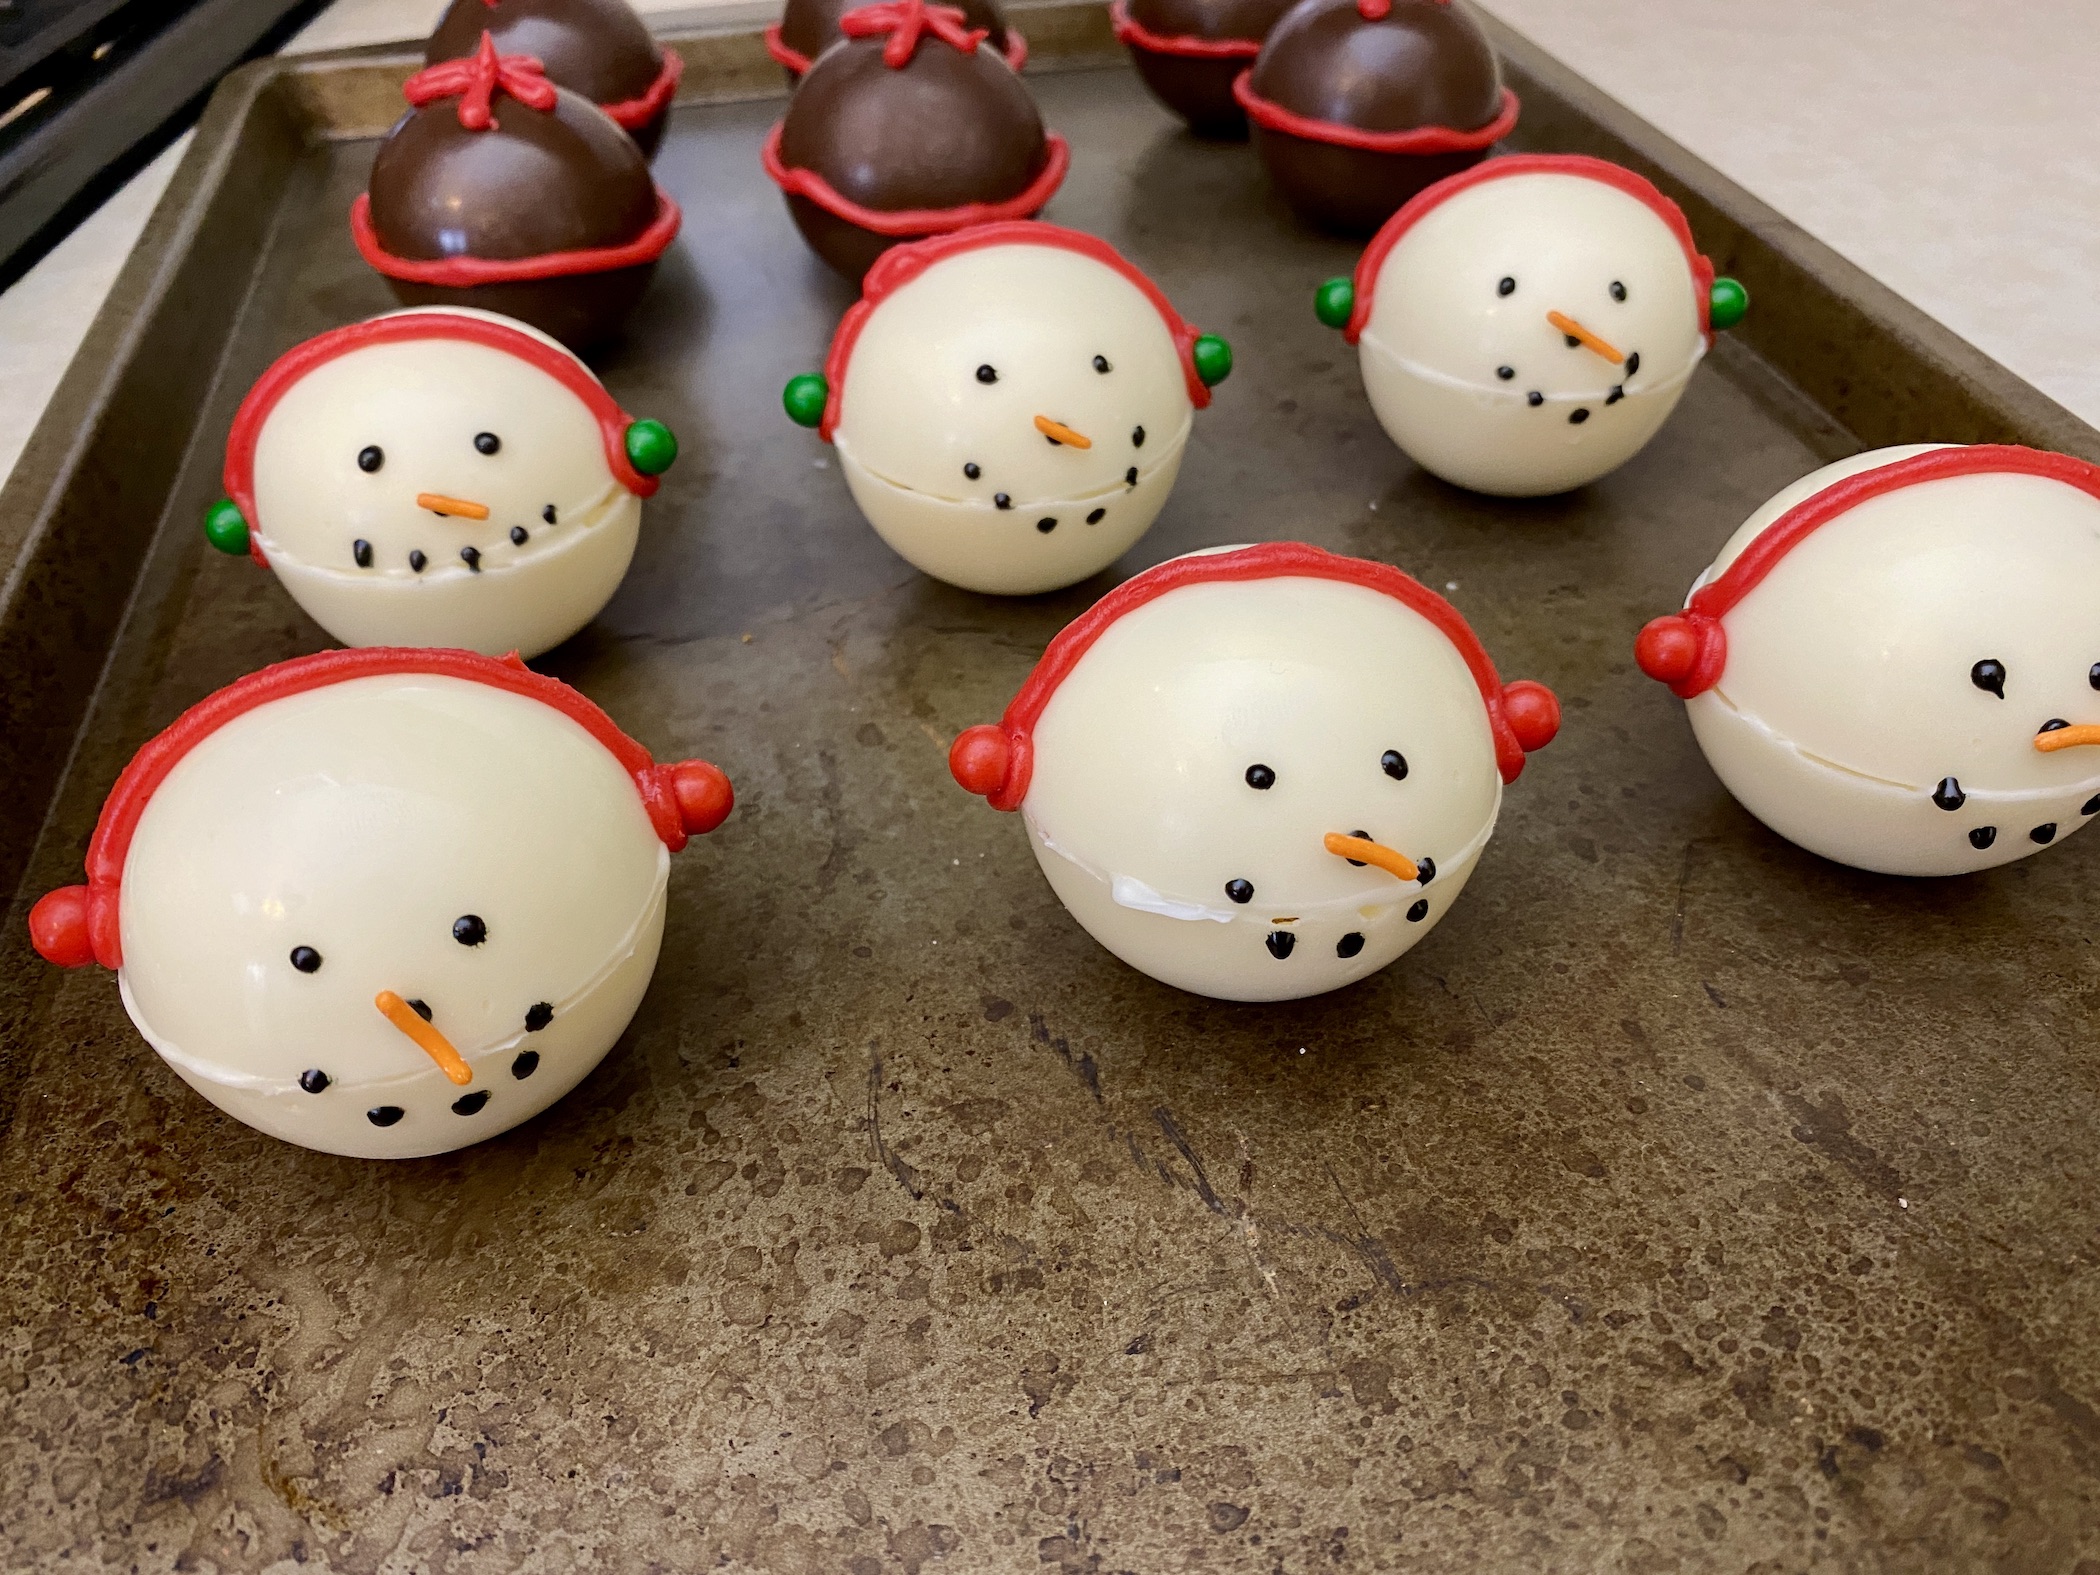
Repeat until all hot chocolate bombs have been decorated. Set aside for about 10-15 minutes to allow the decorations to harden.
Store until ready to use or enjoy immediately in a mug of warm milk/water. Simply heat the milk or water. Once hot, place the hot chocolate bomb directly into the mug or place the hot chocolate bomb in the mug and pour the hot liquid over the top. Wait a few seconds and the hot chocolate bomb should start to melt and open. Stir to dissolve the hot chocolate powder. Enjoy!


The recipe can be found here.
These are completely customizable. Use almond bark or candy melts – any color. You can use orange for Halloween, red or pink for Valentine’s Day, blue for winter, yellow for summer, etc. Add a decoration of your choice – sprinkles, frosting, etc.
I made a second version using milk chocolate and red frosting to decorate. They look like little presents 🙂

There you have it! A few new recipes to add to your rotation this holiday season. What do you think will be your favorite?
Happy Holidays and Happy Cooking!


Recent Comments