 order online
 weekly specials
Valentine’s Day is fast approaching. Do you know how you are celebrating? They are so many options…spend time with a significant other or your kids, maybe a few close friends (think Galantine’s Day), or boycott the day all together 😊 Which I know some people like to do, and that’s OK! We tend to make a last-minute decision on how we will celebrate and some years we go out to eat and some years we stay in. With COVID and rising cases, we’ve been looking for more “at home” options to say safe and healthy.
With that being said, I’m not prepared to talk about dinner options today 😊 but do have a few other Valentine’s Day themed treats to share with you.
- Homemade Valentine’s Day Pop Tarts
- Valentine’s Day S’mores
- Frosted Pink Sugar Cookie Bars
- Strawberry Lemonade Frosé
- Raspberry Pina Colada
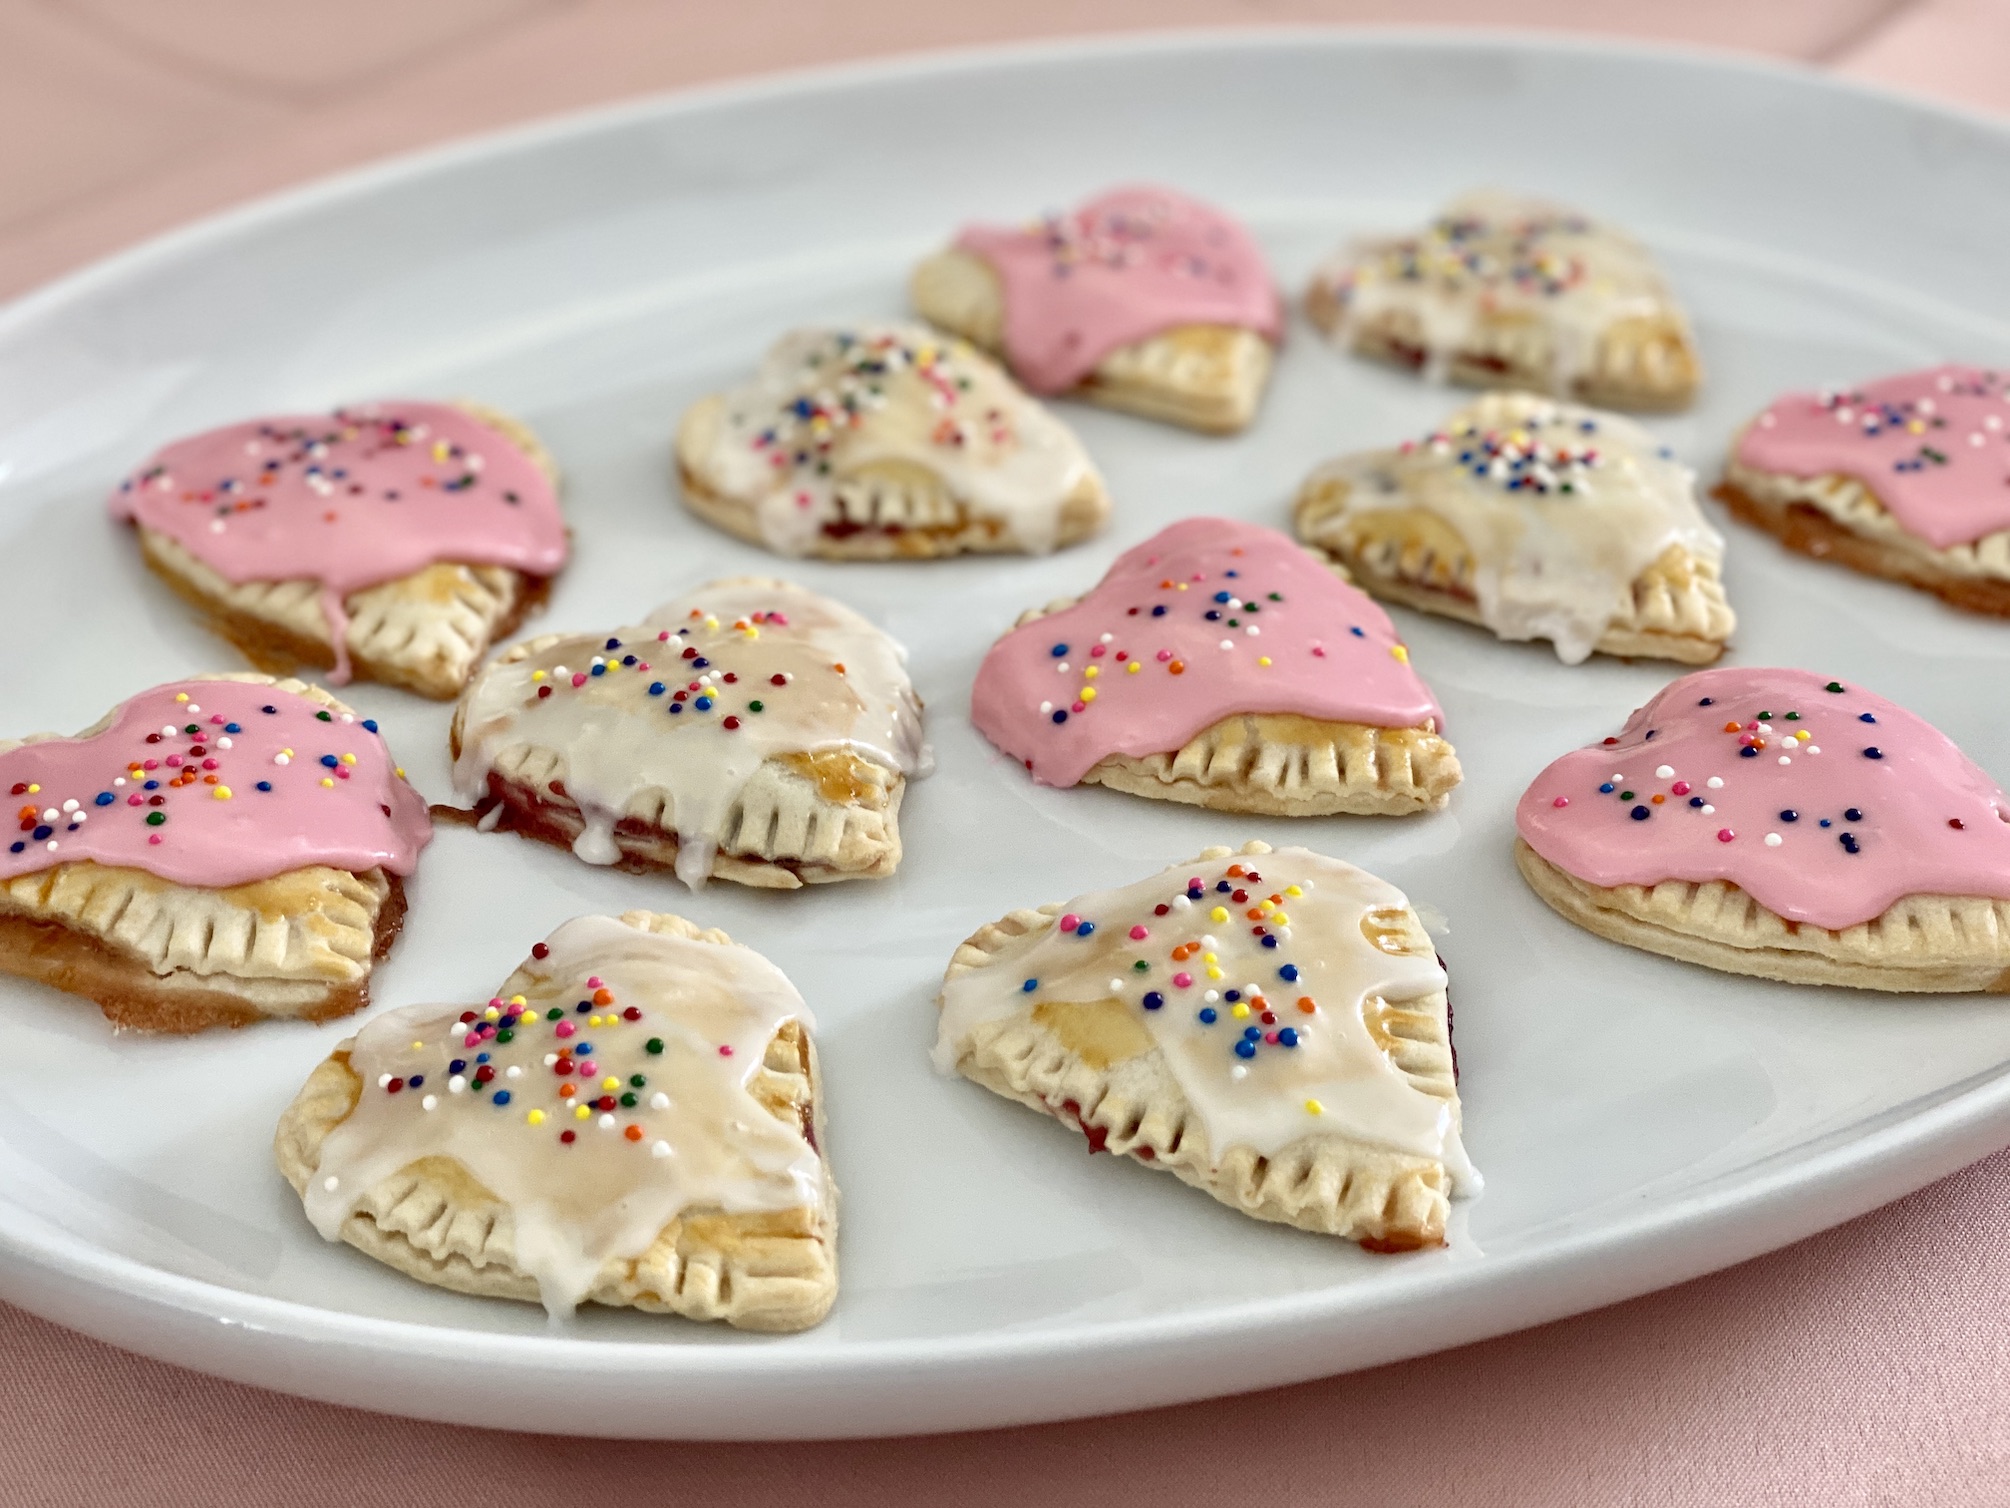
Homemade Valentine’s Day Pop Tarts are a favorite for us! They are basically homemade Pop Tarts that are cut in the shape of a heart. They are filled with yummy jam, slathered in sugary frosting, and make the perfect breakfast.
These are family friendly and something the kids will love to help make and eat. They are also customizable. I like to use raspberry and strawberry jam, but you could use blueberry or apricot, etc. You can also use this recipe for other holidays. Just change the shape (i.e., a shamrock for St. Patrick’s Day or pumpkin for Halloween) and frosting / sprinkles color.

The recipe can be found here.
Start by removing the pie crust from the fridge and let it sit on the counter for about 30 minutes to warm up. This will prevent the crust from cracking or breaking while unrolling. Also preheat the oven to 350 degrees F and line a baking sheet with parchment paper.
Lightly flour the counter and roll out each pie crust. You do need both crusts – one will be the bottom part of the Pop Tarts and one will be the top part of the Pop Tarts. Use a rolling pin to slightly flatten each pie crust. You don’t want the crust to be too thin, just go over it 2-3 times with a rolling pin. This will give you more surface area to work.


Use a heart shaped cookie cutter to cut out the dough. I was able to get 12 hearts per pie crust.
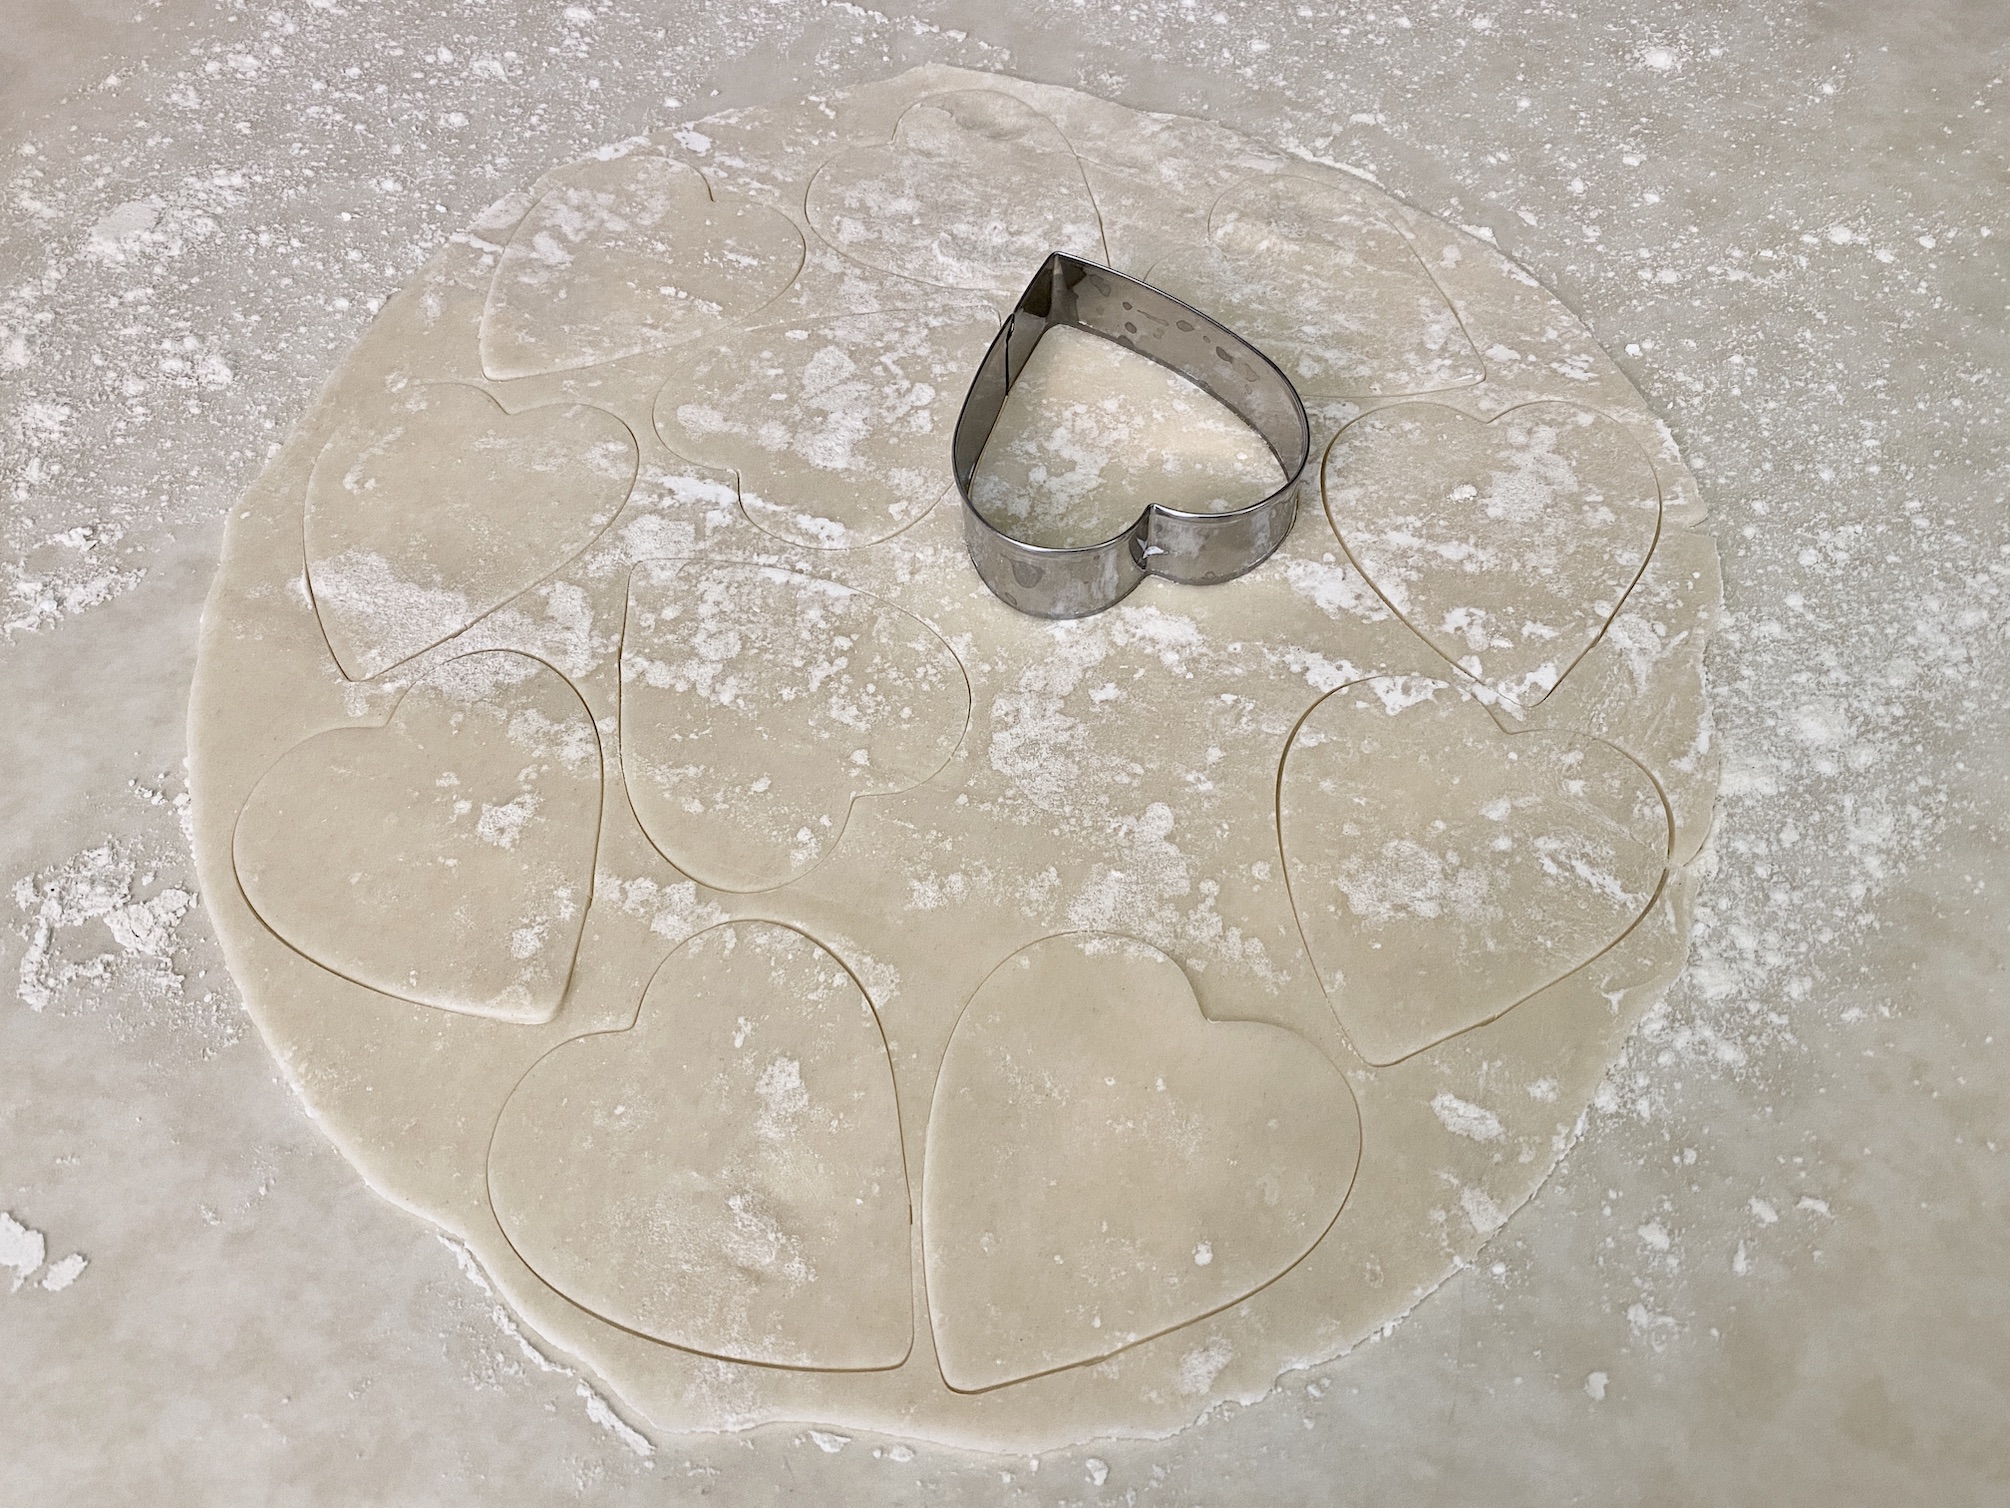

Place 12 hearts on the baking sheet, spaced apart. Leave the other 12 hearts on the counter for now.

Whisk the egg in a small bowl. In 2 separate bowls, mix 1 Tbsp cornstarch with the raspberry jam and 1 Tbsp cornstarch with the strawberry jam.
Brush the egg wash on the hearts on the baking sheet. Then top with approximately 1 Tbsp of the jam mixture (I like to do 6 raspberry and 6 strawberry). Place the other 12 hearts on top.


Use a fork to press the edges together, working your way around each heart, to seal completely.

Use a toothpick to prick a hole in the middle of each Pop Tart and brush the top with egg wash.

Bake for 18-20 minutes or until golden brown.

Remove to a cooling rack to cool completely. You do want the Pop Tarts to be completely cool before adding the icing or it will drip down the sides and more will be on the counter than the Pop Tart!
Once cooled, prepare the icing. Add ½ cup powdered sugar to 2 separate bowls. Add 1 Tbsp half & half to each bowl and stir to combine. Add any additional half & half as needed to thin out the icing. Add 1 drop of red food coloring to one of the bowls and stir to combine to create pink icing. Please note, this is if you are going to have 2 different colors of icing. If you only want 1, add the entire amount of powdered sugar and half & half to the same bowl. You can then add the food coloring color of your choice.
I do prefer to use 2 different colors of icing. As previously mentioned, I make 6 raspberry and 6 strawberry Pop Tarts, so the icing helps me keep the flavors separate. I’ll use the white icing on the raspberry Pop Tarts and the pink icing on the strawberry Pop Tarts (or vice versa). But it’s up to you!
Spread the icing on top of the Pop Tarts and top immediately with sprinkles.


***If the Pop Tarts end up being too warm and the icing just drips off the side, let the icing harden and let the Pop Tarts cool completely, then add another layer of icing. Add the sprinkles after the second layer of icing is added.

Enjoy immediately or store in an airtight container on the counter.
The recipe can be found here.
Valentine’s Day S’mores are super simple to make and don’t require a bonfire pit 😊 Can you imagine standing outside in Feb in MN to roast a marshmallow? Hard pass. These are made in the broiler and take about 2 min to make from start to finish. They are something the kids can help assemble and can be made more than once. If you have leftover ingredients, make them again another day. The marshmallows are perfectly browned and warmed through, the chocolate is melty and oozes out in each bite, and the graham cracker crust add the perfect crunch.

The recipe can be found here.

Preheat the broiler. If you have a low or high setting, pick the low setting so you don’t burn the marshmallows.
Line a baking sheet with aluminum foil or parchment paper. If using parchment paper, make sure it fits inside the rim of the baking sheet and isn’t sticking out the sides (we don’t need any fires).
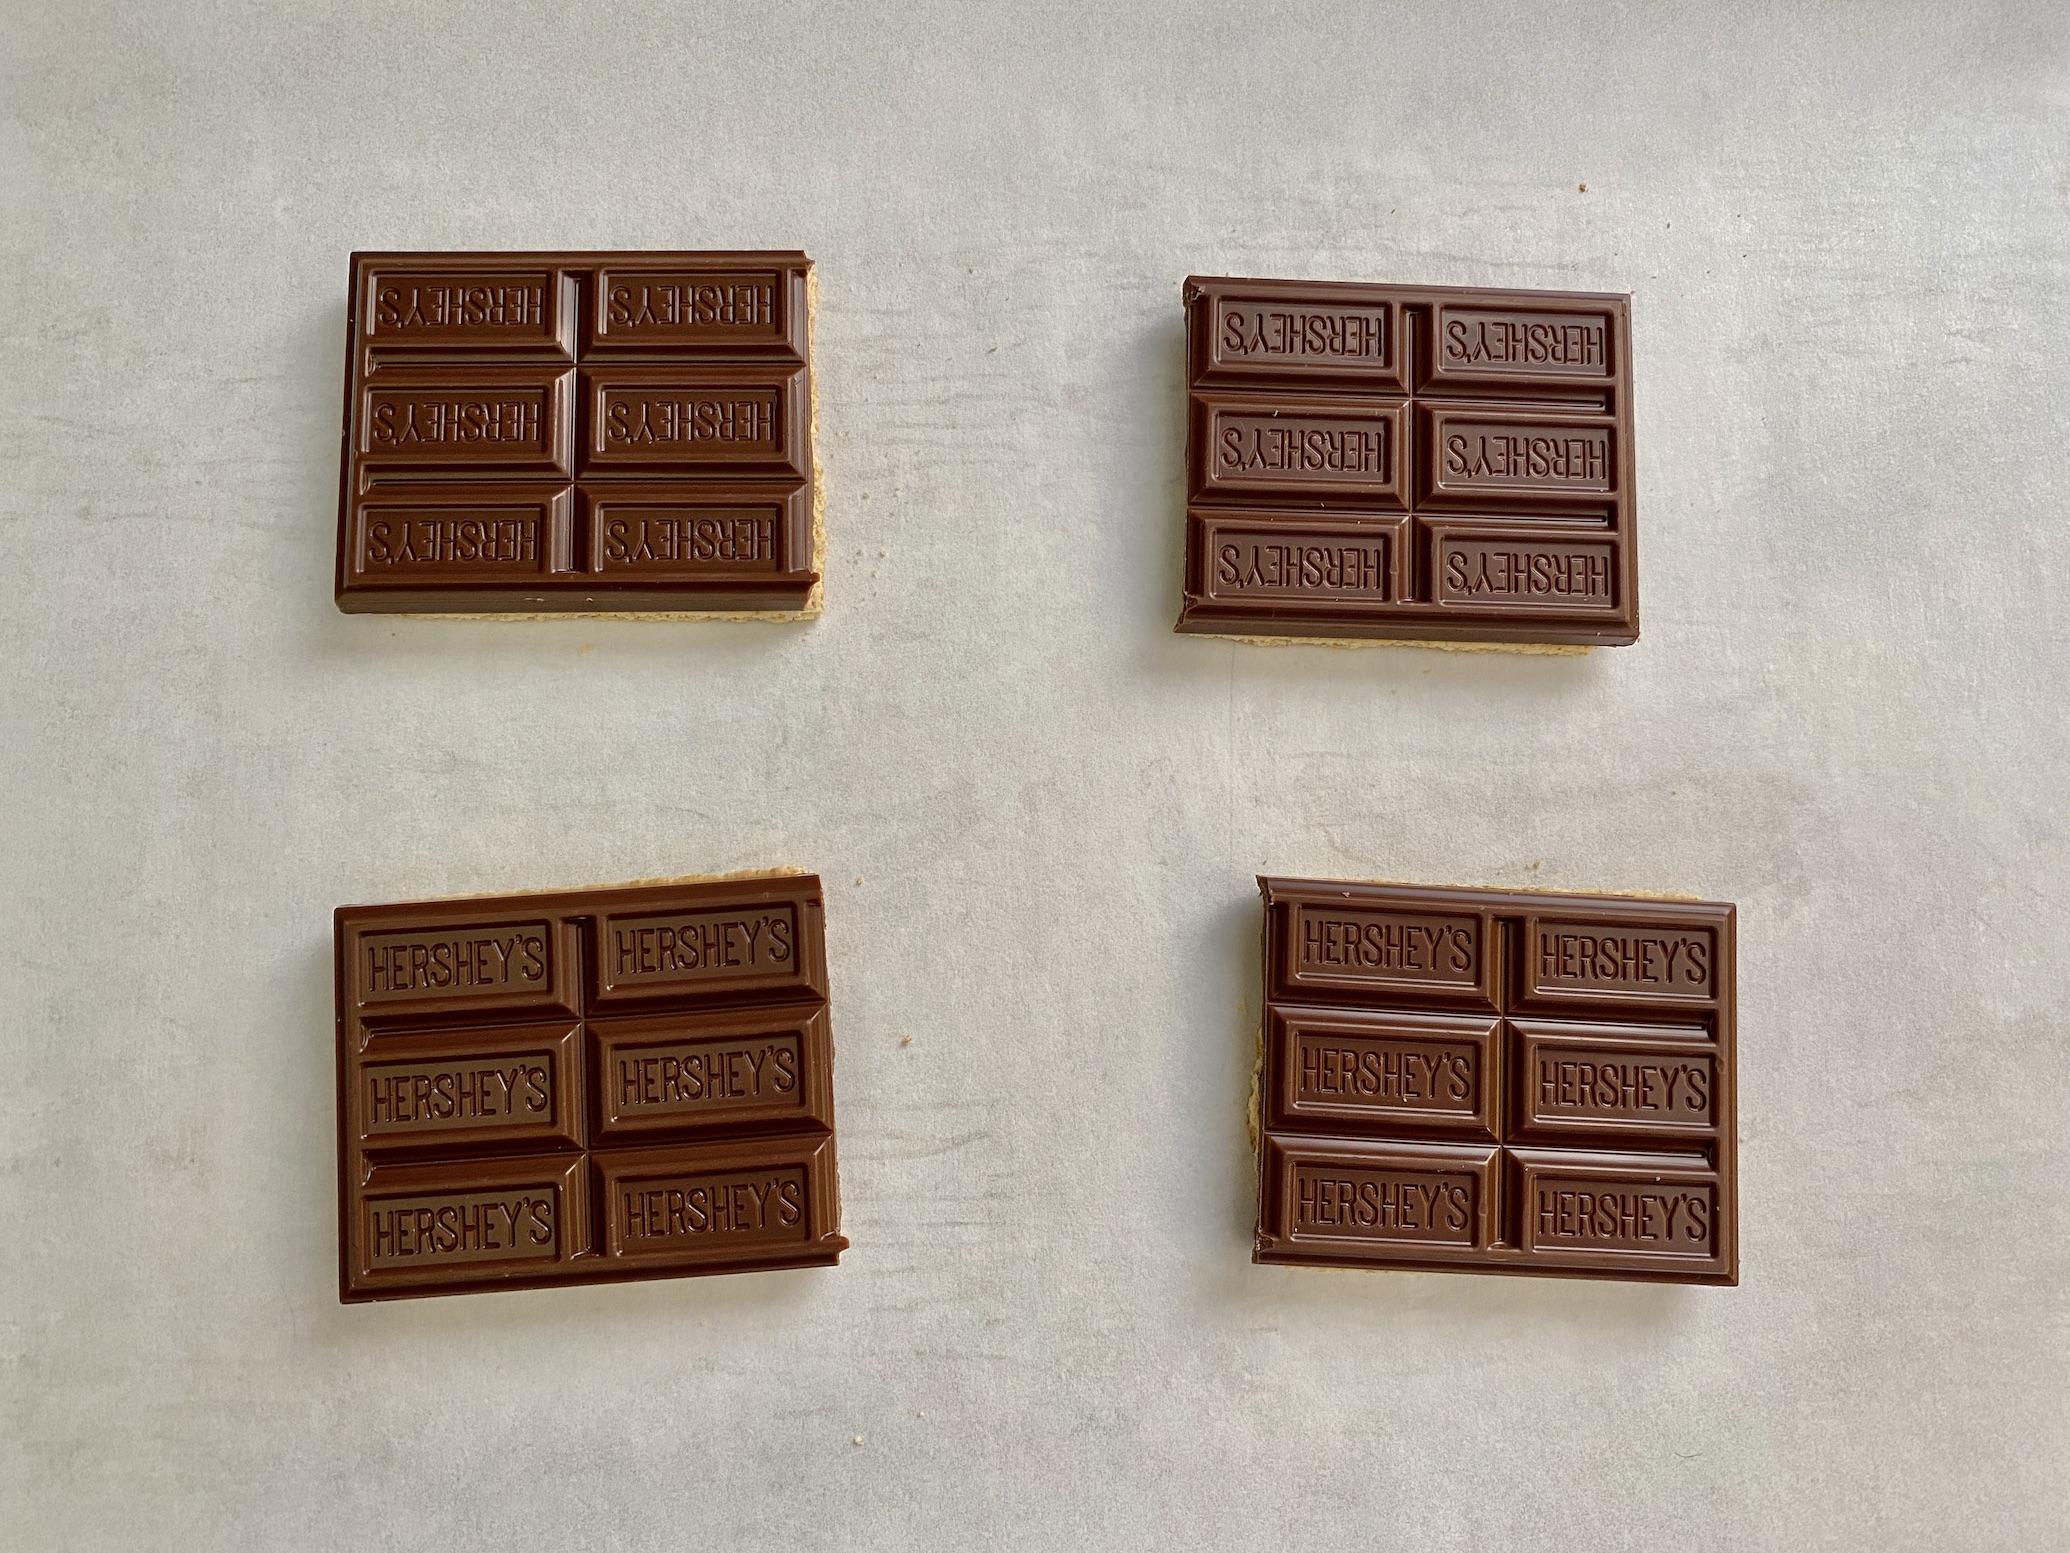
Break the graham crackers in half and place the squares on the baking sheet.

Break the chocolate bars in half and place on top of the graham crackers. I like to use Hershey’s Chocolate because it fits so nicely on the graham crackers but use any chocolate of your choosing.
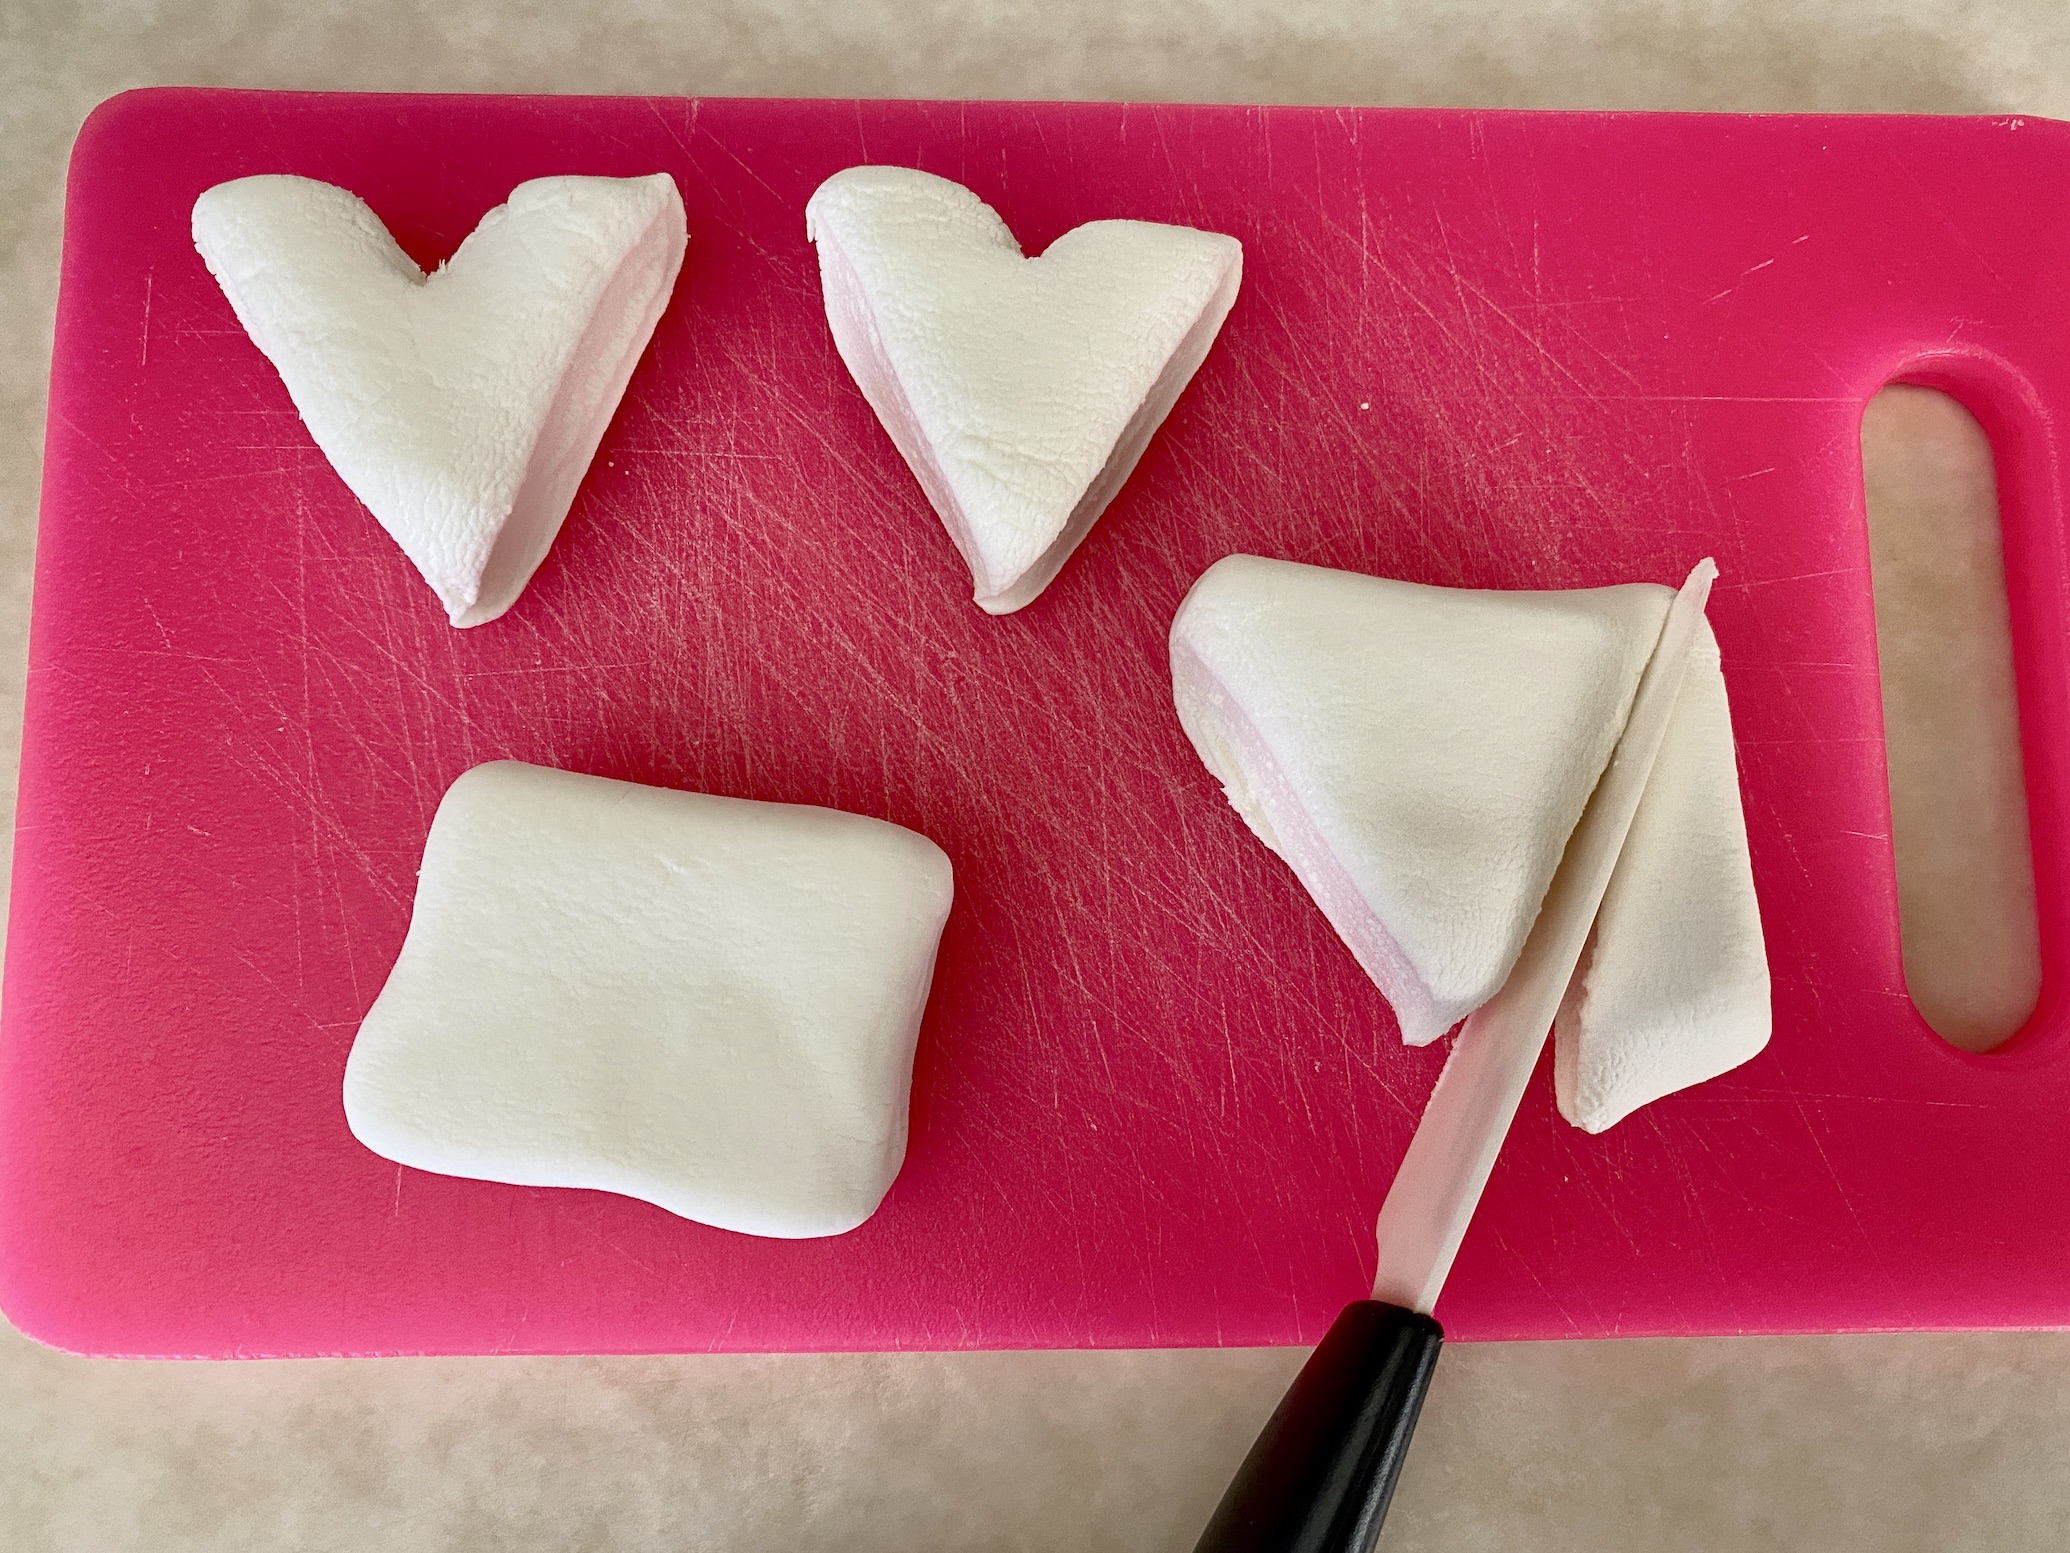
If you can find and are using heart shaped marshmallows, place on top of the chocolate.

If you are like me and couldn’t find heart shaped marshmallows (let’s be honest, I probably shopped too early) you can buy square marshmallows. They are a little large than a standard marshmallow and can be cut in a heart shape.


Place the baking sheet under the broiler for 30-60 seconds. Watch the marshmallows the entire time! You don’t want anything to burn or catch on fire! If you need longer than 60 seconds, that’s OK. Just make sure to keep watching so you can pull the baking sheet when needed. You do want the marshmallows to have a nice toasty top and be warmed through.
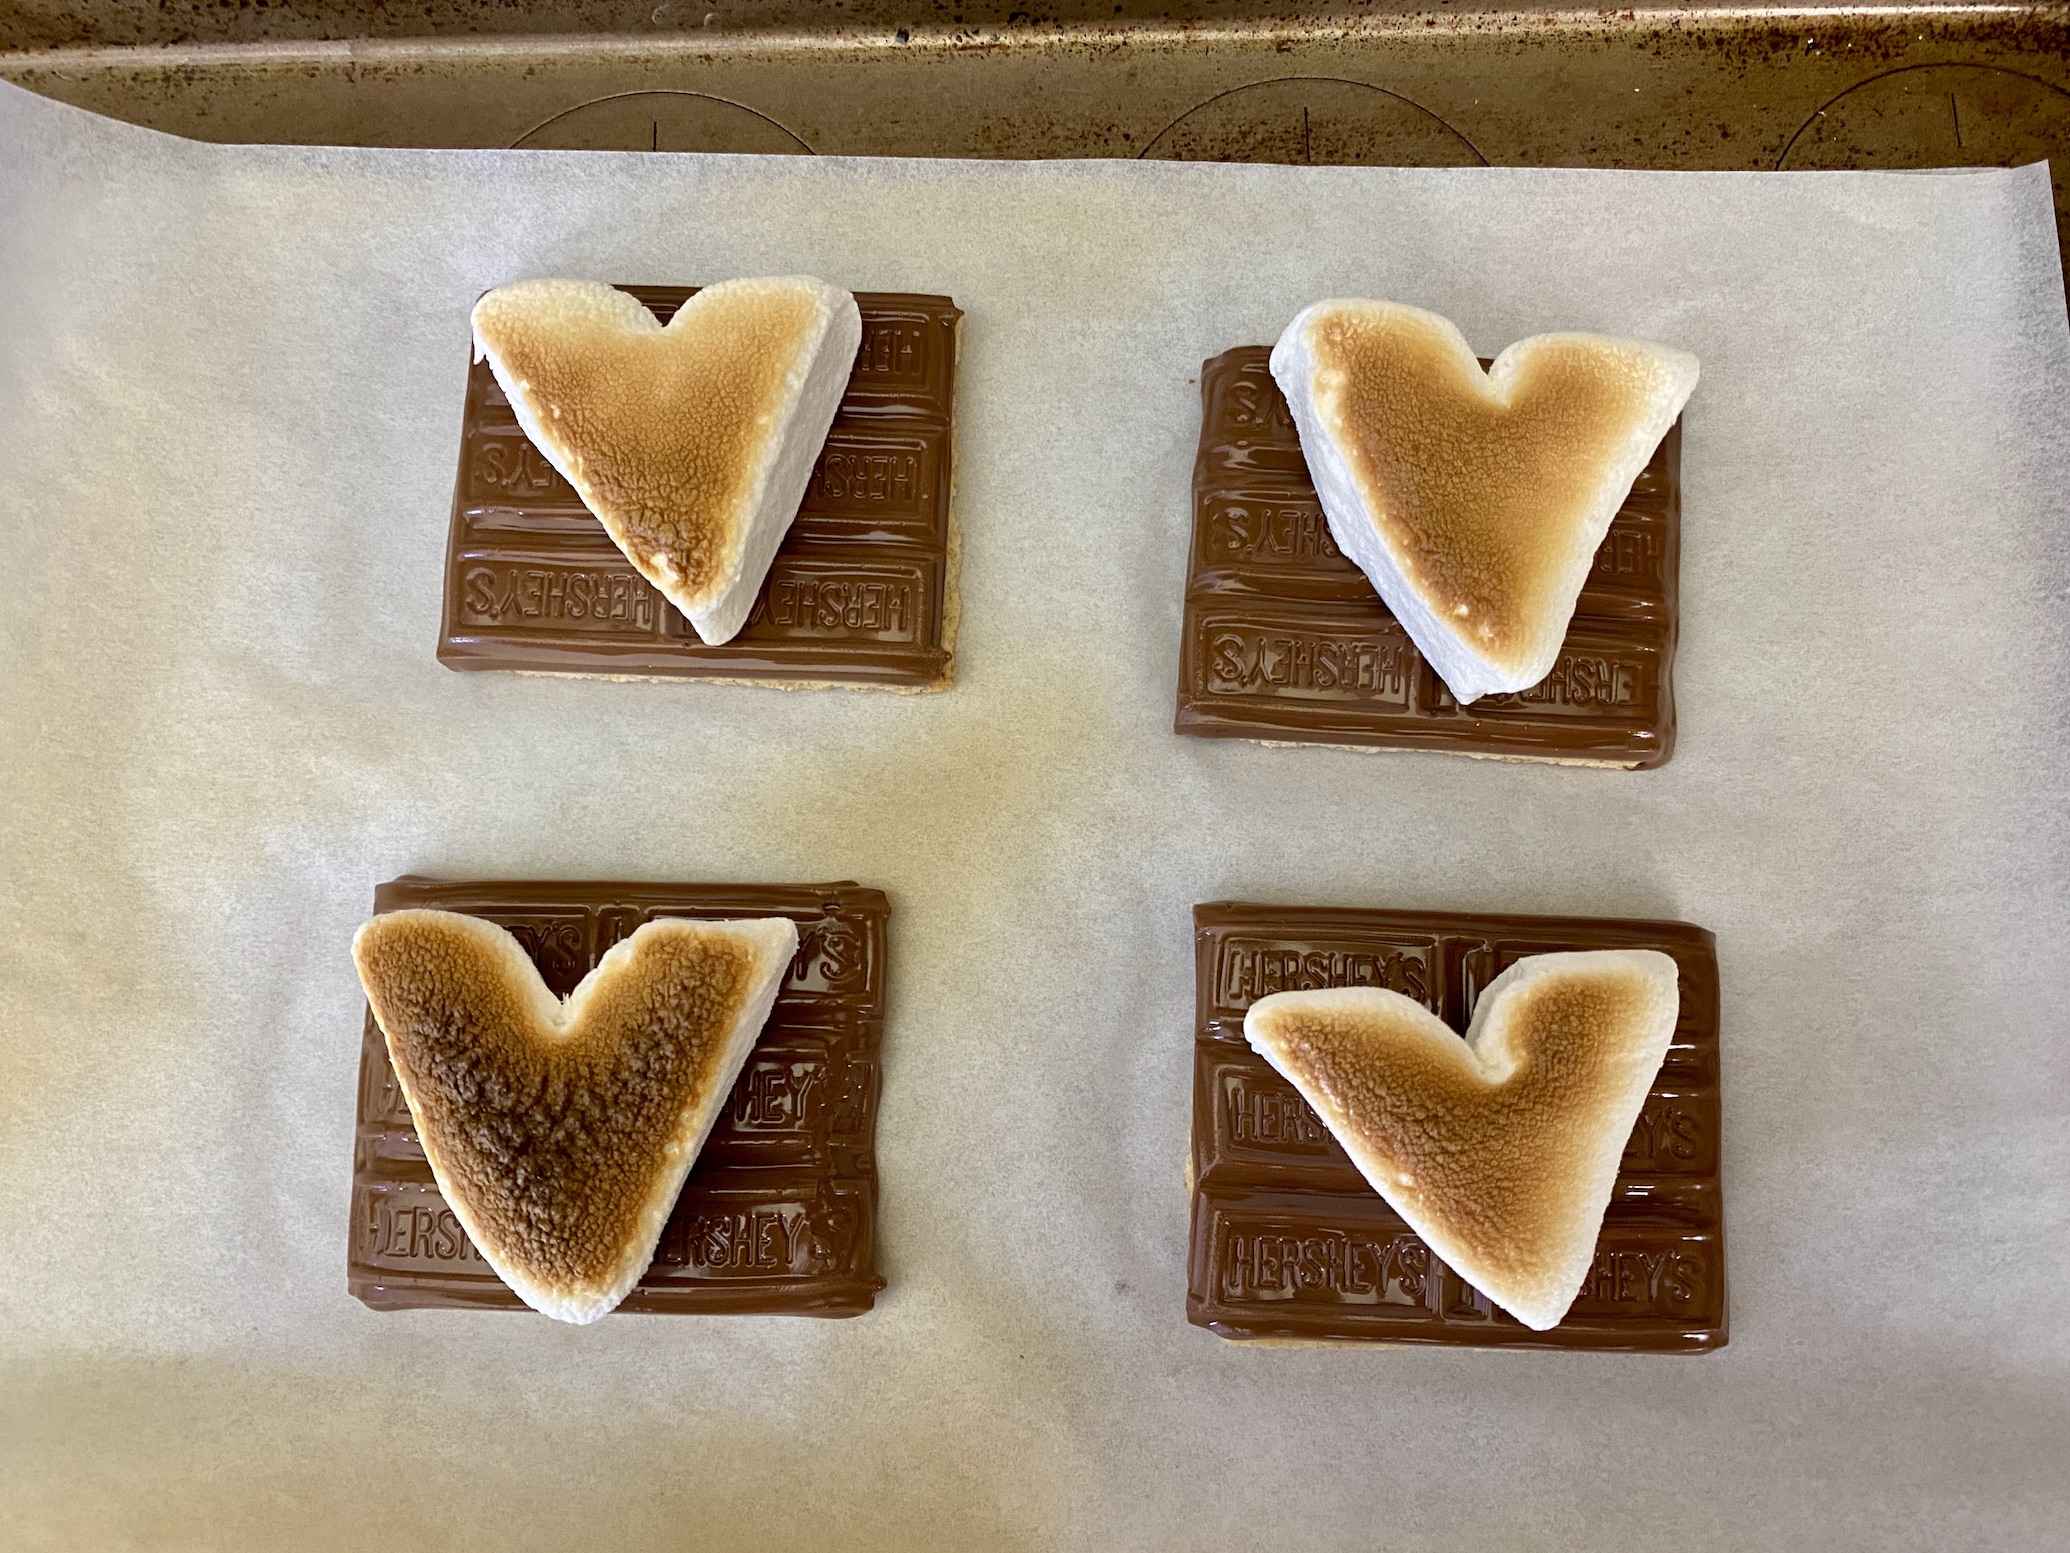
Remove from the oven and add sprinkles while the chocolate is still melted. Use a spatula to remove the s’mores and eat immediately. You can eat as is (open-faced) or add another graham cracker on top to create a sandwich. Yum!

The recipe can be found here.
This is another recipe that can be altered for different holidays. Simply replace the marshmallow and sprinkle colors. You can often find red and green marshmallows around Christmas so go ahead and make these again! Or use chocolate graham crackers with white chocolate for a different taste!
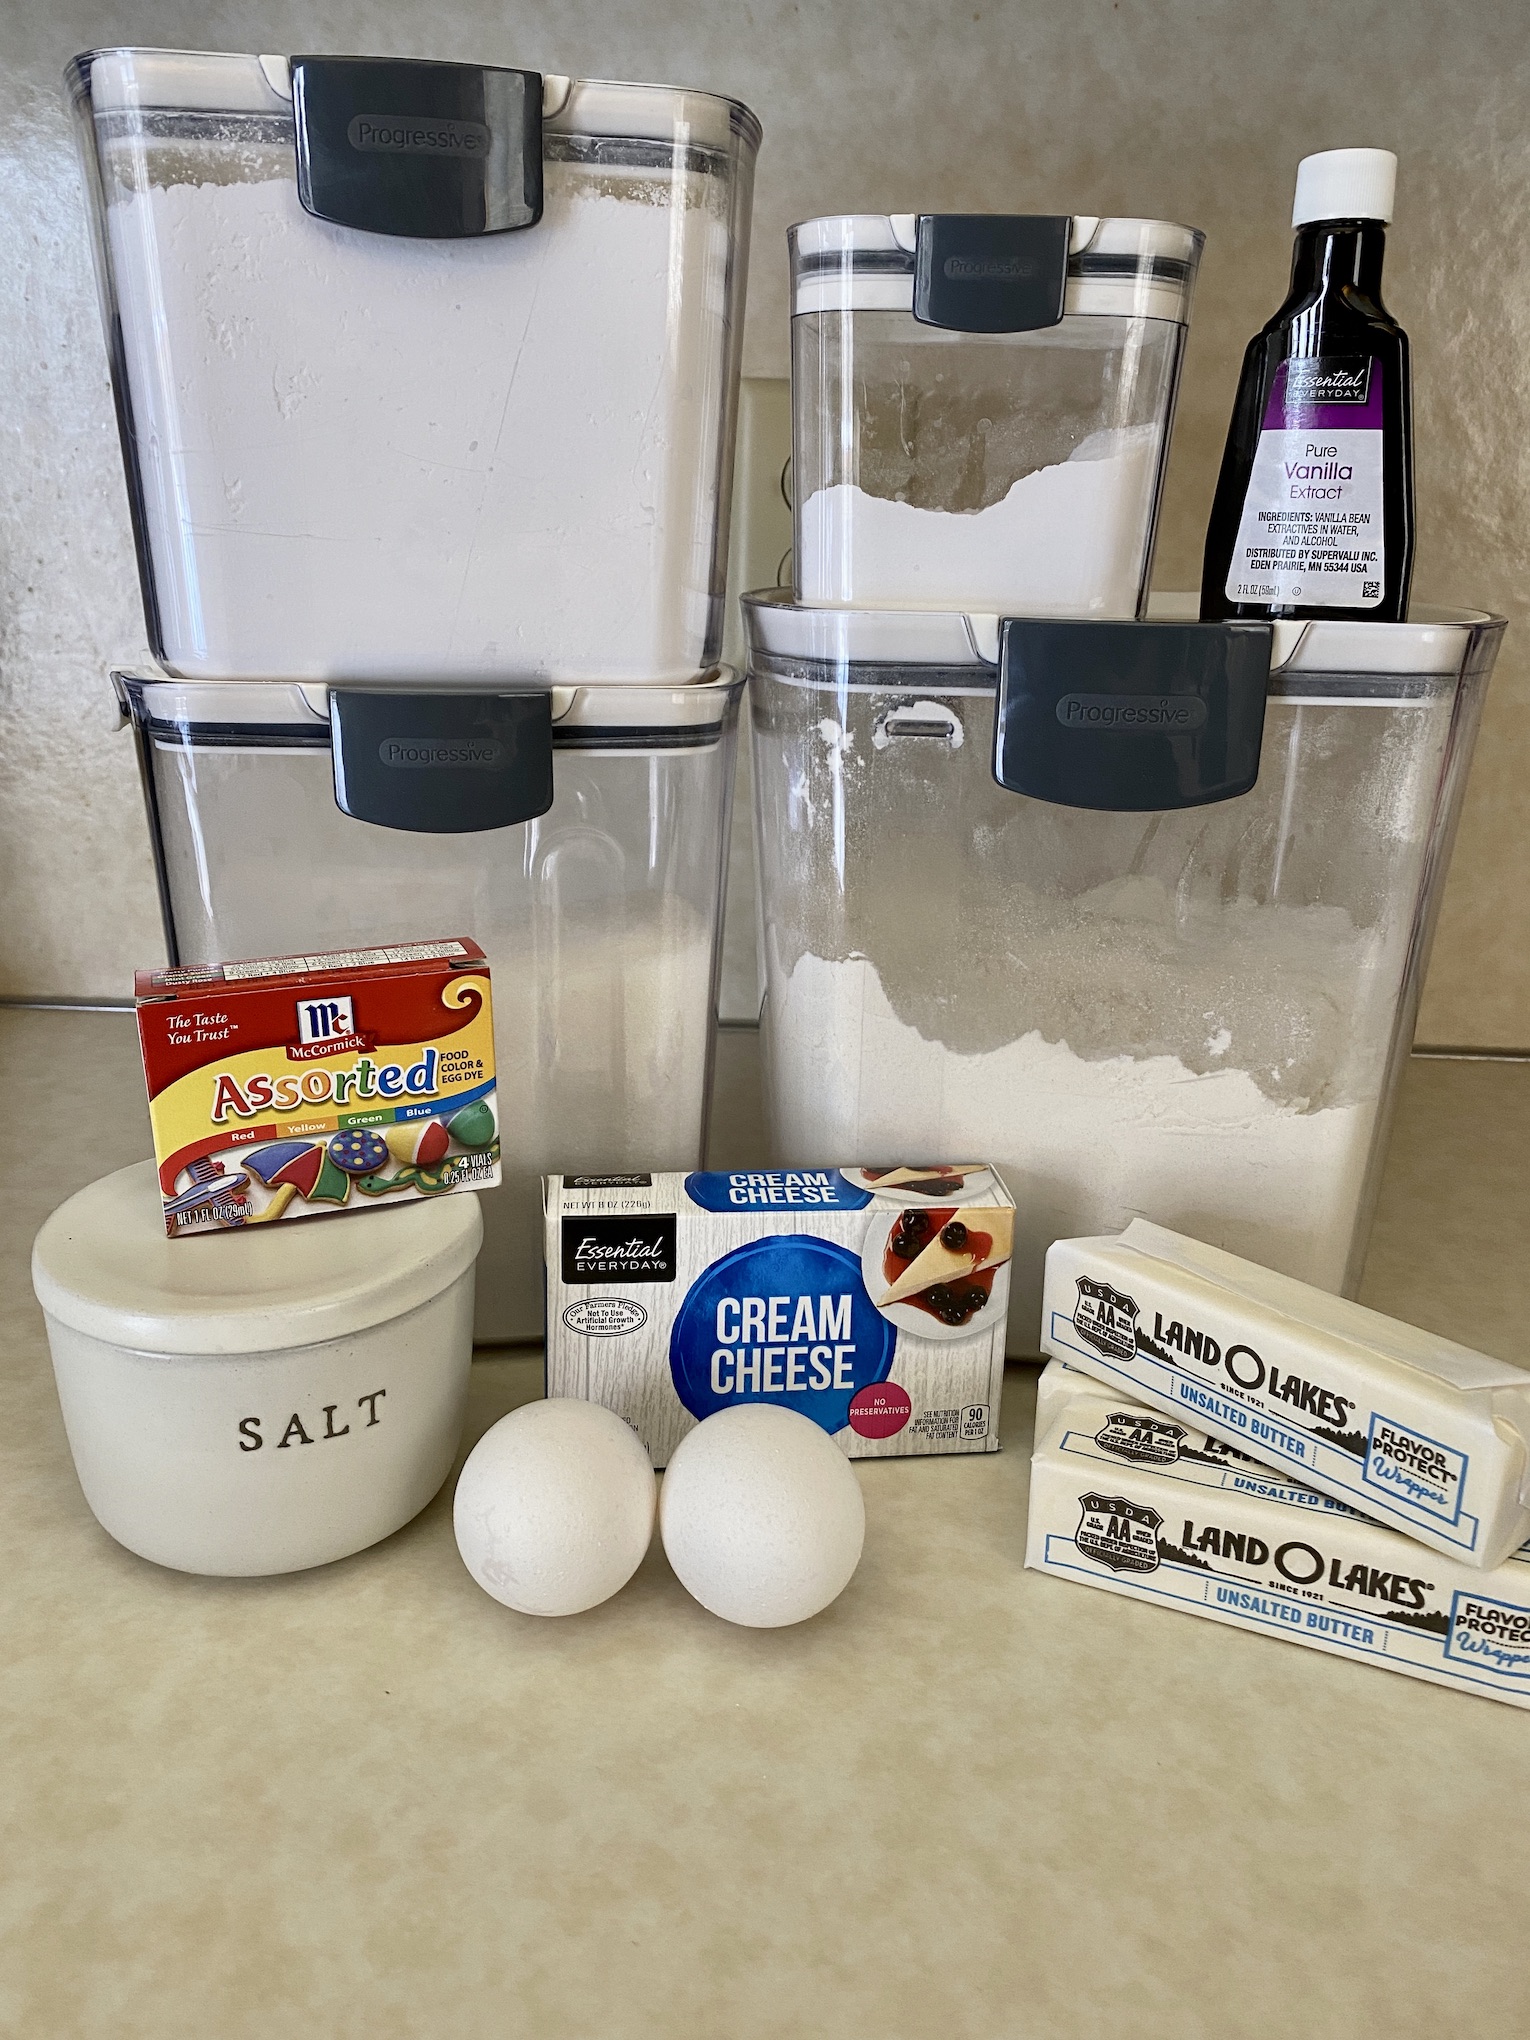
Frosted Pink Sugar Cookie Bars are exactly what they sound like…. sugar cookie bars that are pink with creamy frosting and sprinkles. The sugar cookies are moist, the frosting is extra sugary, and the pink coloring just makes them fun to eat 😊 This is a sheet pan recipe as in the sugar cookie dough will line the bottom of a baking sheet and can be cut into squares for serving. So, it makes a lot! But it’s so worth it because the bars are so good!

Perhaps you might be sensing a theme by now….so far, all these recipes have been customizable. Guess what? This one is too. But it’s the last one…promise! Swap out the food coloring color to make green bars instead of pink, for example. Then use green sprinkles to decorate the top. You get the idea!
The recipe can be found here.
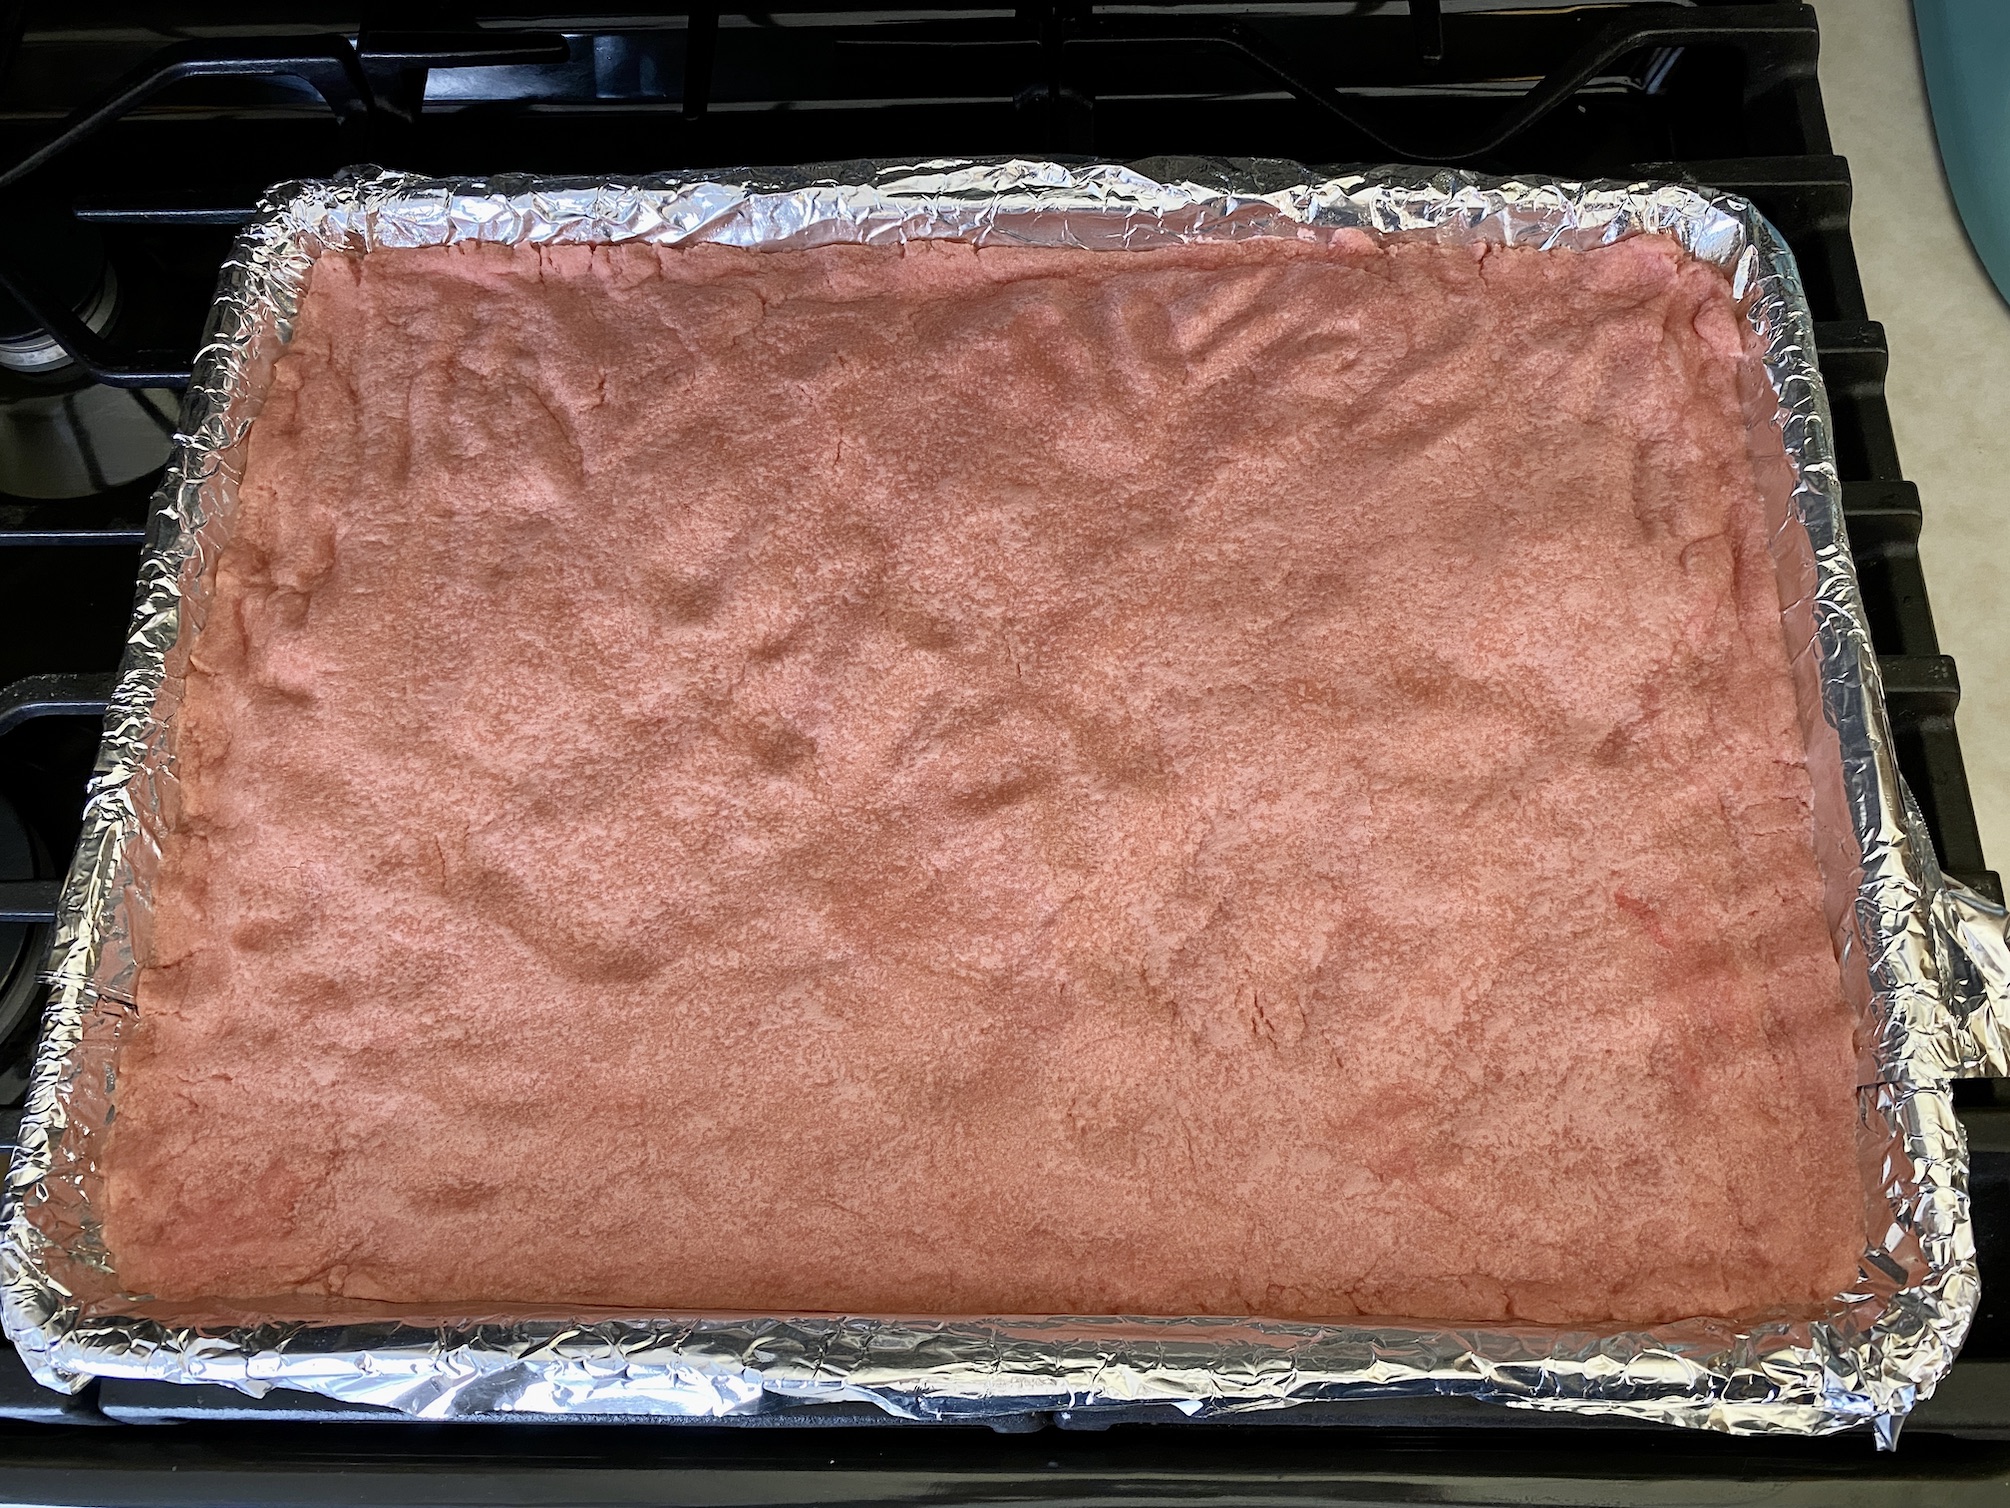
Preheat the oven to 350 degrees F and line a baking sheet (jelly roll size – the big ones) with aluminum foil. Spray the foil with cooking spray. This will help you remove the bars when they are finished cooking so you can easily slice them.
In a medium bowl, whisk together the flour, salt, and baking powder.


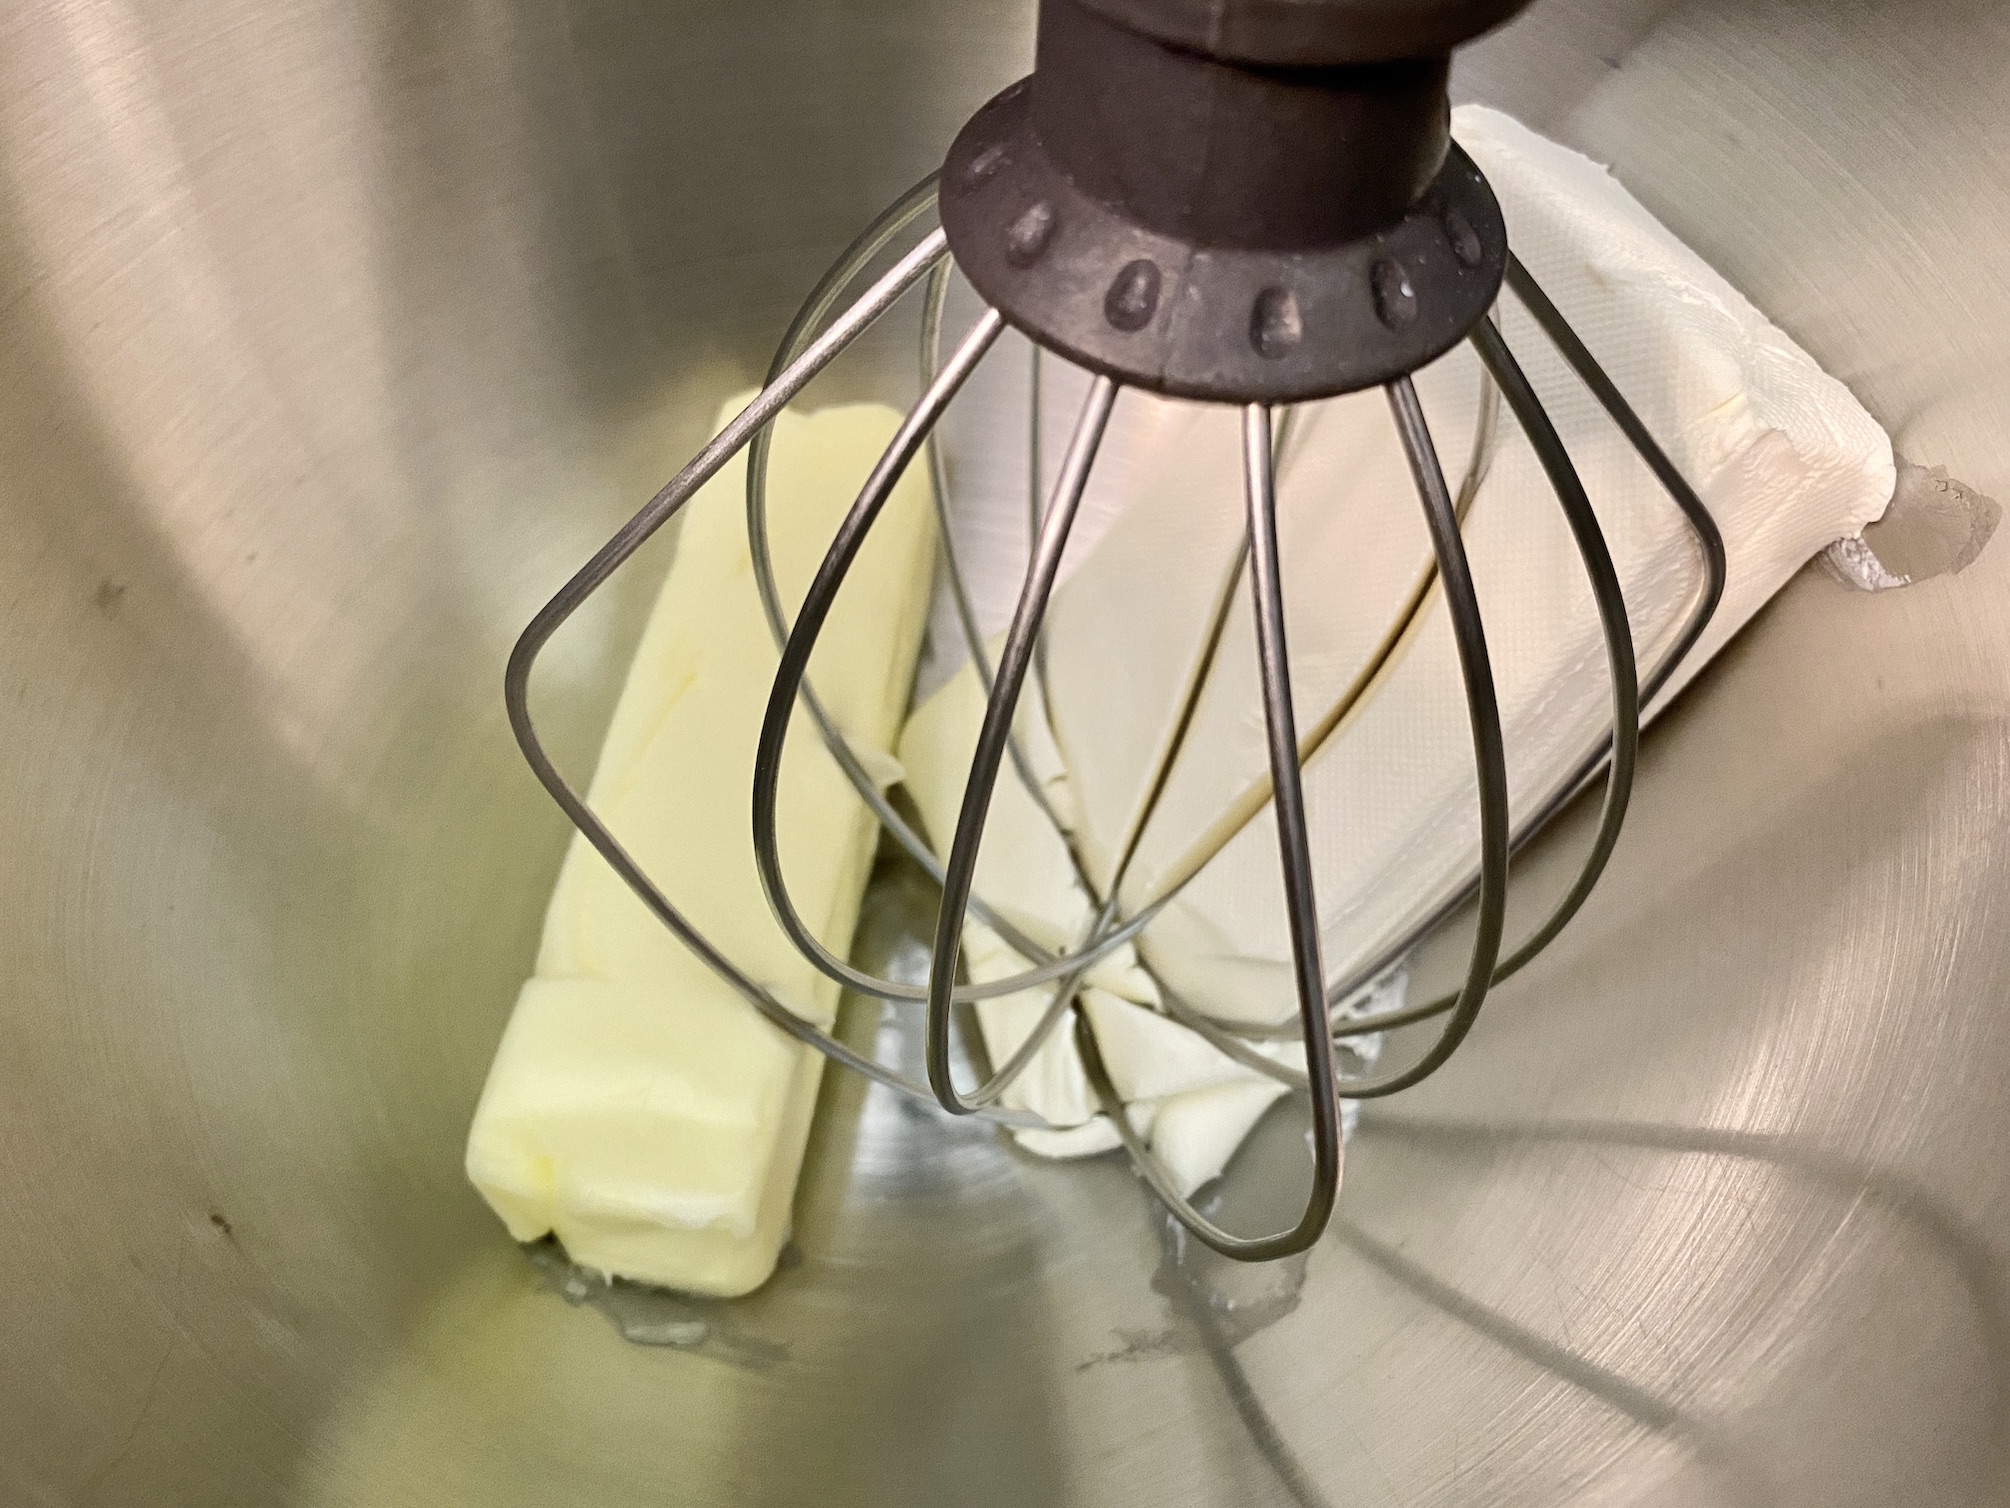
In the bowl of a stand mixer, cream together 2 stick of softened butter and the sugar until light and fluffy. Add the eggs, vanilla, and food coloring and beat until combined. Add additional food coloring as needed to reach the desired color.


With the stand mixer on low speed, slowly add the dry ingredients and mix until incorporated and a dough ball forms.


Pour the dough onto the baking sheet and use the palm of your hand to press it into the bottom of the baking sheet. Make sure you stretch it all the way to the edges. It may seem thin, but it will thicken as it bakes.


Bake for 15-20 minutes or until a toothpick inserted in the center comes out clean. Mine took closer to 20 minutes. It’s OK if you go a little over 20 min, you know your oven, just don’t overbake.
Let the bars cool completely.
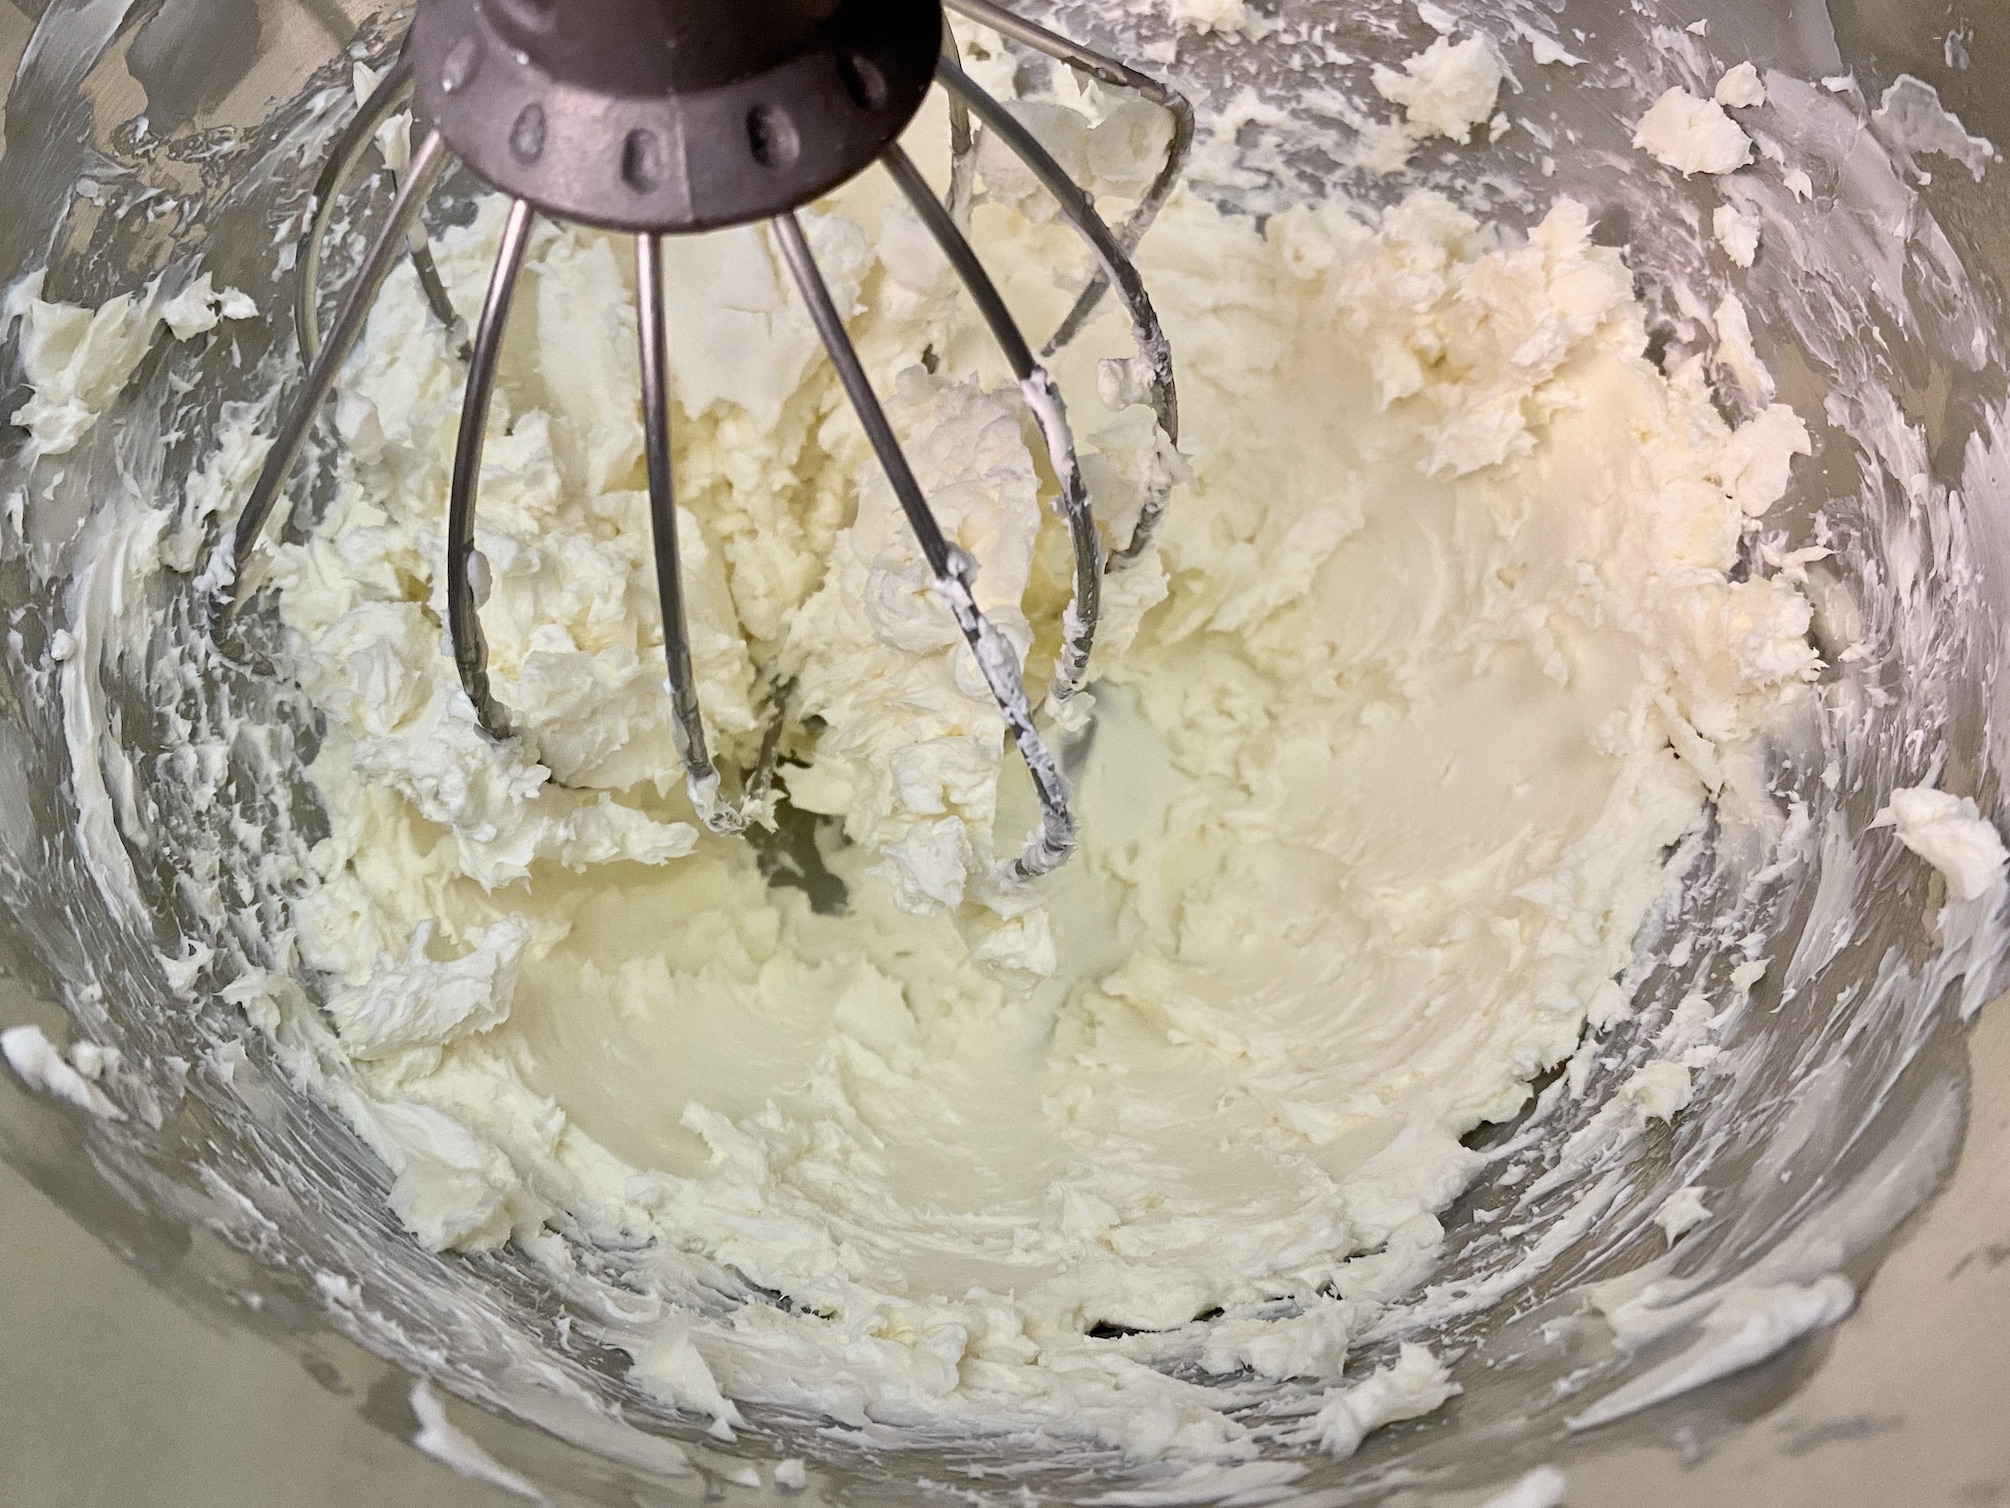
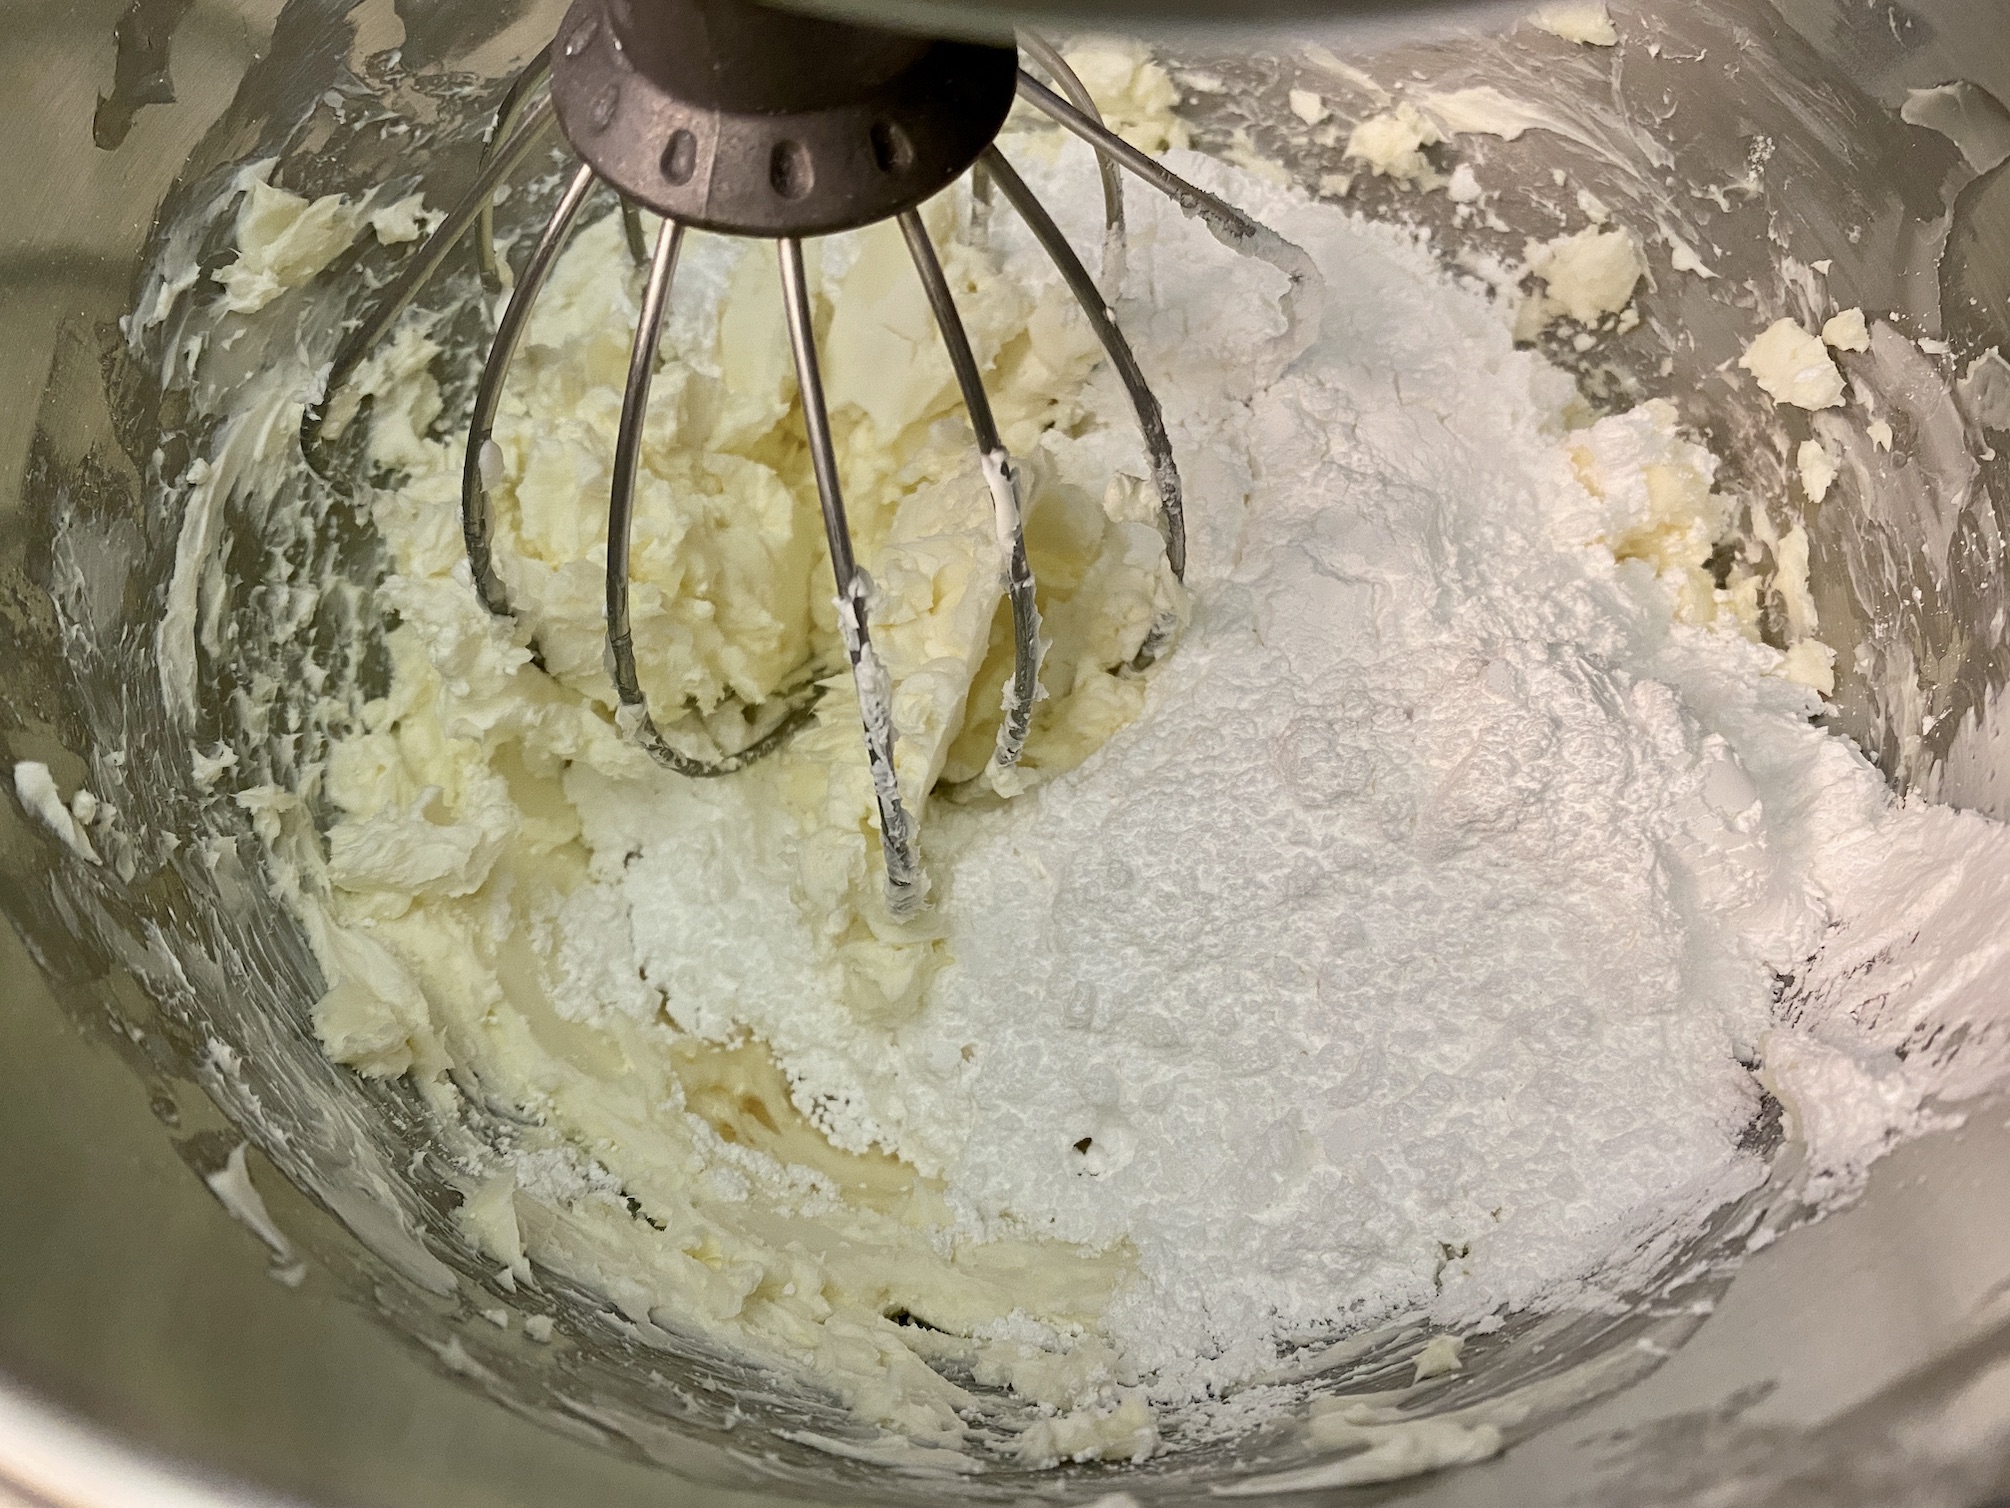
Once the bars have cooled, make the cream cheese frosting. In the bowl of a stand mixer, beat the softened cream cheese and softened butter until well combined. Add the powdered sugar and vanilla. Continue to beat until smooth.

Then, spread in an even layer on top of the bars. Top with sprinkles – as many or as few as you like!


Use the aluminum foil to lift the bars off the baking sheet and onto a cutting board. Slice into bars, your choice of size, and serve. Enjoy!
So festive! Any leftovers should be stored in an airtight container in the fridge (because of the frosting).

The recipe can be found here.
My last 2 recipes are for cocktails. These are alcohol based so these aren’t for the kids but will be loved by the adults 😊
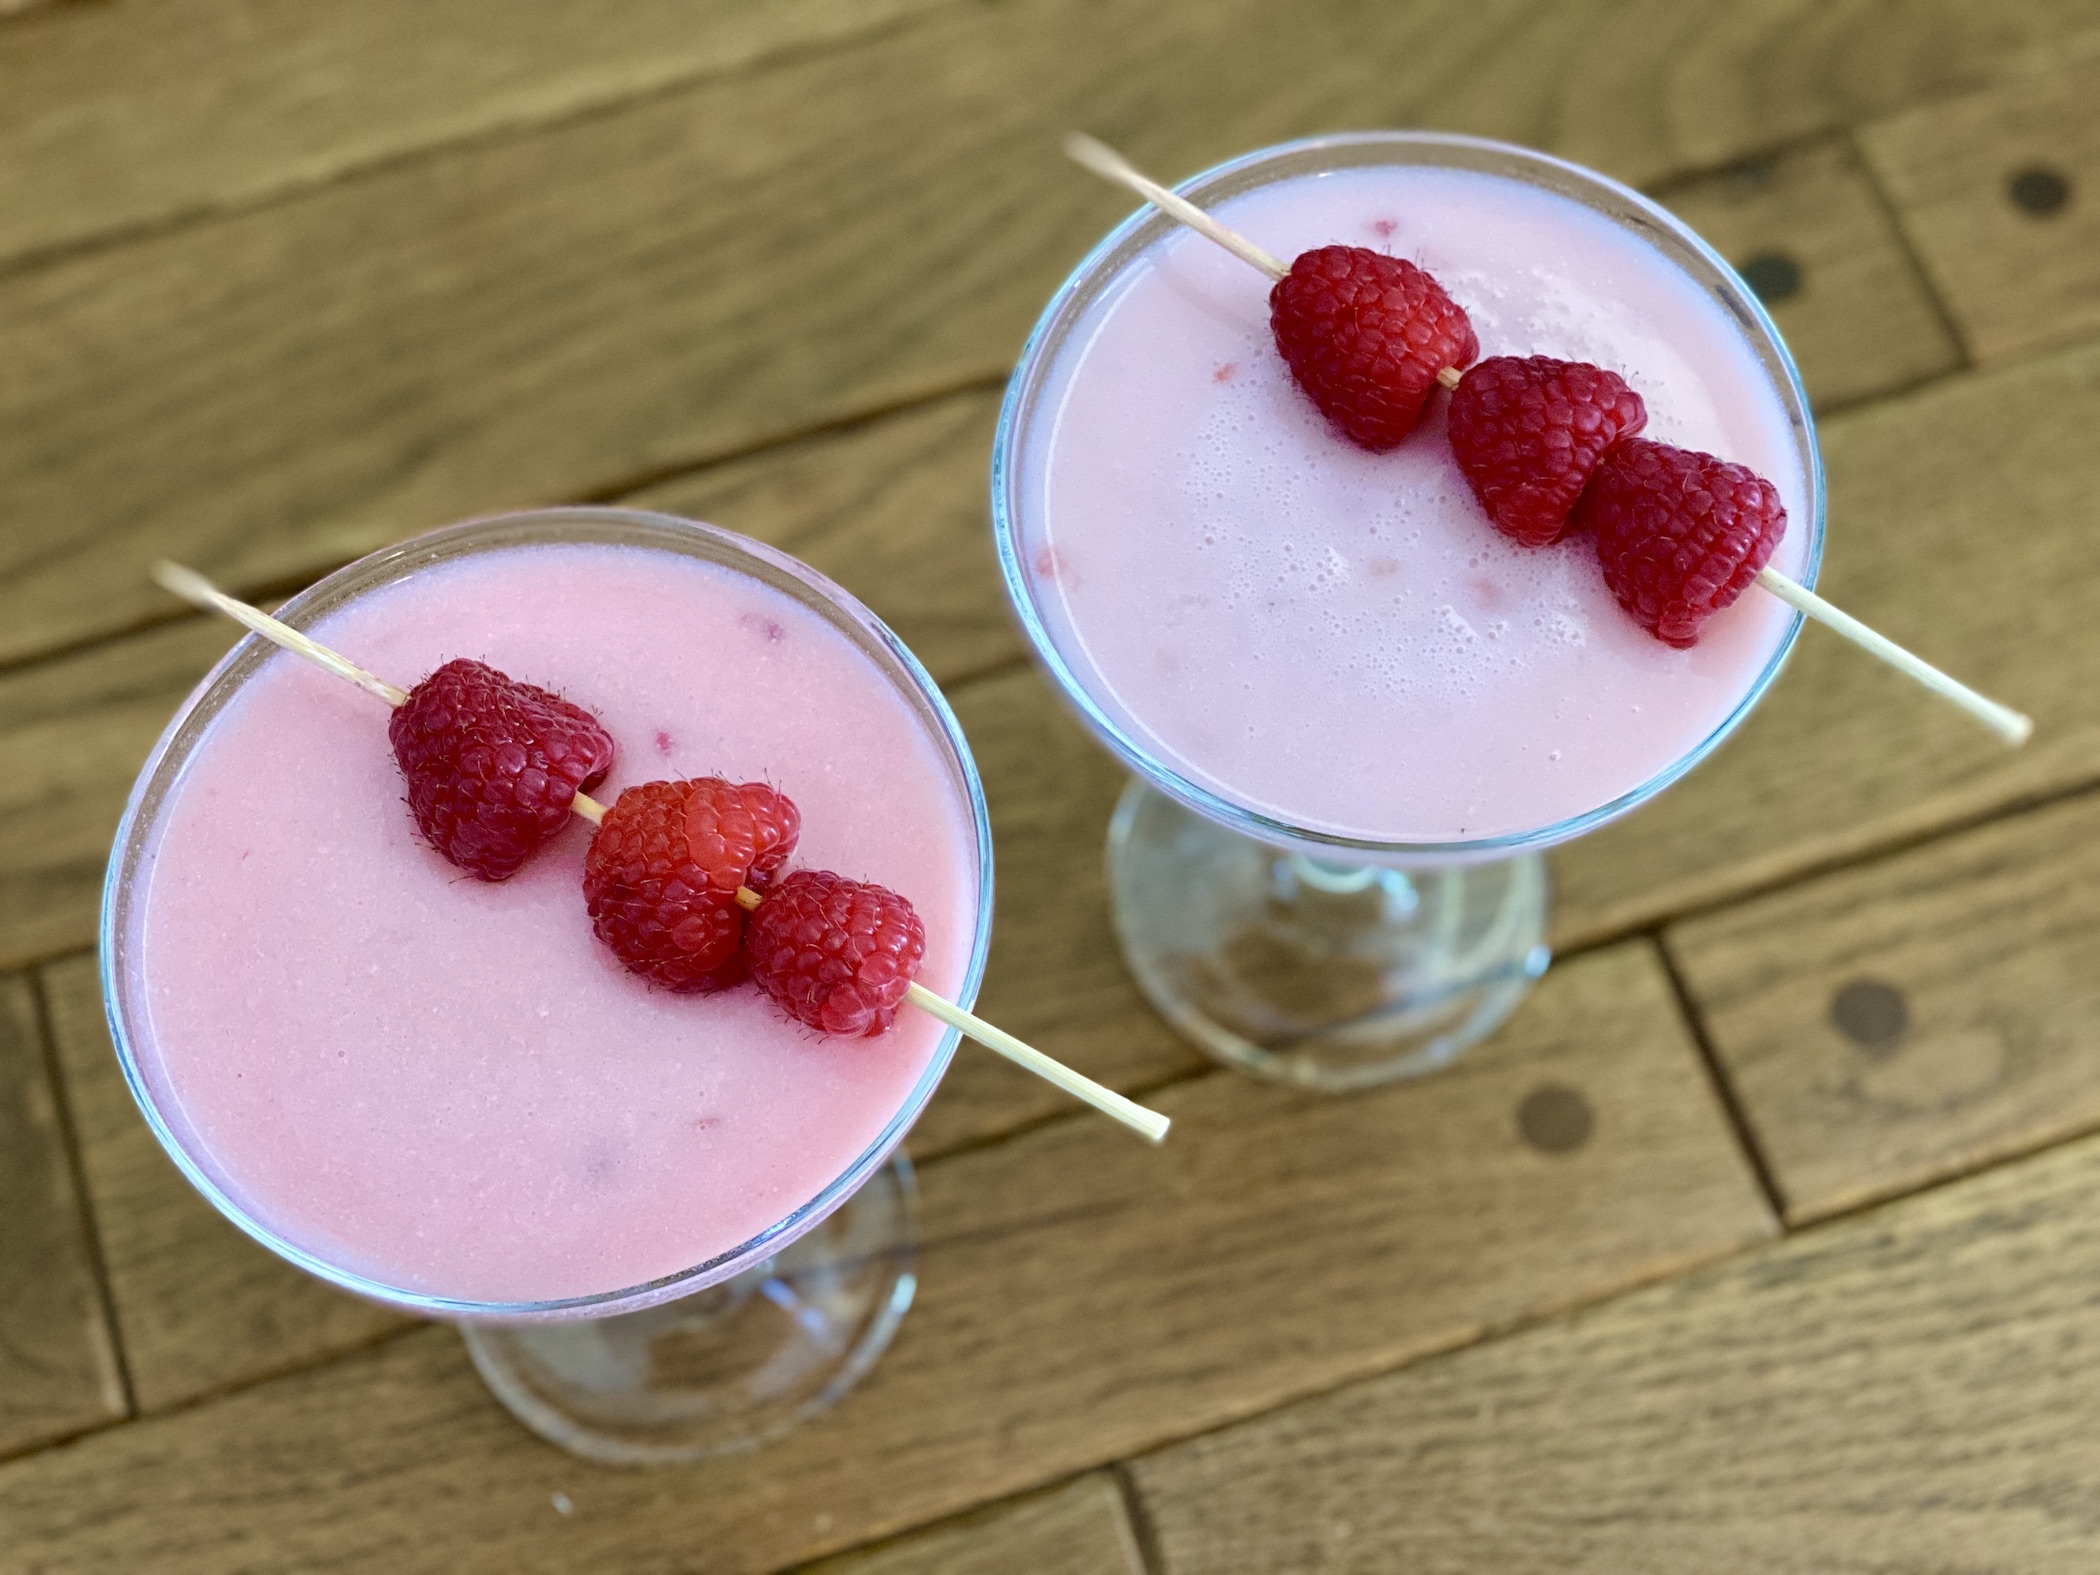
Strawberry Lemonade Frosé is a frozen/blended cocktail. It’s boozy, citrusy, and slightly sweet. It serves 4-6 depending on how large your glasses are.

The recipe can be found here.
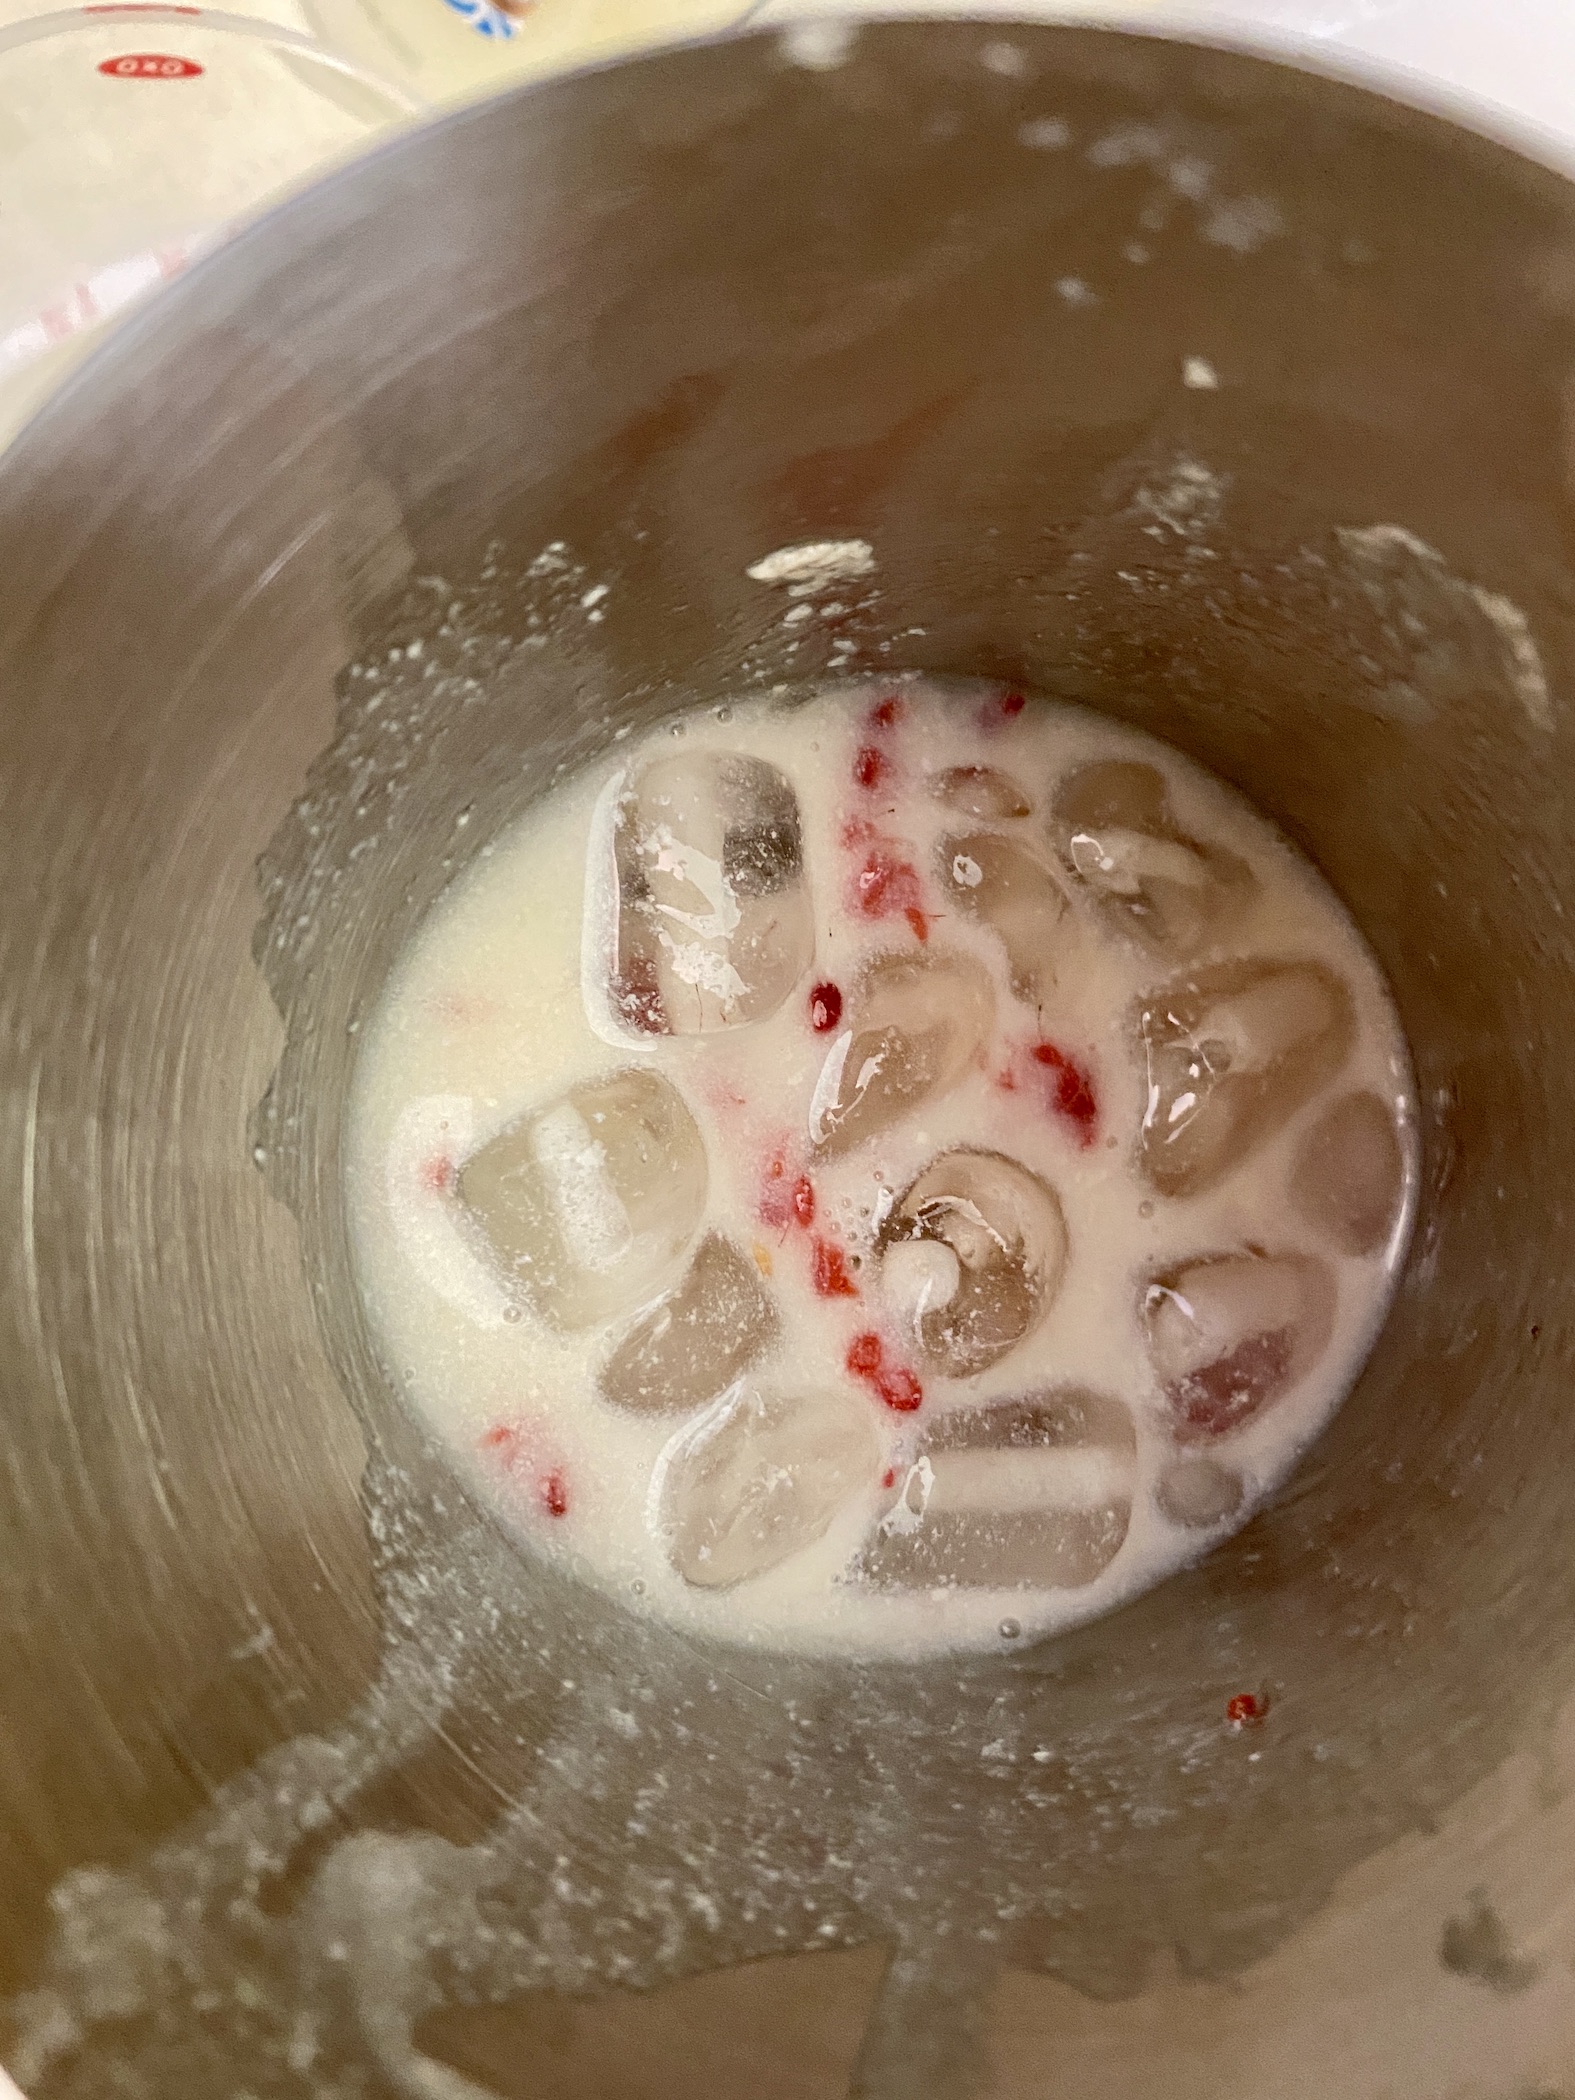
You want to be prepared for this recipe a day in advance because the rosé needs time to freeze. Pour the entire bottle of rosé into ice cube trays. Place the ice cube trays in the freezer for at least 12 hours but preferably overnight. You might notice in my pictures that I did not use ice cube trays… I admittedly could not find any in our house and honestly, we have an ice maker so we just might not have any. So, I used a muffin tin and filled the muffin molds with rosé instead 😊
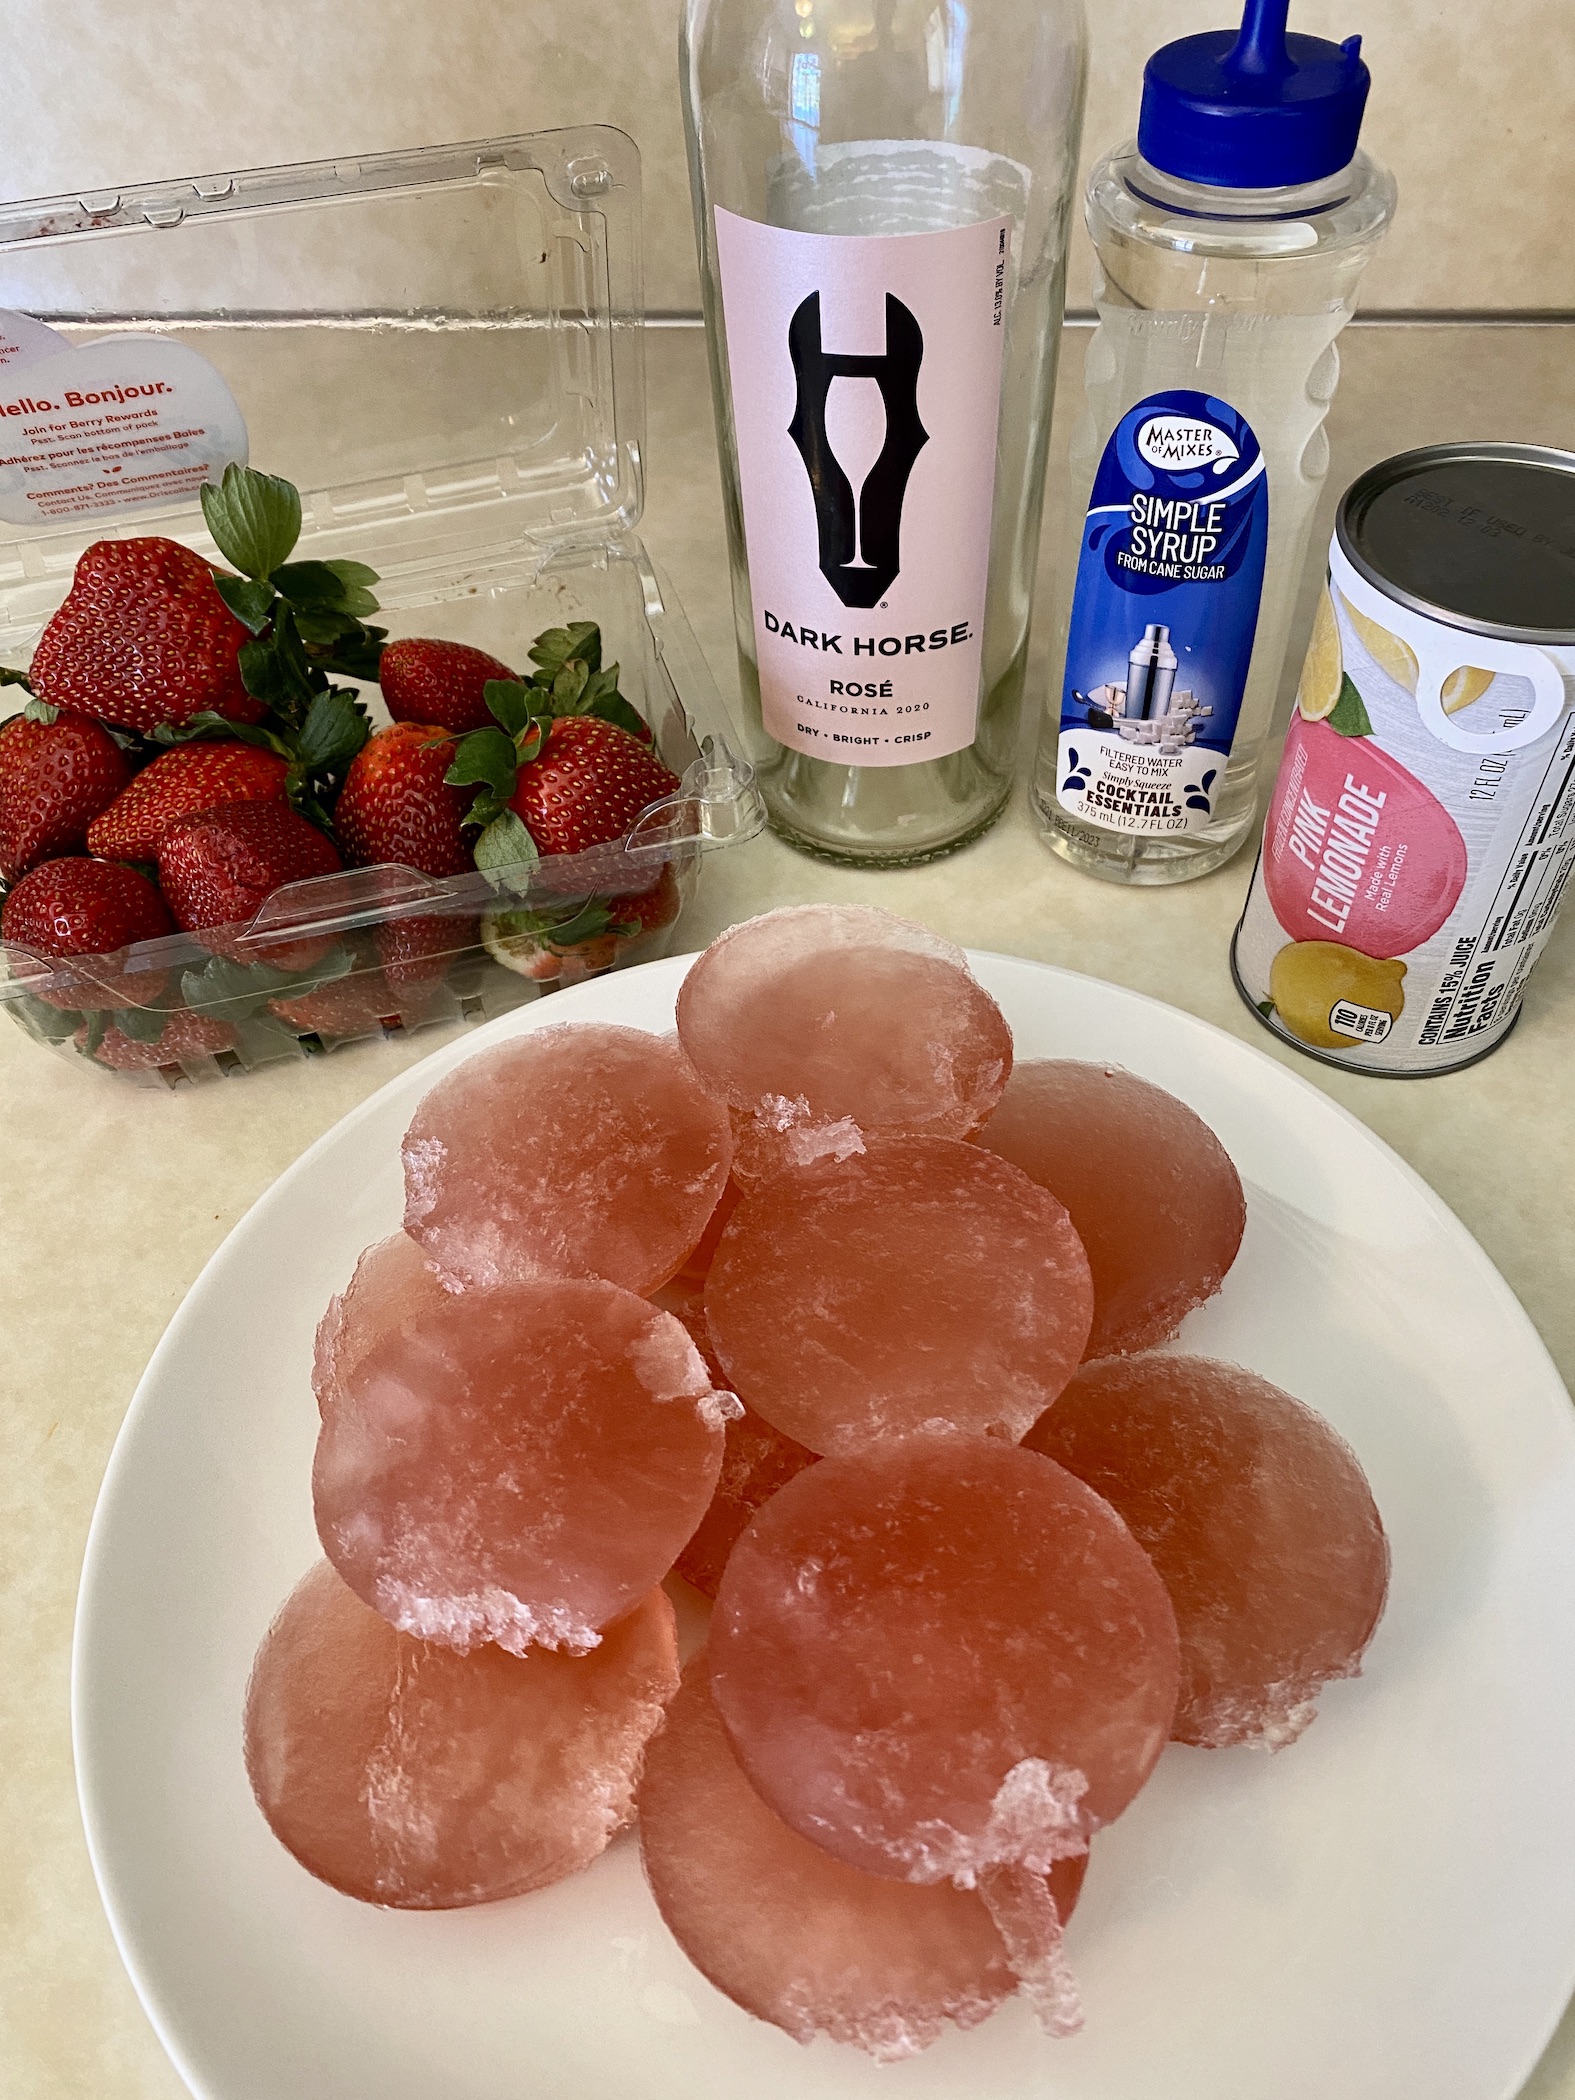
Once the rosé has been frozen into cubes (or muffins…) you are ready to make the frosé. Gently remove the frozen rosé and place it in a blender (yes, all of it). Add the simple syrup, frozen concentrate, fresh strawberries, and ice. Pulse until it’s a slush-like consistency.


Pour into glasses and garnish with fresh strawberries. Enjoy! It’s so refreshing!

The recipe can be found here.
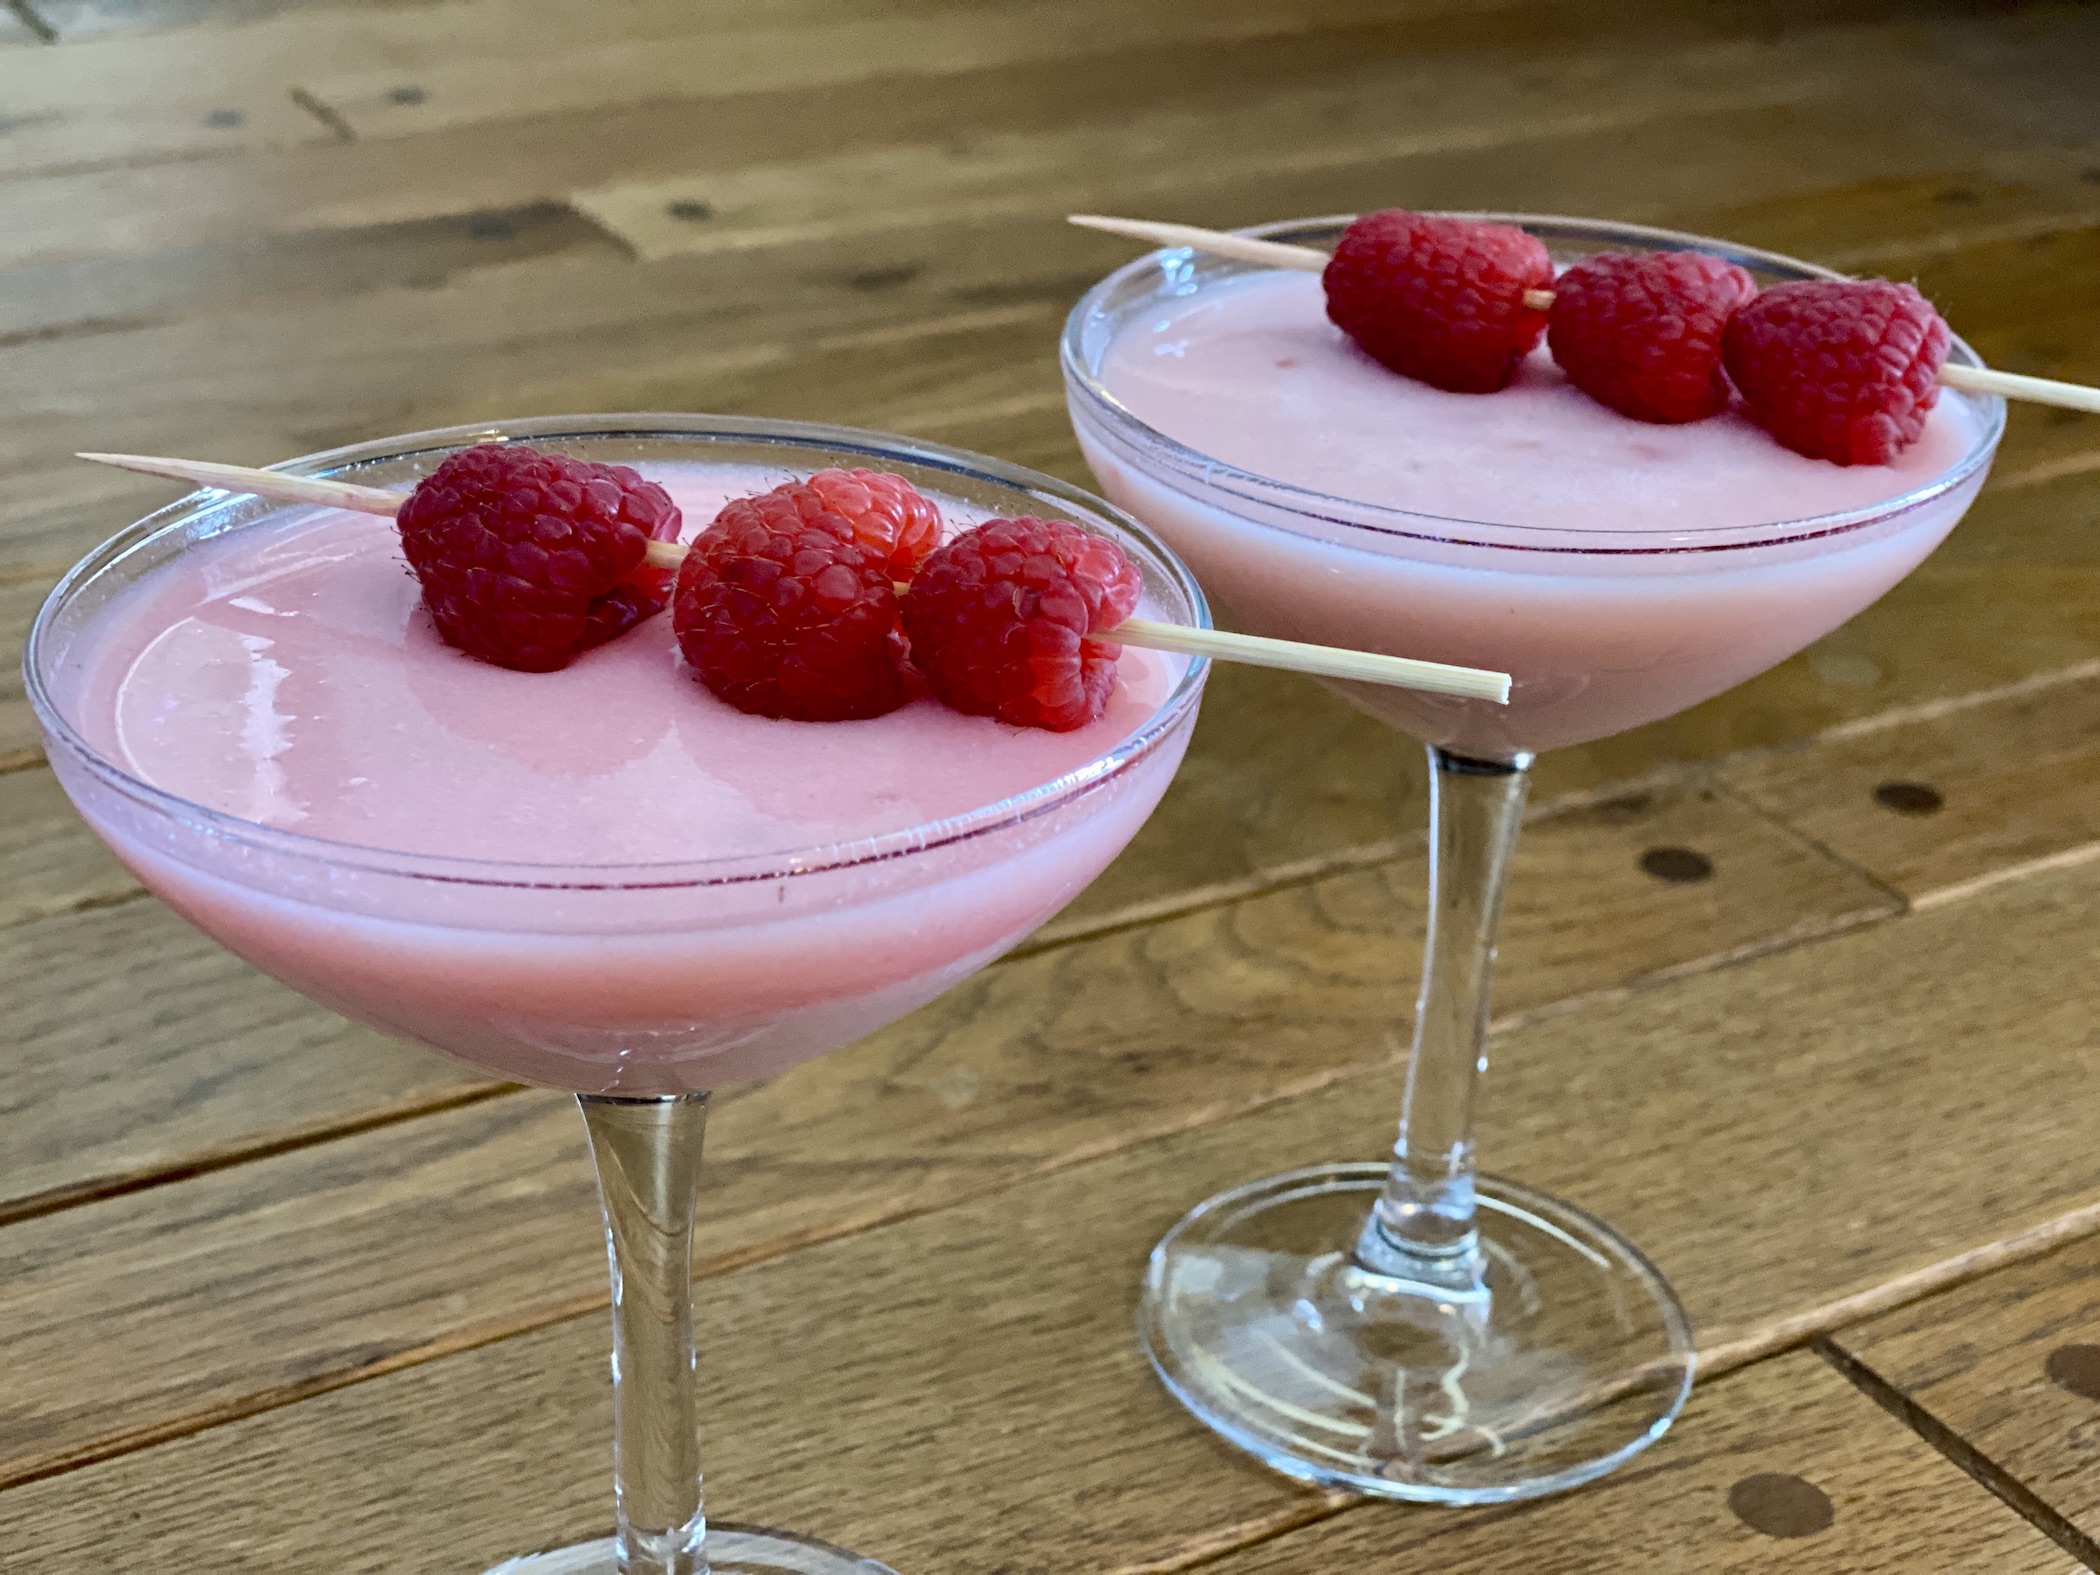
Raspberry Pina Colada has a similar taste to a Pina Colada, but this is not a blended drink. It’s full of coconut flavor, tart raspberries, and a little rum 😊 This recipe make 1 cocktail.
The recipe can be found here.

Start by adding 4-5 raspberries to a cocktail shaker and mash with a muddler.
Add the white rum, raspberry liqueur (I use Chambord), RumChata, and Pina Colada mix.
Add a handful of ice, secure the lid, and shake until well blended (about 30 seconds).
Strain into a serving glass and garnish with additional fresh raspberries. Enjoy! This is one cocktail I would absolutely have as a 2-for-1 special!
The muddled raspberries are supposed to color the drink a shade of pink. If the pink is not very vibrant, you can add a single drop of red food coloring, give it a swirl, and you’ll have a brighter pink drink.
The recipe can be found here.
Now I know I said I don’t have dinner options to talk about today, but I forgot that I actually do (sorry). Unfortunately, they are not new recipes, but I do want to spread the word that Festival Foods offers “heat and serve” dinners and one is specifically for Valentine’s Day. So, if you find yourself without plans but still want to have a nice dinner, check out the links below. Or if you are strapped for ideas and a delicious meal that is ready in minutes sounds appealing, check out the links below.
Prime Rib Dinner for 2 (available for a limited time)
If baking isn’t your thing, check out the links below for some holiday desserts you can find in Festival Foods stores:
Chocolate Heart Cake (cake for 2)
Chocolate Raspberry Heart Cake (cake for 2)
Chocolate Symphony Heart Cake (cake for 2)
Valentine Mini Raspberry White Cake (cake for 2-4)
Whatever you end up doing on Feb 14th, I hope you at least enjoy some good food. Happy Valentine’s Day!


Recent Comments