 order online
 weekly specials
Individual dessert cups are an easy, no bake desserts that are perfect for birthday parties, holidays, a treat for your coworkers, or for you to have on hand at home whenever you are craving a little something sweet 😊 They come in a variety of flavors (3 of which I’m sharing with you today) and are the perfect bite-sized treat. Think cookie base, creamy filling, and festive toppings. You will not be able to stop after one!

Here are the recipes I’ll be walking you through today:
- Individual Birthday Cake Dessert Cups
- Individual Peanut Butter Dessert Cups
- Individual Banana Pudding Dessert Cups
Let’s start with Individual Birthday Cake Dessert Cups. These taste just like birthday cake batter and are to die for! There is a vanilla cookie crust, birthday cake cheesecake filling, and plenty of sprinkles to go around. Super yummy and will be the talk of the party.
The recipe can be found here.
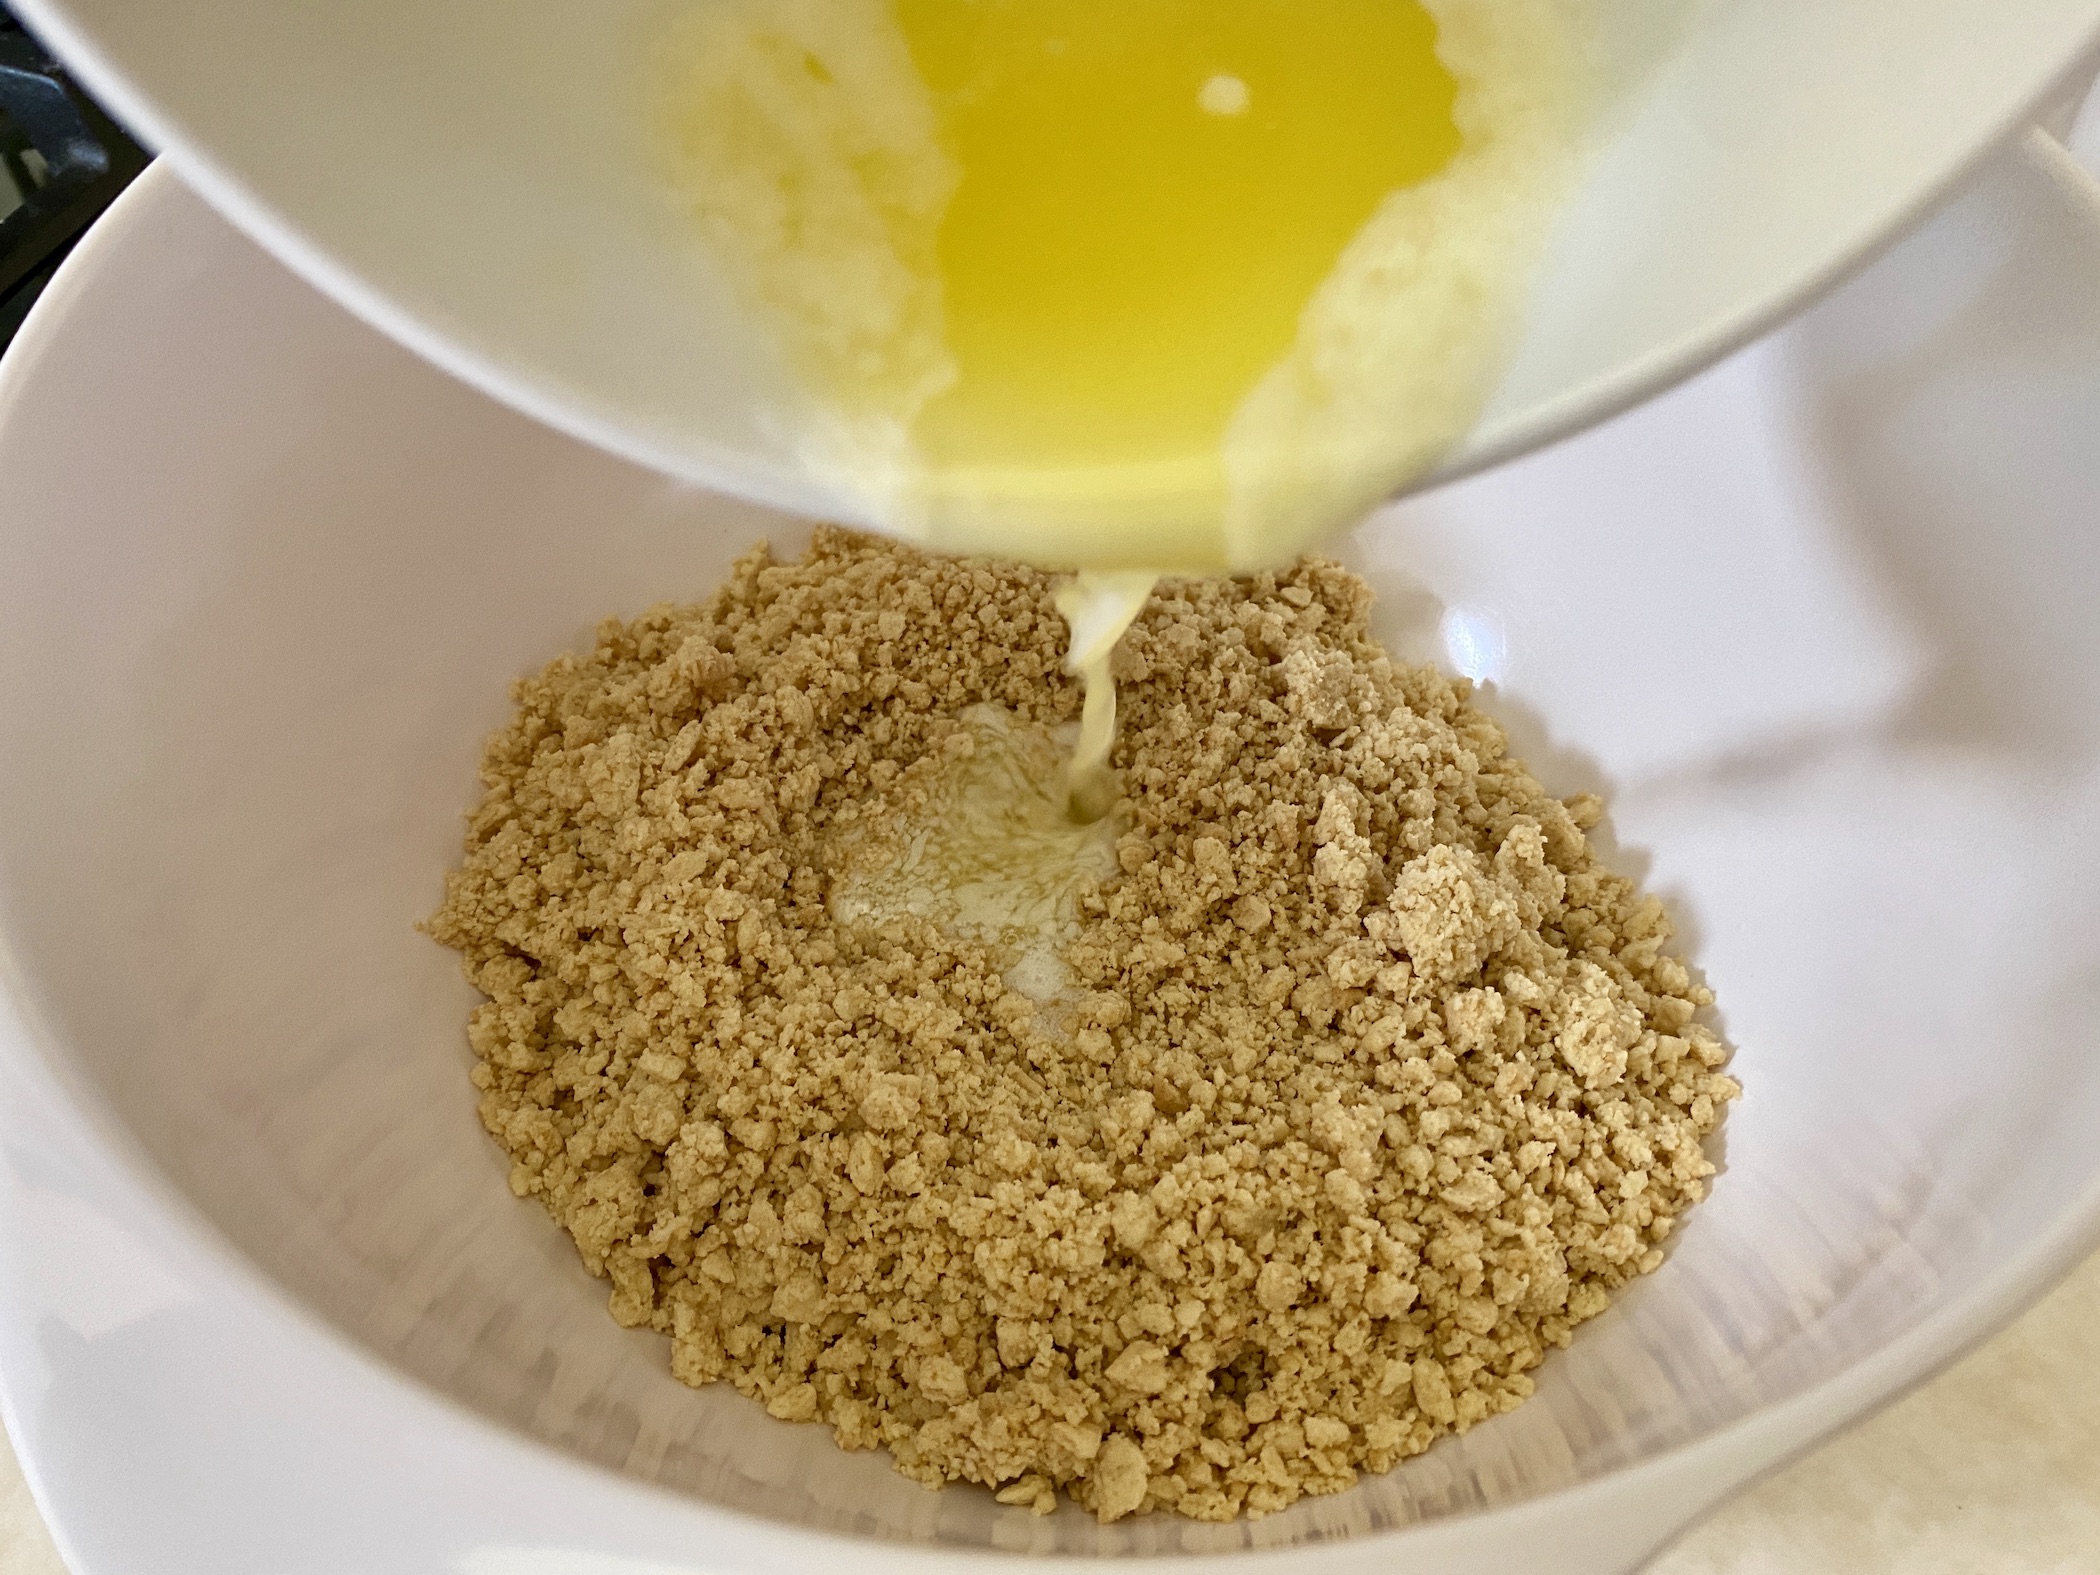
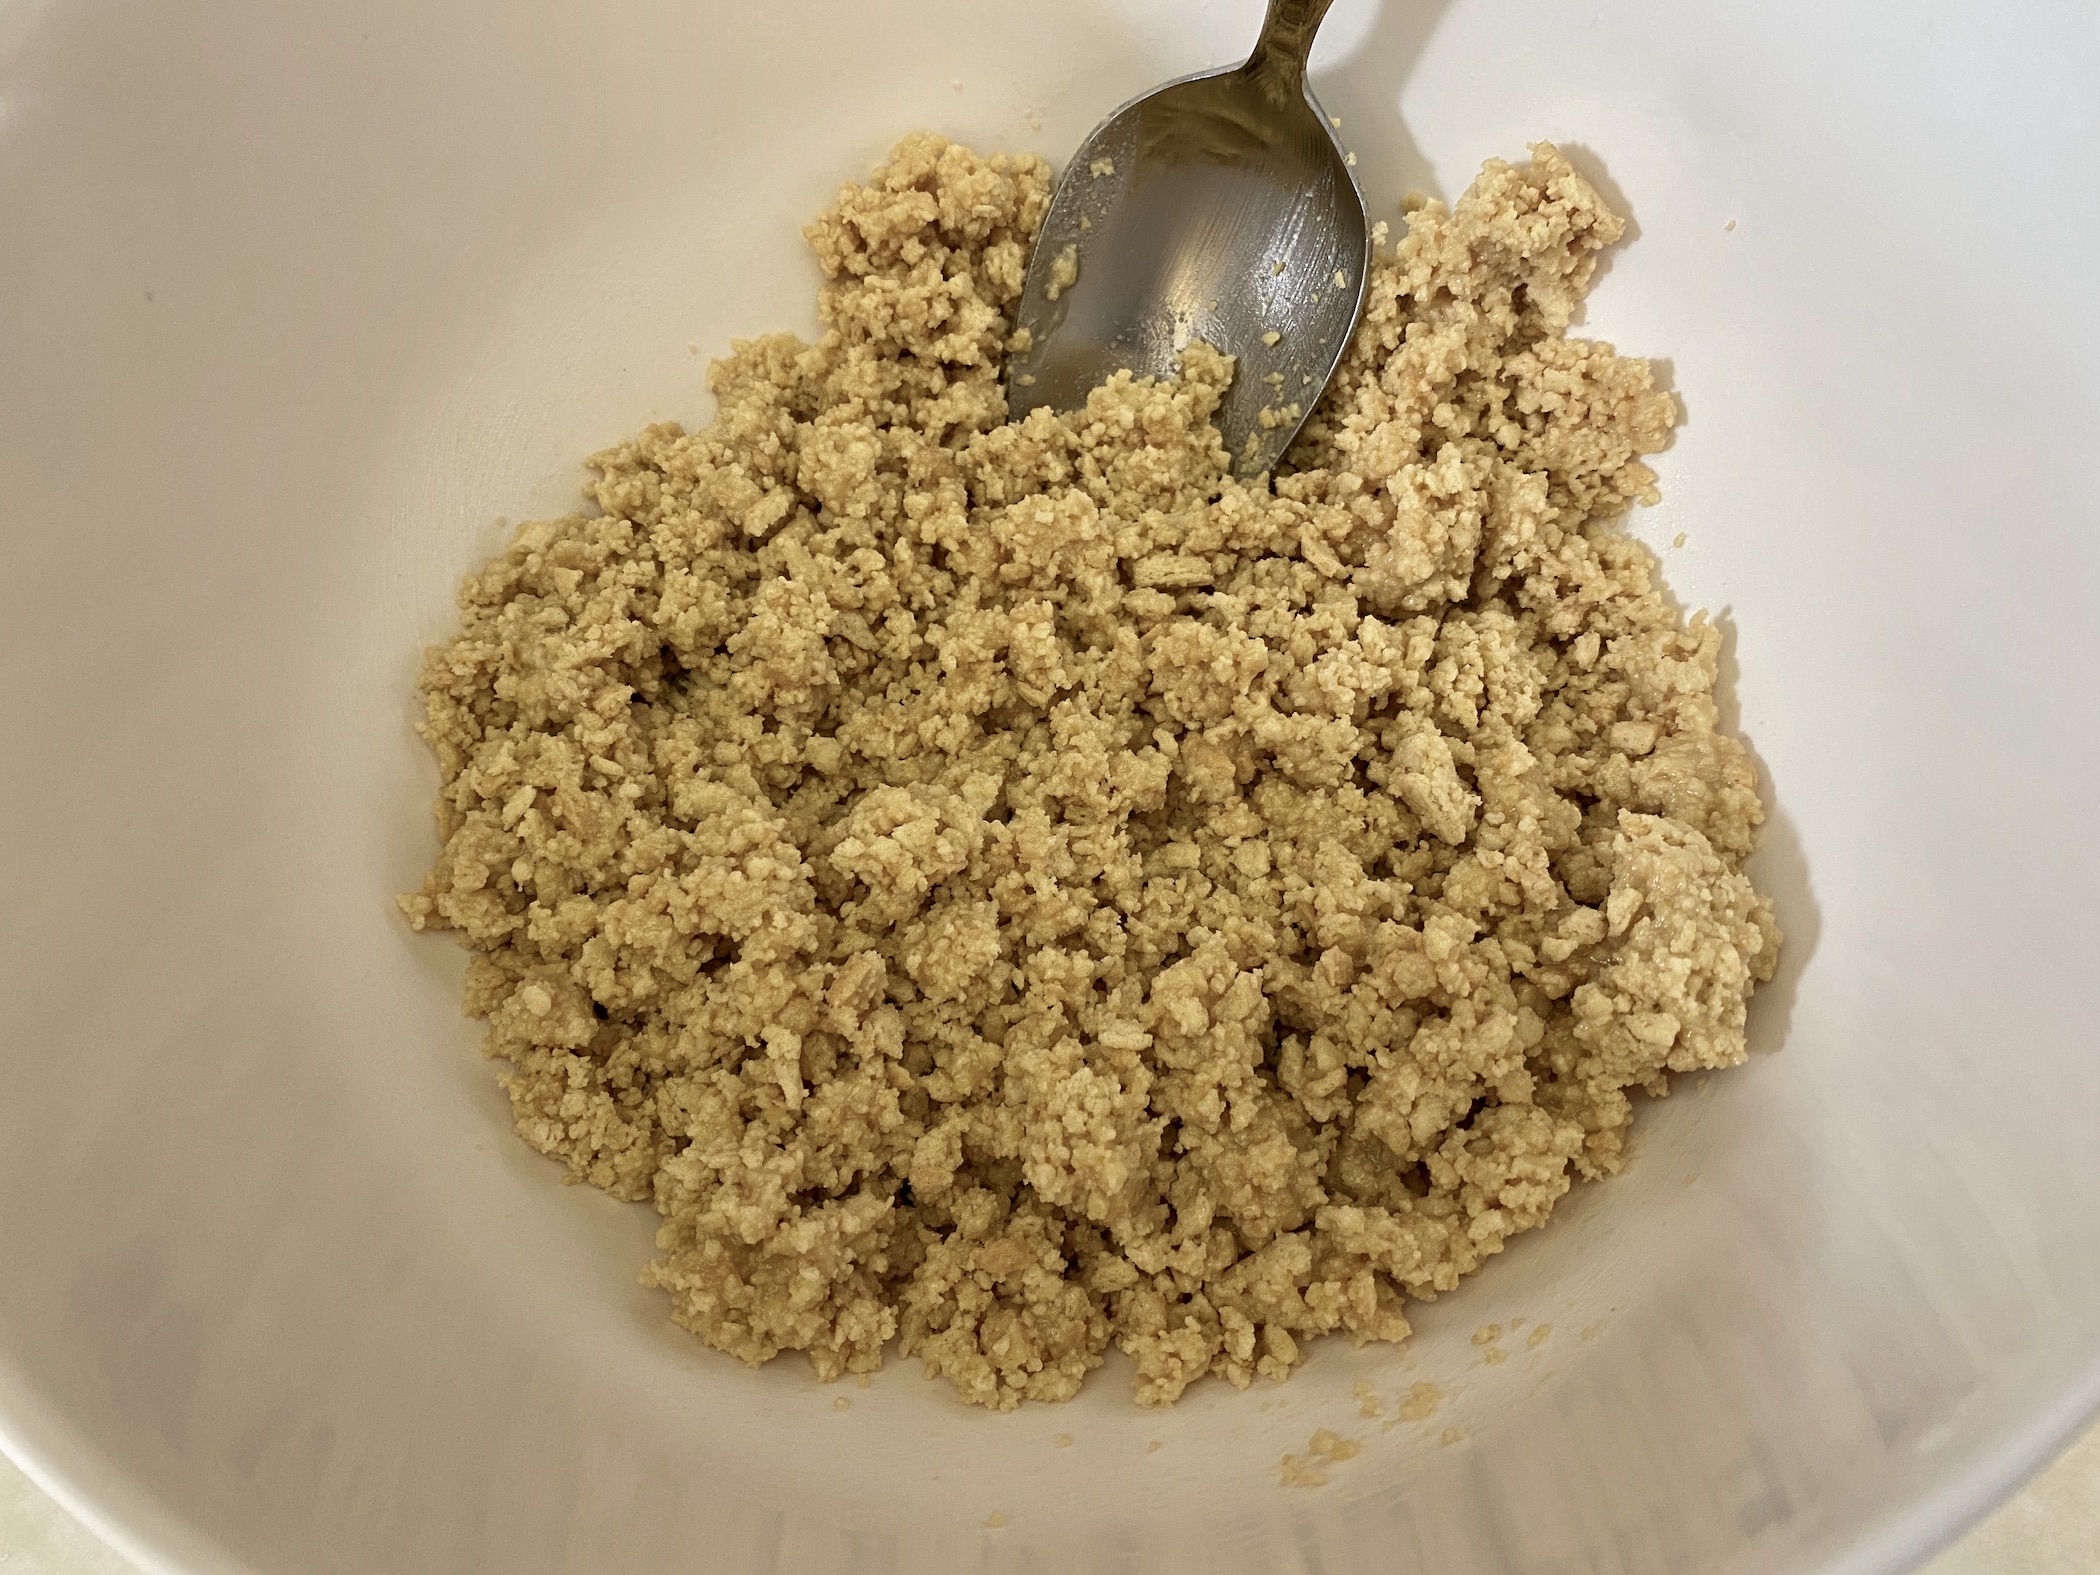
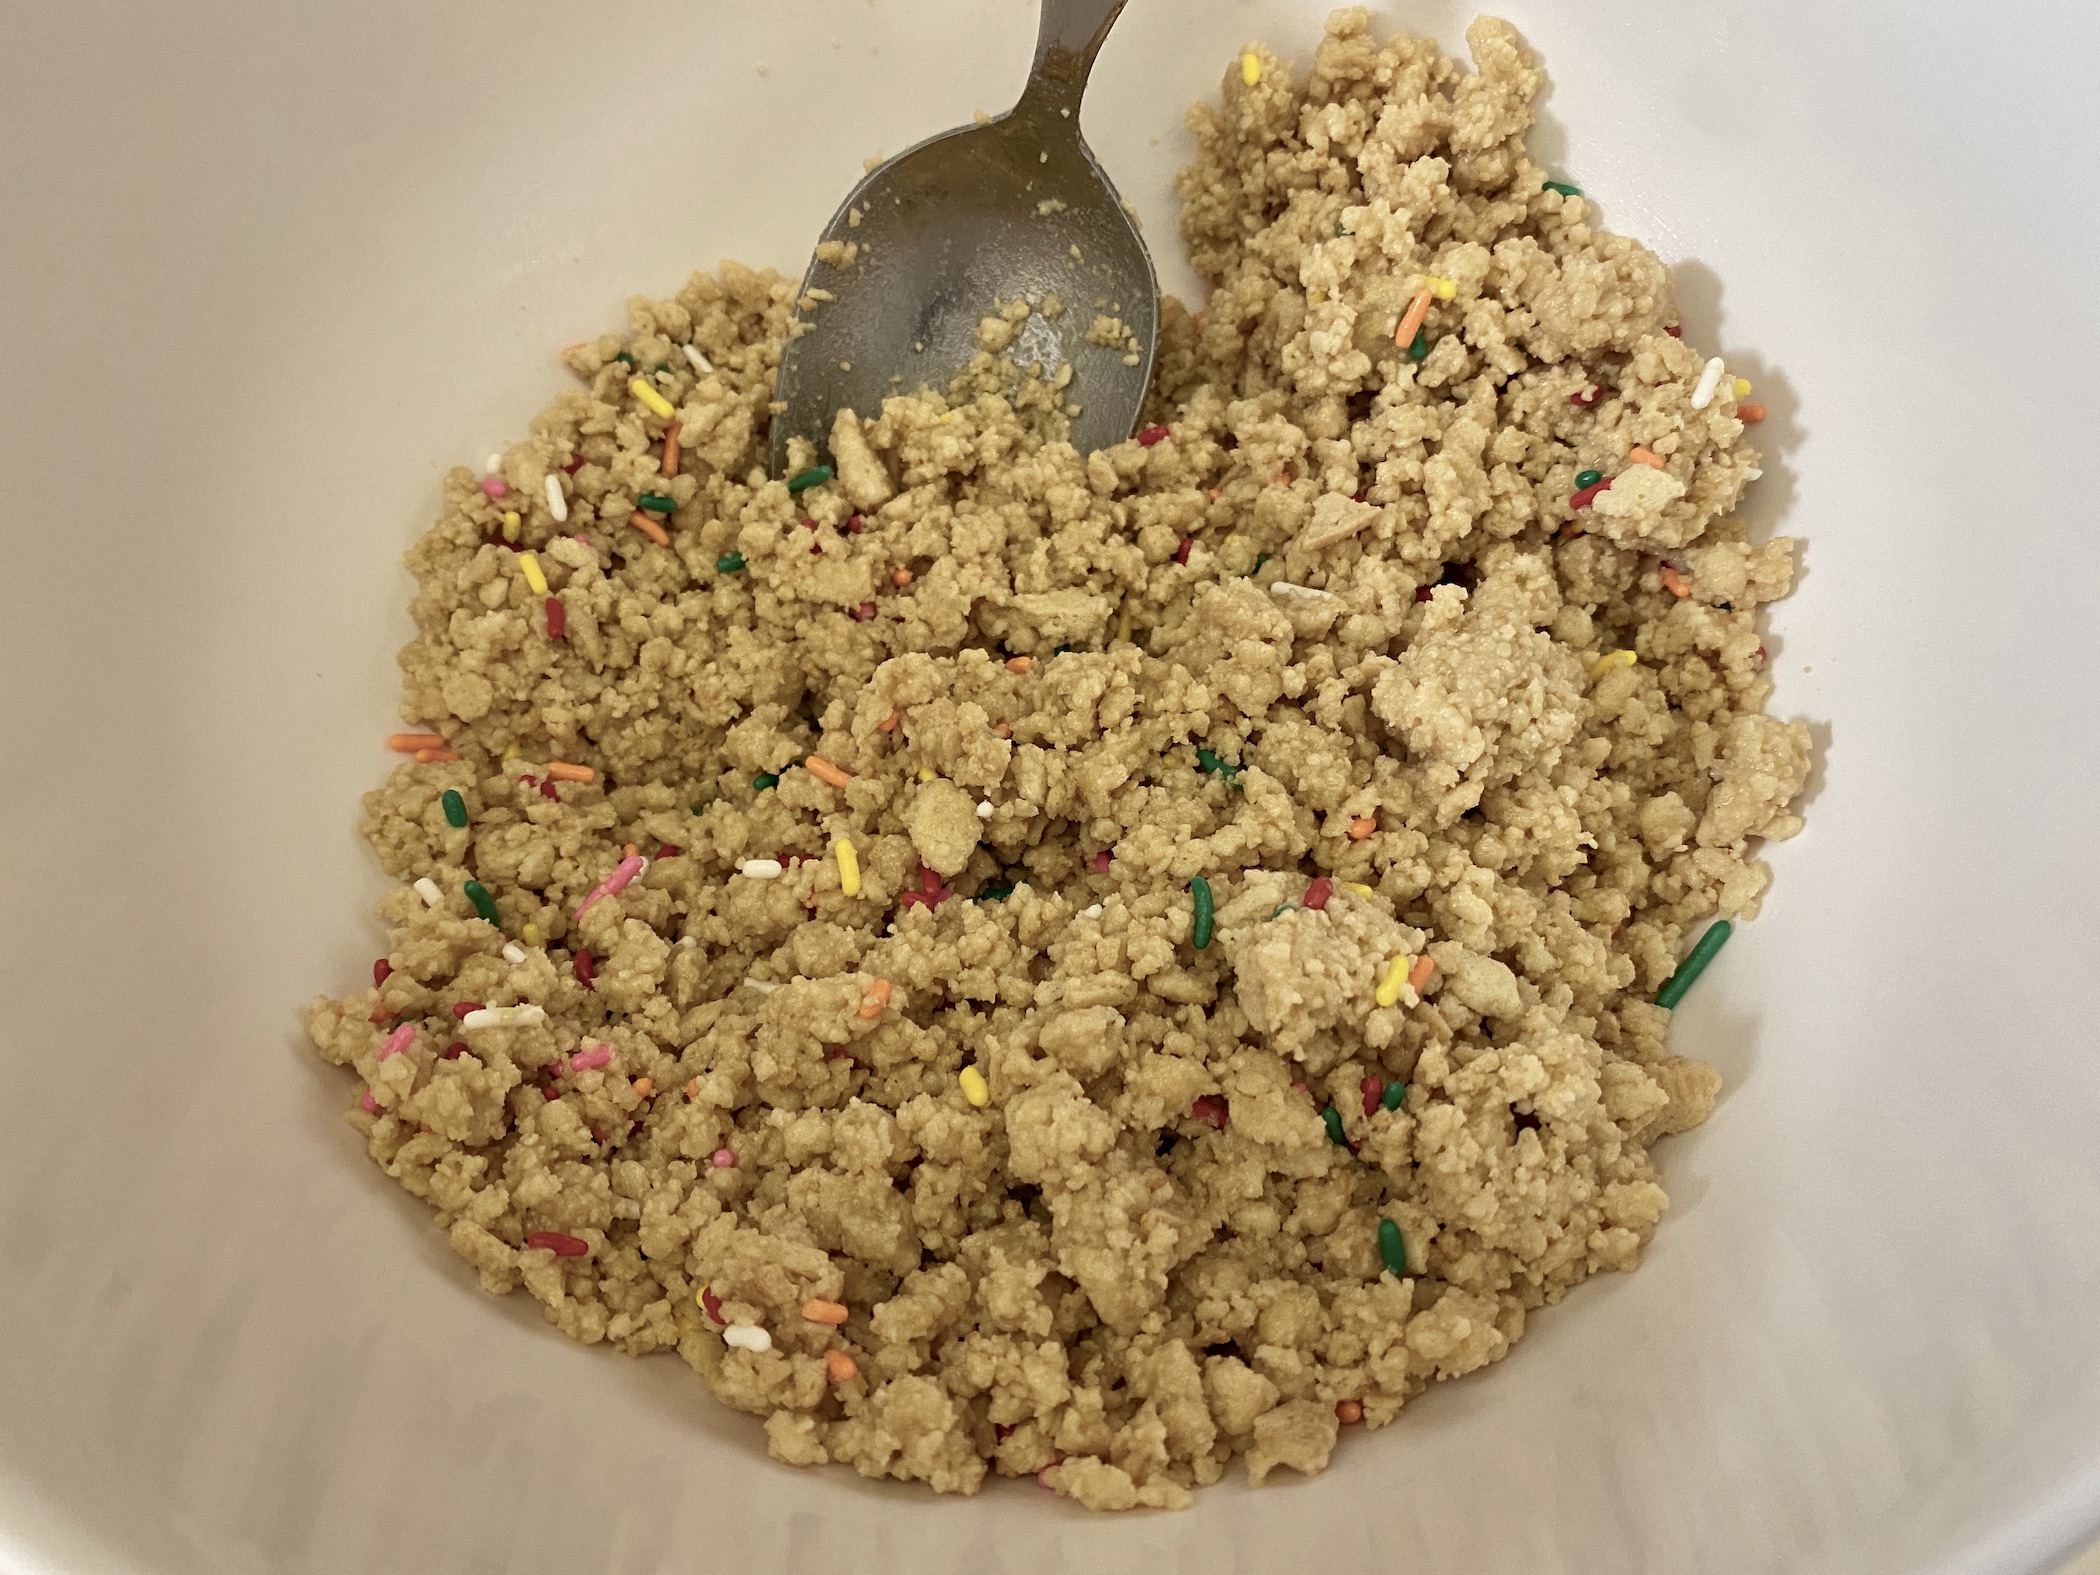
Start by making the crust. Add the vanilla Oreos to the bowl of a food processor. Pulse until fine crumbs then pour the crumbs into a large mixing bowl. Add the melted butter and stir to combine.


Add 1-2 Tbsp of rainbow sprinkles and stir to combine.
Use a spoon to scoop the mixture into 25 2-oz plastic containers. Use an extra plastic cup to press the crumbs into the bottom of each cup. Place the cups on a baking sheet. This will help you move the cups to the fridge to chill.


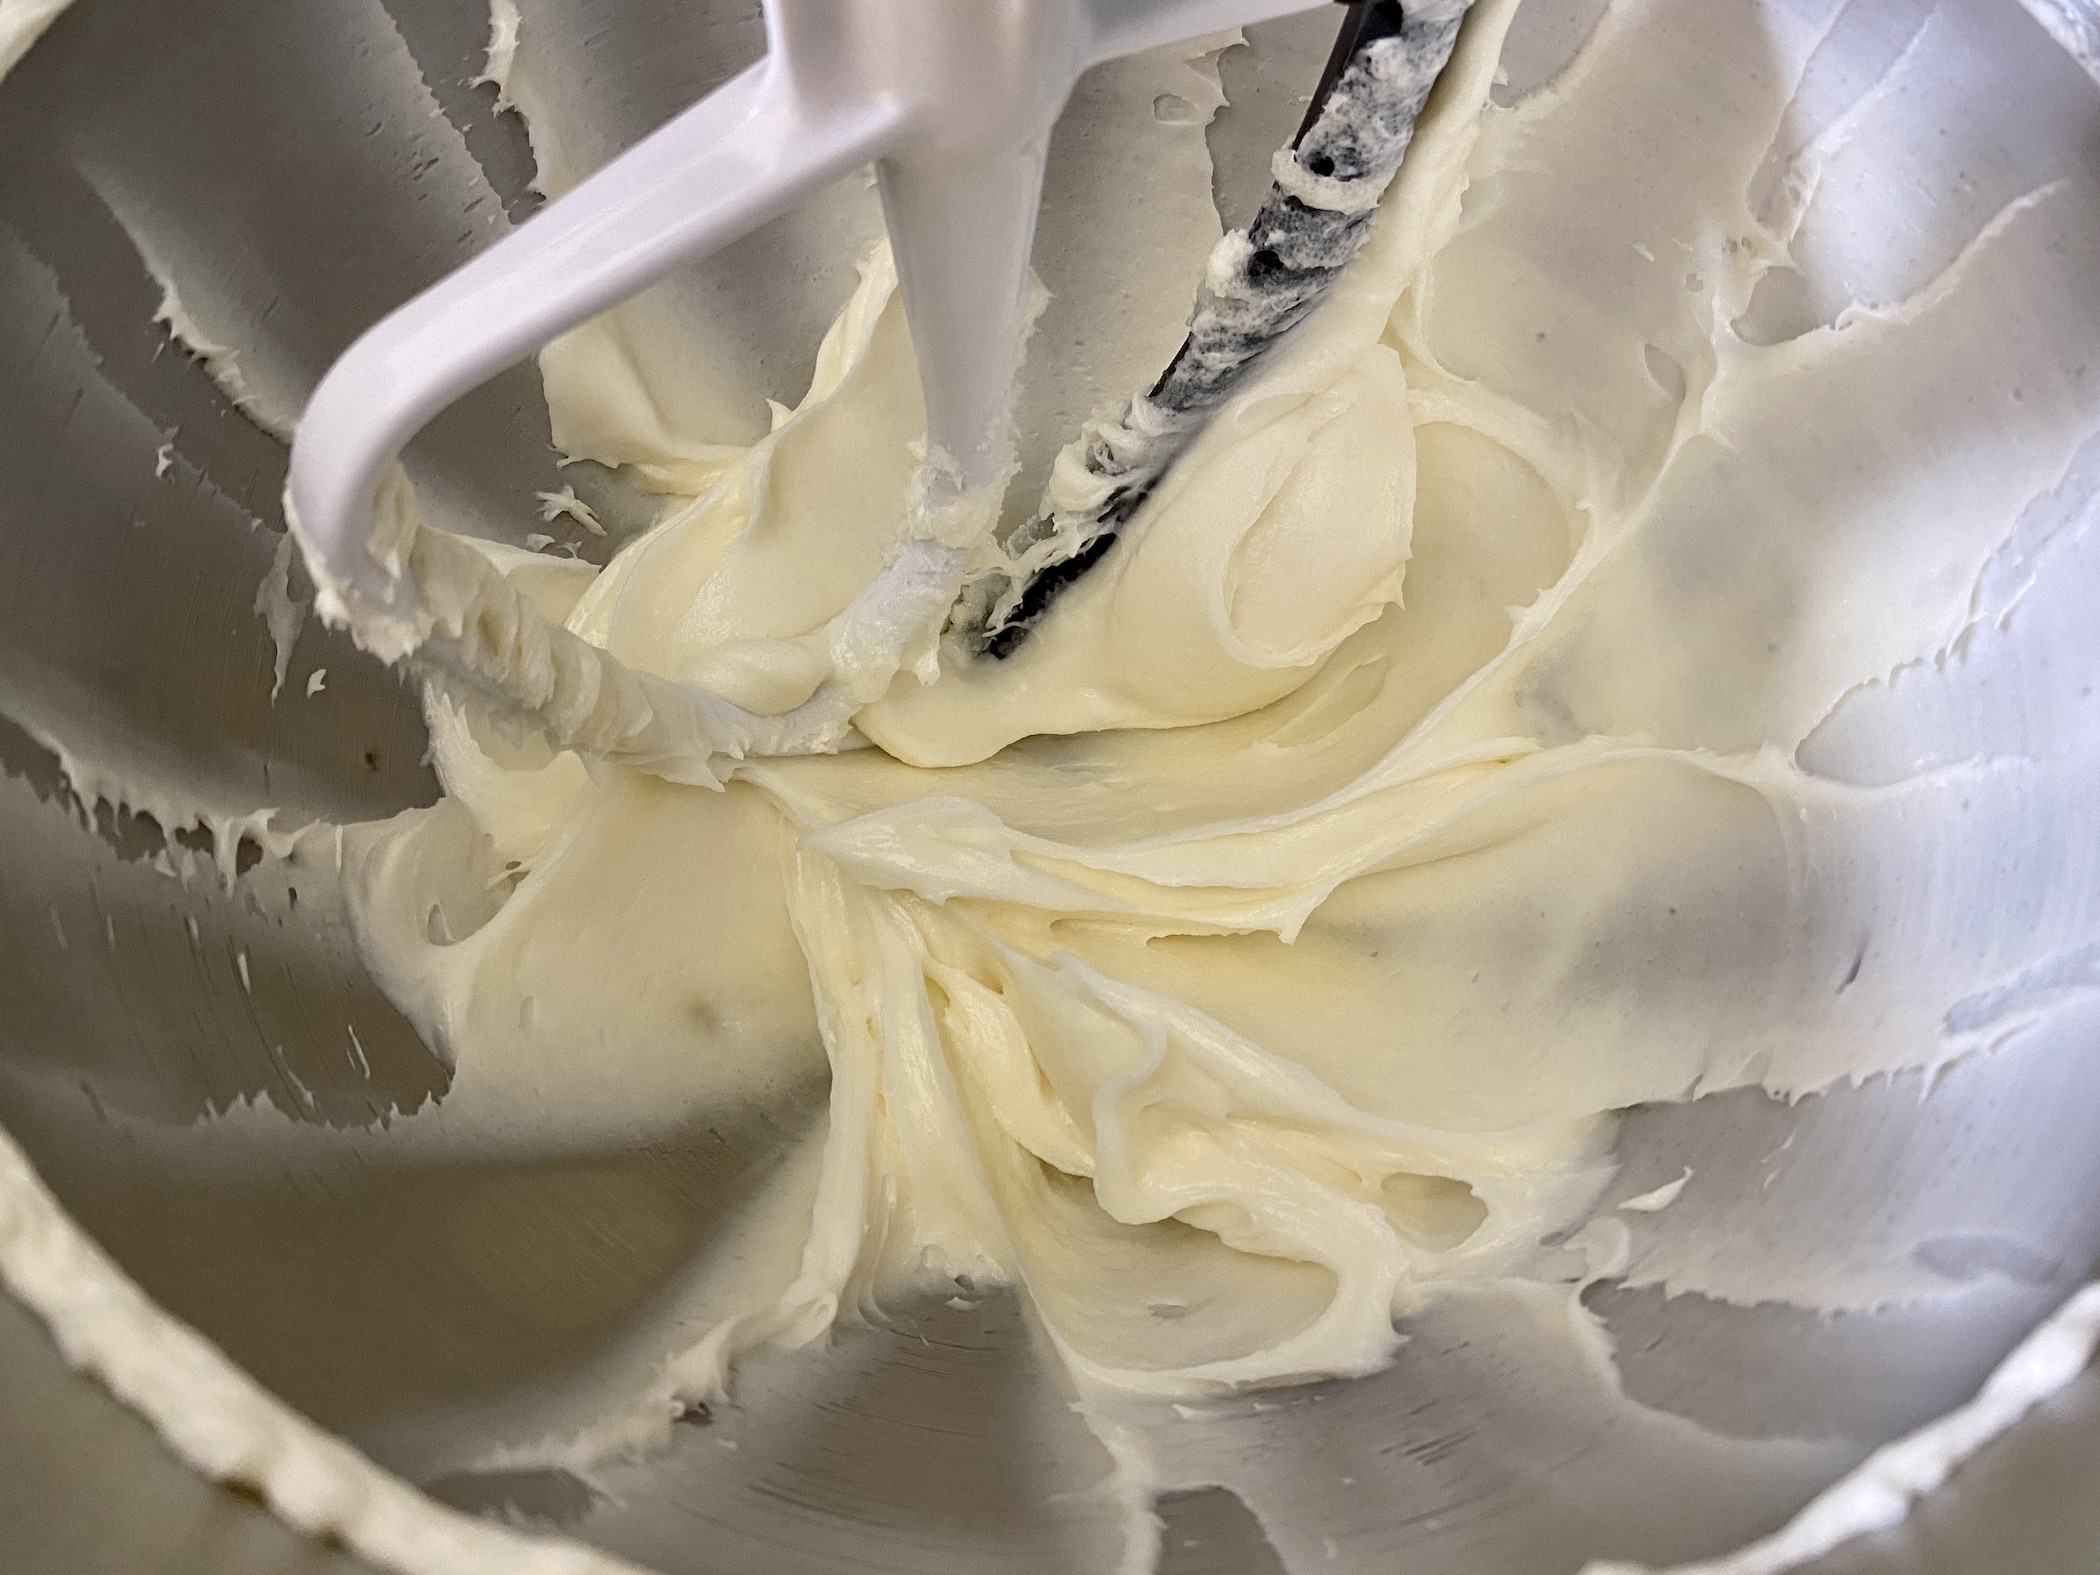
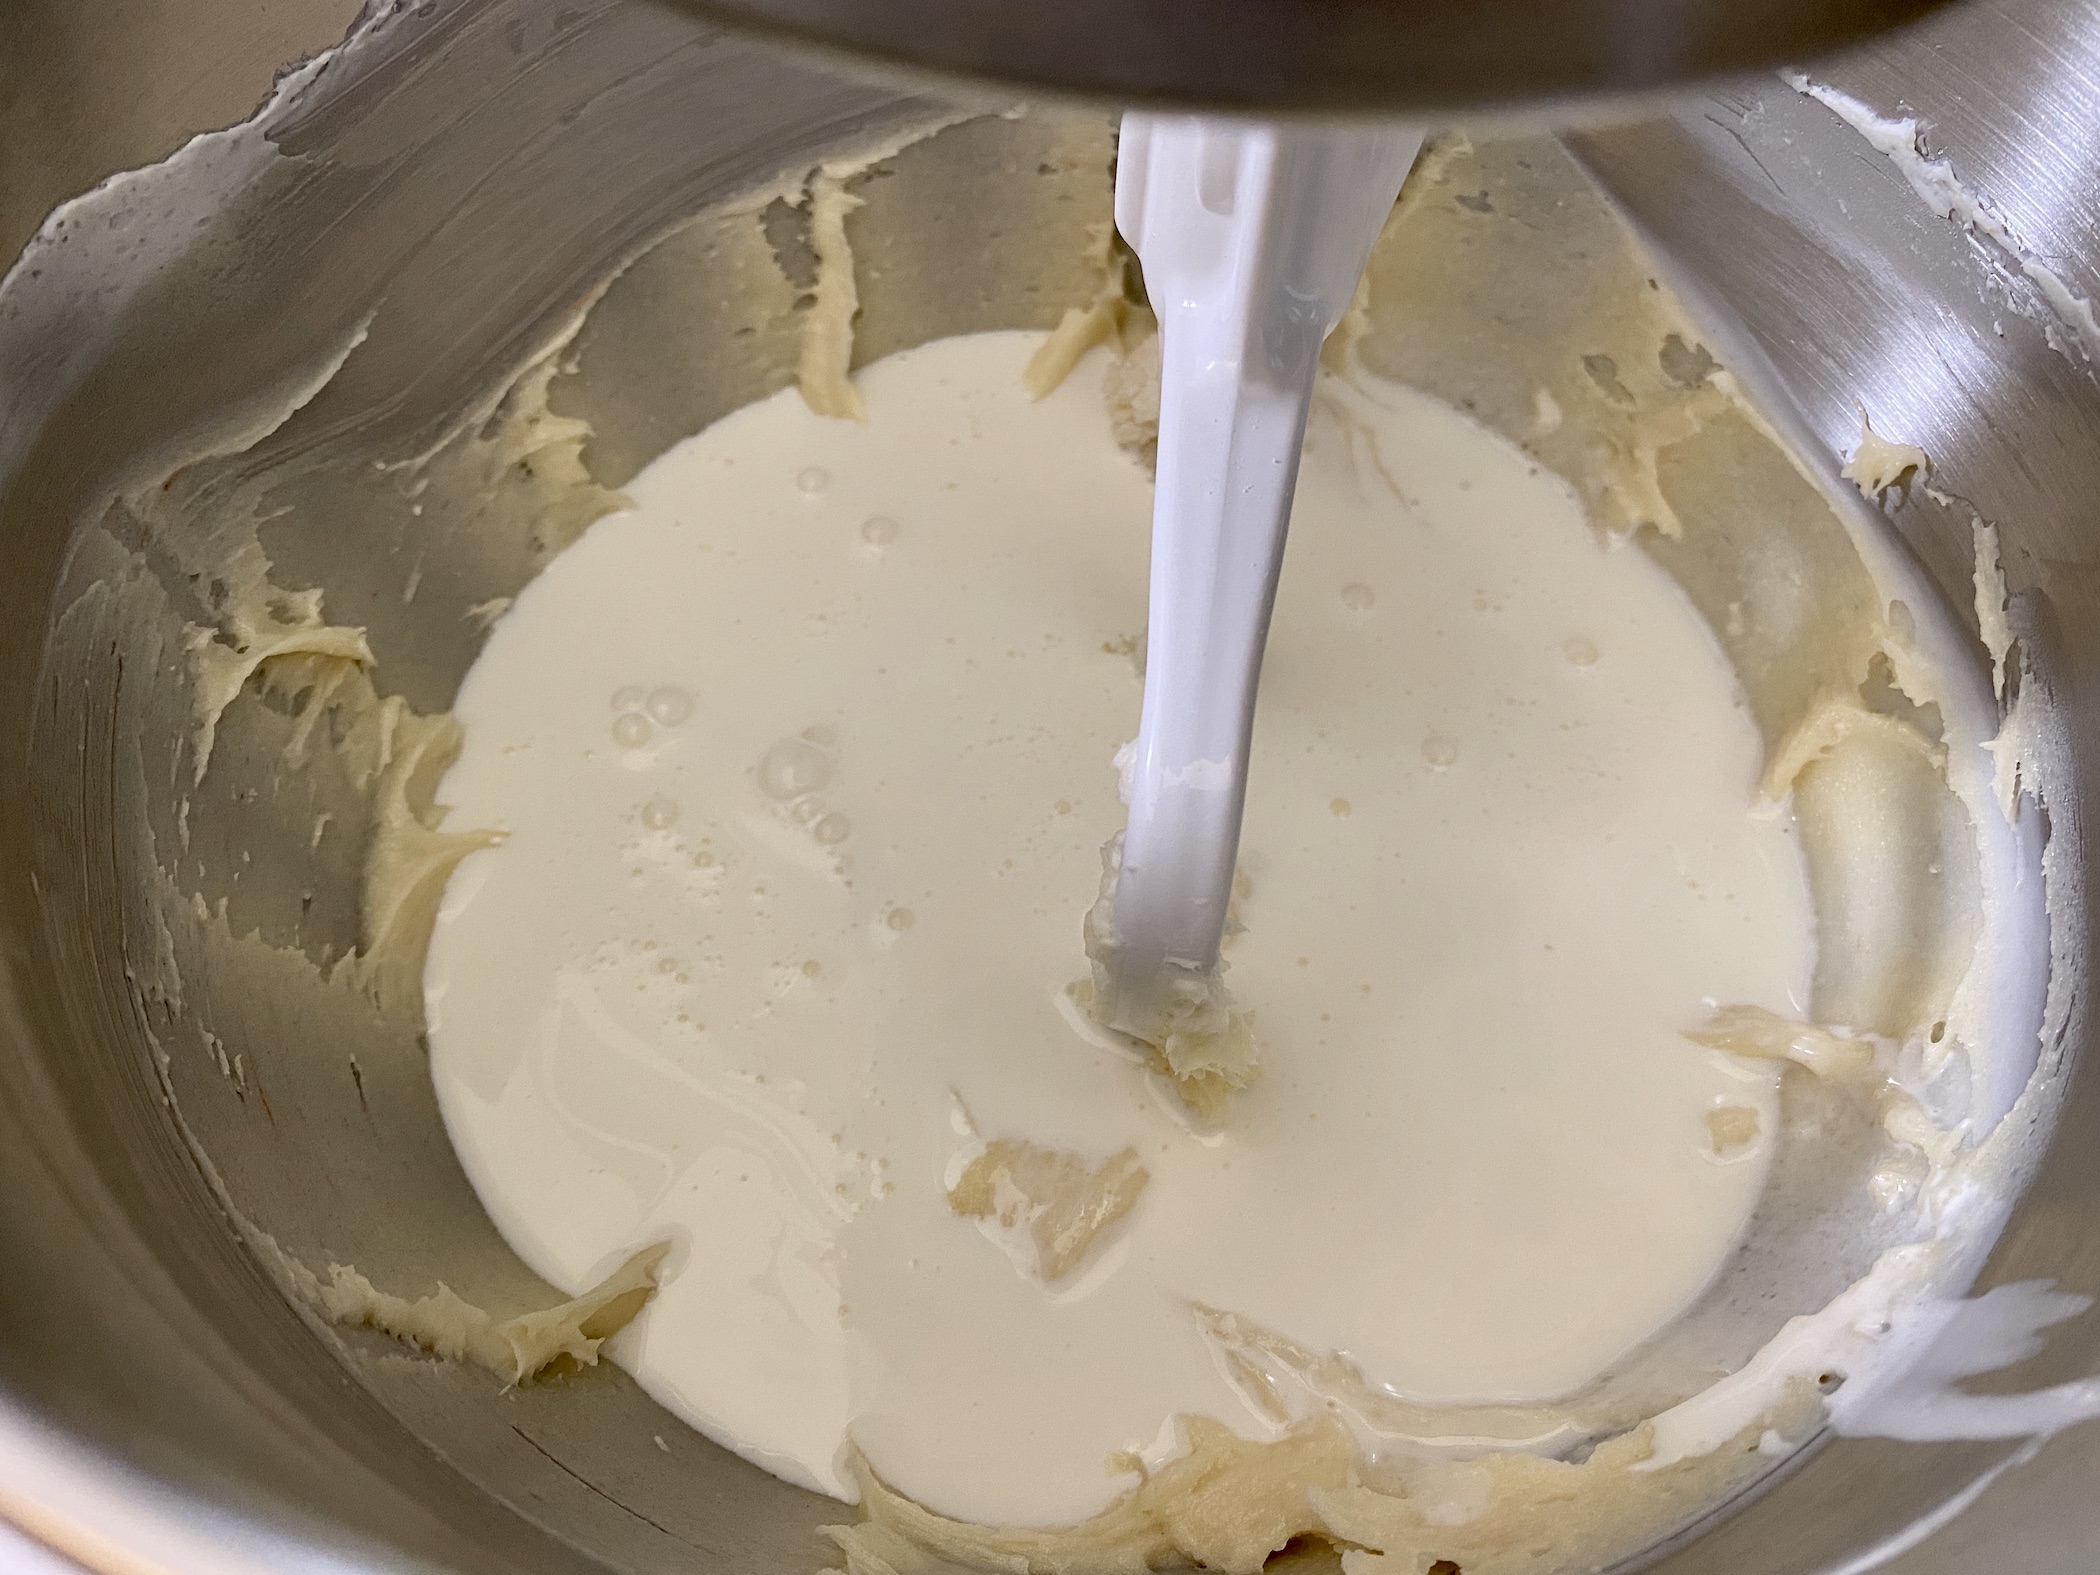
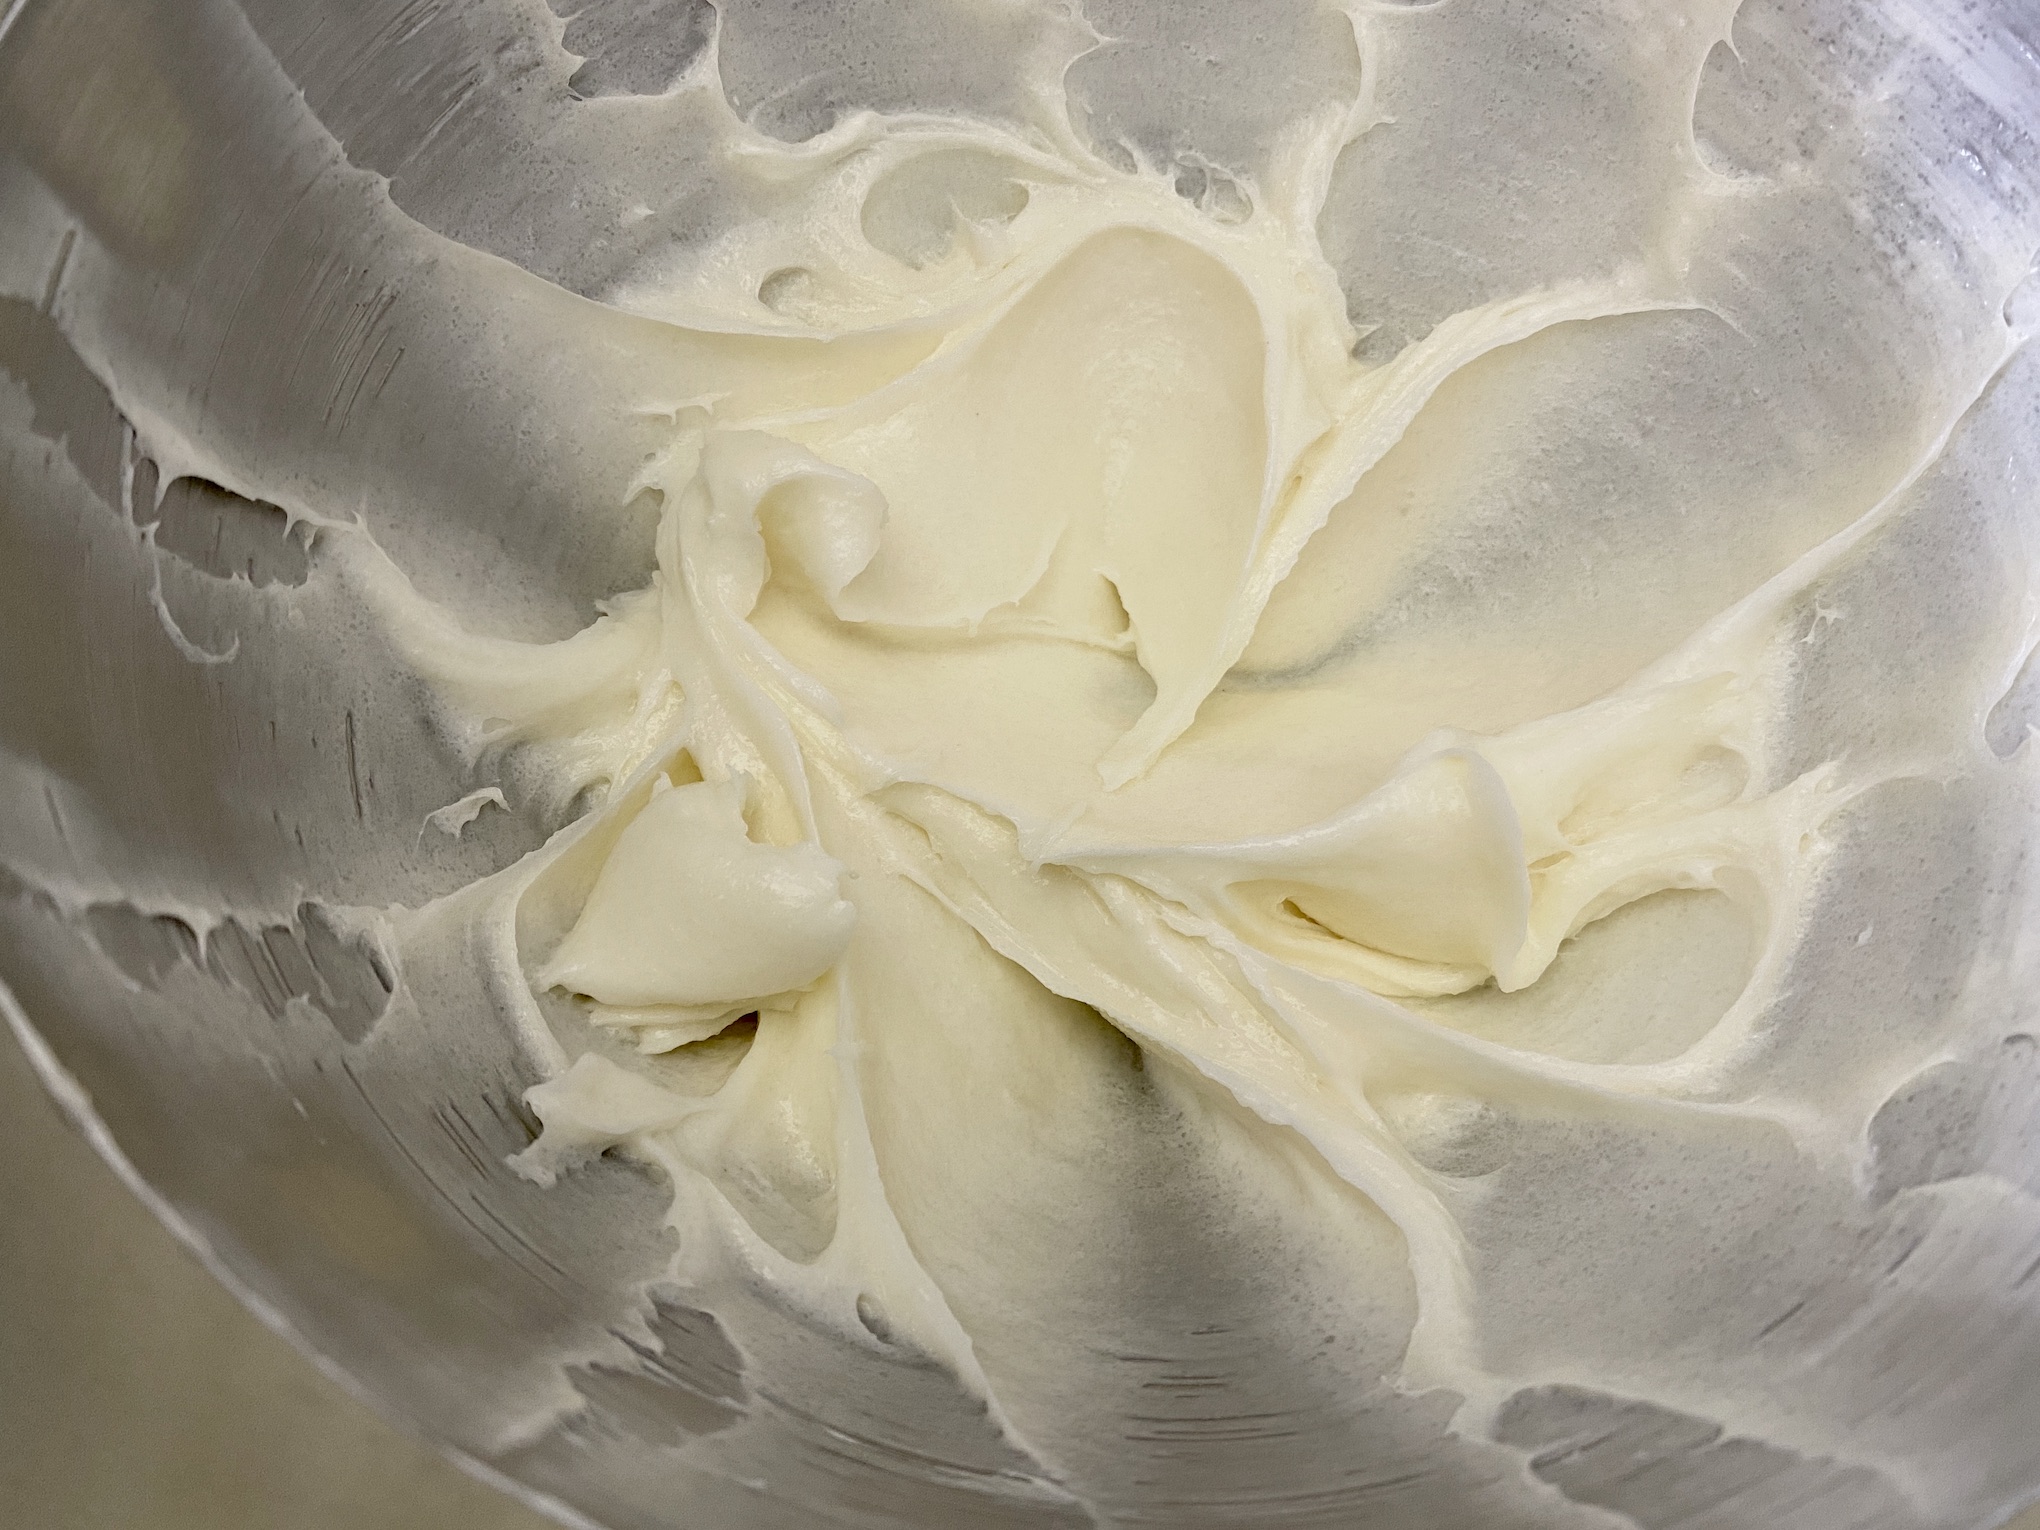
Add the cream cheese and sugar to the bowl of a stand mixer. Beat until well combined and smooth.

Heat the cake mix in the microwave for 30-45 seconds to heat-treat it (makes it safe to consume when not being baked). Add this to the stand mixer, along with the vanilla, and beat until well combined.


Add the heavy whipping cream and whip on medium-high until light and fluffy.
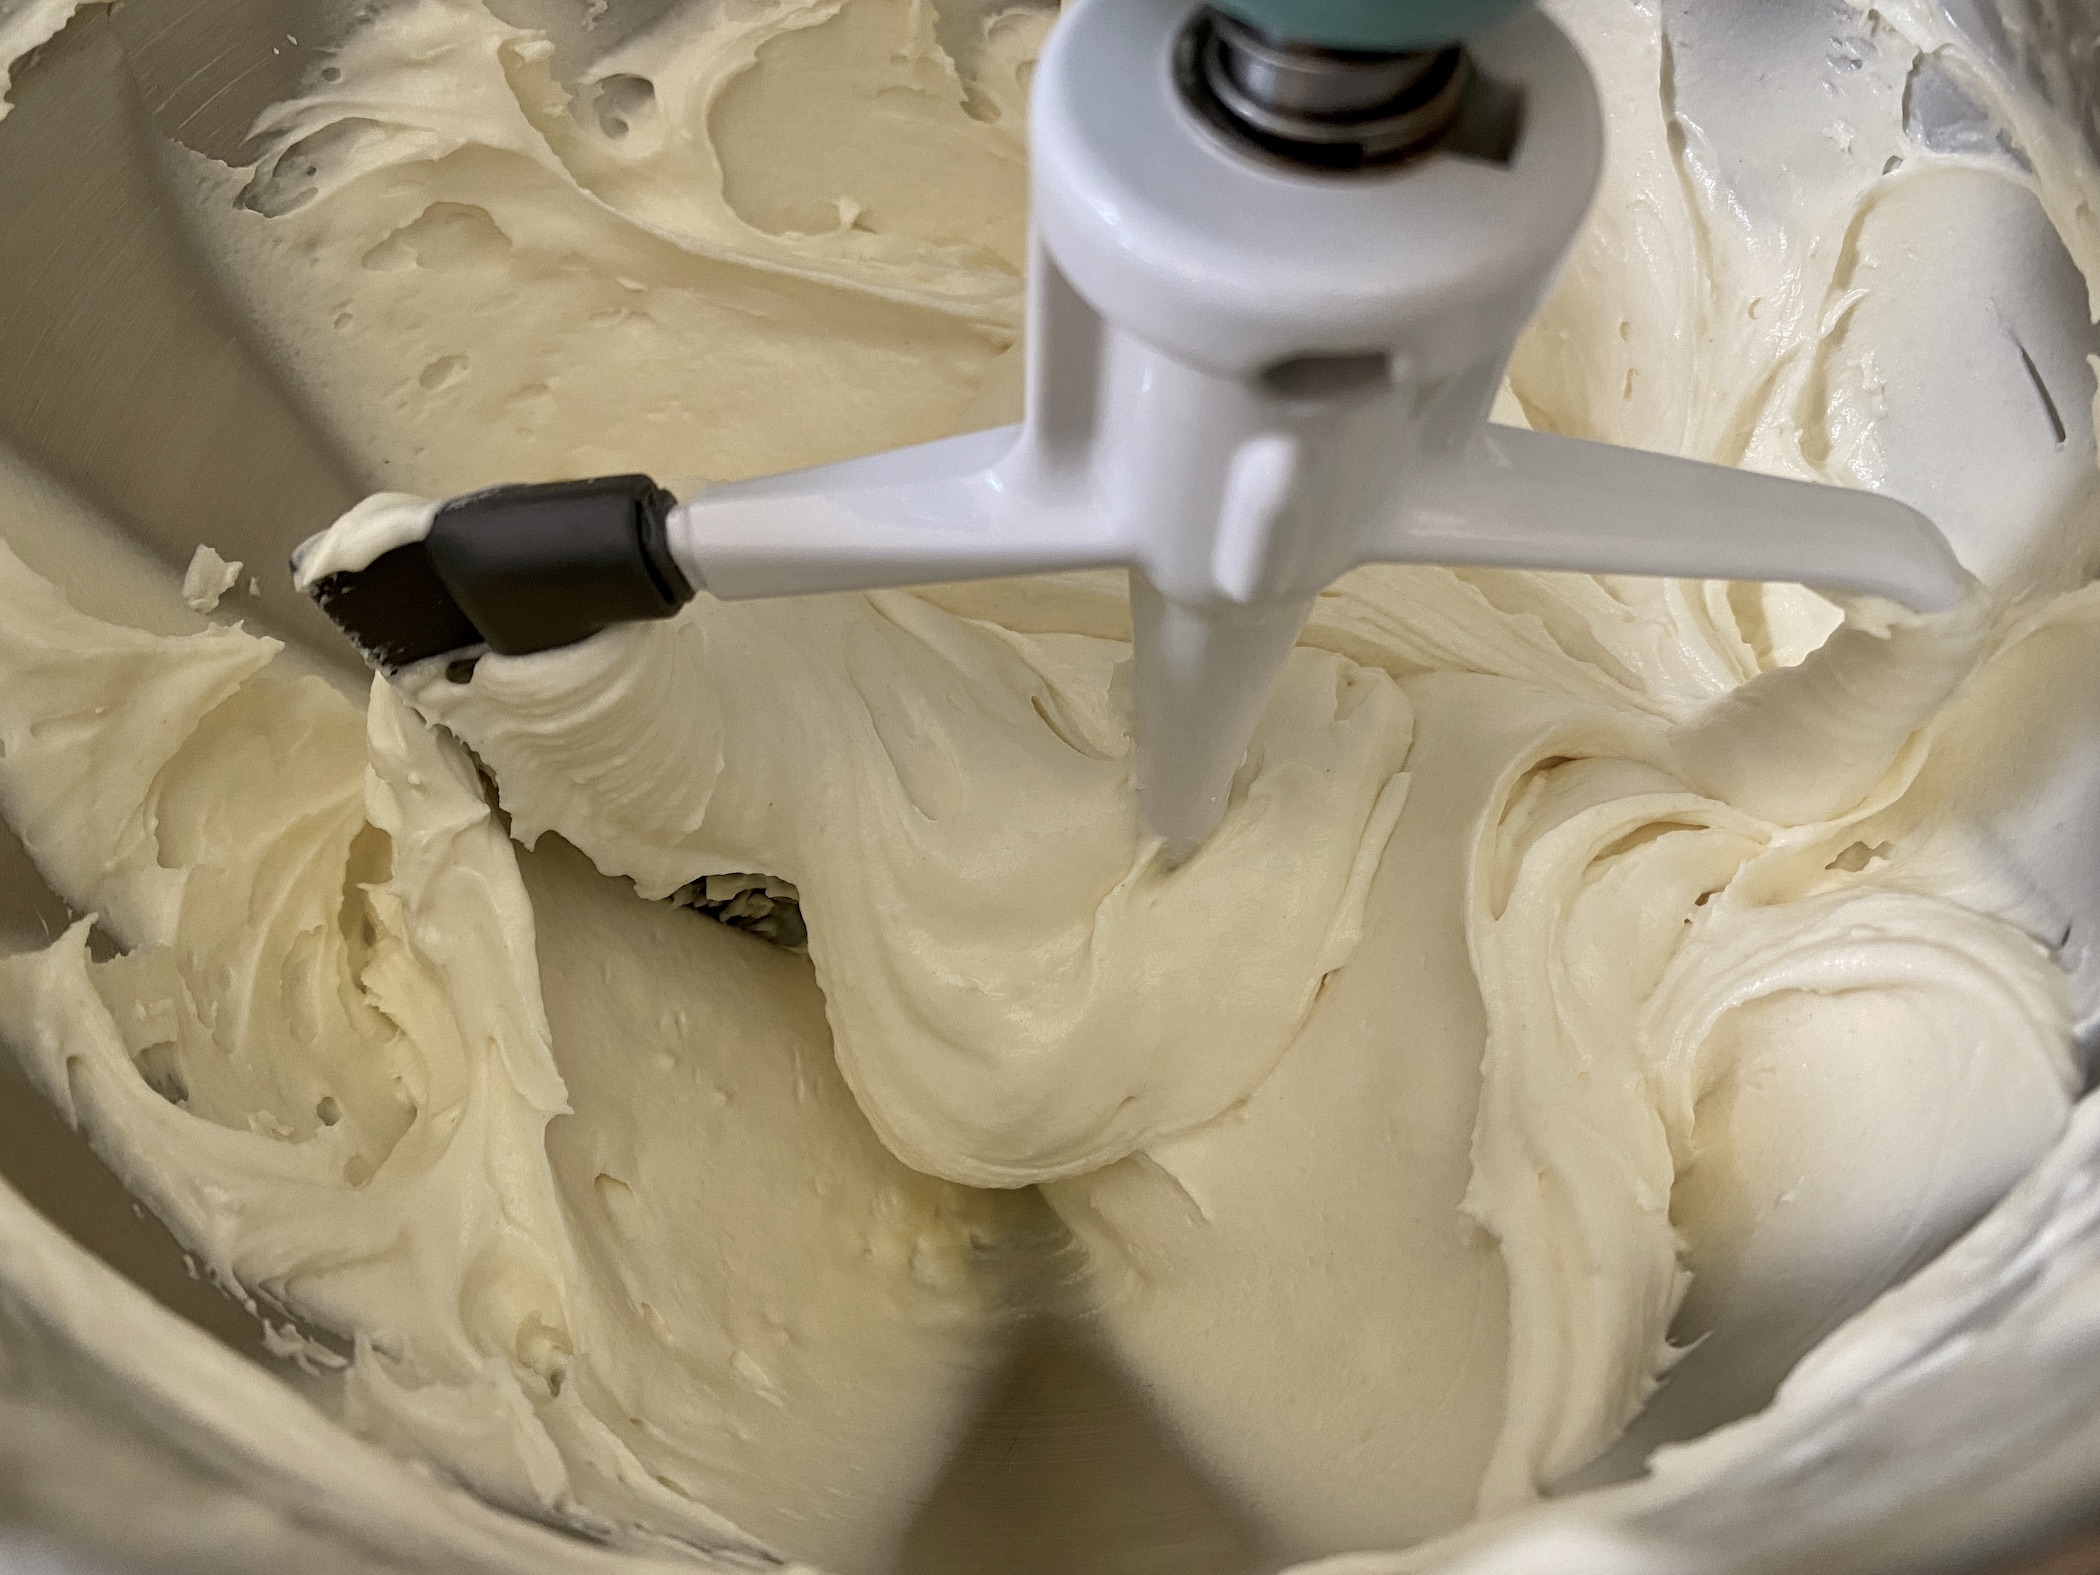
Add 2-3 Tbsp of rainbow sprinkles and stir in by hand. I like to use the “Jimmie” sprinkles because they are less likely to bleed into the mixture but use whatever you have on hand.

Add the mixture to a piping bag or Ziploc bag and snip off the tip. Pipe the mixture into each cup until about 2/3 full.
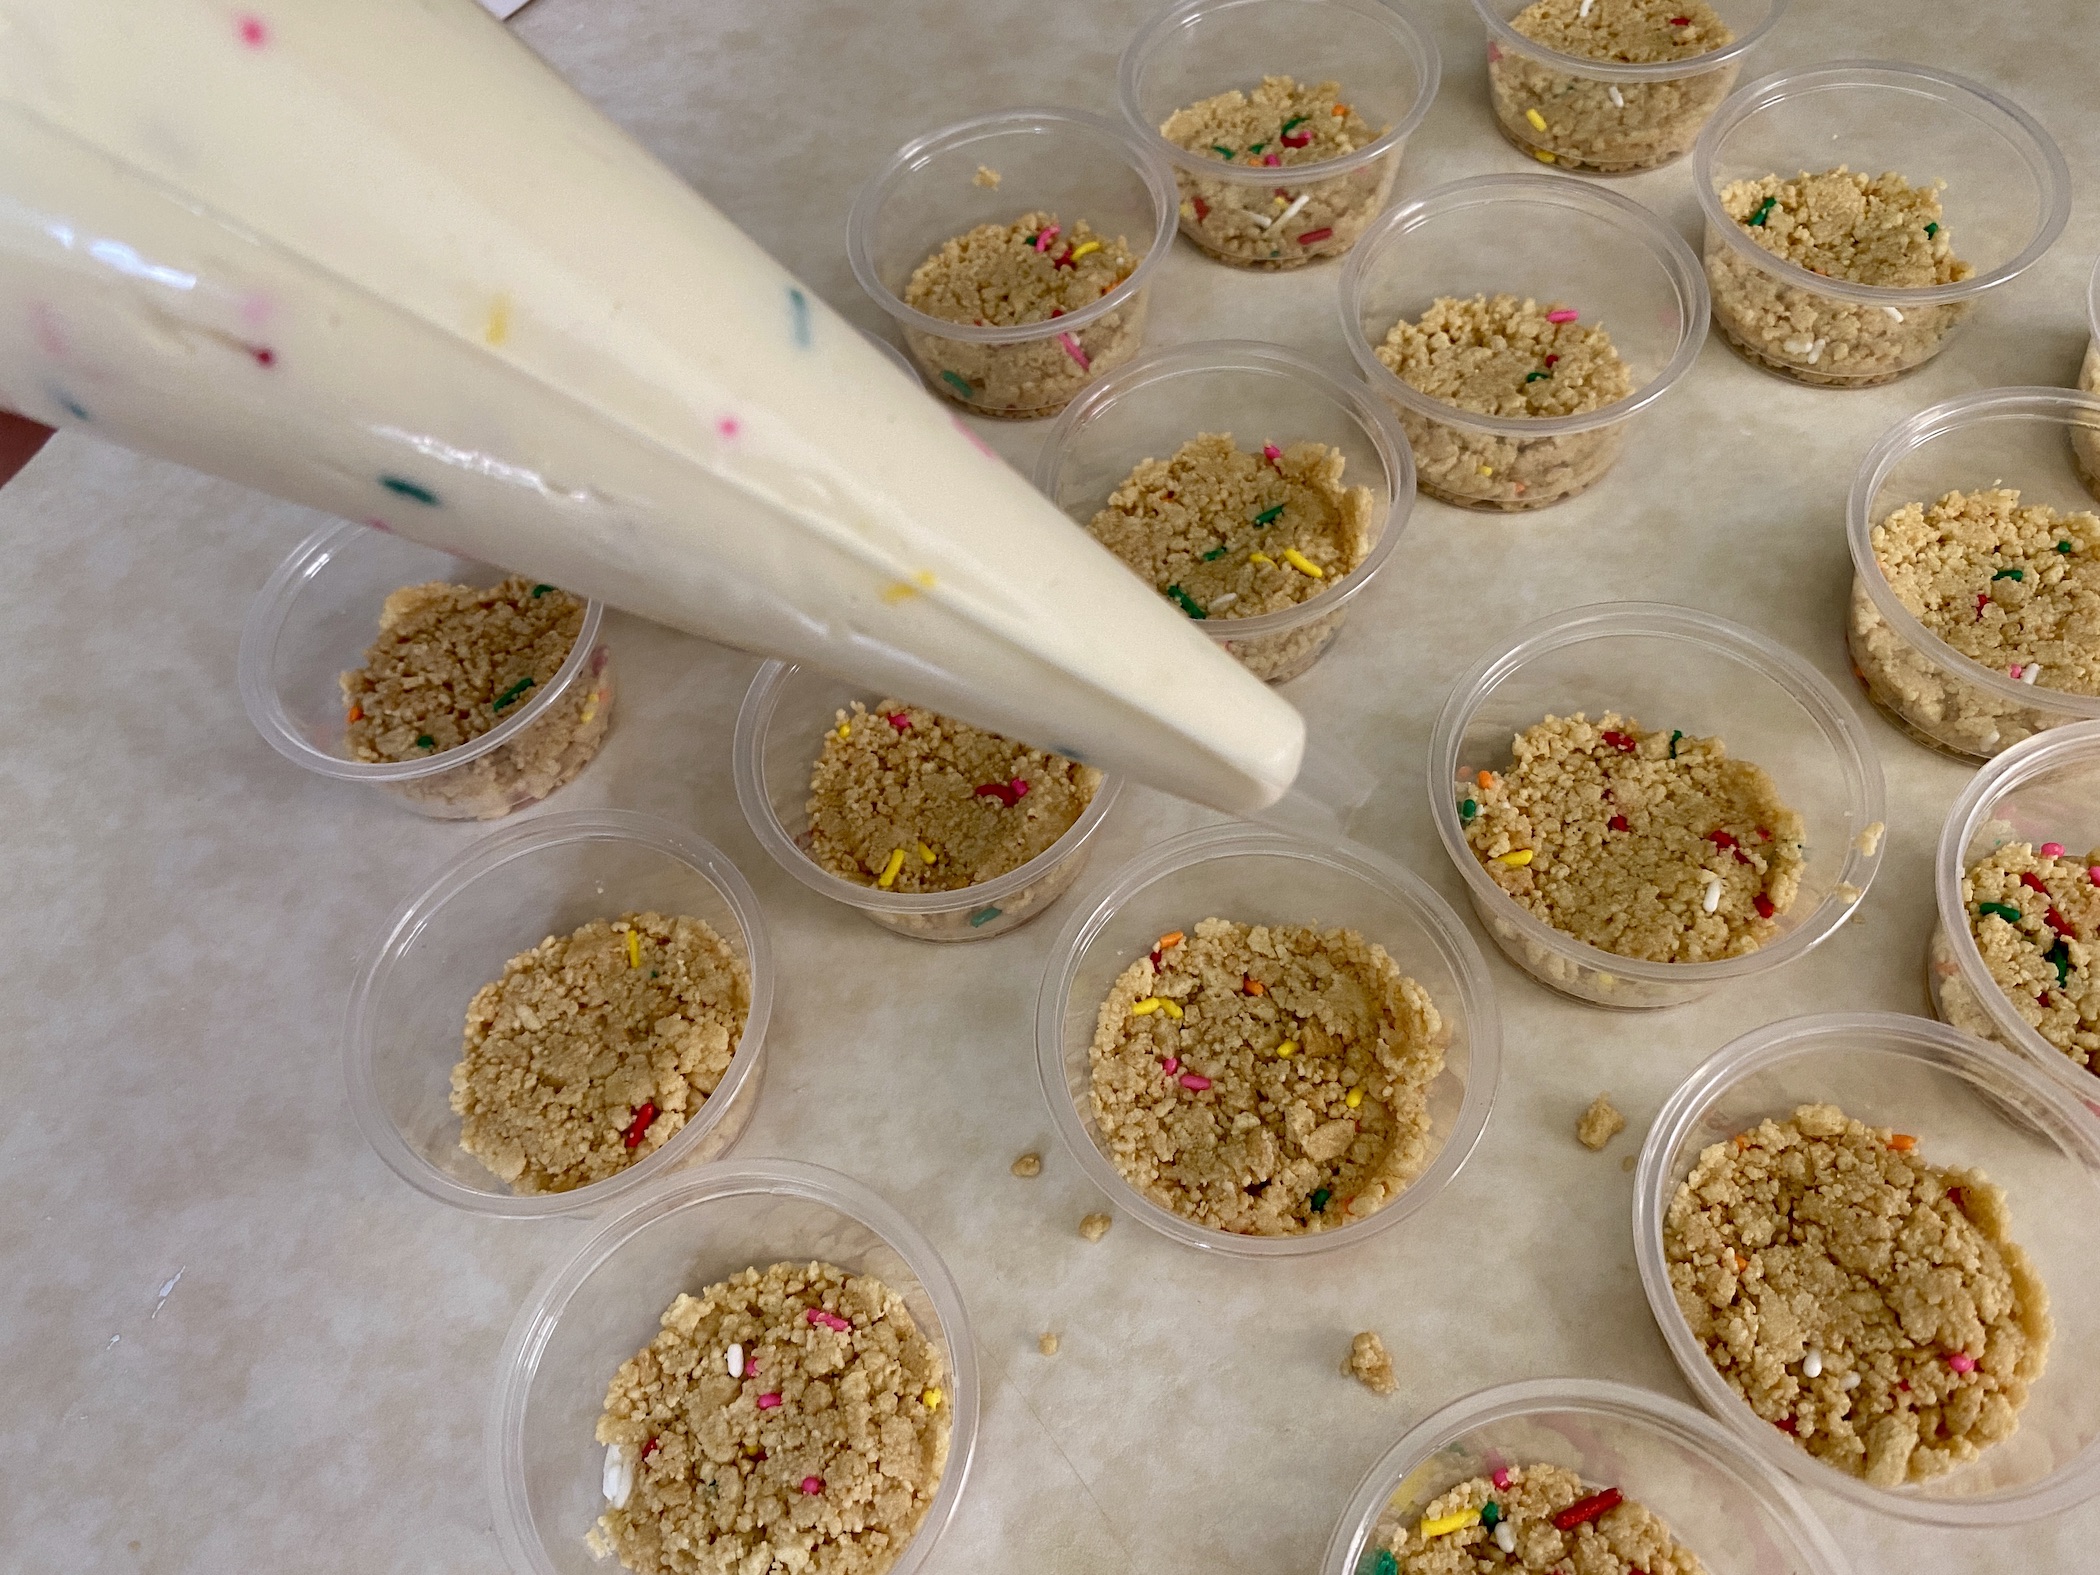

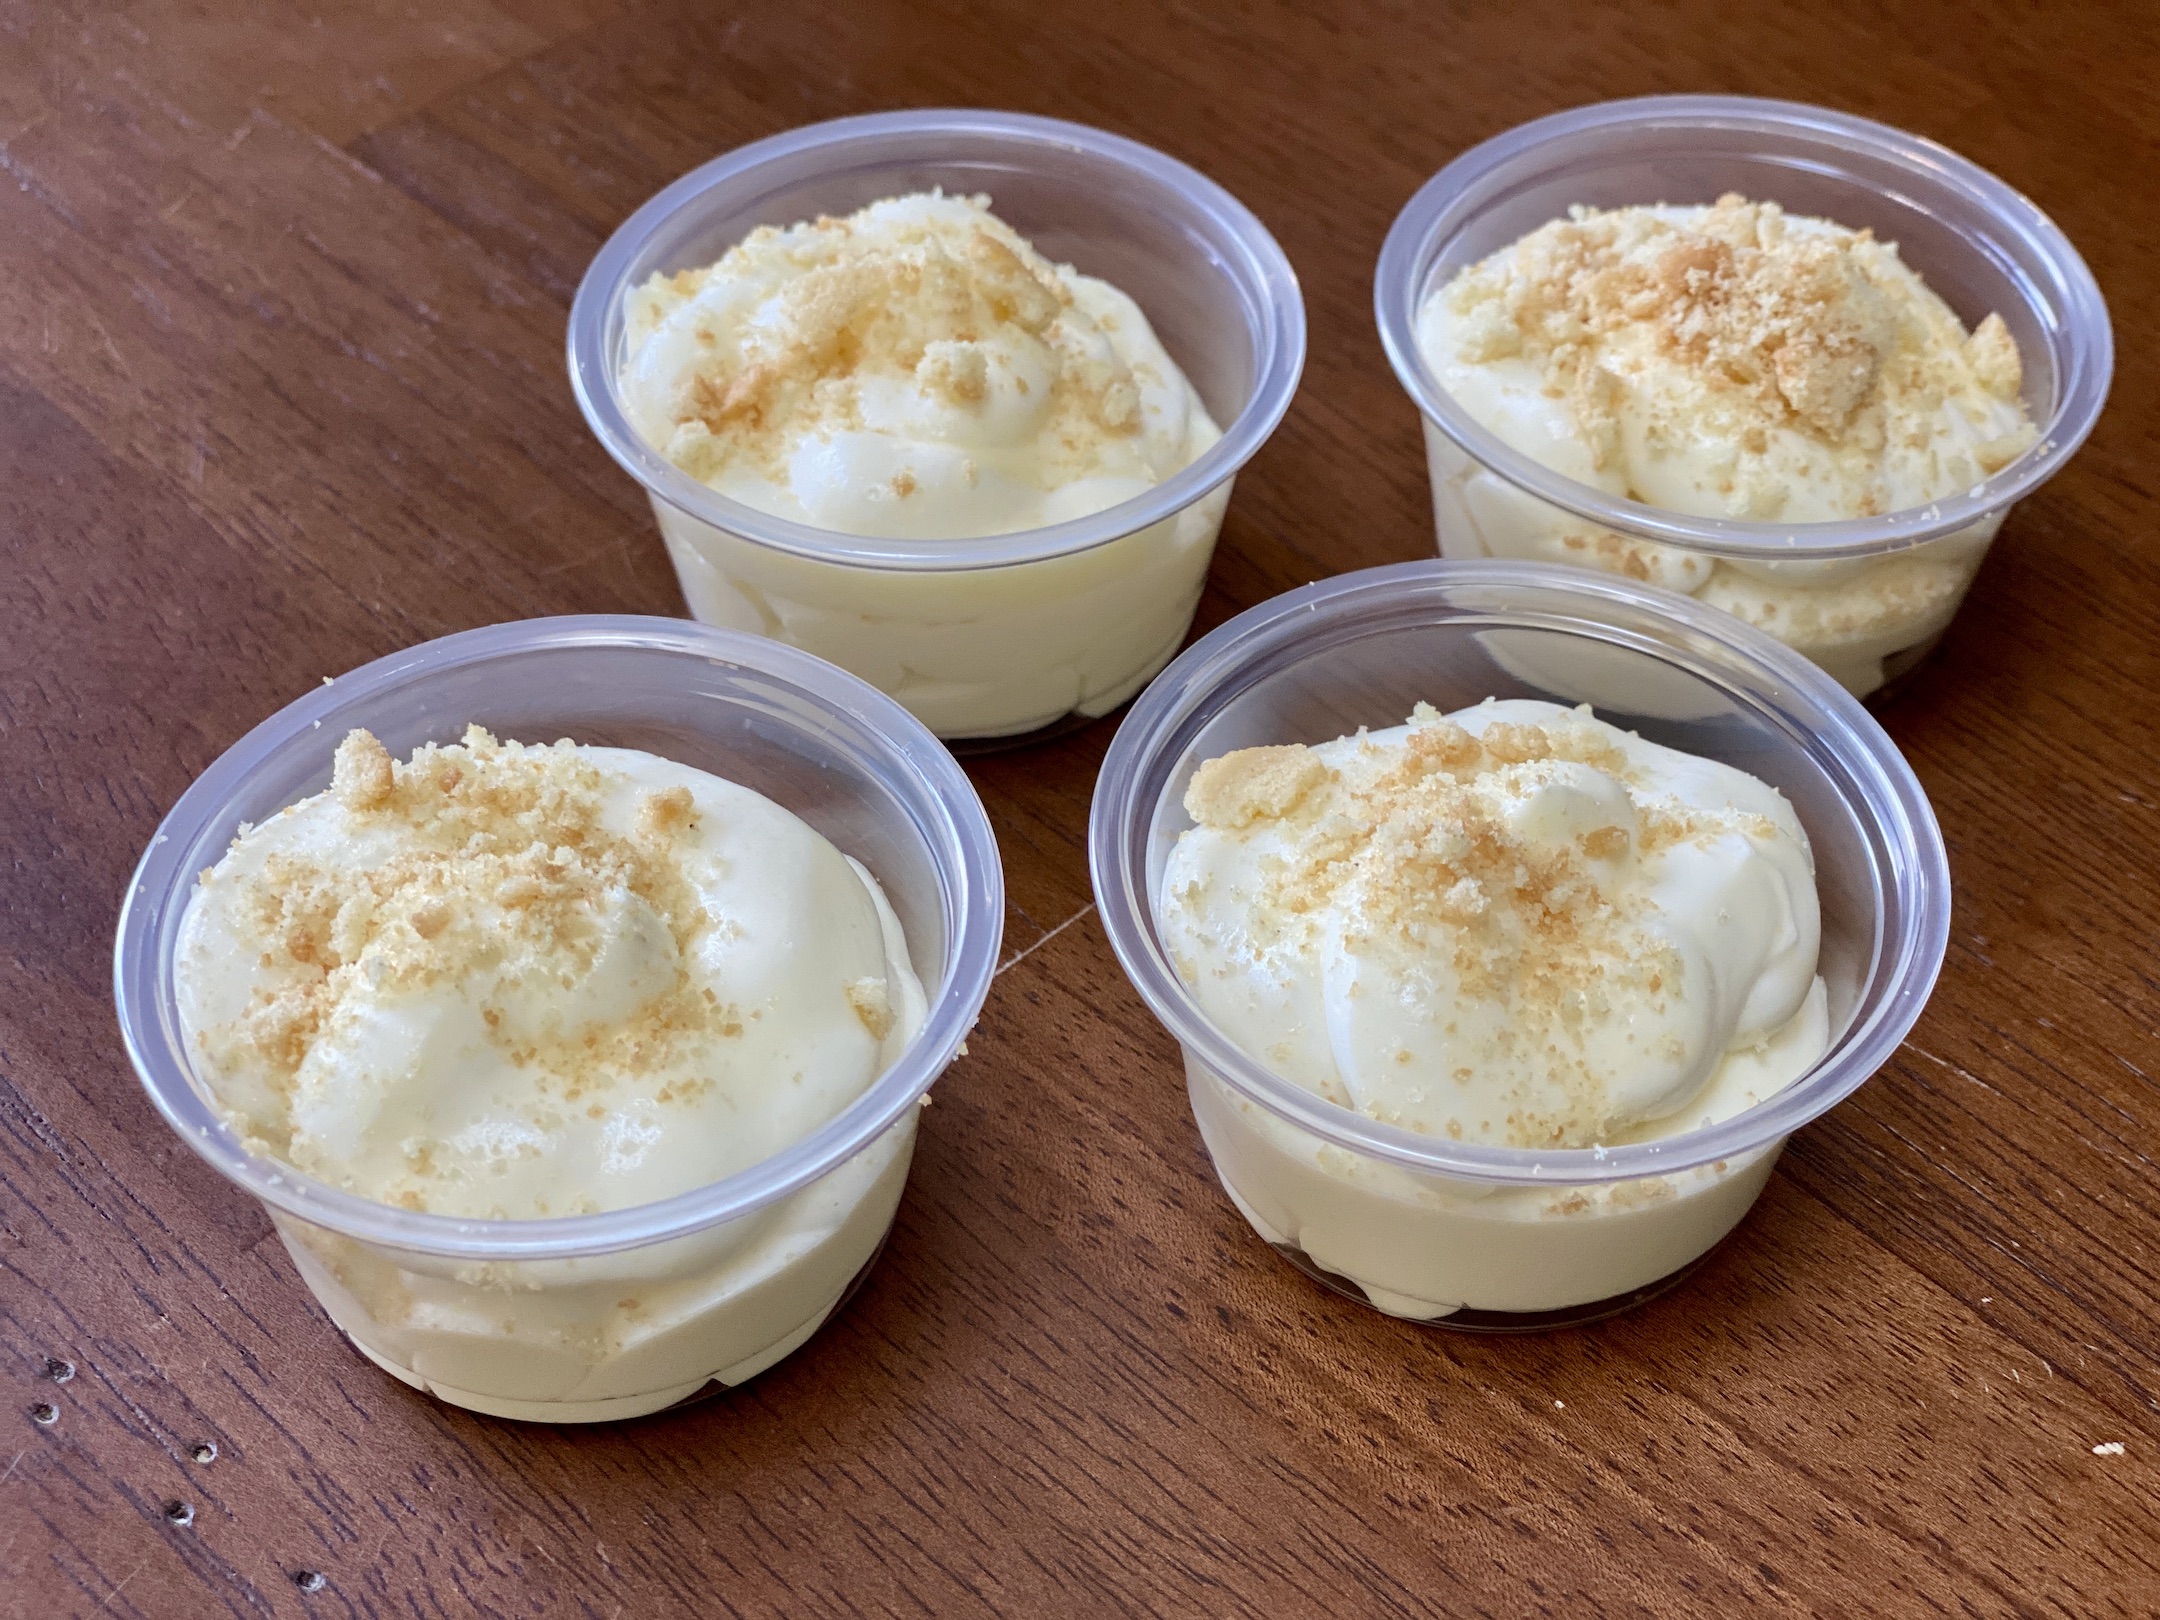
Top each with additional cookie crumbs (if you have any left from the batch you created earlier for the crust) and sprinkles. Place a cover on each cup and refrigerate until chilled, about 1 hour. You can enjoy the dessert immediately, but any leftovers should be stored in the fridge. Enjoy!

The recipe can be found here.
Next up is Individual Peanut Butter Dessert Cups. These remind me of eating a Reece’s Peanut Butter cup. There is a chocolate cookie crust, peanut butter cream, a chocolate ganache, and mini peanut butter cups as a garnish on top. It’s a toss-up which one of these recipes is my favorite but this one might take the win.

The recipe can be found here.
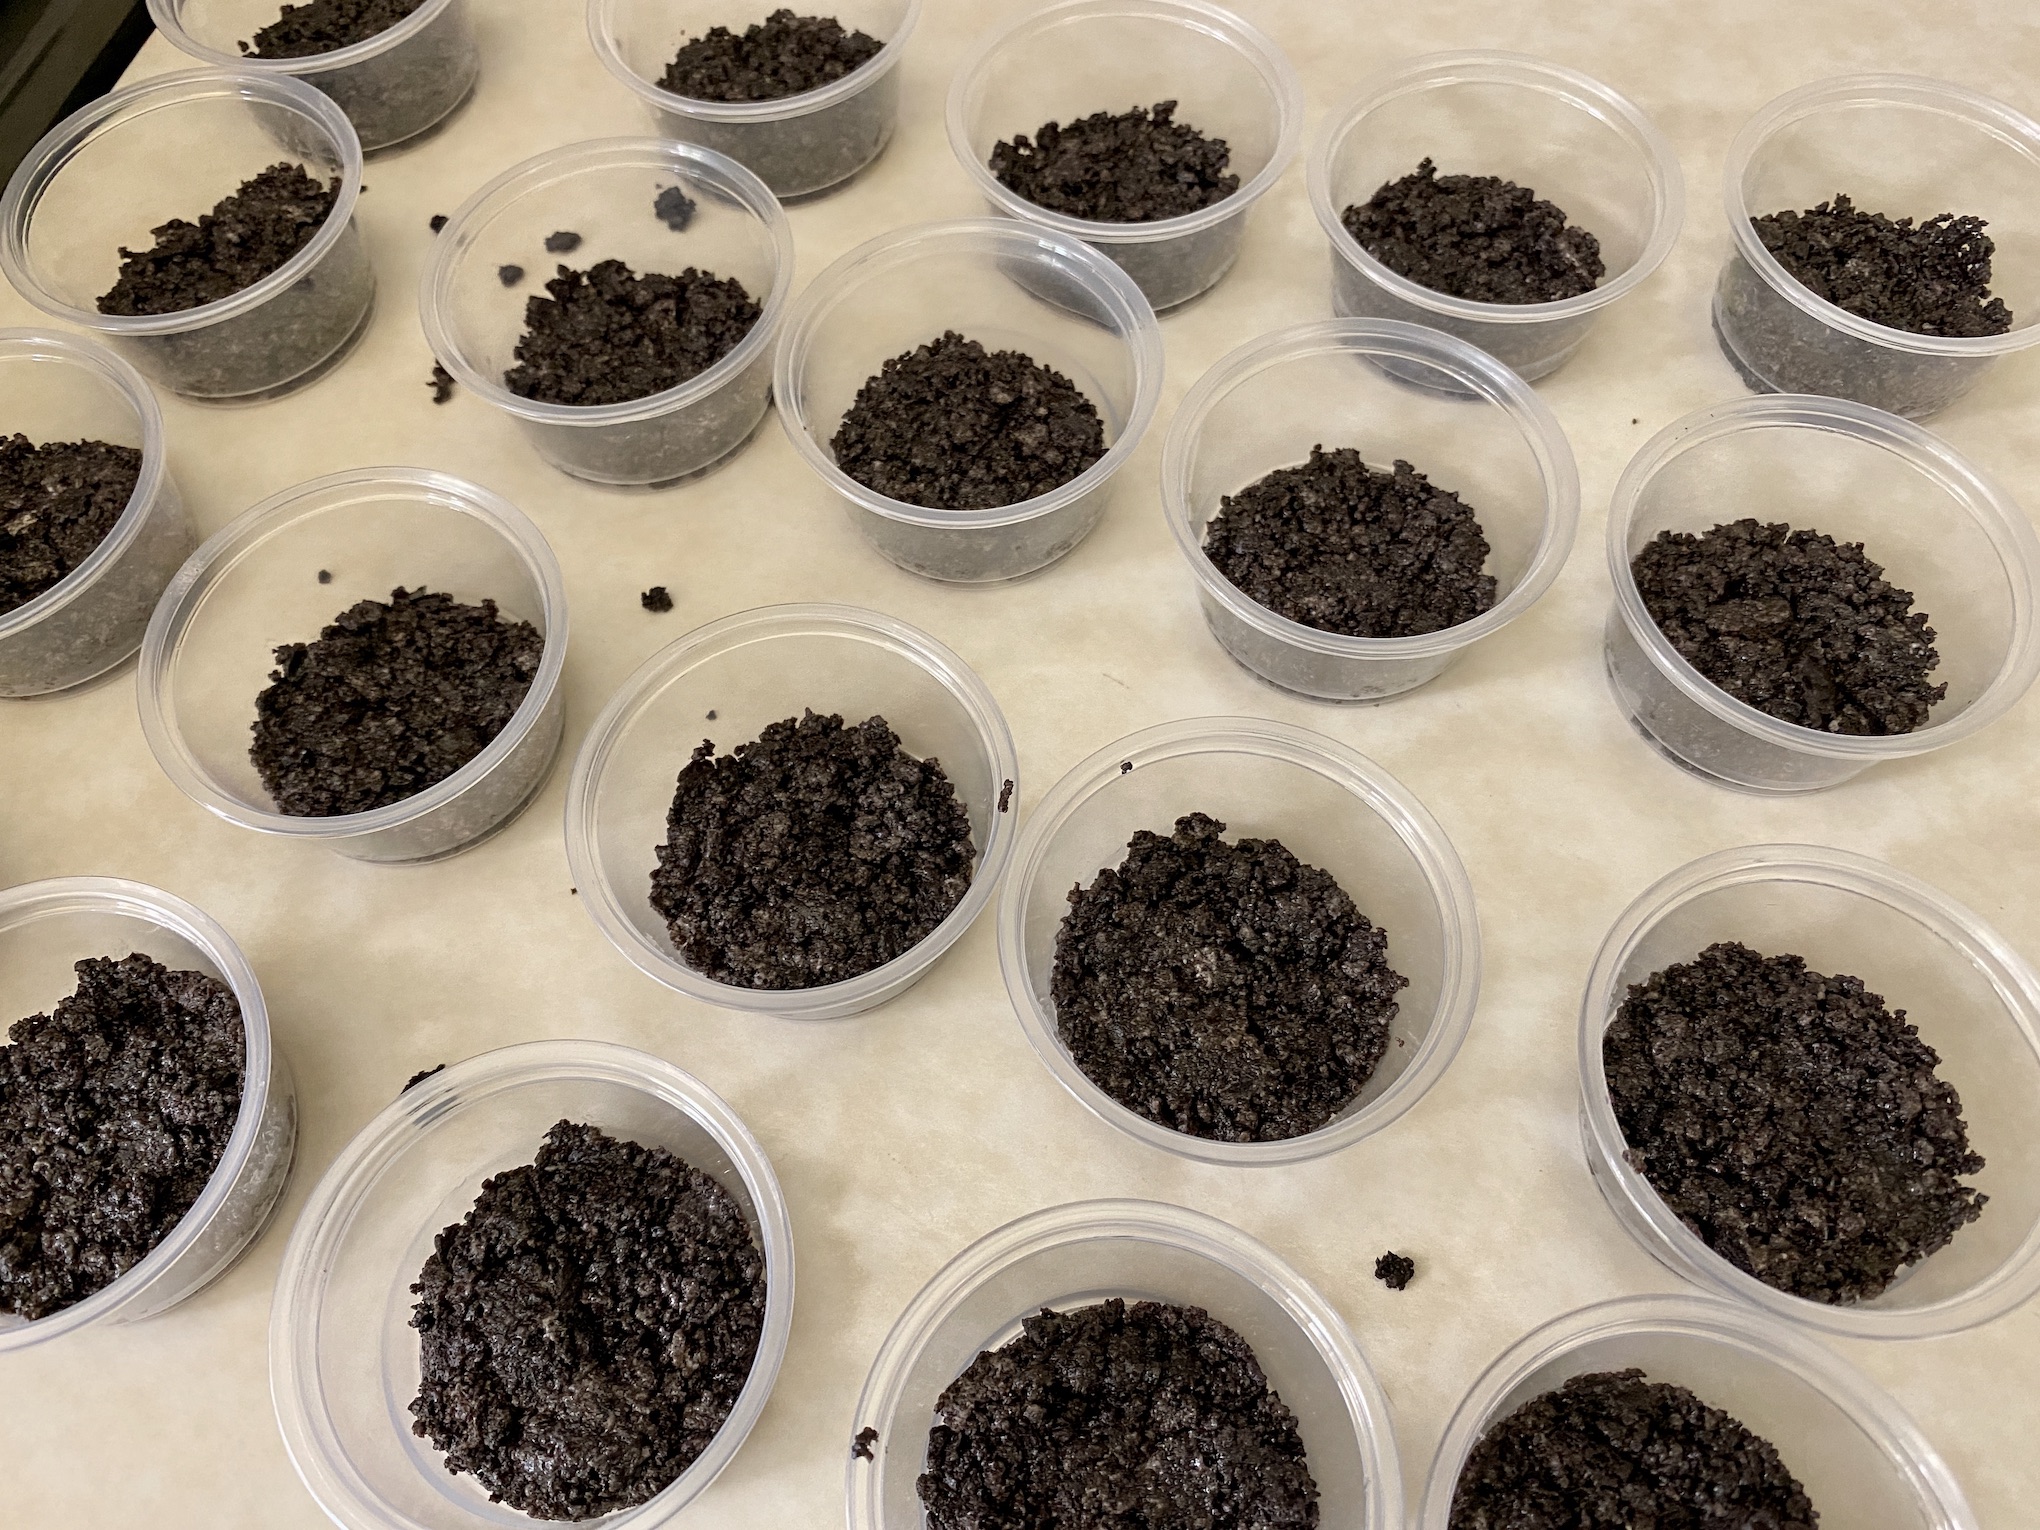
Start by making the crust. Add the Oreos to the bowl of a food processor. Pulse until fine crumbs then pour the crumbs into a large mixing bowl. Add the melted butter and stir to combine.


Use a spoon to scoop the mixture into 25 2-oz plastic containers. Use an extra plastic cup to press the crumbs into the bottom of each cup. Place the cups on a baking sheet. This will help you move the cups to the fridge to chill.

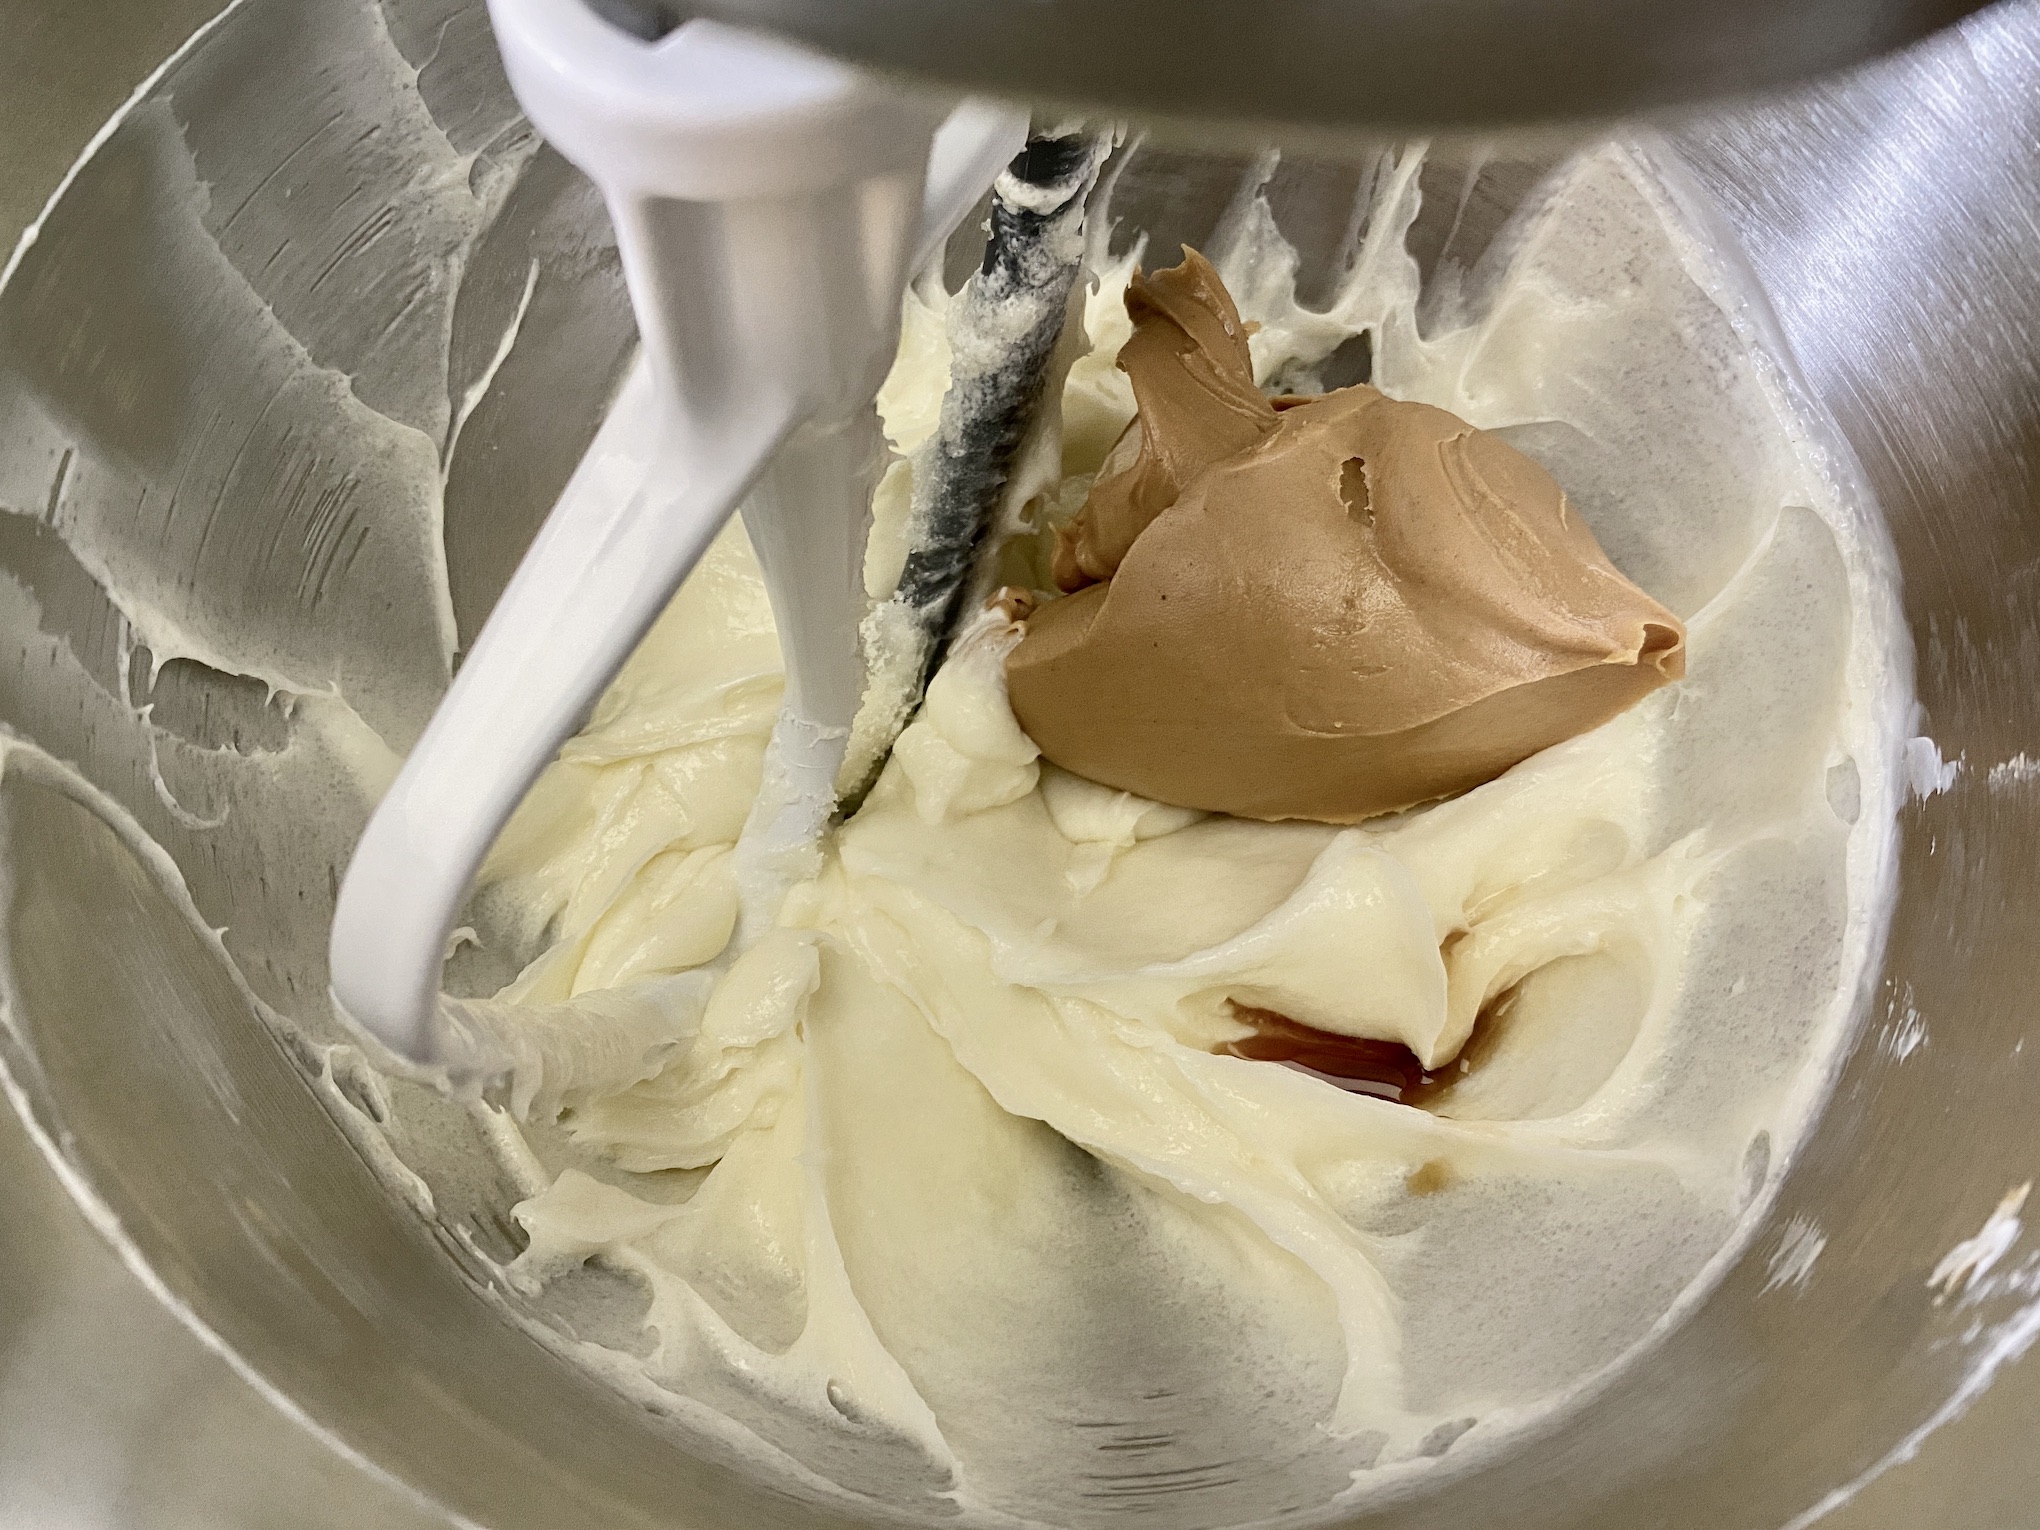
Add the cream cheese and sugar to the bowl of a stand mixer. Beat until well combined and smooth. Add the vanilla and peanut butter and beat until well combined.


Add 1 ½ cups of heavy whipping cream and whip on medium-high until light and fluffy.


Add the mixture to a piping bag or Ziploc bag and snip off the tip. Pipe the mixture into each cup until about 3/4 full.


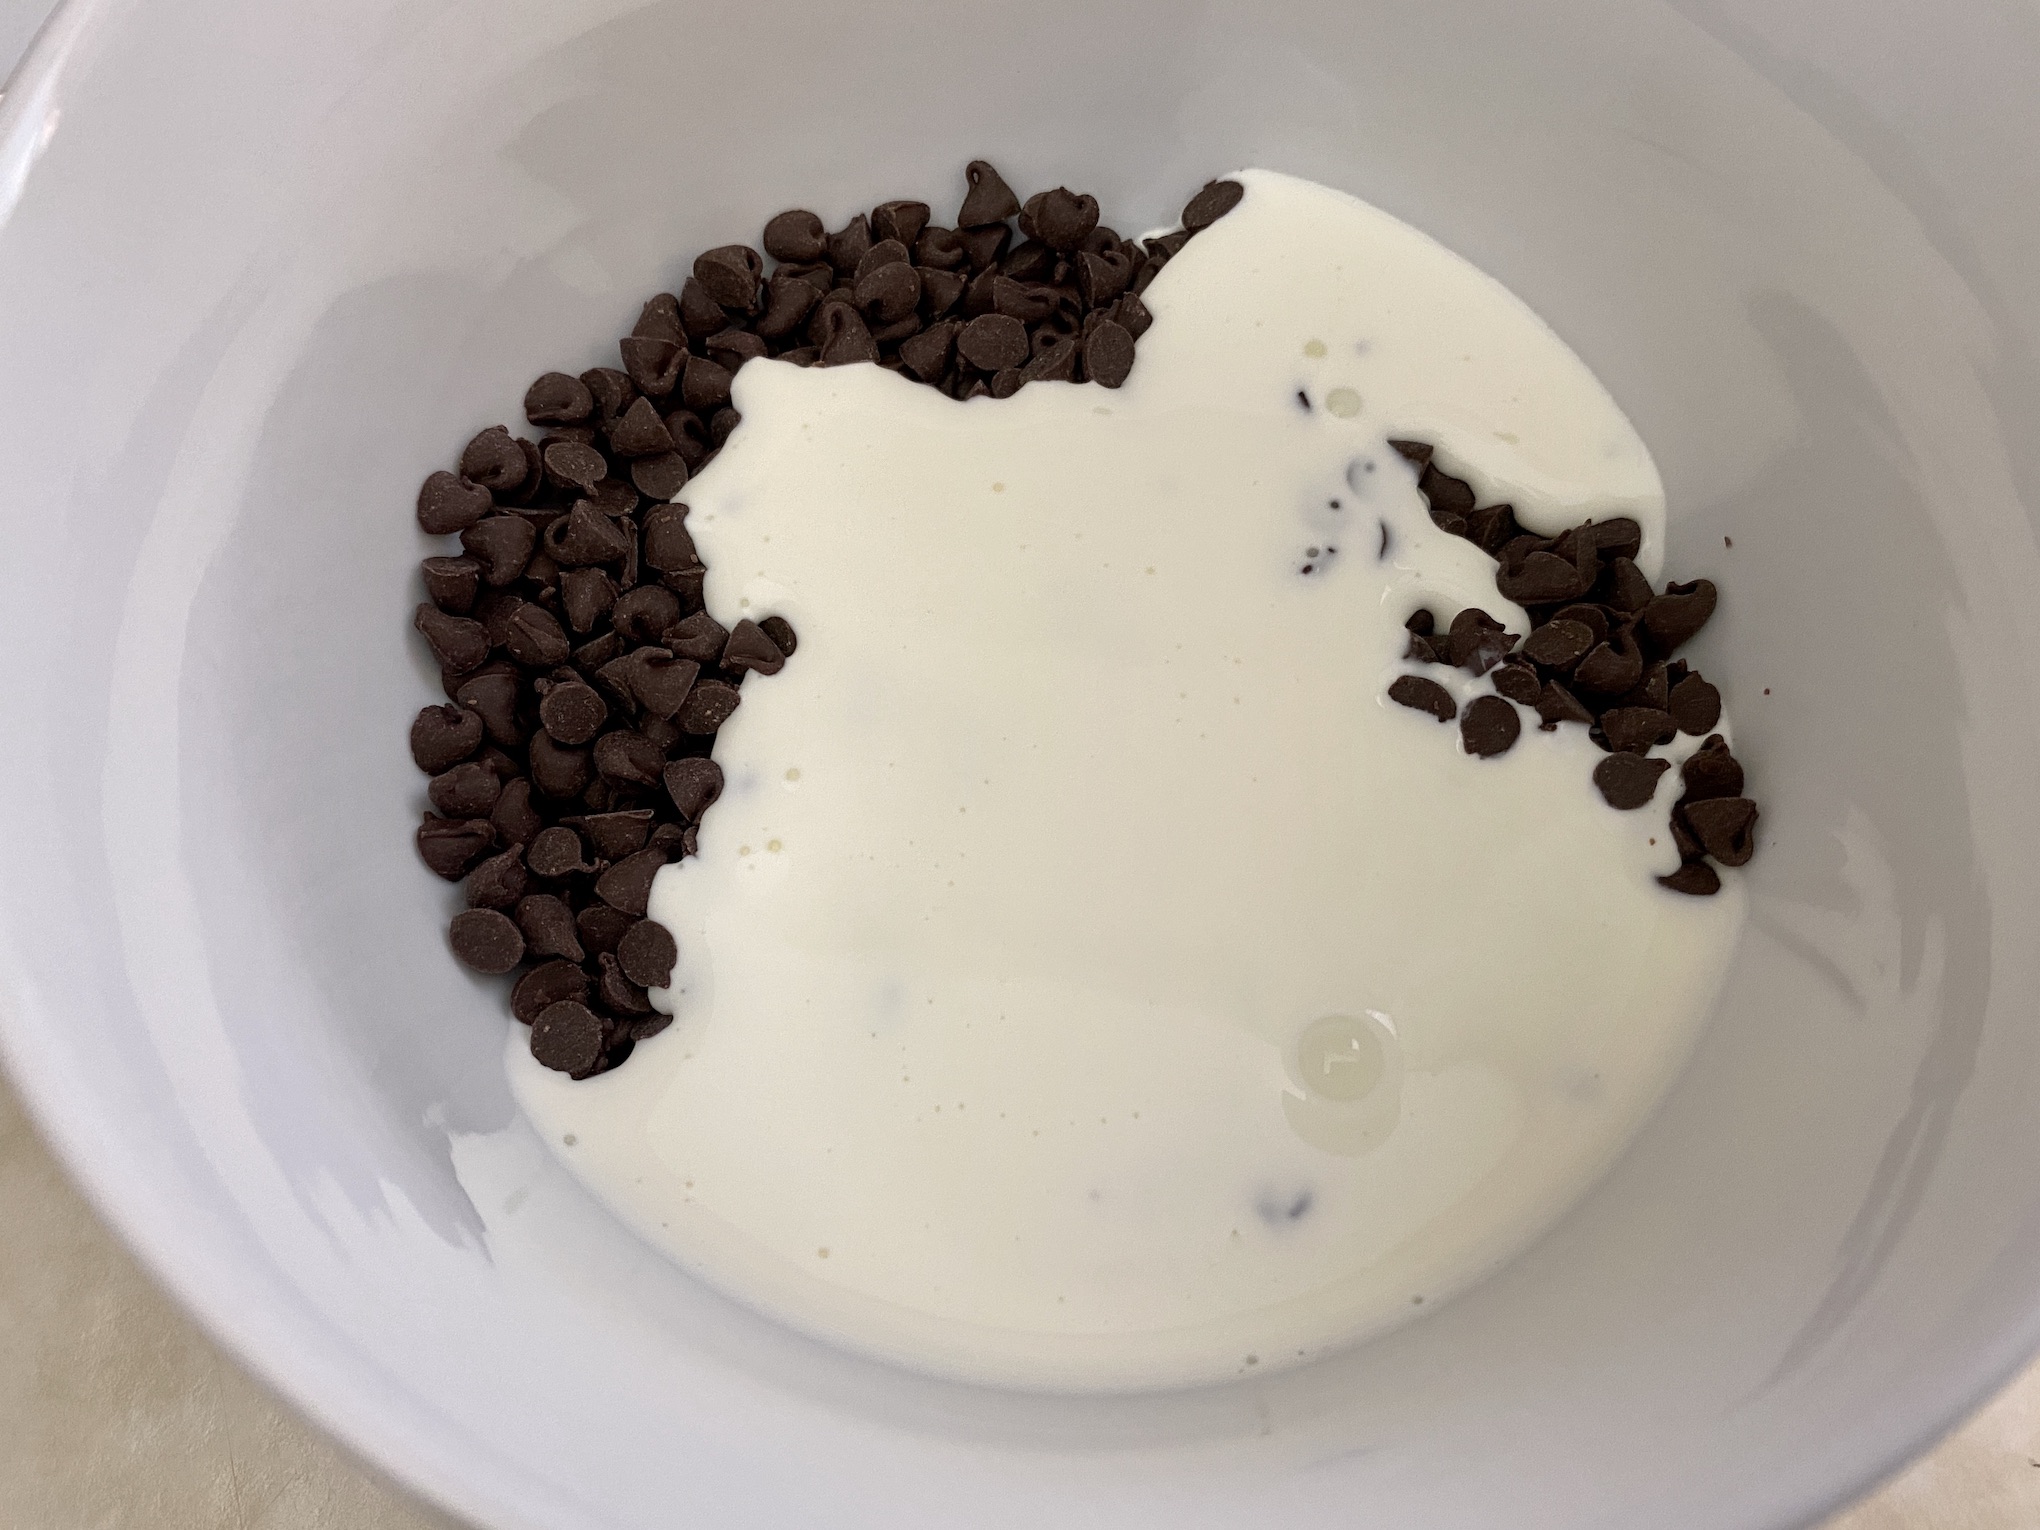
Add the remaining ¼ cup of heavy whipping cream and chocolate chips to a microwave safe bowl. Heat in 30 second intervals, stirring in between, until melted. Cool slightly then pour into a piping bag or Ziploc bag and snip off a tiny part of the corner. Drizzle the chocolate over the top of each dessert.

Garnish each with a mini peanut butter cup. Place a cover on each cup and refrigerate until chilled, about 1 hour. You can enjoy the dessert immediately, but any leftovers should be stored in the fridge. Enjoy!


The recipe can be found here.
Lastly is Individual Banana Pudding Dessert Cups. These can be made with or without alcohol. Think banana pudding or a boozy version of banana pudding. The crust is vanilla wafers topped with fresh banana and banana pudding and garnished with crushed wafers. I actually prefer these without alcohol, but the alcohol version would be fun for a cocktail hour or dinner party. Either way, they are light and refreshing!
The recipe can be found here.
Start by placing 1 vanilla wafer in the bottom of 25 2-oz plastic containers. Place the cups on a baking sheet. This will help you move the cups to the fridge to chill.


In a mixing bowl, whisk together the banana pudding, milk, and white rum. Place in the fridge to chill for 10 minutes. ***To make this recipe alcohol free, omit the white rum and replace with an additional ½ cup of whole milk***


I mentioned it previously, but I do prefer this recipe without the alcohol. It has a rich banana flavor that is quite lovely. The alcohol version is a little potent but also pretty delicious if you like rum 😊
Add the heavy whipping cream and vanilla to the bowl of a stand mixer. Whip on medium-high until light and fluffy.


Add the banana mixture and stir to combine.


Add the mixture to a piping bag or Ziploc bag and snip off the tip. Pipe the mixture into each cup until about 1/2 full.


Slice the banana and place 1 slice into each cup.
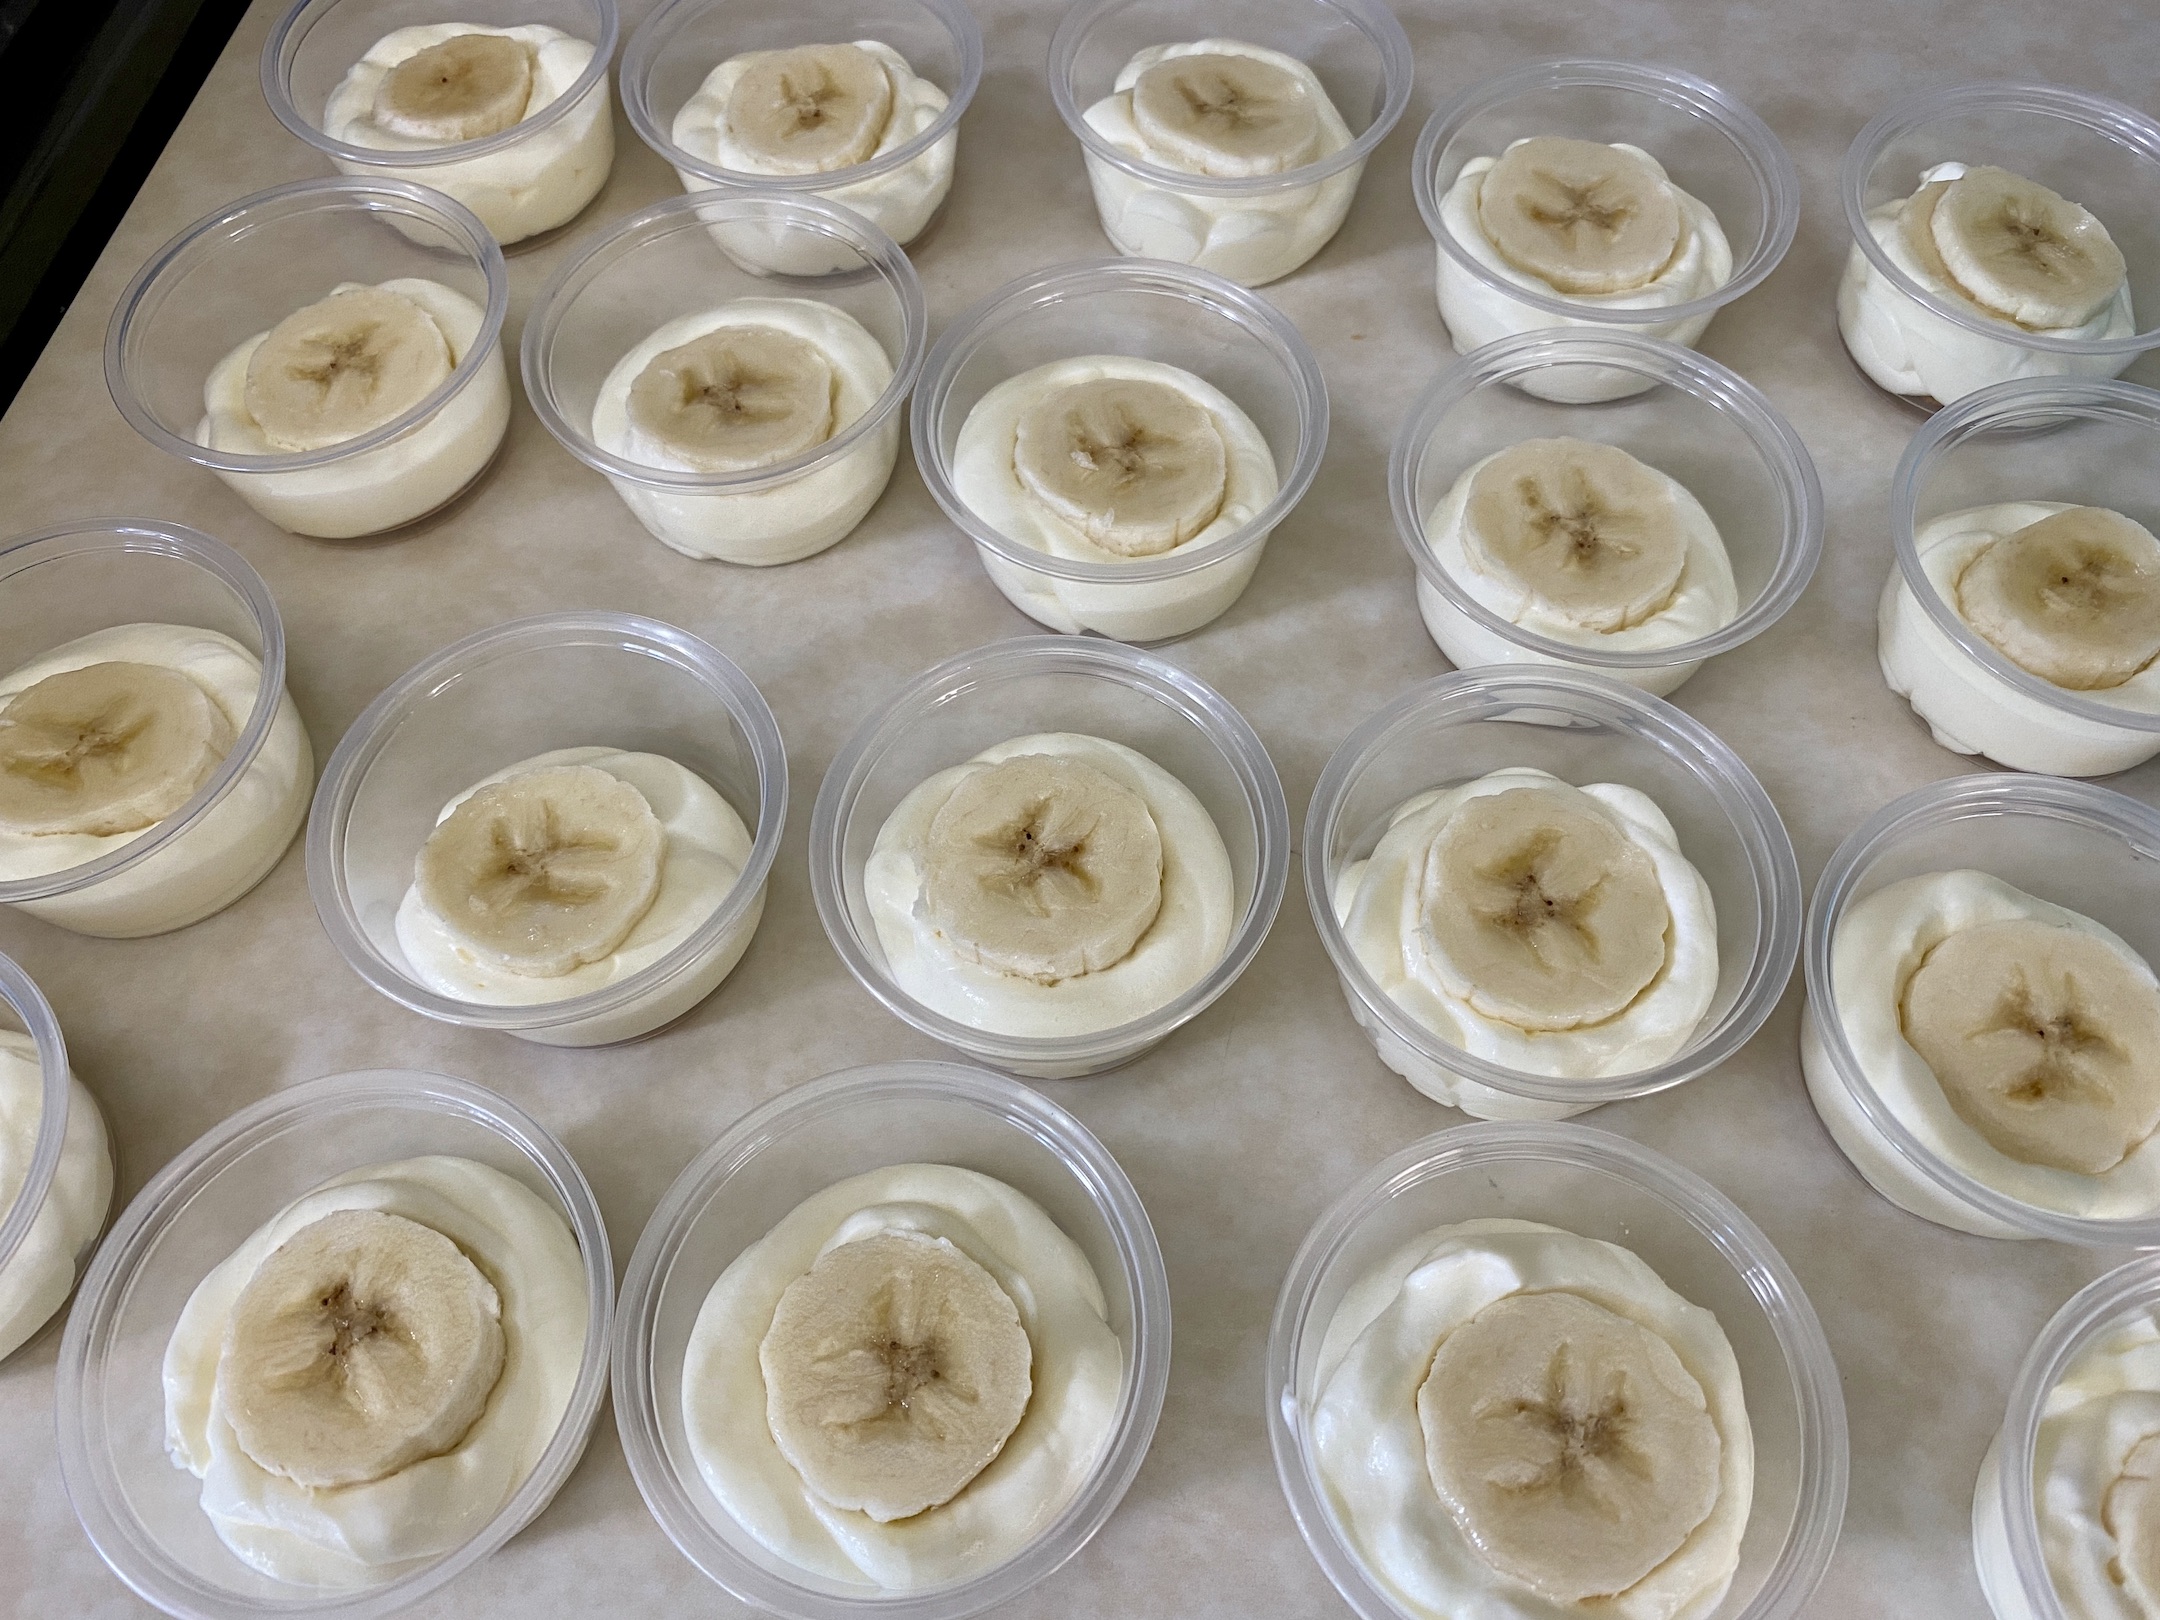
Add the remaining vanilla wafers to the bowl of a food processor. Pulse until fine crumbs. Sprinkle ½ of the crumbs on top of the fresh banana slices.


Pipe the remaining banana mixture into each cup, on top of the banana slice.
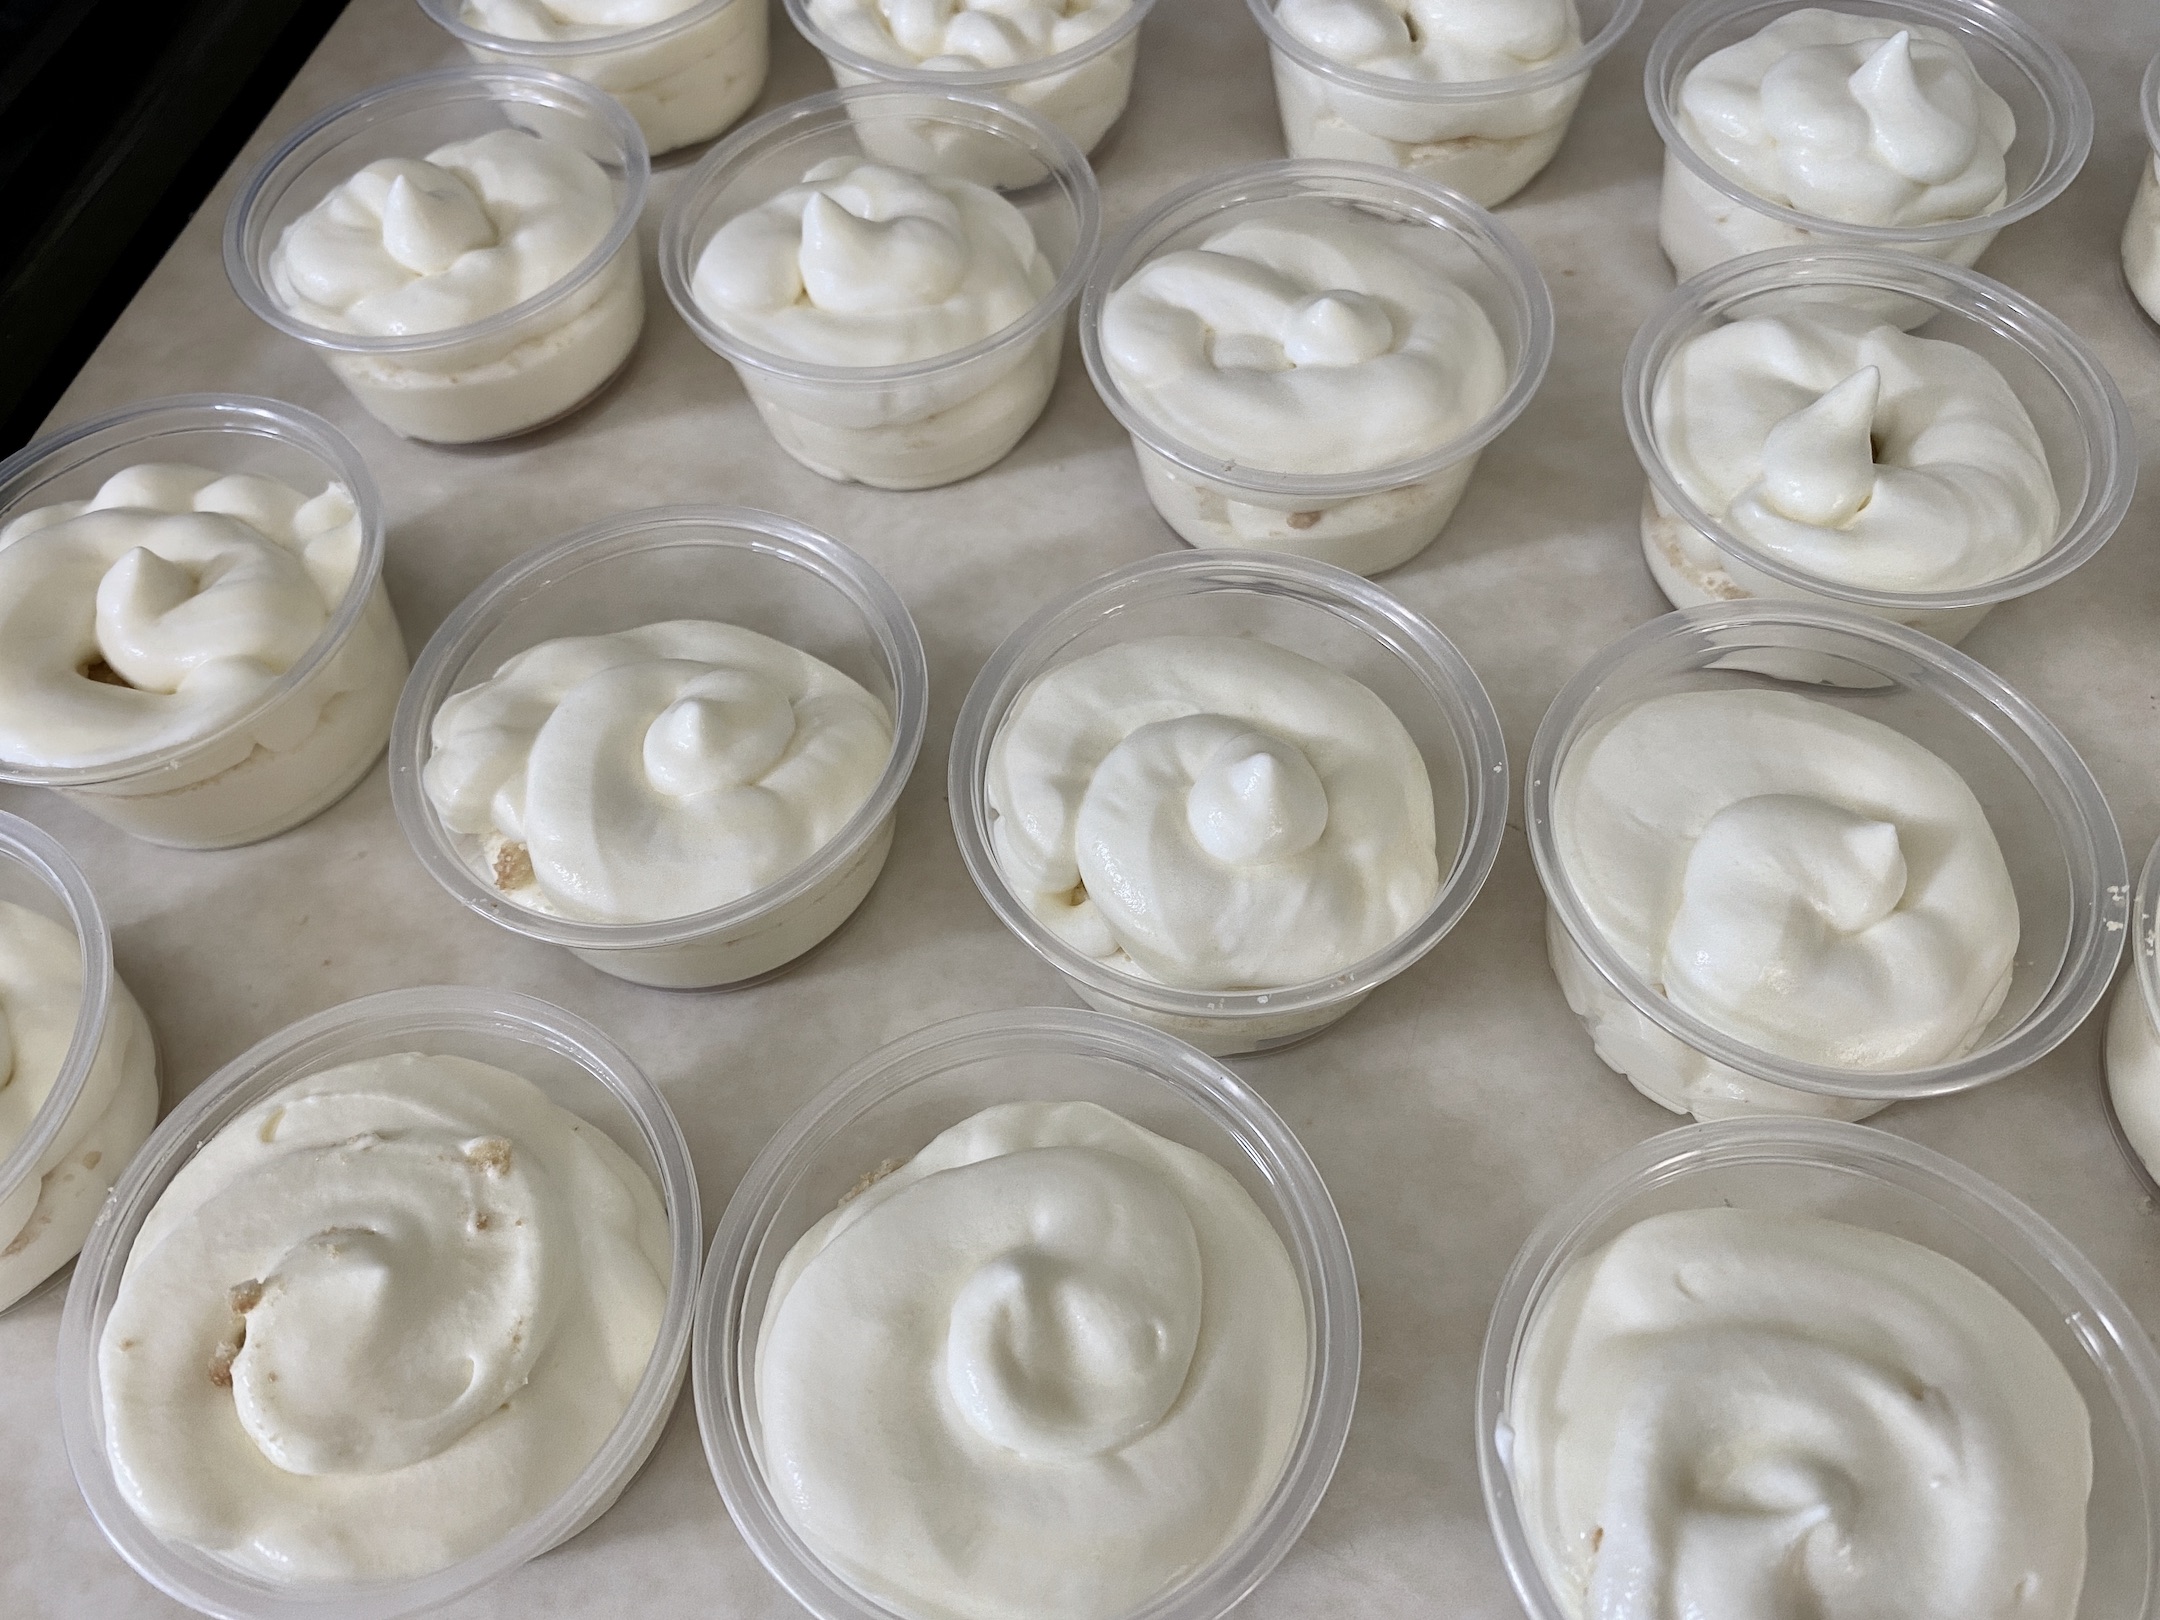
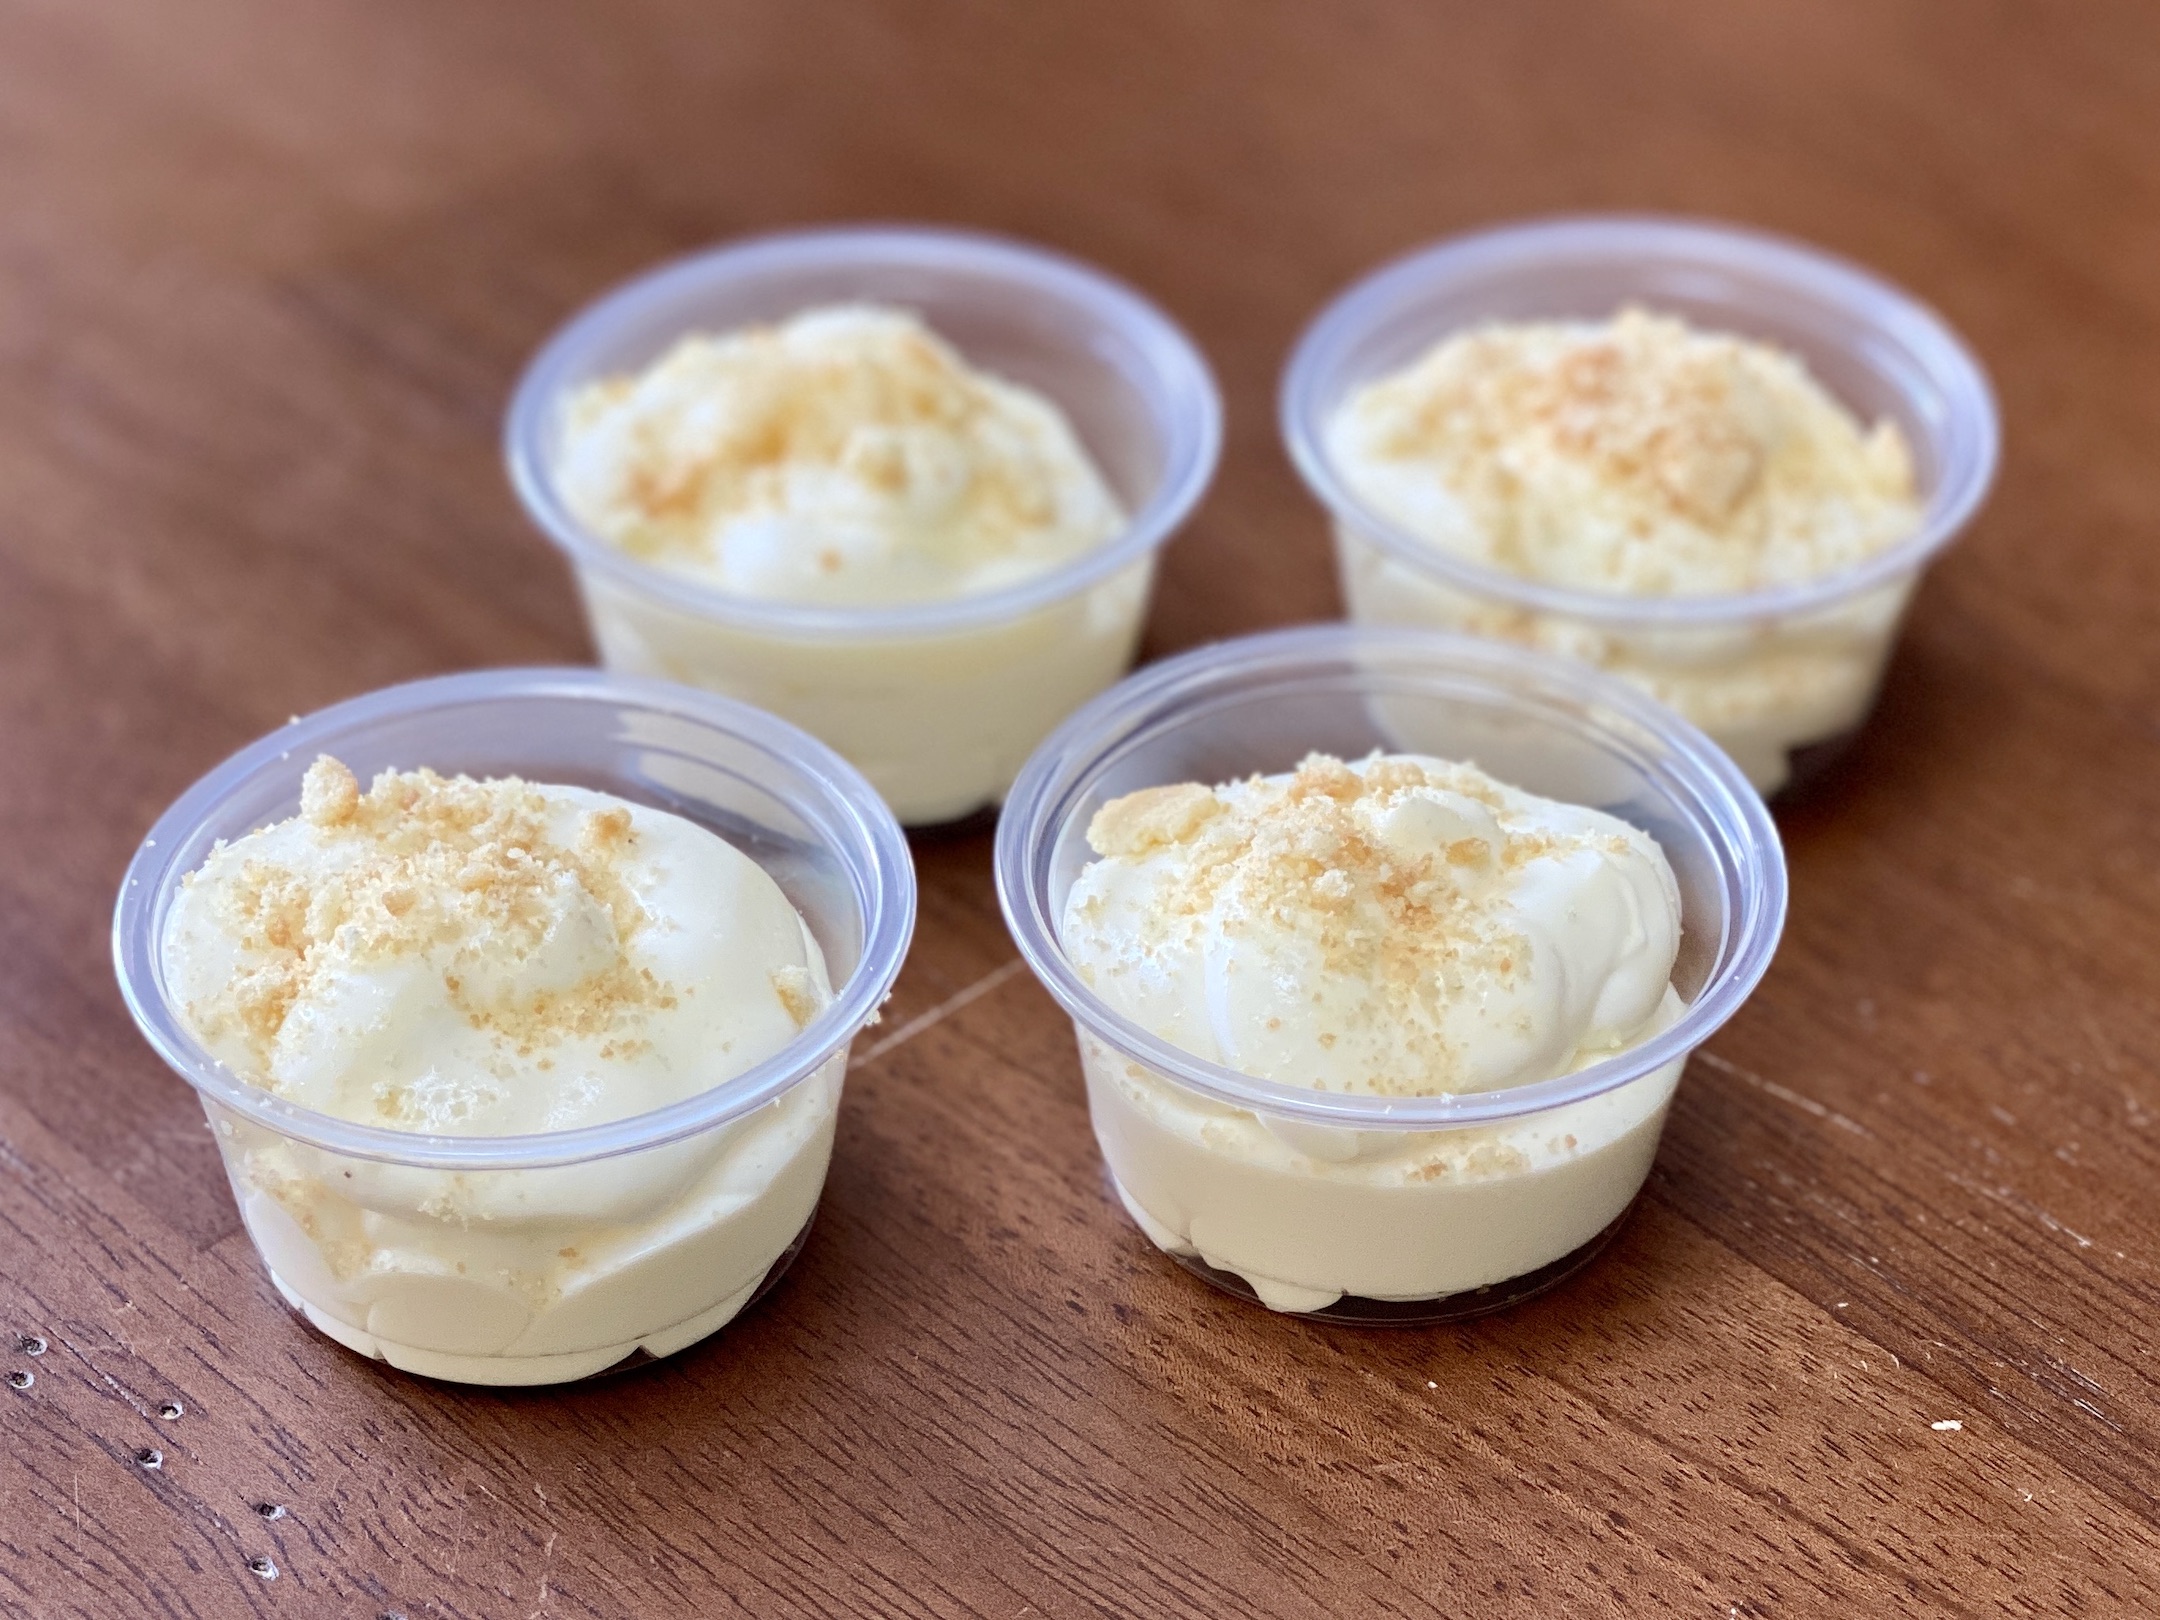
Garnish with additional wafer crumbs. Place a cover on each cup and refrigerate until chilled, about 1 hour. You can enjoy the dessert immediately, but any leftovers should be stored in the fridge. Enjoy!

The recipe can be found here.
I did have one person ask why these were so small because they were so good, lol! So definitely give them a try and share with your family, friends, and coworkers. You’ll be pretty popular that day and can even sneak a few for yourself.
Happy Cooking!


Recent Comments