 order online
 weekly specials
Halloween is fast approaching. For some, Halloween is a lifestyle and obsession, for others, it’s a day to be someone or something else. I personally love decorating the house, buying candy to pass out to trick-or-treaters, dressing up the dog…. but mostly, I love the food! I like to take a traditional dish and “dress it up” for Halloween. For example, a pepperoni pizza might have the pepperoni in the shape of a jack-o-lantern. You get the picture 🙂

This year, I have quite the spread. It’s going to be one big Halloween celebration at our house, starting with breakfast, and ending with dinner. Here’s what’s on the menu:
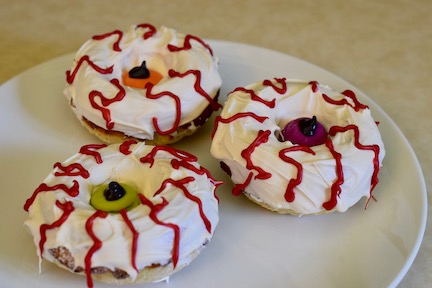
- Eyeball Donuts
- Spider Web Donuts
- Candy “Charcuterie” Board
- Eyeball Asparagus and Gruyere Tart
- Spider Web Loaded Potatoes
- Festival Feetloaf
- Mini Skeleton Cheesecakes
Halloween is full of candy and treats so why not start the day with something sugary? Eyeball Donuts and Spider Web Donuts are the perfect fit. Sweet and sugary, yet scary and spooky enough for Halloween.
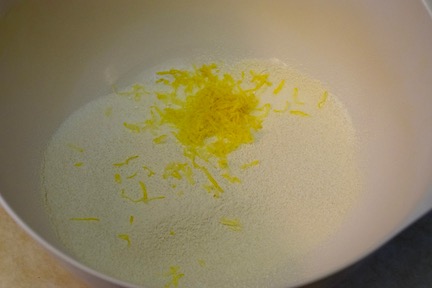
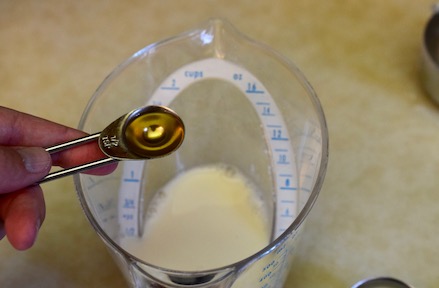
Eyeball Donuts – start by mixing the dry ingredients in a large bowl. Add the wet ingredients and stir to combine.


I find it easiest to place a Ziploc bag inside a drinking glass, then fold the top of the bag over the sides of the glass. Scoop the mixture into the bag and seal. Then snip a tiny amount off the corner of the bag and pipe the mixture into each donut cavity. You want each cavity to be about 2/3 full.


Bake for 8-10 minutes then let cool completely. Line a baking sheet with parchment paper and place a cooling rack on top. This will help immensely with cleanup! Remove the donuts and place on the cooling rack.


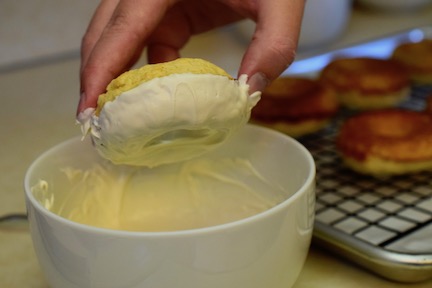
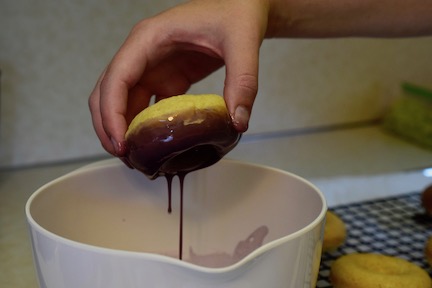
Melt the white candy melts or almond bark in a microwave safe dish. Dip each donut in the chocolate, then place back on the cooling rack to harden.


Add colored candy melts to the center of each donut to represent the eye color. I like to stack a few candies together so you can see the color and it doesn’t get lost in the donut.
Next, melt the red candy melts in a microwave safe dish. Let it cool slightly, then follow the same method as above and add the chocolate to a Ziploc bag so you can pipe the chocolate on the donut. You want to create short squiggly lines on each donut to resemble veins.


Finally, melt a few black candy melts in a microwave safe dish and use a toothpick to add small dots onto the colored center candies to resemble the pupil. Enjoy!
The recipe can be found here.
Spider Web Donuts – combine the dry ingredients in one bowl and the wet ingredients in a separate bowl. Add the wet ingredients to the dry ingredients and stir to combine.


I find it easiest to place a Ziploc bag inside a drinking glass, then fold the top of the bag over the sides of the glass. Scoop the mixture into the bag and seal. Then snip a tiny amount off the corner of the bag and pipe the mixture into each donut cavity. You want each cavity to be about 2/3 full.


Bake for 8-10 minutes then let cool completely. Line a baking sheet with parchment paper and place a cooling rack on top. This will help immensely with cleanup! Remove the donuts and place on the cooling rack.


Whisk together the juice and powdered sugar. Add the food coloring and stir to combine. I didn’t have purple food coloring, so I combined red and blue food coloring to make purple. One great thing about this method is you get to determine the shade of purple by adding more or less food coloring.


Dip each donut in the glaze and place back on the cooling rack. Let the donuts sit for a few minutes to set. If it appears you don’t have enough glaze on top, dip the donuts again. There is no right or wrong amount of glaze, just your preference!


Next, melt the white candy melts or almond bark in a microwave safe dish. Let it cool slightly, then follow the same method as above and add the chocolate to a Ziploc bag so you can pipe the chocolate on the donut. You want to create a web shape on each donut. Let set and enjoy!


The recipe can be found here.
Candy “Charcuterie” Board is a fun take on a traditional Charcuterie board. A charcuterie board typically consists of prepared meats with cheese, nuts, fruit, etc. arranged on a large board for serving. I took the concept and applied it to Halloween candy. So instead of meats and cheeses, I have an array of candy displayed.
I used licorice, M&M’s, candy corn and candy pumpkins, a variety of gummi candy, chocolate covered marshmallows, a variety of chocolate pieces, and popcorn balls. You could also add fun-sized candy bars, caramel apples, etc. The possibilities are endless!

This is a great treat to leave out on your candy as a grab-and-go snack or to bring to a party because there is something for everyone on the platter.
Eyeball Asparagus and Gruyere Tart – a puff pastry crust with tender asparagus and melted gruyere cheese. It’s perfectly savory and salty. Add the eyeballs and you’ll feel like you’re eating a monster tart. Maybe your kids will even want to eat their vegetables 🙂

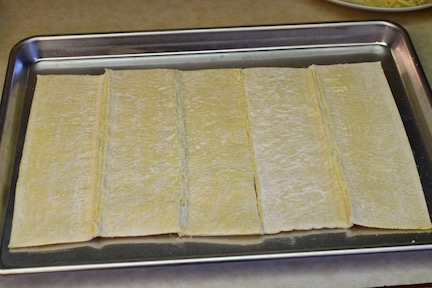
Start by thawing your puff pastry. Unfold one piece and spread out on a baking sheet. Unfold the other pastry and cut one section off (1/3 of the pastry). Place it next to the other pastry on the baking sheet, making sure to press the ends together to form one large sheet.
Use a knife to score the pastry, all the way around, about one inch from the sides. Then use a fork to pierce the pastry every half inch. This allows the steam to vent while baking so you are left with a compressed center and raised edges. Bake for 12-15 minutes or until golden brown.

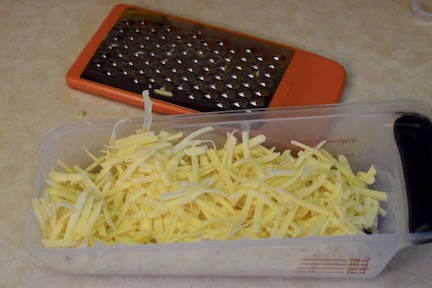
Sprinkle the shredded gruyere cheese on top. It will start to melt on the hot crust and smell amazing!

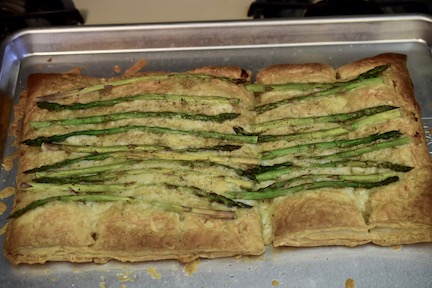
Alternate the asparagus stalks back and forth across the tart. You might need to trim the asparagus slightly to fit to rows. Drizzle with olive oil and bake for another 15-20 minutes, or until the asparagus is tender.

While the pastry is baking, cut out 10-12 round pieces of provolone cheese. These will be the eyes.

Remove the tart from the oven and allow to cool for about 5 minutes. Then place 2 pieces of provolone cheese in various places on top of the asparagus. Add a caper to the center of each piece of provolone cheese to create eyeballs.

Slice and serve. Spooky and fun!
The recipe can be found here.
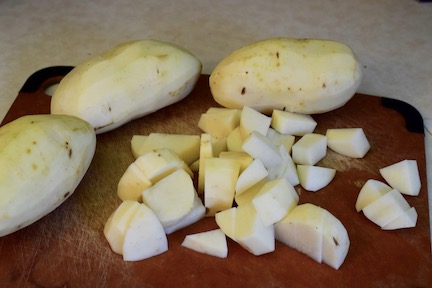
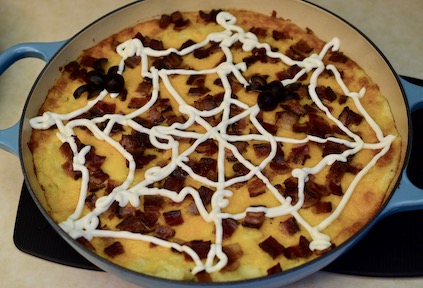
Spider Web Loaded Potatoes – these are delicious! It’s a mashed potato casserole that’s baked to perfection with all your favorite toppings. And what a fun presentation for Halloween!

Peel and chop the potatoes. Add to a large pot, cover with water, sprinkle with salt, and bring to a boil. Boil for 15-20 minutes or until the potatoes are easily pierced with a fork.

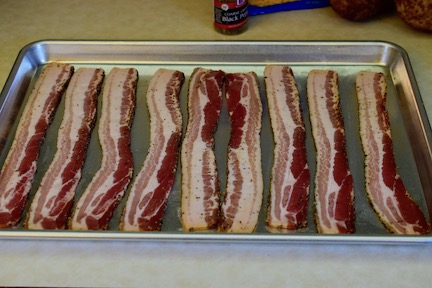
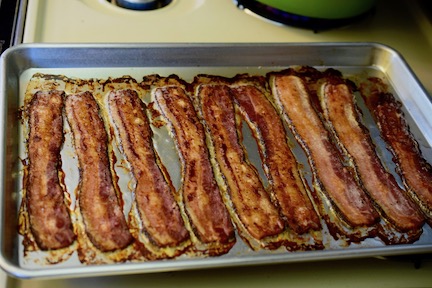
While the potatoes boil, cook the bacon according to package instructions. I’m partial to baking my bacon so that’s the method I prefer. Cool the bacon on a paper towel lined plate to remove some of the grease. Then chop the bacon into little pieces and set aside.

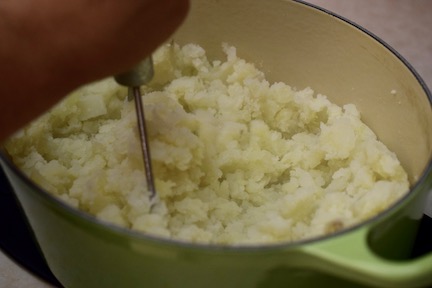
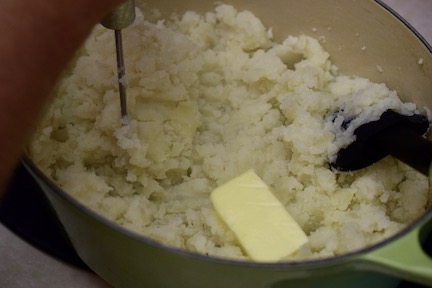
When the potatoes are done, drain the water from the pot. Use a potato masher to mash the potatoes until most of the steam escapes. I had to enlist Andrew to help mash while I held the pot – there were a lot of potatoes! Once most of the steam has escaped, add the butter and milk, and continue to mash until creamy. If you are having a hard time getting a creamy consistency you can add additional milk, 1 Tbsp at a time, until the desired consistency is reached. Season with salt and pepper.

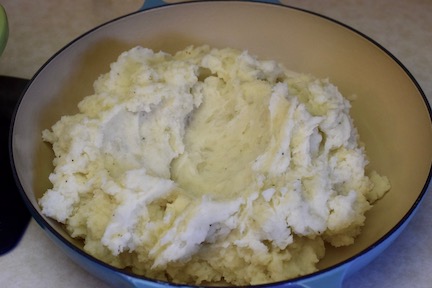
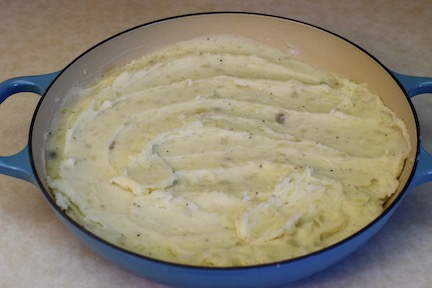
Spread the potatoes in the bottom of a pie pan or oven safe dish. I chose to use a very large oven safe dish because you will have more mashed potatoes than you think…which is OK with me because I love leftovers 🙂
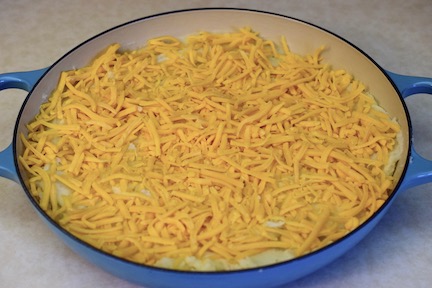
Cover with shredded cheddar cheese and sprinkle with the chopped bacon. Bake for 20 minutes then allow to cool for 10 minutes. You want the dish to cool or the sour cream will melt when added and ruin your pattern.


Add the sour cream in a spider web pattern. I like to buy the squeeze containers of sour cream so you don’t have to use a piping bag but can just squeeze right out of the container.
This is completely optional, but I think it’s fun to slice a few black olives and arrange them on top of the dish to create spiders on top of the web.

Serve warm. It’s a great comfort food! And I love the theme!
The recipe can be found here.
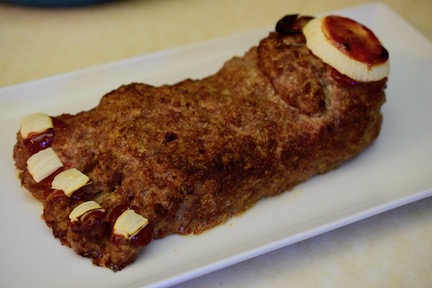
Festival Feetloaf – this is a creepy take on traditional meatloaf. The reason I say creepy is the meatloaf is shaped to look like a severed hand or foot. It’s delicious but looks really lifelike!

I like to use Festival Foods Mom’s Meatloaf to make this dish. If you have a favorite meatloaf recipe you can absolutely use that as well. I’m partial to the Festival Foods Mom’s Meatloaf because it’s pre-made and comes in a great heat-and-serve container so the prep work is mostly done.
Remove the meatloaf from the container and mold into the shape of a foot (or hand). Use a knife to cut slits on one side to make toes (or fingers). You would have laughed if you wanted me make this dish. I was holding my hand next to the meatloaf to make sure I had the right shape and size, holding my food up next to the counter as a guide to make the foot… I’m sure anyone watching thought I looked ridiculous but hey, the footloaf (and handloaf) look quite accurate to me 🙂


Next slice the onion. You want one round slice to use on top of the foot (or hand) to resemble a severed bone. Cut smaller square pieces to use as toenails (or fingernails).

Put a drop of ketchup onto each toe (or finger) and add the onion. Place a few drops of ketchup on top of the foot (or hand) and add the round piece of onion. Top with a small amount of ketchup and spread around the onion round to look like blood.


Bake for 40 minutes or until cooked through. Please note, the baking time will vary from the package instructions due to the thickness of the foot. If you follow the package instructions, you will burn your meatloaf!
Remove from the oven and let stand for 5 minutes. Slice and serve warm. It’s really good with Big Rick’s Jalapeño Honey Mustard dipping sauce! Ketchup is another great topping. It’s eerie to think about eating a severed foot but what a festive meal!


The recipe can be found here.
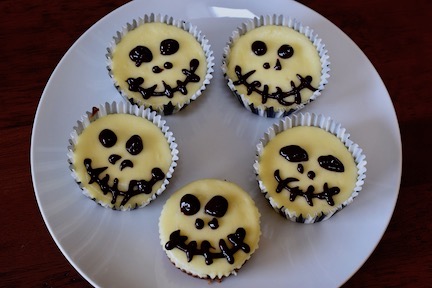
Mini Skeleton Cheesecakes – smooth, creamy, and the perfect handheld bite! Decorated to look like a skeleton face. Do we have any Nightmare Before Christmas Fans out there?
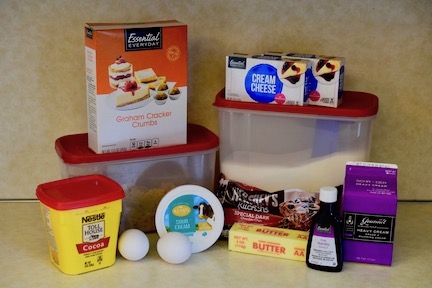
Start by adding paper liners to 18 muffin cups. Combine the crust ingredients, pour into each muffin cup, and press down with your fingers to create a flat crust within each muffin cup.


It’s not required but I think it’s very helpful to use a stand mixer for the next steps. If you don’t have a stand mixer, you can also use a hand mixer, it will just take slightly longer.
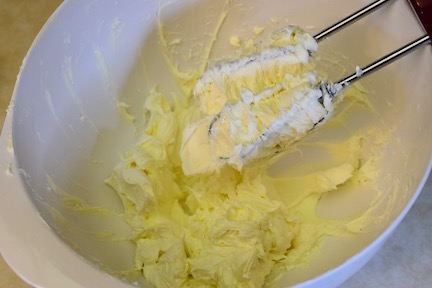
Add the cream cheese to the bowl of the mixer and beat until smooth. Add the sugar and beat until combined. Then add the eggs and vanilla and beat until combined. Stir in the sour cream by hand.


Use a cookie scoop to scoop the mixture into each muffin cup. You should have enough mixture to fill all 18 cups but do not overfill. You want the muffin cups to be about ¾ full.


Bake on the middle rack for 15-20 minutes. The center should jiggle when moved and that’s a good indication they are done baking. Let cool for about 1 hour.

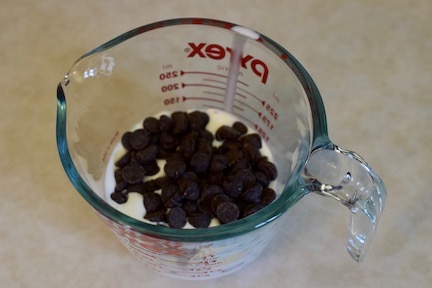
Combine the chocolate and heavy cream in a microwave safe glass. Heat for 45 seconds, stir to combine, and let sit for 5-10 minutes so the ganache will slightly thicken.
Add the chocolate to a pastry bag fitted with a small round tip. Snip the tip of the bag. If you don’t have a piping bag or piping tips, you can use a Ziploc bag. Place a Ziploc bag inside a drinking glass, then fold the top of the bag over the sides of the glass. Scoop the ganache into the bag and seal. Then snip a tiny amount off the corner of the bag.

Pipe eyes, a nose, and a mouth onto each cheesecake. Serve immediately or store in an airtight container in the fridge. A chilling dessert or ghoulish centerpiece for your dinner spread.

The recipe can be found here.
Happy Halloween and Happy Cooking!


Recent Comments